· Beauty & Personal Care · 16 min read
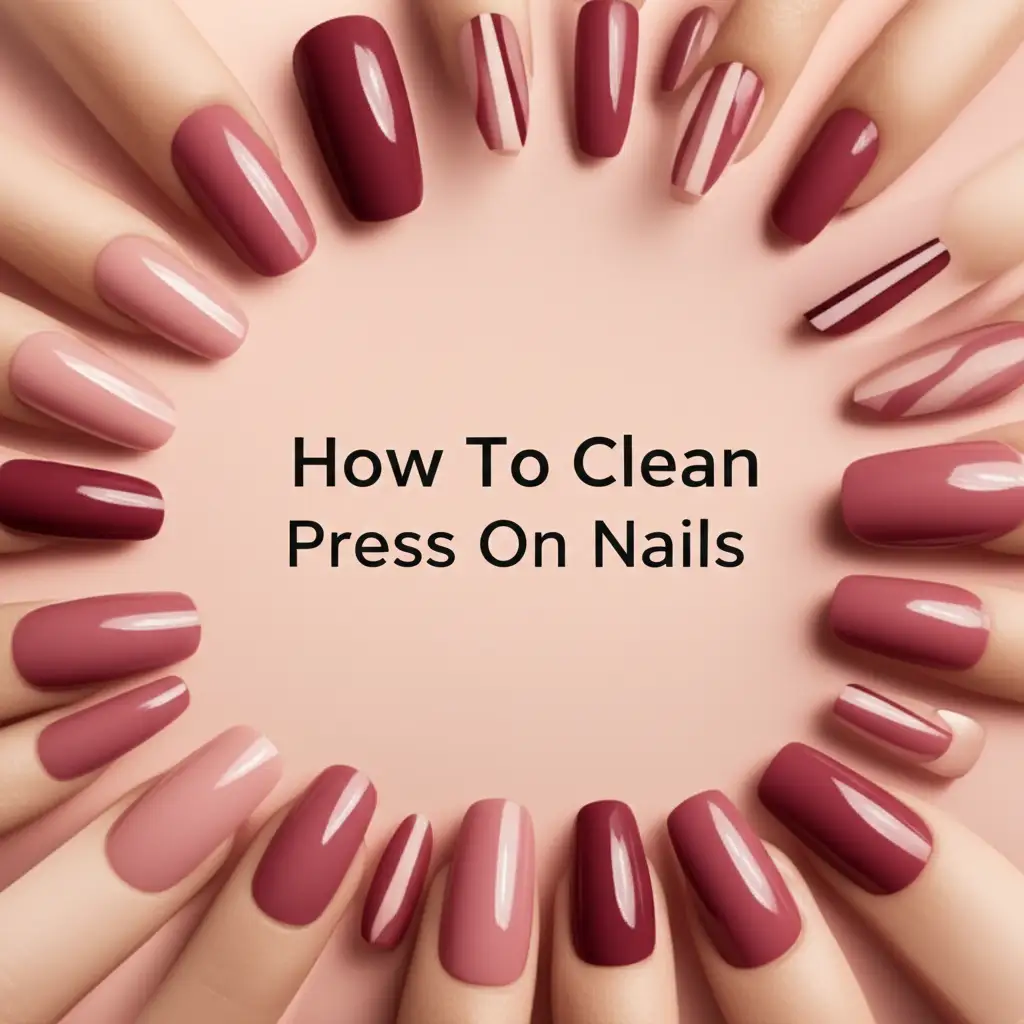
How To Clean Press On Nails
Revive Your Press-Ons: How To Clean Press On Nails Like a Pro
Press-on nails offer a wonderful way to achieve a salon-quality manicure at home. They are convenient and affordable. Many people love how quickly they can change their nail look. However, the true magic of press-ons comes when you can reuse them. This saves money and reduces waste. Knowing how to clean press on nails properly becomes essential for making them last.
This guide will show you how to clean press on nails effectively. We will cover the tools you need and a step-by-step cleaning process. You will learn how to remove old adhesive and tackle stubborn stains. We also discuss smart storage solutions. By the end, you will master the art of press-on nail care. This helps your favorite sets stay beautiful for many uses.
Takeaway
- Gather Tools: Collect rubbing alcohol, cotton, a nail brush, mild soap, and a cuticle stick.
- Remove Old Adhesive: Gently scrape off leftover glue using a cuticle stick or file.
- Wash Thoroughly: Clean nails with warm, soapy water and a soft brush to remove dirt.
- Disinfect: Wipe nails with rubbing alcohol to kill germs and remove residue.
- Dry Completely: Air dry nails fully before storing them to prevent damage.
- Store Properly: Keep nails in a clean, airtight container away from light and heat.
How do you clean press on nails?
You clean press on nails by gently removing old adhesive, washing them with mild soap and water, and disinfecting with rubbing alcohol. Allow them to air dry completely. This process extends their life and keeps them hygienic for future use.
Why Clean Your Press-On Nails? Extending Their Lifespan
Cleaning your press-on nails is not just about making them look good. It is a smart practice that offers several benefits. When you clean them, you remove dirt, oil, and old adhesive. This prepares them for their next use. Proper cleaning extends the life of your nail sets. You get more wear out of each purchase.
The cost savings from reusing press-ons are significant. Imagine buying fewer sets over time. This reduces your beauty budget. Regular cleaning also helps maintain hygiene. Your nails come into contact with many surfaces. Cleaning removes bacteria and grime. This prevents potential nail issues when you reapply them. Keeping your press-ons in top condition means they always look fresh. This makes them a more sustainable beauty choice.
Hygiene Matters for Your Nails
Our hands and nails touch many things throughout the day. This includes doorknobs, phones, and keyboards. Press-on nails can collect dirt and germs just like natural nails. When you wear press-ons, you want them to be clean. This prevents the transfer of bacteria to your skin or eyes. A simple cleaning routine helps keep your hands and nails healthy. It is a quick step for better personal hygiene.
Economic Benefits of Reusing Press-Ons
Buying new press-on nail sets every time can add up financially. Reusable nails are a great way to save money. If you clean and store your sets properly, you can wear them multiple times. This means your initial investment goes further. You get more value from each set you purchase. It is a smart choice for your wallet.
Maintaining Appearance and Adhesion
Clean nails look better. Dirt and old glue make press-ons appear dull. They also interfere with new adhesive. When you clean the back of the nail, you create a smooth surface. New nail glue or adhesive tabs will stick better to a clean surface. This helps your next manicure last longer. Clean nails always give a polished look.
Essential Tools for Cleaning Press-On Nails
Gathering the right tools before you start makes the cleaning process smooth. You likely have most of these items at home. Using the correct tools prevents damage to your press-on nails. It also ensures they become truly clean. Having everything ready saves time. It makes the task simple and efficient.
Here is a list of what you will need:
- Rubbing Alcohol (Isopropyl Alcohol): This is excellent for dissolving stubborn glue residue. It also disinfects the nails. You can find it at any drug store.
- Cotton Balls or Pads: These are for applying rubbing alcohol. They are soft and will not scratch the nails.
- Soft Nail Brush: A small, soft brush helps scrub away dirt. An old, clean toothbrush works well too. This gets into small areas.
- Mild Dish Soap: A gentle soap is perfect for washing away general grime. Do not use harsh detergents.
- Orange Wood Stick or Cuticle Pusher: This tool helps scrape off old adhesive. Be gentle to avoid scratching.
- Small Bowl: You will need this for warm, soapy water.
- Paper Towels or Clean Cloth: For drying the nails. Absorbent materials work best.
- Nail File (Optional): A fine-grit file can smooth edges or remove tiny glue bits. Use it carefully.
Having these items ready will help you tackle the cleaning process with confidence. Each tool plays an important part in restoring your press-on nails. Prepare your cleaning station. This makes the job easier.
Step-by-Step Guide: How to Clean Press-On Nails Properly
Cleaning press-on nails is a simple process. Following these steps ensures your nails are ready for their next application. Take your time with each step. This gives the best results. A clean nail surface ensures proper reapplication.
1. Removing Old Adhesive
The first step is to get rid of any leftover glue. Old adhesive can make the nails look messy. It also prevents new glue from sticking properly. You must remove it gently.
- Soak if Needed: If glue is very hard, soak nails in warm, soapy water for a few minutes. This softens the adhesive. Do not soak too long, especially if nails have designs.
- Scrape Gently: Use an orange wood stick or a metal cuticle pusher. Gently scrape the old glue from the back of the nail. Move slowly. Avoid digging into the nail. For stubborn bits, you can also use a fine-grit nail file. Lightly buff the glue off. Do not file the nail itself.
- Rub with Alcohol: Dampen a cotton ball with rubbing alcohol. Wipe down the back of the nail. The alcohol helps dissolve sticky residues. It prepares the surface for washing.
2. Washing and Scrubbing
Once the bulk of the glue is gone, it is time for a thorough wash. This removes any remaining dirt, oils, and tiny glue particles. This step is crucial for hygiene.
- Prepare Soapy Water: Fill a small bowl with warm water. Add a few drops of mild dish soap. Swirl to create some suds. Avoid very hot water as it can warp plastic nails.
- Soak Briefly: Place your press-on nails into the soapy water. Let them soak for about 2-3 minutes. This loosens any dirt.
- Gentle Scrubbing: Take a soft nail brush. Gently scrub the entire surface of each nail. Pay attention to the underside and around the edges. This removes trapped dirt. Rinse the nails under clean running water. Make sure no soap residue remains.
3. Disinfecting and Final Wipe
Disinfection is an important step. It kills any lingering bacteria or germs. This ensures your nails are truly clean and safe to wear again.
- Alcohol Wipe Down: Get a fresh cotton ball or pad. Saturate it with rubbing alcohol. Wipe every part of each press-on nail. Clean the top, sides, and especially the underside. Alcohol dries quickly. It leaves no sticky residue.
- Check for Cleanliness: Inspect each nail closely. Hold them up to a light source. Look for any remaining glue, dirt, or smudges. If you see anything, repeat the washing or alcohol wipe steps. Ensure they are spotless. This step ensures a perfect finish.
Advanced Cleaning Techniques for Stubborn Stains
Sometimes, press-on nails can pick up tough stains. This might be from food, makeup, or other colored substances. Regular cleaning might not remove these marks. Specific techniques can help tackle these stubborn issues. Always test any new cleaning method on an inconspicuous area first. This prevents damage to the nail’s finish or design.
Using Baking Soda for Discoloration
Baking soda is a gentle abrasive and a natural deodorizer. It can help lift discoloration from press-on nails. This is especially useful for yellowing or food stains.
- Create a Paste: Mix a small amount of baking soda with a few drops of water. Form a thick paste.
- Apply and Scrub: Apply the paste directly to the stained area on the nail. Use a soft brush, like an old toothbrush. Gently scrub the stain in small circular motions.
- Rinse Thoroughly: After scrubbing for 30-60 seconds, rinse the nail completely under clean water. Ensure all baking soda residue is gone. This method is effective for many types of stains. You can also use a similar method to clean tough spots on surfaces like your shower.
Gentle Bleaching for Extreme Stains (Use with Caution)
For very tough stains, a very diluted bleach solution might be considered. This should be a last resort. Bleach can damage nail finishes or colors.
- Dilute Bleach Heavily: Mix one part household bleach with ten parts water. Use gloves to protect your hands.
- Quick Dip: Dip only the stained part of the press-on nail into the solution for a few seconds. Do not soak the entire nail.
- Rinse Immediately: Remove the nail and rinse it immediately and thoroughly under cold running water. Follow with a mild soap wash. This stops the bleaching action. Dry completely. This method is similar to how you might approach cleaning a tough stain on a couch using specialized cleaners, emphasizing caution.
Lemon Juice or White Vinegar for Brightening
Lemon juice and white vinegar are natural acids. They can help brighten dull nails and remove light stains. They are less harsh than bleach.
- Apply Directly: Squeeze fresh lemon juice onto the nail, or use undiluted white vinegar. Let it sit for 5-10 minutes.
- Scrub and Rinse: Use a soft brush to lightly scrub the nail. Rinse thoroughly with water. The acidic nature helps break down residues. This leaves nails looking cleaner. This technique offers a gentle way to refresh the nail’s appearance.
Remember, always be gentle with press-on nails. Harsh scrubbing or strong chemicals can cause damage. Test first, clean carefully, and your nails will look great again.
Drying and Storing Your Clean Press-On Nails for Reuse
After cleaning, proper drying and storage are critical steps. They prevent damage and keep your nails ready for their next use. Moisture can lead to mold or mildew. Improper storage can bend or scratch the nails. Taking these final steps ensures your hard work pays off.
Air Drying Properly
Drying your press-on nails thoroughly is essential. Do not rush this step. Any remaining moisture can cause problems.
- Lay Flat: Place each cleaned nail on a clean, dry paper towel or soft cloth. Lay them flat with the back side facing up. This allows air to circulate around them.
- Allow Ample Time: Let the nails air dry completely. This can take several hours, or even overnight. Patience is key here. Do not try to speed up drying with heat. Heat can warp or melt plastic nails.
- Check for Dampness: Before storing, touch each nail. Feel for any signs of dampness. Ensure they are bone dry. This prevents mildew growth.
Organizing for Future Use
Once dry, store your nails properly. Good storage keeps them protected. It also helps you find the right size and design easily.
- Original Packaging: The best place to store press-on nails is in their original packaging. This packaging often has molds for each nail size. It keeps them organized and protected.
- Small Containers: If you do not have the original box, use small, airtight containers. Clear craft storage boxes with dividers work well. You can store sets together.
- Labeling: Label your containers or bags. Write down the design name or color. This saves time when you want to find a specific set.
- Keep Safe: Store containers in a cool, dry place. Avoid direct sunlight or extreme temperatures. Heat can deform the nails. Sunlight can fade colors.
By following these drying and storage tips, your cleaned press-on nails will remain in excellent condition. They will be ready for many more stylish applications. This proactive approach saves you time and money.
Common Mistakes to Avoid When Cleaning Press-On Nails
Cleaning press-on nails is straightforward, but certain mistakes can damage them. Knowing what to avoid helps preserve your beautiful sets. Ignoring these pitfalls can lead to warped nails, faded designs, or ineffective cleaning. We want your nails to last.
Here are common errors and how to avoid them:
- Using Harsh Chemicals: Avoid strong solvents like acetone-based nail polish remover. Acetone can melt plastic nails or strip designs. Stick to rubbing alcohol for disinfection. Mild dish soap is fine for washing.
- Scrubbing Too Vigorously: Excessive scrubbing, especially with abrasive materials, can scratch the nail surface. It can also damage intricate designs. Use a soft brush and gentle motions. Let the cleaning solutions do most of the work.
- Not Removing All Old Adhesive: Leaving bits of old glue on the back of the nail is a common mistake. This residue will make it difficult for new glue to bond correctly. Your next application will not last long. Take your time to gently scrape and wipe away all old adhesive.
- Improper Drying: Storing nails while they are still damp is a big no-no. Moisture leads to mold or mildew growth. It can also weaken the nail material. Always allow nails to air dry completely. This might take several hours.
- Storing in Direct Sunlight or Heat: Extreme temperatures can warp the plastic of press-on nails. Direct sunlight can fade colors and designs. Store your nails in a cool, dark place. Use their original packaging or small, opaque containers.
- Mixing Nail Sizes/Sets: If you throw all your nails into one pile, you will struggle to find matching pairs later. Keep sets together and organized. Use separate bags or containers for each design. This saves time and frustration.
- Forgetting to Disinfect: Just washing nails removes dirt, but not all germs. Skipping the rubbing alcohol step leaves bacteria on your nails. Always disinfect to ensure your nails are truly hygienic for reuse.
By avoiding these common mistakes, you ensure your press-on nails remain in excellent condition. This extends their life significantly. Proper care makes them a worthwhile investment.
Beyond Cleaning: Tips for Maintaining Press-On Nail Hygiene
Cleaning your press-on nails after removal is one part of the hygiene equation. Maintaining cleanliness while you wear them is also important. These daily habits help keep your press-ons looking good. They also contribute to overall hand and nail health. Small actions can make a big difference.
Regular Hand Washing
Wash your hands often with soap and water. This is the most basic yet effective way to keep your nails clean. Pay attention to cleaning under and around the press-ons. Dirt and food particles can easily get trapped. Use a nail brush if needed. This prevents buildup and keeps your nails looking fresh.
Protecting Nails During Chores
Many household chores involve water or harsh chemicals. This includes washing dishes, cleaning bathrooms, or gardening. Wear gloves during these activities. Gloves protect your press-on nails from water damage. They also shield them from cleaning agents that can loosen glue or fade designs. This simple step extends the life of your manicure.
Avoiding Direct Contact with Oils
Certain oils can break down nail glue. This includes cooking oils, lotions with heavy oils, or cuticle oils applied directly over the nail. When applying lotions, focus on your hands. Avoid rubbing lotions directly onto the nail surface or edges. Use cuticle oils sparingly at the base of your natural nail. This prevents premature lifting.
Being Mindful of Activities
Your nails are not tools. Avoid using your press-ons to open cans, pick at labels, or scrape surfaces. These actions put undue stress on the nails and the adhesive bond. This can cause them to pop off or break. Treat your press-ons gently. This preserves their integrity.
Quick Wipe-Downs
If your press-ons get dirty during the day, do a quick wipe. Use a damp cloth or a small amount of rubbing alcohol on a cotton swab. This removes surface grime immediately. This prevents stains from setting in. A little maintenance goes a long way.
By incorporating these daily practices, you will keep your press-on nails hygienic and beautiful. These tips complement the thorough cleaning process after removal. Enjoy a consistently clean and stylish manicure.
FAQ Section
Q1: Can you reuse press-on nails multiple times? Yes, you absolutely can reuse press-on nails. With proper care and cleaning, many sets can be worn two to three times or even more. The key is to carefully remove old adhesive and thoroughly clean and disinfect them. This extends their lifespan significantly. Reusing saves money and reduces waste.
Q2: How do you remove leftover glue from press-on nails effectively? To remove leftover glue, gently scrape it off the back of the nail using an orange wood stick or a cuticle pusher. For stubborn bits, lightly buff with a fine-grit nail file. Finish by wiping the nail with rubbing alcohol on a cotton ball. The alcohol helps dissolve any remaining sticky residue.
Q3: What if my press-ons get discolored or yellowed? Discoloration often comes from product buildup or prolonged wear. You can try a paste of baking soda and water, gently scrubbing with a soft brush. For light yellowing, soaking them briefly in a diluted lemon juice or white vinegar solution may help. Always rinse thoroughly afterward.
Q4: How long do cleaned press-on nails last in storage? When properly cleaned and completely dry, press-on nails can last indefinitely in storage. Keep them in their original packaging or an airtight container. Store them in a cool, dry place away from direct sunlight. This prevents warping, fading, or damage.
Q5: Is it safe to clean press-on nails with nail polish remover? No, it is generally not safe to clean press-on nails with regular nail polish remover. Most removers contain acetone, which can dissolve or warp the plastic material of press-on nails. It can also strip away designs or color. Stick to rubbing alcohol, mild soap, or specialized non-acetone cleaners.
Q6: Can I use hot water to clean press-on nails for faster drying? You should avoid using very hot water. While warm water is fine for soaking, excessively hot water can cause the plastic material of press-on nails to warp or deform. Always use lukewarm water for washing. Allow them to air dry completely at room temperature to prevent damage.
Conclusion
Cleaning your press-on nails is a simple but incredibly rewarding process. You now have the knowledge to properly clean press on nails. This helps you get the most out of every beautiful set. We discussed why cleaning matters, from hygiene to saving money. We also covered the essential tools and a clear step-by-step cleaning guide. You learned how to tackle stubborn stains and store your nails correctly.
By following these methods, your press-on nails will look fresh and last longer. This practice is good for your wallet and good for the environment. Make cleaning your press-ons a regular part of your beauty routine. You will enjoy flawless manicures time and time again. Start cleaning your press-ons today and enjoy their extended beauty!
- press on nails
- nail care
- cleaning nails
- reusable nails
- nail hygiene