· Home Cleaning · 17 min read
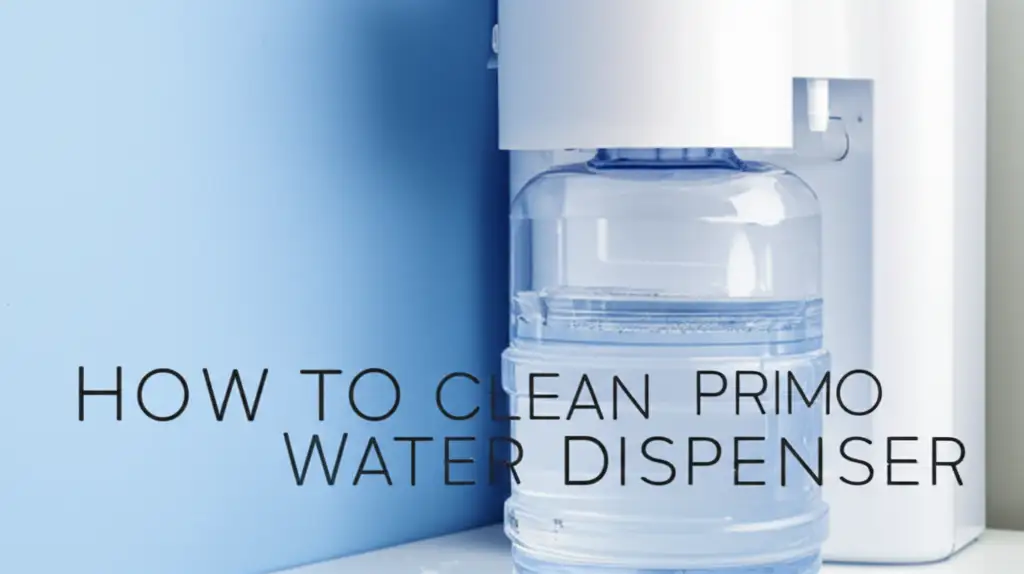
How To Clean Primo Water Dispenser
Clean Your Primo Water Dispenser: A Fresh Guide
A Primo water dispenser brings fresh, cool water right into your home. It provides convenience and hydration for daily life. However, even pure water can lead to issues inside the dispenser over time. Mineral deposits, dust, and even mold can build up.
I know you want clean, healthy drinking water. Regular cleaning ensures your Primo dispenser functions well. It also keeps your water tasting pure. This guide helps you understand how to clean your Primo water dispenser effectively. We cover everything from routine external wipes to deep internal sanitization. You will learn simple steps to maintain your dispenser.
Takeaway
Keeping your Primo water dispenser clean is simple and essential for healthy water.
- Perform routine exterior cleaning weekly.
- Deep clean the internal system monthly or every time you change the water bottle.
- Use a bleach or vinegar solution for sanitization.
- Rinse thoroughly to remove all cleaning solutions.
- Address hard water buildup and mold promptly.
Quick Answer
To clean a Primo water dispenser, disconnect power and remove the water bottle. Use a bleach or vinegar solution to sanitize the water tanks, lines, and spouts. Clean the drip tray and exterior surfaces with mild soap and water. Rinse all components fully before reassembling.
Why Clean Your Primo Water Dispenser?
Maintaining a clean Primo water dispenser is more than just good practice. It directly affects the quality and safety of your drinking water. Over time, water dispensers can develop hidden issues. These issues impact taste and your health. Understanding why cleaning is vital helps you commit to regular upkeep. I prioritize clean water for my family, and you should too.
Water dispensers, including Primo models, create a cool, dark, and often moist environment. This setting is perfect for certain types of growth. Airborne particles can settle on spouts and the drip tray. These particles mix with water splashes. Inside, mineral deposits from tap water can accumulate in tanks and lines. This buildup is common in any appliance that handles water.
Ignoring these buildups can lead to several problems. Mineral scale can affect the dispenser’s efficiency. It might slow down water flow. It can also cause the cooling or heating functions to work harder. More importantly, stagnant water in lines or tanks can become a breeding ground. This affects the water’s taste. Your refreshing water might develop a stale or off-flavor. This is unpleasant and signals an issue.
The biggest concern is the potential for microbial growth. This can include mold or bacteria. Mold often appears as black or pink spots. You might see it in the drip tray or around the spouts. These microbes can enter your drinking water. Consuming contaminated water can lead to health issues. Regular cleaning prevents these problems. It ensures your Primo dispenser provides safe, great-tasting water every single time. A clean dispenser means peace of mind for you and your loved ones.
Gathering Your Primo Cleaning Supplies
Before you start cleaning your Primo water dispenser, gather all necessary supplies. Having everything ready makes the process smoother and more efficient. I always collect my tools first, so I do not stop midway through the job. You likely have most of these items already in your home. This list ensures you have the right materials for both light and deep cleaning.
You will need a few basic cleaning agents. White distilled vinegar is an excellent natural cleaner. It helps break down mineral deposits and sanitizes effectively. Alternatively, household bleach is a powerful disinfectant. A small amount of bleach can kill bacteria and mold. Choose one based on your preference and the level of cleaning needed. Avoid using harsh chemical cleaners, as they can damage your dispenser or leave harmful residues.
For tools, you will need soft cloths or sponges. These are good for wiping down surfaces without scratching them. A soft-bristled brush, like a bottle brush or a pipe cleaner, helps clean hard-to-reach areas. These areas include spouts and inside tubing. A large bucket or basin is essential for draining water and mixing solutions. You might also want a pair of rubber gloves to protect your hands, especially if using bleach.
Here is a simple list to get you started:
- White Distilled Vinegar: An effective descaler and sanitizer.
- Household Bleach (unscented): A strong disinfectant.
- Soft Cloths or Sponges: For wiping and scrubbing surfaces.
- Soft-bristled Brushes: To clean narrow parts like spouts and water lines. Consider brushes designed for bottles or straws.
- Large Bucket or Basin: For draining water and preparing cleaning solutions.
- Rubber Gloves: To protect your hands during cleaning.
- Dish Soap (mild): For cleaning the drip tray and exterior.
- Clean Water: For rinsing all components thoroughly.
Having these items on hand ensures you are prepared for a complete and effective Primo water dispenser cleaning. This preparation saves time. It helps ensure a thorough job.
Routine Exterior Primo Dispenser Cleaning
Regular exterior cleaning of your Primo water dispenser is crucial. This keeps the dispenser looking good and prevents surface grime from building up. I aim to do this weekly, or whenever I notice any splashes or dust. This routine step is quick and prevents bigger cleaning jobs later. It also reduces the chance of microbes spreading to the dispensing areas.
Start by wiping down the dispenser’s outer surfaces. Use a soft cloth dampened with warm water and a little mild dish soap. Pay attention to the main body, sides, and front panel. Dust and fingerprints can accumulate quickly. A gentle wipe removes these surface contaminants. This simple action helps maintain a clean appearance.
Next, focus on the spouts where water comes out. These areas get touched often and can accumulate germs. Use a clean, damp cloth to wipe around the spouts. For a deeper clean, you can use a small brush or cotton swab. Dip it in a mild cleaning solution. Gently scrub inside and around the spout openings. This removes any sticky residue or buildup. Rinse the area with a clean, damp cloth.
The drip tray is another key area for routine cleaning. It catches spilled water and drips. This makes it a prime spot for mold and slime to grow. Most Primo models have a removable drip tray. Take it out and empty any water. Wash the tray with warm, soapy water. Use a brush to scrub away any slime or buildup. You can link to how to clean refrigerator water dispenser mold for more tips on mold prevention in dispensers. Rinse the tray thoroughly and let it air dry completely before putting it back.
Remember to wipe the area under the drip tray as well. Sometimes, water can splash onto the surface below. A quick wipe ensures no hidden moisture remains. This simple routine protects your dispenser. It ensures your water stays fresh. A clean exterior also makes your kitchen look tidier.
Deep Cleaning Primo’s Internal Water System
Deep cleaning the internal water system of your Primo dispenser is crucial for true water purity. This process addresses the hidden tanks and lines where mineral deposits and biofilm can accumulate. I recommend performing this deep clean every 3-6 months. This is also a good idea whenever you change the water bottle if your usage is high. This part of the cleaning process ensures your water is free from internal contaminants.
First, always unplug the dispenser from the power outlet. Safety is paramount when working with water and electricity. Remove the water bottle from the top or bottom of the unit. Drain any remaining water from both the hot and cold water spouts into a bucket. This empties the internal tanks and lines. For some units, there is a drain plug at the back; open it to ensure all water drains out. You might be surprised how much sediment comes out. For similar issues with water lines, consider reviewing how to clean sediment from water lines.
Now, prepare your cleaning solution. You have two main options: bleach or vinegar.
- Bleach Solution: Mix one teaspoon of unscented liquid household bleach with one gallon of clean water. This creates a sanitizing solution.
- Vinegar Solution: Mix equal parts white distilled vinegar and clean water. This is good for descaling and sanitizing.
Pour your chosen cleaning solution into the dispenser’s water reservoir. If your Primo is a top-load model, pour it directly into the top opening. For bottom-load models, you might need to use a funnel or a specific cleaning kit designed for internal reservoirs. Allow the solution to fill both the hot and cold water tanks. Dispense about a cup of the solution from each spout to ensure the lines are filled.
Let the cleaning solution sit inside the dispenser for 30 minutes to an hour. This dwell time allows the solution to work. It breaks down mineral deposits and kills bacteria or mold. If you use vinegar, you might see small bubbles as it reacts with mineral scale. For hard water buildup, you can find more general tips at how to clean hard water from shower head. After the dwell time, drain the entire solution from the dispenser. Use the spouts and the drain plug if available.
Next, rinse the system thoroughly. Refill the dispenser with fresh, clean tap water. Dispense several cups of water from both spouts. Empty the system again. Repeat this rinsing process at least two to three times. This ensures all traces of the cleaning solution are gone. You do not want any bleach or vinegar taste in your drinking water. For concerns about water purity in general, insights from how to clean under sink water filter can be helpful.
After the final rinse, replace the drain plug if removed. Wipe down any remaining moisture. Now your Primo’s internal system is clean and ready for a fresh bottle of water. This deep cleaning step is vital for your health and the longevity of your dispenser.
Tackling Mold and Hard Water in Your Primo
Mold and hard water buildup are common issues in water appliances. They can affect your Primo water dispenser. Addressing these problems quickly ensures your water stays safe and clean. I have faced both of these challenges, and I know how to handle them effectively. Prevention is always best, but treatment is simple.
Mold often appears as black or pinkish slime. You might find it around the spouts, inside the drip tray, or sometimes even in visible parts of the water reservoir. Mold thrives in damp, dark environments. If you see mold, a bleach solution is your best friend. After unplugging and draining the dispenser, prepare a solution of one teaspoon of unscented bleach per gallon of water. Pour this into the dispenser’s reservoir. Let it sit for at least 30 minutes. Make sure the solution touches all affected areas. For external mold, apply the bleach solution with a cloth or brush. Gently scrub away the mold. For comprehensive guidance on internal systems, you may want to check how to clean fridge water line as it shares similar concerns.
Hard water leaves mineral deposits. These look like white, chalky residue. They build up inside the tanks and lines, and around the spouts. This buildup can reduce water flow and affect heating or cooling efficiency. White distilled vinegar is excellent for breaking down these mineral deposits. Use a solution of equal parts vinegar and water for internal cleaning. Pour it into the reservoir and let it sit for at least an hour. The acid in vinegar dissolves the minerals. For stubborn deposits on spouts, you can soak a cloth in vinegar and wrap it around the affected area. Let it sit for a while before scrubbing. This is like descaling a hot water heater, where mineral buildup is also common.
After treating either mold or hard water, rinse the dispenser thoroughly. This means running several cycles of fresh, clean water through the system. Dispense water from both hot and cold spouts until you no longer smell or taste the cleaning solution. Rinse until the water comes out completely clear. If any residue remains, it could affect the taste of your water. This thorough rinsing is critical. By taking these steps, you eliminate unsightly and unhealthy contaminants. You also keep your Primo dispenser performing its best.
Primo Water Dispenser Maintenance Tips
Maintaining your Primo water dispenser properly extends its life and ensures pure water. Beyond routine and deep cleaning, a few regular habits make a big difference. I always keep these tips in mind to avoid common issues and maintain the dispenser’s efficiency. Small actions today prevent large problems tomorrow.
Cleaning Frequency:
- Exterior and Drip Tray: Wipe daily or weekly, especially if heavily used. This prevents grime buildup on surfaces.
- Spouts: Clean weekly. These are high-contact points.
- Internal System (Tanks & Lines): Deep clean every 3-6 months. For very hard water areas, consider cleaning quarterly. It is also good practice to deep clean with every 3rd or 4th bottle change, depending on bottle size.
Protecting the Dispenser:
- Placement: Place your dispenser away from direct sunlight. Sunlight can encourage algae growth inside the water bottle. It can also cause the plastic components to degrade faster. Keep it in a cool, shaded area.
- Air Circulation: Ensure the back of the dispenser has good airflow. The condenser coils are located there. Good airflow helps the cooling system work efficiently. Do not push the dispenser flush against a wall.
- Power Cord: Always unplug the dispenser when not in use for extended periods. This saves energy. It also protects the unit from power surges.
Water Bottle Handling:
- Clean Hands: Always wash your hands before handling the water bottle. This prevents transferring germs to the bottle’s neck.
- Bottle Neck: Before placing a new bottle, quickly wipe the neck of the bottle. Use a clean cloth. This removes dust or dirt that might fall into the reservoir.
- Store Bottles Correctly: Store spare water bottles in a cool, dark place. This prevents any potential algae or bacterial growth inside the sealed bottle.
Filter Maintenance (if applicable):
- Some Primo dispensers have an internal water filter. If yours does, follow the manufacturer’s instructions for filter replacement. A dirty filter can affect water taste and purity. This is similar to replacing a water filter in fridge for clean drinking water.
- Regularly checking the filter status is an important part of your Primo cleaning routine.
By following these simple maintenance tips, you ensure your Primo water dispenser remains a reliable source of clean, fresh water. These habits prolong the unit’s lifespan. They also guarantee healthy hydration for you and your family.
Troubleshooting Common Primo Cleaning Issues
Even with regular cleaning, you might encounter specific challenges with your Primo water dispenser. Knowing how to troubleshoot these common issues saves time and frustration. I have learned to identify and resolve these problems effectively. A quick solution often prevents a larger repair.
Issue 1: Persistent Off-Taste or Odor Sometimes, after cleaning, your water might still have a strange taste or odor. This often means the cleaning solution was not fully rinsed out.
- Solution: Perform several extra rinse cycles. Refill the dispenser with fresh tap water, dispense from all spouts, and completely drain the unit. Repeat this 3-4 times. Ensure you drain all water, including from the rear drain plug if present. If the issue continues, it might indicate a more deeply embedded issue that requires professional service or a more aggressive cleaning, possibly with a stronger vinegar solution if the smell is still present.
Issue 2: Slow Water Flow If water dispenses slowly, it is usually due to mineral buildup or sediment in the lines or spouts.
- Solution: Focus on descaling. Use a stronger vinegar solution (e.g., 2 parts vinegar to 1 part water). Let it sit in the internal tanks and lines for 1-2 hours. Dispense some through the spouts to ensure the lines are saturated. Then, use small brushes or pipe cleaners to clear the spouts directly. This is similar to clearing sediment from a water heater. Rinse very thoroughly afterward.
Issue 3: Mold or Slime Returns Quickly If mold reappears soon after cleaning, it means the source or lingering spores were not fully eliminated.
- Solution: Use a bleach-based cleaning solution for internal sanitization. Ensure the bleach concentration is correct (1 teaspoon per gallon). Increase the dwell time to 45-60 minutes. For external mold, use a dedicated mold cleaner suitable for plastic surfaces, or a stronger bleach solution applied with a cloth. Ensure the dispenser is placed in an area with good air circulation and no direct sunlight, which can encourage growth. Regularly empty and clean the drip tray.
Issue 4: Leaking from Spouts or Base Leaking after cleaning can happen if parts are not reassembled correctly or if seals are old.
- Solution: First, recheck all connections and the water bottle placement. Ensure the bottle is seated firmly and evenly. If the leak is from a spout, check if it is fully closed. Sometimes, during cleaning, a part might get slightly dislodged. If leaks persist, it could be a worn O-ring or a crack. In this case, consult your Primo dispenser’s manual for specific troubleshooting related to leaks or contact Primo customer support.
By knowing these common problems and their solutions, you can keep your Primo water dispenser in optimal condition. This ensures you always have access to clean and refreshing water without unnecessary hassle.
FAQ Section
Q1: How often should I clean my Primo water dispenser? A1: You should clean the exterior and drip tray weekly. Perform a deep internal cleaning monthly or every time you replace the water bottle, especially if you use it heavily. This schedule prevents mineral buildup and microbial growth. Regular cleaning ensures fresh-tasting water.
Q2: Can I use dish soap for internal cleaning of my Primo dispenser? A2: No, avoid using dish soap for the internal parts of your Primo dispenser. Dish soap can leave residue that is difficult to rinse completely. This residue can affect the taste of your water. It might also potentially damage internal components over time. Stick to white vinegar or bleach solutions for internal sanitization.
Q3: What kind of bleach should I use to clean my dispenser? A3: Use unscented liquid household bleach. Do not use gel or scented bleach. These types can leave residues or strong odors that are hard to remove. Always dilute the bleach properly, typically one teaspoon per gallon of water, to avoid damage and ensure safe cleaning.
Q4: How do I remove hard water stains from the spouts? A4: To remove hard water stains from spouts, soak a cloth in white distilled vinegar. Wrap the cloth around the spouts and let it sit for 30 minutes. The vinegar’s acidity breaks down mineral deposits. Then, scrub with a small brush and rinse thoroughly with clean water.
Q5: Is it safe to drink water after cleaning with bleach or vinegar? A5: Yes, it is safe to drink water after cleaning with bleach or vinegar, provided you rinse the dispenser thoroughly. You must flush the system multiple times with fresh water until no cleaning solution odor or taste remains. This ensures all residue is gone, making the water safe to consume.
Q6: Can cleaning my Primo dispenser affect its warranty? A6: Cleaning your Primo dispenser according to the manufacturer’s instructions typically does not void the warranty. Using abrasive cleaners or methods not recommended by Primo might. Always check your specific model’s manual for recommended cleaning products and procedures.
Conclusion
Keeping your Primo water dispenser clean is a simple yet vital task. It ensures your family enjoys pure, great-tasting water every day. We covered why cleaning is important. We explored the necessary supplies. You learned routine exterior care steps. You also gained knowledge on deep cleaning the internal water system. I believe these steps make a real difference in your water quality.
Remember to address specific issues like mold or hard water buildup. Follow the maintenance tips to extend your dispenser’s life. Regular cleaning prevents health risks. It also maintains the efficiency of your unit. A well-maintained Primo water dispenser is a valuable appliance in any home.
You now possess the knowledge to effectively clean your Primo water dispenser. Make cleaning a regular part of your home maintenance routine. Your efforts will lead to healthier hydration. Take action today. Keep your water clean. If you have questions or need further assistance, consult your Primo user manual or visit the official Primo website for model-specific instructions.
- Primo dispenser cleaning
- Water dispenser maintenance
- Sanitizing water cooler