· Kitchen Cleaning · 18 min read
How To Clean Protein Shaker
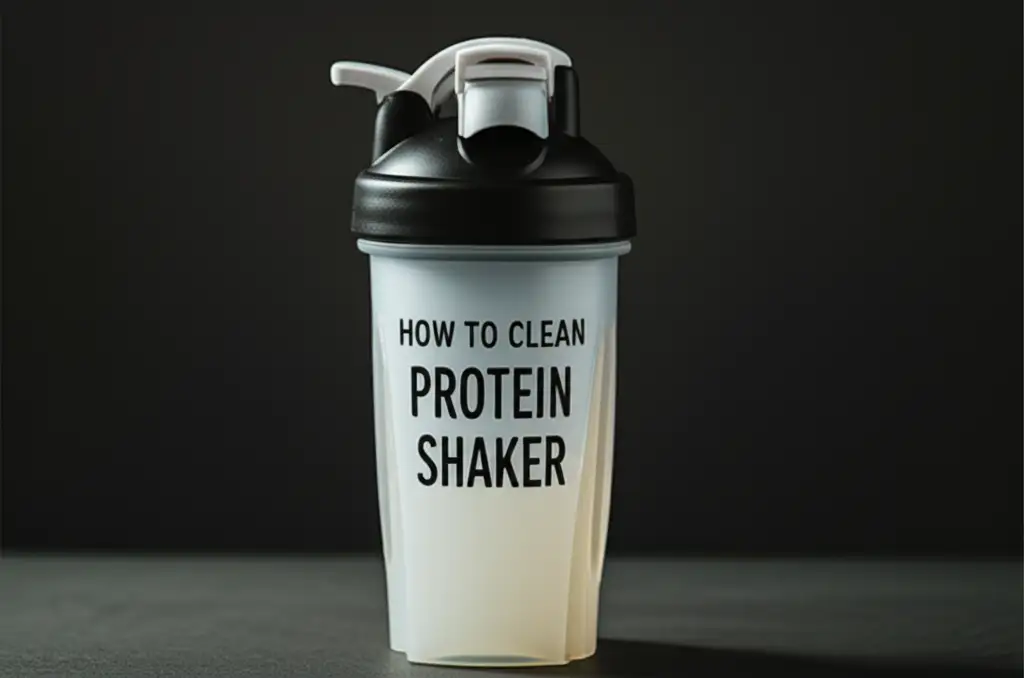
How to Clean Your Protein Shaker Effectively
Protein shakers are essential tools for many fitness enthusiasts. They help us mix supplements and stay hydrated throughout the day. However, these helpful bottles can quickly develop unpleasant smells if not cleaned properly. The combination of protein residue and moisture creates a perfect breeding ground for bacteria. This article gives you a complete guide on how to clean protein shaker bottles, ensuring they remain fresh, hygienic, and ready for your next workout. I will cover daily cleaning routines, deep cleaning methods for tough odors, and tips to prevent future smells.
Takeaway
- Rinse your protein shaker immediately after each use to prevent residue buildup.
- Use soap and warm water for a thorough daily wash, focusing on all parts.
- Deep clean with natural solutions like vinegar or baking soda for stubborn smells.
- Always allow your shaker to air dry completely before storing it.
To clean a protein shaker effectively, immediately rinse it with water after use. Then, wash all parts with warm, soapy water and a bottle brush. For deep cleaning or odor removal, soak the shaker in a mixture of water and vinegar or baking soda for several hours before scrubbing and rinsing thoroughly.
Why Proper Shaker Cleaning Matters for Your Health
Cleaning your protein shaker is more than just about avoiding bad smells. It directly affects your health and the lifespan of your shaker. Neglecting to clean it can lead to various problems that are easy to prevent.
Avoiding Odor and Bacteria Buildup
Imagine the smell of old, sour milk trapped inside your bottle. This happens when protein residue dries and ferments. Protein powder, especially dairy-based types, leaves a sticky film. This film provides food for bacteria. The moist environment inside a closed shaker makes it a perfect place for these bacteria to grow fast. A quick rinse often misses these microscopic invaders. They multiply rapidly, causing that notorious foul odor. This smell is not just unpleasant; it is a sign of bacterial growth. Regular and proper cleaning removes this food source. It stops bacteria from thriving and prevents the smell before it starts. This keeps your shaker smelling fresh every time you use it.
Protecting Your Health
Using a dirty protein shaker means you are drinking from a bottle full of bacteria. Some bacteria are harmless, but others can cause digestive issues or illness. Think about cross-contamination. If you touch a dirty shaker and then your mouth, you transfer germs. This is especially true if you carry your shaker to the gym or other public places. A clean shaker ensures that what you drink is pure. It prevents you from ingesting harmful microbes that can upset your stomach. Your health is important. A clean shaker bottle protects your gut and keeps you feeling good. It removes a common source of potential illness from your daily routine.
Extending Shaker Lifespan
Poor cleaning habits can also damage your shaker over time. Dried protein residue can harden, making it very difficult to remove. This residue can also cause stains, especially in clear plastic shakers. The plastic itself can absorb odors if left uncleaned for too long. This makes the smell permanent, even after washing. You might feel you need to throw away an old, smelly shaker, even if it is still structurally sound. Proper cleaning prevents these issues. It keeps the plastic clear and prevents odor absorption. This helps your shaker last longer, saving you money in the long run. A well-maintained shaker looks better and works better.
Daily Cleaning for Your Protein Shaker
Daily cleaning is your first line of defense against smells and bacteria. It is a simple habit that takes only a few minutes. Make it part of your routine right after each use.
Immediate Rinse Method
The most important step is rinsing your shaker immediately after you finish your drink. Do not let protein residue dry inside the bottle. Dried protein is very hard to remove. As soon as you finish your shake, empty any remaining liquid. Then, fill the shaker with warm water. Close the lid tightly and shake it vigorously for about 10-15 seconds. This helps loosen any fresh residue. Pour out the water. Repeat this rinse process if you see any remaining film. This initial rinse removes most of the protein before it has a chance to stick. It makes the deeper cleaning much easier later. You can do this at the gym or at home.
Soap and Water Wash
After the immediate rinse, a more thorough wash is necessary. This step removes any remaining film and germs. Disassemble your shaker completely. This means taking off the lid, removing the agitator (like the whisk ball or mesh screen), and separating any rubber seals. Each part needs individual cleaning. Use warm water and a small amount of dish soap. A bottle brush is very helpful for reaching the bottom and sides of the shaker cup. Scrub all surfaces, inside and out. Pay special attention to the lid, as residue can get stuck in the threads and drinking spout. The agitator also collects residue, so scrub it well. Rinse all parts thoroughly under running water until no soap bubbles remain. Ensure all parts are completely free of soap before drying.
Dishwasher Cleaning (If Applicable)
Some protein shakers are dishwasher safe. Check the manufacturer’s instructions or look for a dishwasher-safe symbol on the bottom of your shaker. If it is safe, place all disassembled parts on the top rack of your dishwasher. The top rack is generally safer for plastics, as the heat is less intense there. High heat on the bottom rack can warp plastic. Use your regular dishwasher detergent. A dishwasher offers a convenient way to clean and sanitize your shaker. However, it may not always remove stubborn smells or stains as effectively as a manual deep clean. Always air dry completely after the dishwasher cycle.
Deep Cleaning Stubborn Odors and Stains
Sometimes, daily cleaning is not enough. If your shaker has a lingering smell or stubborn stains, a deep clean is necessary. Natural cleaners are often very effective and safe.
The Vinegar Soak Method
Vinegar is a powerful natural deodorizer and disinfectant. It works wonders on stubborn protein shaker smells. First, wash your shaker with soap and water as usual. Then, mix equal parts white vinegar and warm water in your shaker cup. Fill it completely. Place the lid and agitator into a separate bowl with the same vinegar solution. Let all parts soak for several hours, or even overnight, for severe odors. The vinegar breaks down the odor-causing bacteria and residues. After soaking, pour out the vinegar solution. Scrub all parts thoroughly with a brush and dish soap. Rinse everything very well with clean water. The vinegar smell will disappear as it dries. This method is effective for many plastic items. You can use similar vinegar soaks to clean a plastic shower, helping remove buildup and odors from other plastic surfaces. Clean Plastic Shower
Baking Soda Power
Baking soda is another excellent natural cleaning agent known for absorbing odors. It is also mildly abrasive, helping to remove stuck-on residue. You can use baking soda in a few ways. For a general deodorizing soak, mix a few tablespoons of baking soda with warm water in your shaker. Let it sit for several hours or overnight. For tougher stains or odors, create a paste. Mix baking soda with a small amount of water to form a thick paste. Apply this paste to the inside of the shaker and any stained areas. Let it sit for at least an hour. Then, scrub vigorously with a bottle brush. Rinse thoroughly with warm water. Baking soda works well alone or in combination with vinegar. Both ingredients are safe and effective for cleaning. For example, you can also use a vinegar solution to clean mold from various surfaces effectively. Clean Mold with Vinegar
Lemon Juice Freshness
Lemon juice offers a fresh scent and mild acidity that can help cut through residue and odors. It contains citric acid, which is a natural cleaner and deodorizer. After washing your shaker, squeeze the juice of half a lemon into the bottle. Add some warm water and shake it around. Let it sit for a few hours. You can also rub a lemon wedge directly onto stained areas or inside the lid. For a more intense treatment, add a few slices of lemon along with water and let it sit overnight. The citrus scent will leave your shaker smelling clean and fresh. Remember to rinse thoroughly after using lemon juice to remove any stickiness. Lemon juice is a good choice if you prefer a more pleasant smell than vinegar.
Dealing with Persistent Smells and Mold
Sometimes, despite your best efforts, a protein shaker can develop persistent smells or even mold. These situations require more intense cleaning methods.
Addressing Mold Growth
Mold can appear as black spots or a fuzzy growth inside your shaker, especially if it was left uncleaned for too long with moisture. It is crucial to remove mold completely. Mold is a health concern. Start by discarding any remaining contents. Then, disassemble the shaker. Create a strong cleaning solution. You can use a mixture of warm water and a few drops of dish soap. For persistent mold, a solution of white vinegar (undiluted or 1:1 with water) is highly effective. Vinegar kills many types of mold. Soak all parts in this solution for several hours. Scrub every part thoroughly with a stiff brush, focusing on the moldy areas. Pay close attention to seals and crevices. Rinse very well. If mold persists, consider a mild bleach solution as a last resort, but always follow safety guidelines and rinse extremely thoroughly afterward. Persistent mold growth can be a serious issue. Understanding how to clean mold in a shower can also provide valuable insights, as similar principles apply to removing mold from plastic surfaces. [Clean Mold in Shower](https://beacleaner.com/how-to-clean-mold-in-shower]
Bleach Solution (Use with Caution)
Bleach is a powerful disinfectant that can kill bacteria and mold. However, it should be used as a last resort and with extreme caution. Bleach is harsh and can degrade plastic over time. It can also be dangerous if not used properly. To use bleach, mix one teaspoon of bleach with one gallon of water. Submerge your disassembled shaker parts in this solution for no more than 15-30 minutes. Do not leave it longer. After soaking, remove the parts. Rinse them extremely thoroughly under running water for several minutes. Ensure no bleach smell remains. Then, wash again with dish soap and water. Rinse again. Air dry completely. Always wear gloves when handling bleach. Never mix bleach with vinegar or other cleaners, as it can create dangerous fumes.
Salt Scrub for Abrasive Cleaning
For persistent stains or dried-on residue that will not budge, salt can act as a natural abrasive. It provides gentle scrubbing power without scratching the plastic. Pour a generous amount of coarse salt (like kosher salt or sea salt) into your empty shaker. Add a small amount of warm water, just enough to make a slushy mixture. Close the lid and shake vigorously. The salt crystals will rub against the inside surfaces, loosening stuck particles. For tough spots, you can also use a cloth or sponge with salt to scrub. Rinse the shaker very well after using salt to ensure no salt particles remain. This method works well for food stains too. Remember to be gentle if your shaker has soft plastic parts.
Preventive Measures for a Fresh Shaker
The best way to deal with a smelly protein shaker is to prevent the smell from happening in the first place. Good habits will keep your shaker fresh every day.
Air Drying is Key
Moisture is the enemy when it comes to smells and mold. After washing your protein shaker, it is essential to let it air dry completely. Do not immediately reassemble it or put it in a cupboard. Disassemble all parts: the cup, lid, and agitator. Place them separately on a drying rack or a clean towel. Position them so air can circulate around all surfaces. A quick trick is to place the shaker cup upside down but slightly tilted, allowing water to drain and air to enter. Ensure the lid is also fully open and separated. This prevents moisture from getting trapped, which is where bacteria and mold thrive. A completely dry shaker will not develop odors.
Store Shaker Properly
Once your protein shaker is completely dry, proper storage is important. Never store it with the lid sealed tightly, especially if it is not bone dry. This traps any remaining moisture and odors inside. Instead, store the shaker with the lid off or loosely placed on top. You can also store the lid and agitator separately from the cup. This allows air to continue circulating and prevents a stale smell from developing. Choose a clean, dry cupboard or shelf for storage. Avoid storing it in dark, damp places, which can encourage mold growth. Proper storage ensures that when you grab your shaker next, it smells as fresh as the day you cleaned it.
Use Shaker for Protein Only
Using your protein shaker exclusively for protein shakes or supplements can help prevent odors. If you use it for other beverages like coffee, juice, or milk, residues from these drinks can mix with protein residue. This can create unique and often stronger odors that are harder to remove. Coffee, for example, can leave a dark stain and a lingering smell. Milk can sour quickly and leave a very strong odor. Dedicating your shaker to protein helps reduce the variety of residues it comes into contact with. This makes daily cleaning more effective. If you need a bottle for other drinks, consider having a separate one. This simple rule simplifies cleaning and keeps your protein shaker smelling clean.
Choosing the Right Cleaning Tools and Supplies
Having the correct tools and knowing which supplies to use makes cleaning your protein shaker much easier and more effective. You do not need many items, but the right ones make a difference.
Bottle Brushes and Sponges
A good bottle brush is an essential tool for cleaning protein shakers. These brushes have long handles and stiff bristles that reach the bottom and sides of narrow bottles. They are far more effective than just trying to scrub with your hand or a standard sponge. Look for brushes with a smaller brush on the handle end, designed for cleaning lids and smaller openings. Sponges are great for the outside of the shaker and for scrubbing the lid’s surface. Make sure your sponge can fit into any crevices of the lid. For the agitator, a small kitchen brush or even an old toothbrush can be useful for scrubbing the nooks and crannies. Having these specialized tools ensures you can reach every part of your shaker and remove all residue.
Dish Soap and Natural Cleaners
Regular dish soap is usually sufficient for daily cleaning of your protein shaker. Choose a good quality dish soap that effectively cuts through grease and food residue. For deeper cleaning or odor removal, natural cleaners like white vinegar and baking soda are excellent choices. As discussed, they are effective at neutralizing odors and breaking down tough residues. They are also safe to use on most plastics and do not leave behind harsh chemical residues. Avoid using harsh chemical cleaners or abrasive scouring pads, as these can scratch the plastic. Scratches create tiny grooves where bacteria can hide, making future cleaning harder. Sticking to dish soap, vinegar, and baking soda is a safe and effective approach.
Dishwasher Safety Tips
While many protein shakers are labeled “dishwasher safe,” it is still wise to take precautions. High heat from a dishwasher can sometimes warp plastic or degrade rubber seals over time. Always place your shaker parts on the top rack of the dishwasher. The heating element is usually at the bottom, making the top rack cooler and safer for plastic items. Remove any rubber gaskets or seals from the lid if possible, and wash them separately by hand or in a small mesh bag in the top rack. This prevents them from getting lost or damaged. After the dishwasher cycle, always inspect your shaker parts. If they still feel damp, allow them to air dry completely before reassembling. You can find more cleaning tips for various items, like how to clean glass with vinegar, which is also a safe and effective method for many dishwasher-safe items. Clean Glass with Vinegar
Common Protein Shaker Cleaning Mistakes to Avoid
Even with the best intentions, some common mistakes can hinder your protein shaker cleaning efforts. Knowing what to avoid will help you keep your shaker in top condition.
Delaying Cleaning
The biggest mistake people make is not cleaning their protein shaker immediately after use. Leaving protein residue inside, even for a few hours, allows bacteria to start growing. The longer it sits, the more the residue dries and hardens. This makes it much harder to remove later. It also gives the foul odor a chance to set in. As soon as you finish your shake, rinse it out. If you cannot do a full wash immediately, at least rinse it thoroughly with water. This simple step prevents most problems. Make cleaning your shaker part of your post-workout or post-meal routine. Do not let it sit in your gym bag or sink overnight.
Ignoring the Lid and Agitator
The shaker cup itself usually gets the most attention, but the lid and agitator are equally important. Protein residue loves to hide in the threads of the lid, the drinking spout, and the intricate parts of the whisk ball or mesh screen. These areas are often overlooked. If you only wash the cup, bacteria will still thrive in the uncleaned lid or agitator. Always disassemble your shaker completely. Use a small brush or even an old toothbrush to thoroughly scrub all crevices of the lid and the entire agitator. Rubber seals in the lid are notorious for trapping moisture and odor. Remove them if possible and clean underneath. A clean lid and agitator are crucial for a truly clean shaker.
Using Harsh Abrasives or Chemicals
While you want to clean effectively, using very harsh abrasive scrubbers or strong chemical cleaners can damage your shaker. Metal scouring pads or rough sponges can scratch the plastic surface. These scratches create tiny hiding places for bacteria and make your shaker look cloudy or old. Similarly, harsh chemicals, beyond mild dish soap or natural cleaners like vinegar/baking soda, can degrade the plastic. They might cause it to become brittle, discolored, or even release chemicals into your drink. Stick to soft brushes, sponges, and recommended cleaning solutions. If you need a more abrasive clean, try the salt scrub method, which is gentler on plastic. Remember, the goal is to clean, not to destroy, your shaker.
Frequently Asked Questions
How do I get rid of the smell in my protein shaker?
To remove odor from your protein shaker, first wash it well with soap and water. Then, soak all parts in a solution of equal parts white vinegar and warm water for several hours or overnight. Alternatively, use a paste of baking soda and water to scrub the inside. Rinse thoroughly afterward and air dry completely.
Can I put my protein shaker in the dishwasher?
Many protein shakers are dishwasher safe, usually on the top rack. Always check the manufacturer’s instructions or the bottom of your shaker for a dishwasher-safe symbol. High heat on the bottom rack can warp plastic. Ensure all parts are separated before loading.
Why does my protein shaker smell bad after washing?
Your protein shaker might still smell bad after washing if residue is left in crevices, or if it is not dried completely. Bacteria thrive on hidden residue and moisture. Make sure to disassemble all parts, scrub thoroughly, and allow all components to air dry fully before reassembling and storing.
How often should I clean my protein shaker?
You should rinse your protein shaker immediately after every use. A full wash with soap and water should be done daily. Perform a deep clean with vinegar or baking soda at least once a week, or whenever you notice a persistent smell or residue buildup.
What causes mold in protein shakers?
Mold grows in protein shakers due to trapped moisture and leftover protein residue. If a shaker is not cleaned and dried completely after use, especially if left sealed, the dark, damp environment inside becomes a perfect breeding ground for mold spores to develop.
Is it safe to drink from a smelly protein shaker?
Drinking from a smelly protein shaker is not safe. The bad smell indicates the presence of bacteria and potentially mold. These microbes can cause digestive upset or other health issues. Always ensure your shaker is clean and odor-free before using it.
Conclusion
Keeping your protein shaker clean is a simple yet crucial part of your fitness routine. From immediate rinsing to regular deep cleaning, each step helps maintain hygiene and extend your shaker’s life. I know it can be tempting to just leave it in the sink, but a few minutes of care prevents much bigger problems. By following these steps on how to clean protein shaker bottles, you ensure your health and enjoy fresh, odor-free supplements every time. Make these cleaning habits a consistent part of your day. Your nose, your body, and your wallet will thank you. Start today for a cleaner, healthier workout experience!
- protein shaker cleaning
- fitness bottle care
- remove shaker odor
- deep clean protein bottle
- natural cleaning solutions