· Food Preparation · 13 min read
How To Clean Red Snapper
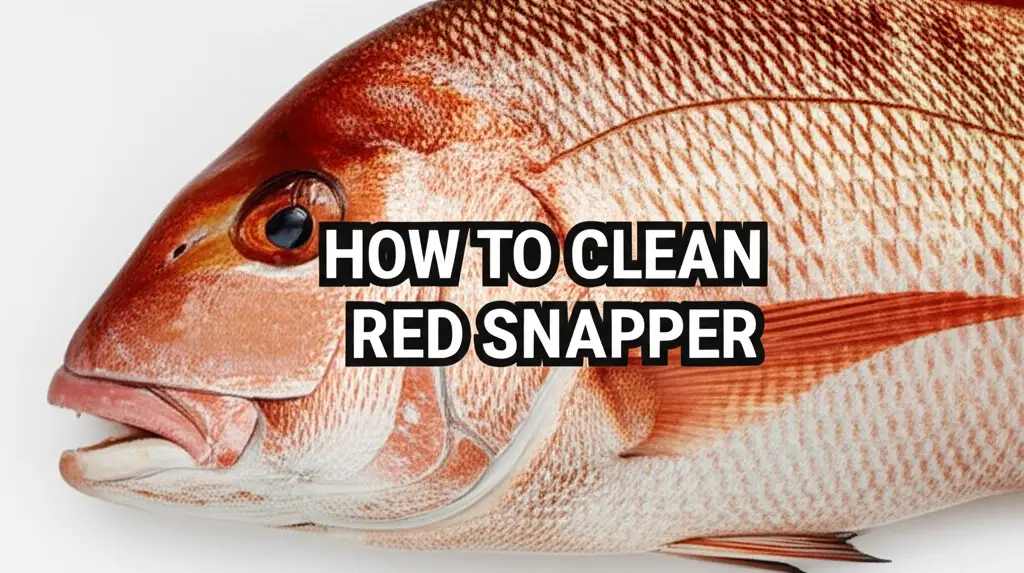
Mastering How to Clean Red Snapper
Have you ever caught a beautiful red snapper and wondered what to do next? Cleaning fish can seem daunting at first. However, learning how to clean red snapper properly is a simple process. It helps you get the most from your fresh catch.
This guide breaks down each step. We will cover preparing your workspace, scaling the fish, gutting it, and then filleting it. You will learn easy ways to remove the skin and how to store your cleaned fish. By the end, you will feel confident preparing red snapper for your next meal. Let us start cleaning some fish.
Takeaway
- Gather Tools First: Have a sharp knife, scaling tool, and gloves ready.
- Scale Thoroughly: Remove all scales from tail to head.
- Gut Carefully: Cut from vent to gills, remove all organs.
- Fillet Precisely: Use a sharp knife to cut along the backbone.
- Keep it Clean: Wash fish and sanitize your workspace immediately.
To clean red snapper, you must first scale the fish completely. Then, you gut it by removing all internal organs. Next, you can fillet the fish by cutting the meat away from the bones. Finally, rinse and prepare the fillets for cooking or storage.
Preparing Your Workspace and Tools for Red Snapper
Before you begin to clean red snapper, setting up your area is important. A clean, organized space makes the job easier. It also helps keep your kitchen sanitary. I always pick a spot with good lighting and access to water.
You will need a few specific tools. A sharp fillet knife is crucial for precise cuts. A fish scaler or the back of a knife works well for scale removal. Thick gloves protect your hands. A large cutting board gives you a stable surface. I also use a dedicated container for waste. This helps with easy disposal.
Essential Tools List:
- Sharp Fillet Knife: A flexible blade makes filleting easier.
- Fish Scaler: Designed specifically for quick scale removal.
- Cutting Board: A large, non-slip board is best.
- Gloves: Protect hands and improve grip.
- Waste Container: For immediate disposal of guts and scales.
- Paper Towels: For quick clean-ups.
- Clean Cloths: For wiping down surfaces.
Ensure your cutting board is stable and does not slide. You can place a damp towel underneath it for extra grip. Having all tools ready before you start saves time. It makes the entire process smoother. Remember, a tidy workspace prevents mess. This leads to a cleaner finished product.
Scaling Your Red Snapper: A Step-by-Step Guide
Scaling is the first major step when you clean red snapper. Red snapper have tough scales. Removing them prevents a chewy texture in your cooked fish. This step is a bit messy, but it is necessary. I usually do this near a sink or outside if possible.
Hold the fish firmly by the tail. Use your scaler or the back of a sturdy knife. Scrape against the direction of the scales. Start from the tail and move towards the head. Use short, firm strokes. Apply even pressure. Scales will fly off, so be ready for that.
How to Scale Red Snapper:
- Prepare the Fish: Lay the fish flat on your cutting board. Hold its tail firmly.
- Scrape Against Grain: With your scaler, scrape from the tail to the head. Overlap your strokes.
- Check All Areas: Make sure to scale both sides of the fish. Pay attention to the belly, fins, and near the head. Scales can hide there.
- Rinse Thoroughly: Once scaled, rinse the fish under cold running water. This washes away loose scales. Run your hand over the fish to check for any missed spots. You want it completely smooth.
Proper scaling ensures your fish cooks evenly. It also prevents any gritty texture from scales in your meal. Take your time during this step. It lays the groundwork for easy gutting and filleting later. I always rinse the fish very well after scaling. This makes sure no tiny scales remain.
Gutting the Red Snapper: Preparing for Fillet
After scaling, the next step is gutting your red snapper. This removes the internal organs. Gutting is vital for fresh, clean-tasting fish. It also prevents spoilage. This part may seem daunting, but it is simple with a sharp knife. I approach this step with focus and precision.
Place the scaled fish on your cutting board. Locate the vent, which is a small opening near the tail. Insert the tip of your fillet knife into the vent. Make a shallow cut along the belly towards the head. Stop before you reach the gills. You do not want to cut too deep into the flesh. Just enough to open the body cavity.
Steps for Gutting Your Fish:
- Open the Belly: Insert your knife at the vent. Carefully cut up to the pectoral fins.
- Remove Organs: Open the cavity with your hands. Reach inside and pull out all organs. This includes the liver, stomach, and intestines.
- Clean the Cavity: Scrape along the backbone with your thumb or a spoon. This removes the dark bloodline. This bloodline can cause a strong, fishy taste if left.
- Rinse Inside and Out: Rinse the body cavity thoroughly under cold water. Make sure no bits of organ or blood remain. Rinse the outside of the fish again too.
Proper gutting prepares the fish for storage or filleting. It also removes any potential sources of off-flavors. My goal is always a perfectly clean cavity. This ensures the best taste for the snapper. After gutting, the fish is ready for the next stage of cleaning.
Filleting Red Snapper: Achieving Perfect Cuts
Filleting is where you separate the meat from the bone structure. This skill makes cooking fish much easier. It also gives you boneless portions. When I fillet, I aim for maximum yield from the fish. A very sharp fillet knife is critical here. It makes clean cuts and reduces waste.
Lay the gutted, rinsed red snapper on its side. Make an initial cut behind the pectoral fin. Cut straight down to the backbone. Do not cut through the backbone. Then, turn your knife parallel to the backbone. Slice along the spine from head to tail. Use long, smooth strokes. Keep the knife blade flat against the bones. This helps maximize meat on the fillet.
How to Fillet a Red Snapper:
- Initial Head Cut: Cut behind the gills, down to the spine. Do not cut through.
- Slice Along Spine (First Side): Turn the knife flat. Cut along the backbone from head to tail. Separate the fillet.
- Flip and Repeat (Second Side): Flip the fish over. Repeat the same steps for the second fillet.
- Remove Rib Bones: Each fillet will still have rib bones. Gently lift the fillet. Cut around and under the rib cage. You can also use pliers or tweezers to pull them out.
- Check for Pin Bones: Feel along the center of the fillet. You might find small pin bones. Use pliers to pull them out. Pull in the direction the bone grew.
Filleting takes practice. Do not worry if your first few attempts are not perfect. The key is a sharp knife and patience. Each clean fillet is a step closer to a delicious meal. I find that a good fillet knife makes all the difference. Always cut away from your body for safety.
Skinning Your Red Snapper Fillets: Easy Methods
Once you have your beautiful red snapper fillets, you might want to remove the skin. Red snapper skin is edible. However, many people prefer their fillets skinless. Removing the skin makes for a cleaner presentation. It also changes the texture of the cooked fish. I often remove the skin, especially for baking or pan-searing.
Place a fillet skin-side down on your cutting board. Hold the tail end of the skin firmly. Use your sharp fillet knife. Angle the blade slightly down towards the cutting board. Start cutting between the flesh and the skin. Keep the knife blade flat and move it away from the tail. Use a sawing motion. Pull the skin with your free hand as you cut.
Methods for Skinning Fillets:
Knife Method (Preferred):
- Secure the Skin: Hold the tail end of the skin firmly against the board.
- Angle the Knife: Insert your sharp knife between skin and flesh. Keep it almost flat.
- Slide and Separate: Pull the skin tightly with one hand. Slide the knife along the skin with the other. Cut from tail to head. The skin should come off in one piece.
Alternative (Less Common): For very thin or delicate fillets, you might chill them first. This makes them firmer and easier to handle. However, red snapper fillets are usually robust enough.
This process removes all remaining skin. You are left with pure, clean fish meat. Make sure your knife is very sharp for this step. A dull knife will tear the flesh. This leaves skin on the fillet. After skinning, your red snapper is ready for further preparation or storage.
Final Touches and Proper Storage for Fresh Snapper
You have scaled, gutted, filleted, and potentially skinned your red snapper. Now comes the crucial final step: proper cleaning and storage. Proper handling ensures your fish remains fresh. It also maximizes its shelf life. I always handle my fish with care at this stage.
After filleting, give your fillets a final rinse under cold water. Pat them completely dry with paper towels. Excess moisture can degrade fish quality. It also makes a poorer sear if you are cooking immediately. Drying is important for both fresh use and freezing.
Storing Your Red Snapper Fillets:
Immediate Use (within 1-2 days):
- Place fillets on a plate or in a container.
- Cover them loosely with plastic wrap or parchment paper.
- Place over a bed of ice in the refrigerator. This keeps the temperature very low.
- Change the ice as it melts.
Freezing (for longer storage):
- Wrap Individually: Wrap each dry fillet tightly in plastic wrap.
- Add Another Layer: Then wrap in aluminum foil or freezer paper. This prevents freezer burn.
- Place in Bag: Put wrapped fillets into a heavy-duty freezer bag.
- Remove Air: Press out as much air as possible from the bag.
- Label and Date: Write the date on the bag.
- Freeze: Store in the coldest part of your freezer. Properly frozen fish lasts 3-6 months.
Freezing fish allows you to enjoy your catch much later. Always thaw frozen fish slowly in the refrigerator. Never thaw at room temperature. This final attention to detail ensures every bite of your red snapper is perfect.
Maintaining Cleanliness After Cleaning Red Snapper
Cleaning fish creates a mess. Ensuring proper hygiene afterwards is essential. This prevents odors. It also stops the spread of bacteria in your kitchen. I always prioritize a thorough cleanup right after I finish with the fish. This makes sure my kitchen remains a safe space.
Start by disposing of all fish waste immediately. This includes scales, guts, and bones. Place them in a sealed bag and put them in your outdoor trash bin. Do not leave them inside. This prevents smells and attracts pests. Then, clean all surfaces and tools.
Steps for Post-Cleaning Sanitation:
- Dispose of Waste: Bag all fish scraps tightly. Move them to an outdoor trash can at once.
- Wash Tools and Cutting Board:
- Rinse your knife, scaler, and cutting board with cold water first. This prevents hot water from “cooking” fish proteins onto surfaces.
- Wash thoroughly with hot soapy water. Use a brush for scrubbing.
- Rinse well.
- You might consider using a solution of vinegar for cleaning your shower or other surfaces, which also works for kitchen disinfection.
- Sanitize Surfaces:
- Wipe down your entire workspace. Use hot soapy water. This includes countertops, sinks, and any surrounding areas.
- Follow with a sanitizing spray or a diluted bleach solution (1 tablespoon bleach per gallon of water).
- Let it sit for a few minutes.
- Wipe clean with a fresh cloth.
- Remember to also clean under your sink and around the bottom of your pan or other kitchen items that might have come into contact.
- Wash Hands Thoroughly: Wash your hands with soap and hot water for at least 20 seconds. Use a nail brush too.
Proper cleanup is as important as the cleaning of the fish itself. It keeps your kitchen hygienic and safe. I pay special attention to my cutting board. Sometimes, I even use a scrub with baking soda or clean my baking steel and other kitchen items that might have absorbed odors. A clean workspace means a healthy kitchen.
FAQ Section
Q1: What tools do I need to clean red snapper? A1: You need a sharp fillet knife, a fish scaler, a large cutting board, and protective gloves. A dedicated waste container and paper towels are also very helpful. These tools make the process efficient. They also ensure safety during fish preparation.
Q2: How do I remove red snapper scales without making a big mess? A2: Scaling fish always creates some mess. You can scale the fish inside a large plastic bag. This traps most flying scales. Alternatively, scale the fish under running water in a sink. This helps wash scales away immediately. Do it slowly and carefully.
Q3: Can I leave the skin on red snapper fillets? A3: Yes, you can leave the skin on red snapper fillets. The skin is edible and becomes crispy when cooked. Many people enjoy the flavor and texture of crispy fish skin. If you leave it on, make sure it is thoroughly scaled.
Q4: How long can fresh red snapper fillets be stored in the refrigerator? A4: Fresh red snapper fillets should be stored on ice in the coldest part of your refrigerator. They will stay fresh for 1 to 2 days. For longer storage, you should freeze the fillets. Always check for any off-smells before cooking.
Q5: What is the purpose of removing the dark bloodline from the fish cavity? A5: The dark bloodline, or kidney line, running along the backbone contains residual blood. Removing it is important. It can give the fish a stronger, sometimes metallic, or “fishy” taste. Scraping it out results in a cleaner, milder flavor.
Q6: Is it necessary to wear gloves when cleaning fish? A6: Wearing gloves is highly recommended. Gloves protect your hands from cuts. They also prevent strong fish odors from lingering on your skin. Additionally, gloves improve your grip on the slippery fish. They provide a more hygienic cleaning experience.
Your Fresh Red Snapper Journey Begins
You have now learned how to clean red snapper from start to finish. From preparing your workspace to the final steps of proper storage and kitchen cleanup, you possess the knowledge needed. This detailed process ensures you get the freshest, most delicious fish possible. Taking the time to clean your own fish gives you control. It also provides satisfaction knowing you prepared your meal from scratch.
Remember that practice makes perfect. Do not worry if your first fish is not flawless. Every time you clean a red snapper, you will get better and faster. Enjoy the process of transforming a whole fish into beautiful fillets ready for cooking. Get out your tools, find a fresh red snapper, and start cleaning today! The reward is a wonderful meal made by your own hands.
- fish cleaning
- red snapper
- seafood preparation
- filleting fish
- kitchen hygiene