· Appliance Care · 19 min read
How To Clean Refrigerator Ice Maker
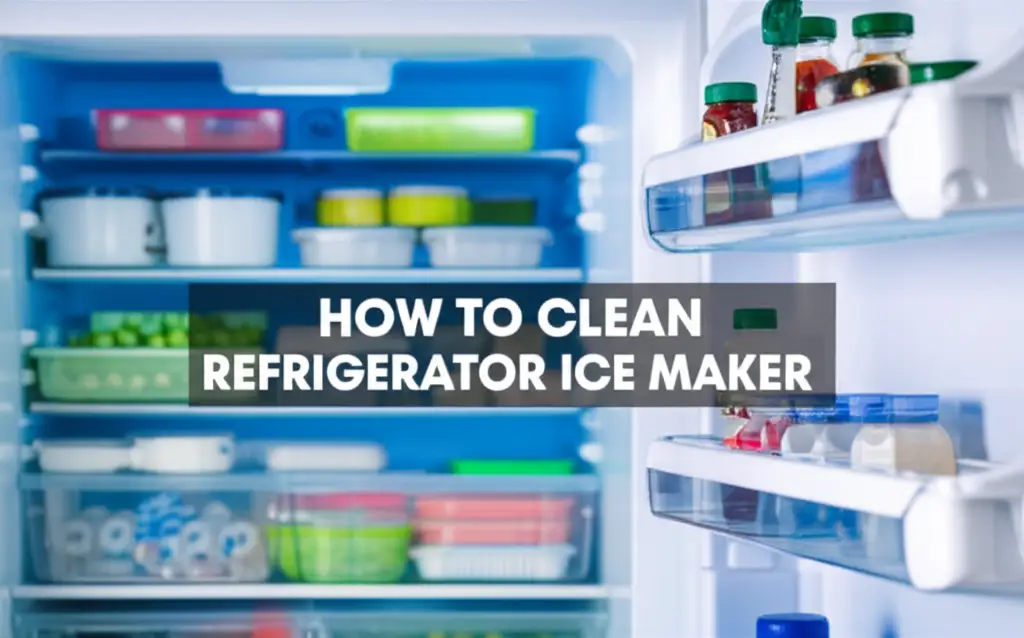
Restore Your Ice: How to Clean Your Refrigerator Ice Maker
Imagine grabbing a handful of ice for your drink. You expect it to be clear, cold, and fresh. Sometimes, ice cubes can carry strange smells or even look cloudy. This often means your refrigerator ice maker needs a good cleaning.
Cleaning your ice maker ensures your ice is pure and safe to use. It also helps your appliance work better and last longer. This guide will walk you through clear, simple steps. You will learn how to clean refrigerator ice maker, remove buildup, and keep your ice tasting great. I will share common tools and effective methods. We will cover everything from basic cleaning to tackling tough mold and odors.
Takeaway
Cleaning your refrigerator ice maker is simple and important for fresh, safe ice.
- Disconnect power before starting.
- Use mild cleaners like vinegar or baking soda.
- Clean all removable parts thoroughly.
- Address the water line and dispenser chute.
- Perform regular maintenance to prevent future issues.
Clear, Concise Answer to Main Query
To clean a refrigerator ice maker, disconnect power, remove the ice bin and removable parts, wash them with mild soap and water, sanitize the interior with a vinegar solution, rinse well, dry completely, and reassemble. Regularly clean the water line and dispenser for optimal ice quality.
Why Your Refrigerator Ice Maker Needs Regular Cleaning
Many people clean their refrigerator interior. They often forget about the ice maker. This small appliance works hard. It constantly processes water into ice. Over time, mineral deposits build up. Food particles from the freezer can also get inside.
Mold and mildew can grow in damp environments. Your ice maker is a perfect spot for them. These contaminants affect ice quality. They can make your ice taste strange or cause odors. More seriously, mold and bacteria can pose health risks. I want my ice to be clean and safe for my family.
Regular cleaning prevents these problems. It keeps your ice pure. This process also improves the efficiency of your ice maker. A clean machine runs better. It helps avoid costly repairs down the line. A clean ice maker is a healthy ice maker.
Think about the source of your ice. It comes from the water line. This line can also collect impurities. Cleaning the whole system is key. It ensures every cube is crisp and fresh. This is a small task with big benefits.
Essential Supplies for Refrigerator Ice Maker Cleaning
Before you start cleaning your refrigerator ice maker, gather your tools. Having everything ready makes the job easier. You do not need many special items. Most of these are likely already in your home. I like to have everything organized before I begin any cleaning project.
First, you will need a few cleaning agents. White vinegar is a fantastic natural cleaner. It removes mineral buildup and kills odors. Baking soda also works well for scrubbing and absorbing smells. A mild dish soap helps with general dirt and grime. Avoid harsh chemicals or abrasive cleaners. These can damage your ice maker’s parts.
Next, get some cleaning tools. You will need a soft cloth or sponge. A soft-bristle brush is helpful for small crevices. Make sure the brush is clean and does not scratch surfaces. A clean towel for drying is also important. I usually grab a few microfibers.
A large bowl or bucket can hold parts as you clean them. Safety is also important. Wear rubber gloves to protect your hands from cleaning solutions. Finally, have access to warm water. Warm water helps dissolve dirt and sanitizes better. These simple supplies will get your ice maker sparkling.
- Cleaning Agents:
- White Vinegar
- Baking Soda
- Mild Dish Soap
- Cleaning Tools:
- Soft Cloths or Sponges
- Soft-Bristle Brush (e.g., old toothbrush)
- Clean Towels
- Large Bowl or Bucket
- Safety Gear:
- Rubber Gloves
- Other:
- Warm Water
Step-by-Step Guide to Cleaning Your Refrigerator Ice Maker
Cleaning your refrigerator ice maker is a straightforward process. Follow these steps for a sparkling clean machine and fresh ice. I find breaking it down makes it less daunting. This ensures you clean every part effectively.
1. Prepare for Cleaning
Your first step is critical for safety. You must unplug your refrigerator from the wall outlet. This prevents accidental starts or electrical shocks. Never work on an appliance that is still powered. Safety always comes first when dealing with electronics.
Next, empty the ice bin completely. Discard any existing ice. This ice might already have odors or impurities. Some people save it in a bag if they want to discard it later. I prefer to just toss it right away. Remove the ice bin from the freezer. Most bins slide out easily.
Identify and remove any other detachable parts. This includes the ice bucket, ice chute parts, or any trays. Refer to your refrigerator’s manual if you are unsure about which parts are removable. Knowing your appliance helps prevent damage. You can usually find the manual online if you do not have a physical copy.
2. Clean Removable Parts
Now, it is time to wash the removable parts. Take the ice bin and other detached components to your sink. Fill the sink or a large bowl with warm water. Add a few drops of mild dish soap to the water. Do not use harsh detergents.
Carefully wash each part. Use a soft cloth or sponge to scrub away any residue. For stubborn spots, a soft-bristle brush can help. Pay close attention to corners and crevices. These areas often collect buildup.
Rinse all parts thoroughly under clean, running water. Ensure no soap residue remains. Any leftover soap can affect the taste of your ice. Rinse until the water runs clear. Soap films can also attract dirt over time.
Dry all parts completely with a clean towel. Air drying can work, but towel drying is faster. It also helps prevent water spots. Make sure they are fully dry before returning them. Damp parts can encourage mold growth.
3. Clean the Ice Maker Unit Interior
With the parts removed, focus on the ice maker unit itself. This is the section still inside your freezer. Do not spray water directly into the unit. This can damage electrical components. You want to clean carefully.
Prepare a cleaning solution. Mix equal parts white vinegar and warm water in a spray bottle. Vinegar is great for sanitizing. It breaks down mineral deposits effectively. This solution also helps with odors. You can also make a paste with baking soda and a little water for tough spots.
Dampen a clean cloth with the vinegar solution. Carefully wipe down all accessible surfaces inside the ice maker. Clean the ice mold, the auger (the screw-like part that moves ice), and the surrounding areas. Use a small brush for tight spots. Do this gently.
If you see mold, use a stronger vinegar solution or the baking soda paste. Scrub the affected areas carefully. Let the solution sit for a few minutes. Then, wipe it away completely. For more detailed instructions on using vinegar, you can read about how to clean ice maker with vinegar.
After cleaning, wipe all surfaces with a clean, water-dampened cloth. This removes any vinegar residue. Then, use a dry towel to dry everything completely. Ensuring no moisture remains is key. This prevents new mold growth.
4. Reassemble and Restart
Once all parts are dry, carefully put them back. Reinstall the ice bin and any other components you removed. Make sure everything clicks into place. Improper assembly can cause issues. Your refrigerator manual can guide you here.
After reassembly, plug your refrigerator back into the wall outlet. The ice maker will start producing ice again. Discard the first batch or two of ice it produces. This flushes out any remaining cleaning solution or residual particles. The new ice will be fresh and taste better.
Allow the ice maker several hours to refill the bin. The time varies by model. You will then have clean, pure ice ready for use. Enjoy the taste of clean, fresh ice. This process helps maintain a healthy home environment.
Deep Cleaning the Water Line and Ice Dispenser
Your ice maker is only as clean as the water it uses. The water line feeds water to your ice maker. The ice dispenser chute is where the ice comes out. Both areas can harbor buildup and mold. I often find these areas are overlooked. Cleaning them ensures true ice purity.
1. Cleaning the Water Line
The water line can accumulate mineral deposits over time. This affects water flow and ice quality. Most refrigerator water lines are difficult to access directly. However, you can flush them. Start by turning off the water supply to your refrigerator. This is usually a small valve behind the fridge or under the sink.
Next, empty your ice bin. Wait a few hours for the ice maker reservoir to empty. Some manufacturers recommend disconnecting the water line and blowing air through it. This removes stagnant water. For a more comprehensive guide, learn how to clean refrigerator ice maker water line. This linked article provides specific steps for flushing the line.
Once flushed, turn the water supply back on. Allow the ice maker to produce a few batches of ice. Discard these first batches. This helps clear out any remaining impurities. Flushing the line improves water quality. It helps prevent future buildup.
2. Cleaning the Ice Dispenser Chute
The ice dispenser chute is a common place for mold and grime. Ice melts slightly here. This creates a damp environment. Food particles can also fall into the chute. A dirty chute can contaminate your fresh ice. I always check this area carefully.
First, wipe down the exterior of the dispenser. Use a warm, soapy cloth. For the interior, use a soft, damp cloth with a vinegar solution. Reach as far into the chute as you can. A bottle brush or a pipe cleaner can help clean tight spaces. Pay attention to any dark spots.
If you notice mold, use a stronger solution. Mix one part white vinegar with one part water. You can also use a mixture of baking soda and water to form a paste. Apply the paste to the moldy areas. Let it sit for 10-15 minutes. Scrub gently with a brush.
For severe mold, consider using a mold-specific cleaner. Ensure it is food-safe if possible. Always rinse thoroughly after using any cleaning product. Wipe down the chute with a clean, water-dampened cloth. Then, dry the area completely. This prevents new mold growth. Cleaning the ice dispenser chute also helps prevent issues like how to clean refrigerator water dispenser mold, as both systems share similar challenges.
Regular cleaning of both the water line and the dispenser chute is important. This ensures all parts of your ice-making system are clean. It guarantees pure, refreshing ice every time you use it. Maintaining these components extends the life of your refrigerator.
Dealing with Mold and Odors in Your Refrigerator Ice Maker
Discovering mold or strange odors in your ice maker is unpleasant. It is a clear sign that a deep clean is overdue. Mold thrives in damp, dark environments. Odors often come from mold or food particles. Tackling these issues quickly is important for health and ice quality.
1. Identifying and Removing Mold
Mold often appears as black, green, or fuzzy spots. Check all parts of your ice maker: the bin, the auger, and the dispenser chute. The rubber seals around the dispenser are also common mold spots. I always inspect these areas first.
To remove mold, create a strong vinegar solution. Mix equal parts white vinegar and warm water. For tougher mold, use undiluted white vinegar. Vinegar is a natural disinfectant. It kills many types of mold and bacteria. It is also safe for food contact surfaces.
Dampen a clean cloth with the vinegar. Wipe down all moldy areas thoroughly. For stubborn patches, apply the vinegar directly. Let it sit for about 15 minutes. Then, scrub with a soft brush. An old toothbrush works well for small spaces. Ensure you reach into all crevices.
After scrubbing, rinse the areas with a clean, water-dampened cloth. Make sure all vinegar residue is gone. Finally, dry everything completely. Leaving any moisture behind encourages mold to return. This step is critical for success.
2. Eliminating Stubborn Odors
Strange odors in ice can come from mold. They can also come from food odors in your freezer. Ice absorbs smells easily. If your ice tastes like last night’s dinner, it is time for a smell refresh. I hate when my ice smells like old food.
Baking soda is excellent for absorbing odors. After cleaning with vinegar, sprinkle baking soda inside the empty ice bin. You can also place an open box of baking soda in the freezer. This helps absorb general freezer smells. Leave it for several hours, or even overnight.
For internal odor issues within the ice maker unit, you can make a baking soda paste. Mix baking soda with a small amount of water. Apply this paste to the cleaned interior surfaces. Let it sit for about 20-30 minutes. The baking soda will absorb lingering odors.
Wipe away the baking soda paste with a clean, damp cloth. Then, dry the area completely. The combination of vinegar for sanitizing and baking soda for odor absorption is very effective. Repeat the process if odors persist. Persistent odors might indicate a larger issue. Sometimes, the problem could also relate to the main refrigerator compartment or even how to clean under a refrigerator, where smells can originate and spread.
Regular maintenance helps prevent mold and odors from returning. A clean ice maker means fresh-tasting ice every time. This ensures a pleasant experience for everyone using your refrigerator. Do not let bad ice ruin your drink.
Maintaining Your Ice Maker for Long-Lasting Cleanliness
Cleaning your refrigerator ice maker is not a one-time event. Regular maintenance keeps it running smoothly. It ensures you always have clean, fresh ice. Consistency is key for appliance longevity. I believe a little regular effort saves a lot of trouble later.
1. Establishing a Cleaning Schedule
How often should you clean your ice maker? Experts suggest cleaning your ice maker every 6 months. If your household uses a lot of ice, or if you live in an area with hard water, consider cleaning it every 3 months. Hard water leaves more mineral deposits. I try to put a reminder on my calendar.
A quick wipe-down of the ice bin and dispenser chute can be done monthly. This prevents major buildup. It also helps you spot any issues early. Small tasks often prevent bigger problems. It is like brushing your teeth daily to avoid cavities.
When you notice cloudy ice, strange odors, or a decrease in ice production, clean your ice maker immediately. These are clear signs that it needs attention. Do not wait for things to get worse. Early action saves effort.
2. Changing the Water Filter
Most refrigerators with ice makers have a water filter. This filter removes impurities from your water. It improves the taste and quality of your ice. However, filters get clogged over time. A clogged filter cannot do its job well.
Check your refrigerator manual for the recommended filter replacement schedule. Most filters need changing every 6 months. Some advanced filters last longer. I mark the replacement date on the filter itself. This helps me remember.
Replacing the filter regularly is simple. It ensures your water is always clean. This prevents mineral buildup in your ice maker. It also keeps your ice tasting great. A fresh filter is crucial for optimal performance.
3. Tips for Preventing Buildup
Preventing problems is easier than fixing them. Here are a few simple tips to keep your ice maker clean between deep cleans. These small habits make a big difference. I try to incorporate these into my routine.
- Discard Old Ice: If ice sits in the bin for a long time, it can absorb freezer odors. It can also start to clump. Regularly empty your ice bin. Let new ice form. This keeps your ice supply fresh. I usually dump old ice before guests arrive.
- Keep Freezer Clean: A clean freezer reduces the chance of food particles or odors getting into your ice maker. Wipe up spills immediately. Store uncovered foods in airtight containers. This protects your ice.
- Monitor Water Quality: If your tap water has a strong mineral content, it might lead to faster buildup. Consider using a whole-house water filter. This improves water quality for all your appliances. It also helps with the taste of your drinking water.
- Avoid Contamination: Do not use the ice scoop for anything other than ice. Make sure your hands are clean when reaching into the bin. This prevents introducing germs or food particles. Simple hygiene goes a long way.
By following these maintenance tips, you ensure your refrigerator ice maker remains clean. You will enjoy fresh, clear, and odor-free ice for a long time. Regular care extends the life of your appliance. It also provides peace of mind.
Troubleshooting Common Refrigerator Ice Maker Problems
Even with regular cleaning, your refrigerator ice maker might occasionally encounter issues. Many common problems relate to cleanliness or simple mechanical fixes. Understanding these can save you a service call. I find troubleshooting empowers me to solve problems.
1. Ice Maker Not Producing Ice
This is a common and frustrating problem. Several factors can cause it.
- Water Supply: Check if the water supply line to the refrigerator is turned on. The valve might be accidentally closed.
- Clogged Water Filter: A dirty water filter restricts water flow. Replace your filter if it is old.
- Frozen Water Line: The water line feeding the ice maker can freeze. Unplug the fridge for a few hours. This allows the line to thaw. Then plug it back in.
- Temperature: Ensure your freezer temperature is set correctly. It should be below 0°F (-18°C) for proper ice production.
- Ice Maker Arm: The shut-off arm inside the ice maker might be in the “off” position. This stops ice production when the bin is full. Ensure it is down if you want ice.
2. Ice Tastes Strange or Smells Bad
If your ice still tastes off after a basic clean, a deeper issue might be present.
- Lingering Odors: Your freezer itself might have odors. Place an open box of baking soda inside the freezer. This absorbs smells.
- Water Quality: The water supply might be the source of the taste. Test your tap water. Consider a new water filter. Flushing the water line, as discussed earlier, can also help.
- Dirty Water Line: Mineral buildup or mold in the water line can affect taste. Refer to the section on cleaning the water line for steps.
- Food Contamination: Uncovered foods in the freezer can transfer odors to the ice. Use airtight containers for all food.
3. Ice Dispensing Slowly or Jamming
A clogged or dirty dispenser chute often causes this.
- Ice Clumping: If ice melts and refreezes, it can clump together. This makes it hard to dispense. Empty the bin and let new ice form.
- Dirty Dispenser Chute: Food particles or ice shards can build up. Clean the dispenser chute thoroughly with a brush and vinegar solution.
- Frozen Dispenser Mechanism: Frost buildup around the auger can cause jams. Unplug the fridge and let it defrost for a few hours. Then clean and dry the area before restarting.
4. Ice Maker Making Loud Noises
Unusual noises often indicate a mechanical problem, but sometimes it is related to ice.
- Ice Jams: Large chunks of ice can get stuck in the auger. This causes grinding noises. Clear any visible jams.
- Motor Issues: If the noise is a persistent whirring or grinding, the ice maker motor might be failing. This usually requires professional repair.
- Water Valve: A buzzing sound when filling might indicate a water valve issue. This also often needs a professional.
5. When to Call a Professional
Sometimes, a problem is beyond simple cleaning or troubleshooting.
- Persistent Leaks: Water leaks from the ice maker or water line need immediate attention. These can cause significant damage.
- Electrical Issues: If you suspect electrical problems, do not attempt to fix them. Call a qualified appliance technician.
- Component Failure: If the ice maker motor, thermostat, or other major parts seem broken, professional repair is necessary.
- No Power to Ice Maker: If the unit has no power despite the refrigerator being plugged in, it could be a wiring or control board issue.
Regular cleaning and maintenance can prevent most ice maker problems. But when in doubt, call a professional. They can diagnose and fix complex issues safely. Keeping the area around and under your refrigerator clean also contributes to overall appliance health, as debris can affect cooling and water lines. Consider cleaning the space behind and below the unit, as described in guides like how to clean under a refrigerator.
FAQ Section
How often should I clean my refrigerator ice maker?
You should clean your refrigerator ice maker at least every six months. If you notice strange odors, cloudy ice, or heavy use, clean it every three months. Regular cleaning prevents mineral buildup and mold growth. This keeps your ice tasting fresh and pure.
Can I use bleach to clean my ice maker?
No, you should not use bleach to clean your ice maker. Bleach can leave behind harmful residues. It is also corrosive and can damage appliance parts. Stick to natural cleaners like white vinegar or baking soda solutions. These are safe and effective for food-contact surfaces.
Why does my ice smell or taste strange?
Strange ice taste or smell often comes from absorbed odors in the freezer. Ice readily absorbs smells from uncovered foods. It can also be due to mold or mineral buildup in the ice maker or water line. Regular cleaning and keeping foods covered helps prevent this issue.
How do I clean the water line to my ice maker?
To clean the water line, first turn off the refrigerator’s water supply. Empty the ice bin and let the ice maker reservoir drain. You can then flush the line by running water through it or, if possible, disconnecting it and blowing air. Discard the first few batches of ice after cleaning.
What are signs my ice maker needs cleaning?
Key signs your ice maker needs cleaning include cloudy ice, ice with an unusual odor or taste, visible mold or discoloration, or a noticeable decrease in ice production. If ice clogs or dispenses slowly, it also indicates a need for cleaning. Do not ignore these indicators.
Can cleaning prevent ice maker issues?
Yes, regular cleaning can prevent many common ice maker issues. It stops mineral buildup, which can cause clogs. It also prevents mold and bacterial growth, improving ice quality and taste. Proper cleaning extends your ice maker’s lifespan and maintains its efficiency.
Conclusion
Keeping your refrigerator ice maker clean is simpler than you might think. It makes a big difference for your health and the taste of your drinks. We have covered all the steps, from preparing your workspace to deep cleaning the water line. You now know how to tackle mold and odors effectively.
Remember, consistent maintenance is key. Make cleaning your ice maker a regular part of your home routine. Change your water filter on time. Store food properly in your freezer. These small actions help you enjoy fresh, clean ice every day. A well-maintained ice maker performs better and lasts longer. Take action today for clearer, purer ice tomorrow.
- refrigerator cleaning
- ice maker maintenance
- clean ice
- home cleaning tips