· Home Maintenance · 20 min read
How To Clean Reusable AC Filters
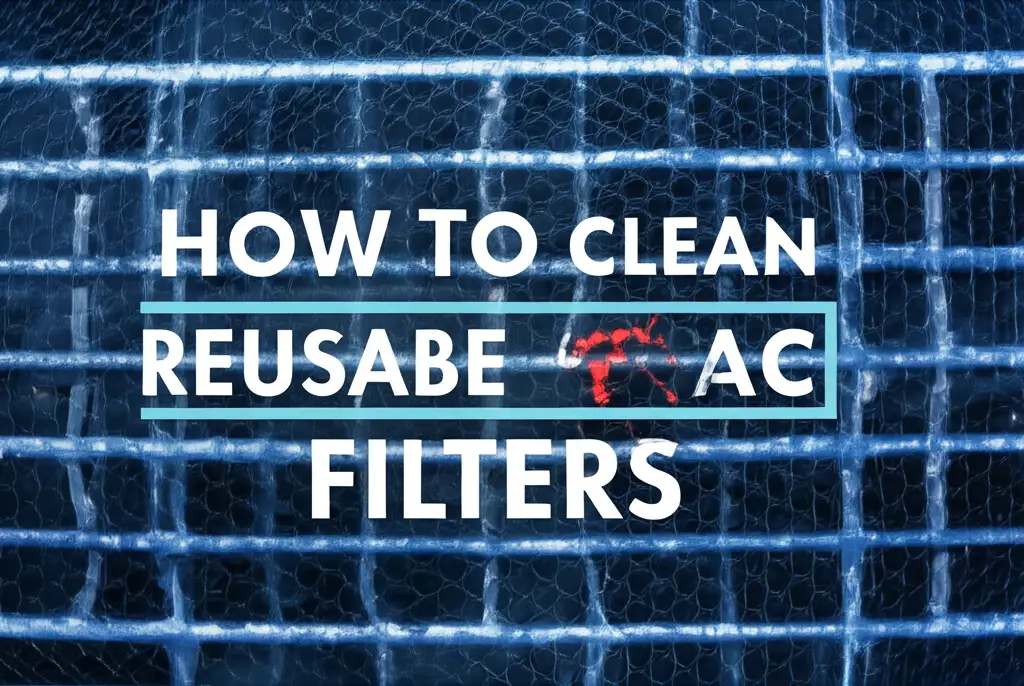
How To Clean Reusable AC Filters: Your Ultimate Guide
Imagine walking into your home on a hot day. You switch on the AC, expecting a wave of cool, fresh air. Instead, you get a weak breeze and a faint, stale smell. What is happening? Often, the culprit is a dirty air filter. Many homes use reusable AC filters.
These filters trap dust, allergens, and pet dander. Over time, they become clogged. This makes your AC unit work harder. It wastes energy and lowers indoor air quality.
I understand the importance of a clean home environment. That includes the air we breathe. Cleaning reusable AC filters saves you money. It also keeps your home air clean. This guide covers everything you need.
You will learn why these filters matter. I will show you how to clean them properly. We will discuss drying techniques. We will also cover when to perform this important task. Get ready to improve your home’s comfort and air quality.
Takeaway:
- Regularly clean reusable AC filters to save energy and improve air quality.
- Always power off your AC unit before cleaning the filter.
- Use gentle methods like vacuuming and rinsing with water.
- Ensure the filter is completely dry before reinstallation to prevent mold.
How do you clean a reusable AC filter?
Cleaning a reusable AC filter involves a few simple steps. First, turn off your AC unit for safety. Carefully remove the dirty filter. Then, vacuum away loose debris. Rinse the filter with water, using a mild detergent if needed. Allow it to air dry completely before putting it back.
The Importance of Cleaning Reusable AC Filters
Many people forget about their AC filters. They often do not realize how crucial these components are. Reusable AC filters are designed to capture airborne particles. These include dust, pollen, pet dander, and mold spores. A clean filter allows your AC unit to function properly. It pulls air in efficiently. It then cools and circulates clean air throughout your home.
Think about a dirty sponge. It struggles to absorb water. A dirty air filter acts in a similar way. It struggles to pull in air. This forces your AC system to work much harder. The fan motor runs longer and consumes more electricity. This leads to higher energy bills. I always tell my friends that a clean filter is like giving your AC a clear path to breathe. This directly lowers your energy costs.
Beyond saving money, a clean filter improves your indoor air quality. If your filter is clogged, pollutants build up. They can then bypass the filter. These particles re-enter your living space. This is a problem for everyone. It is especially bad for people with allergies or asthma. I find that regular cleaning makes a noticeable difference. Our home feels fresher. We breathe easier. It helps keep our home a healthy sanctuary. This simple task offers big benefits for both your wallet and your health.
Identifying Your Reusable AC Filter Type
Before you start cleaning, you need to know your filter type. Reusable AC filters come in various materials and designs. Each type has specific cleaning needs. Knowing your filter helps you choose the right method. You avoid causing any damage. It also ensures effective cleaning.
Common types include pleated filters. These often use synthetic media. They might have a sturdy frame. Some are electrostatic filters. They use static electricity to attract particles. These often have a mesh-like appearance. Other filters are made of foam. These are usually thicker and spongier. I have cleaned all sorts of filters over the years. Each one requires a slightly different approach.
Your AC unit’s manual is a great resource. It usually specifies the filter type. It also provides cleaning instructions. If you do not have the manual, look at the filter itself. Many reusable filters have “washable” or “reusable” printed on their frame. Some also list the MERV rating. This indicates how well the filter captures particles. Once you know your filter type, you are ready for the next steps. It removes guesswork. You can then clean with confidence. Cleaning filters on a mini-split AC unit often involves similar washable filters, for example. Understanding your specific filter is always the first step.
Essential Tools and Supplies for Cleaning
Cleaning your reusable AC filter does not require many special tools. Most items you likely already have at home. Gathering everything beforehand makes the process smooth. It saves you trips back and forth. I always lay everything out before I start. This way, I do not miss a step.
Here is a list of what you will need:
- Vacuum Cleaner with Brush Attachment: This helps remove loose dust and debris. It is great for the initial pass.
- Garden Hose or Utility Sink: You need a water source. A hose is perfect for outdoor cleaning. A utility sink works well for smaller filters indoors.
- Mild Dish Soap or All-Purpose Cleaner: Avoid harsh chemicals. A gentle cleaner breaks down stubborn grime.
- Soft Brush or Sponge: This helps dislodge caked-on dirt without damaging the filter material.
- Clean Towels or Rags: For patting the filter dry.
- Safety Gloves (Optional): Protect your hands from dirt and cleaning solutions.
Having these items ready prevents interruptions. It ensures you have the right tools for a thorough job. Remember, the goal is to clean effectively without harming the filter. So, choose gentle cleaning agents. Use soft brushes. Your reusable filter will thank you. Cleaning a Midea AC filter or a Windmill AC filter often uses this same basic set of tools.
Step-by-Step: Safely Removing Your AC Filter
Before you even think about cleaning, safety comes first. This is a rule I live by for all home maintenance. Working with electrical appliances requires caution. You must disconnect power to your AC unit before touching anything. This prevents accidental startups. It protects you from electrical shock.
Here are the steps for safe filter removal:
- Turn Off the Power: Go to your thermostat and switch the unit to “Off.” For central AC systems, find your circuit breaker. It is usually in your electrical panel. Flip the breaker that controls your AC unit. Label it clearly if you are unsure. For window or wall AC units, unplug the unit from the wall outlet. If you have a wall AC unit, its filter is typically accessed from the front.
- Locate the Filter:
- Central AC Systems: The filter is often in the return air duct. This can be near the furnace, in a wall or ceiling vent, or inside the air handler unit itself. Look for a slot where the filter slides in.
- Window AC Units: The filter is usually behind the front grille. You might need to unclip or slide out the grille cover. This exposes the filter. If you need to clean a window AC unit filter, this is where you start.
- Mini-Split Units: These filters are behind the front panel of the indoor unit. Gently lift or unclip the panel to access them.
- Carefully Remove the Filter: Once you locate the filter, slide it out slowly. It might be covered in a lot of dust and debris. Try to keep it level. This prevents dirt from falling back into the ductwork or unit. I usually have a trash bag ready to put the dirty filter directly into it. This helps contain the mess.
Taking these precautions ensures a safe and clean start to your filter maintenance. You protect yourself and your AC system from potential issues.
The Best Ways to Clean Reusable AC Filters
Now, let’s get to the actual cleaning. The method depends slightly on how dirty your filter is. It also depends on its material. Remember to be gentle. You want to remove dirt, not damage the filter.
Method 1: Vacuuming for Light Dust
For filters with only light dust buildup, a vacuum cleaner might be enough.
- Vacuum Both Sides: Use a brush attachment on your vacuum. Gently vacuum both sides of the filter. Move in one direction. This pulls off loose dust and pet hair.
- Check for Cleanliness: Hold the filter up to a light source. If light passes through easily, and it looks clean, you might be done.
This method is quick and easy. It is perfect for frequent, light cleanings.
Method 2: Rinsing with Water for Deeper Cleaning
For dirtier filters, water is your best friend. This is the most common and effective cleaning method.
- Rinse from the Clean Side: Take the filter outdoors or to a utility sink. Rinse it under running water. Start rinsing from the side opposite where the air enters the filter. This pushes dirt out the way it came in. It prevents pushing debris deeper into the filter material. Use a garden hose with moderate pressure.
- Apply Mild Detergent (if needed): If the filter is still grimy, mix a few drops of mild dish soap into a bucket of water. You can also use a gentle all-purpose cleaner. Dip a soft brush or sponge into the soapy water. Gently scrub the filter. Focus on heavily soiled areas. Do not use abrasive cleaners or harsh brushes. These can damage the filter media.
- Thorough Rinse: Rinse the filter again with clear water. Make sure all soap residue is gone. Soap left behind can attract more dirt. It can also cause issues when the filter is reinstalled. Keep rinsing until the water runs clear. I always give it an extra minute of rinsing. This ensures no soap remains.
This rinsing method works well for most reusable filters. It restores their effectiveness. It makes them almost like new. If you need to clean components of your main AC unit, remember that filter cleaning is a separate, vital step in overall cleaning your AC unit inside.
Ensuring Your Filter Dries Completely
Drying is perhaps the most critical step after washing your reusable AC filter. It is also the one most often overlooked. Reinstalling a damp filter can lead to serious problems. The main concern is mold growth. Mold thrives in dark, damp environments. A wet filter in your AC system provides the perfect breeding ground. Mold spores then spread throughout your home. This can cause health issues. It also creates a musty odor. Nobody wants that.
Here is how to ensure your filter dries thoroughly:
- Shake Off Excess Water: After rinsing, gently shake the filter. This removes as much excess water as possible. You can also pat it with a clean towel.
- Air Dry in a Well-Ventilated Area: Place the filter upright. Lean it against a wall or hang it in a spot with good airflow. A sunny spot outdoors is ideal. If drying indoors, choose a room with open windows or use a fan. The goal is to dry it completely and quickly. Avoid direct heat sources like heaters or dryers. Excessive heat can warp or damage the filter material.
- Allow Ample Drying Time: Drying can take several hours, or even a full day. This depends on humidity levels and filter thickness. Do not rush this step. I usually clean my filter in the morning. This gives it the entire day to dry. Before reinstalling, physically check the filter. It must feel bone dry to the touch. No damp spots at all.
Patience here pays off. A properly dried filter prevents mold. It ensures your AC system remains healthy and efficient. If you ever find mold on your AC unit, you will need to clean mold from your AC unit thoroughly, but prevention starts with proper filter drying. Similarly, if mold appears on a window AC unit, a damp filter could be a contributing factor.
Reinstalling and Routine Maintenance Tips
Once your reusable AC filter is completely dry, you are ready to put it back. Proper reinstallation is crucial. It ensures the filter works as intended. It also prevents air from bypassing it.
- Check Filter Direction: Most filters have an arrow on the frame. This arrow indicates the direction of airflow. The arrow should point towards your AC unit (or furnace/air handler). If you installed it correctly when you removed it, simply reverse the removal process.
- Slide Filter Back In: Gently slide the dry filter back into its slot. Make sure it fits snugly. There should be no gaps around the edges. Gaps allow unfiltered air to enter your system.
- Restore Power: Once the filter is securely in place, restore power to your AC unit. Go back to your circuit breaker and flip it on. Or, plug your window unit back in. Then, turn your AC system back on at the thermostat.
Routine Maintenance Schedule
Knowing when to clean is as important as knowing how. The frequency of cleaning depends on several factors:
- Usage: How often do you run your AC? A unit running constantly needs more frequent cleaning.
- Household Members: Do you have pets? Animals shed hair and dander. This clogs filters faster.
- Allergies: If anyone in your home has allergies, more frequent cleaning is beneficial. It keeps allergens low.
- Environment: Live in a dusty area? Near construction? Your filter will get dirty quicker.
As a general rule, I recommend cleaning reusable AC filters every 1 to 3 months. In peak cooling seasons or with pets, I clean mine monthly. At a minimum, check your filter monthly. If it looks dirty, clean it. A visible layer of dust means it is time. Consistent cleaning extends the life of your AC unit. It also maintains optimal performance. It protects your investment.
Troubleshooting Common Cleaning Challenges
Even with the best intentions, you might run into a few snags when cleaning your reusable AC filter. Knowing how to handle these challenges helps you maintain your filter effectively. I have seen common issues, and there are always simple solutions.
Stubborn Dirt and Grime
Sometimes, rinsing alone does not cut it. Filters can accumulate sticky residue. This happens if cooking grease travels through the air. Or, if you have very high humidity and some airborne pollutants.
- Soaking: If dirt is caked on, try soaking the filter. Fill a tub or large basin with warm water. Add a generous amount of mild dish soap. Submerge the filter for 15-30 minutes. This helps loosen the grime.
- Gentle Scrubbing: After soaking, use a soft brush or non-abrasive sponge. Gently scrub the stubborn areas. Work in the direction of the filter pleats or mesh. Avoid harsh scrubbing. This can damage delicate filter media.
- Pressure Spray: A garden hose with a nozzle set to a focused, but not overly powerful, spray can dislodge tough dirt. Hold it a few inches away. Direct the spray through the filter. Remember to rinse from the “clean” side out.
Mold Growth on the Filter
Finding mold on your filter is concerning. It means there was too much moisture. Or, the filter was not dried completely.
- Bleach Solution (Caution!): For mold, a diluted bleach solution can be effective. Mix 1 part bleach with 10 parts water. Spray the moldy areas. Let it sit for 10-15 minutes.
- Important: Rinse thoroughly with clean water afterward. Make sure no bleach residue remains. Bleach is harsh. It can degrade certain filter materials over time. Use it sparingly and only when necessary for mold. Ensure good ventilation when using bleach.
- Vinegar Solution: For a less harsh alternative, use a mixture of white vinegar and water (50/50). Spray it on the mold. Let it sit for 30 minutes. Then, scrub and rinse well. Vinegar is a natural antifungal. It is safer for your filter material.
- Consider Replacement: If mold is extensive, or if the filter material looks degraded, replacing the filter is the safest option. Sometimes a filter is simply beyond cleaning.
Filter Damage
During cleaning or removal, you might notice tears or bends.
- Small Tears: A very small tear might not significantly impact performance. However, air will bypass the filter through the hole.
- Large Tears or Warping: If the filter has large tears, or if its frame is bent and no longer fits snugly, you must replace it. A damaged filter cannot effectively trap pollutants. It can also put strain on your AC system.
Regular inspection during cleaning helps catch issues early. It ensures your filter remains effective. It protects your indoor air quality.
Beyond Filters: Full AC Unit Care
Cleaning your reusable AC filter is a great start. It is a vital part of AC maintenance. However, your air conditioning system is complex. Many other components also need attention. Neglecting them can reduce efficiency. It can also shorten your unit’s lifespan. I always tell people that a clean filter is step one. There are many other steps to keep your AC running strong.
Think of your AC unit as a series of interconnected parts. Each one plays a role in cooling your home. If one part is dirty or malfunctioning, the whole system suffers. This impacts performance. It increases energy consumption. For example, if your coils are dirty, heat exchange is inefficient. Your unit works harder to cool the air. This leads to higher electricity bills.
Here are other critical areas of AC unit care:
- Cleaning Coils: Both evaporator coils (inside) and condenser coils (outside) collect dirt. Dirty coils prevent efficient heat transfer. You can often spray down outdoor condenser coils with a garden hose. Indoor evaporator coils may need professional cleaning. I often recommend cleaning coils on a window AC unit as a good entry point.
- Clearing the Drain Line: Your AC unit produces condensation. This water drains away through a condensate drain line. This line can get clogged with algae or mold. A clog causes water to back up. It can overflow into your home. It can also damage your unit. You can often clear minor clogs yourself. Some people use a mixture of bleach and water for this. Cleaning an AC drain line with bleach is one method. You can also use an air compressor for stubborn clogs. Cleaning an AC drain line with an air compressor is another effective approach.
- Cleaning the Blower Wheel: The blower wheel circulates air throughout your home. Dust and debris can build up on its blades. This reduces airflow and efficiency. Cleaning the blower wheel often does not require removing it from the unit. Learning how to clean an AC blower wheel without removing it saves time.
- Outdoor Unit Maintenance: The outdoor unit (condenser) gets exposed to leaves, dirt, and debris. Keep the area around it clear. Regularly spray it down with a garden hose. This removes surface dirt. You can learn how to clean an outside AC unit with a water hose for simple, effective maintenance.
Regular maintenance extends the life of your AC system. It prevents costly repairs. It ensures your home stays cool and comfortable. While some tasks require professional help, many can be done yourself. Start with the filter. Then, gradually tackle other parts of your AC unit for comprehensive care.
When to Consider Professional AC Service
While regular DIY cleaning and maintenance are excellent, some AC issues require professional expertise. Knowing when to call a technician saves you time, money, and potential damage to your system. I believe in handling what I can myself, but also knowing my limits.
Here are situations when you should consider professional AC service:
- No Cool Air: If your AC unit runs but blows warm air, it might indicate a refrigerant leak. This requires a certified technician. They can diagnose the leak and safely recharge the refrigerant.
- Strange Noises: Grinding, squealing, or persistent banging noises from your AC unit are warning signs. They often point to mechanical problems like a failing motor or loose parts. A professional can identify the source and fix it properly.
- Unusual Odors: Beyond a mild musty smell from a dirty filter, strong burning smells or chemical odors need immediate attention. These could signal electrical problems or refrigerant leaks.
- Water Leaks Inside: While a clogged drain line can cause leaks, persistent or significant water leaks from your indoor unit might indicate a more complex issue. This could be a cracked drain pan or a frozen evaporator coil.
- System Freezes Up: If your outdoor unit’s lines or indoor coils are covered in ice, your system is “freezing up.” This can be caused by low airflow (a very dirty filter!), low refrigerant, or mechanical problems. Turn off the unit immediately and call a professional. Running a frozen unit causes severe damage.
- High Energy Bills (Unexpectedly): If your energy bills suddenly spike without a change in usage, your AC system may be losing efficiency. A technician can perform a diagnostic check. They can pinpoint the exact cause of the inefficiency.
- Annual Tune-Ups: Even if your AC seems fine, scheduling an annual professional tune-up is a smart investment. Technicians can spot small issues before they become big problems. They clean components you cannot reach. They also check refrigerant levels and electrical connections. This prevents breakdowns and extends your system’s life.
Do not hesitate to call an HVAC professional for complex issues. They have specialized tools and knowledge. They ensure your AC system operates safely and efficiently. Regular professional maintenance complements your DIY efforts. It keeps your home comfortable year-round.
FAQ Section
How often should I clean my reusable AC filter?
You should clean your reusable AC filter every 1 to 3 months. This frequency depends on how often you use your AC, if you have pets, or if anyone in your home has allergies. During peak cooling seasons, or in dusty environments, monthly cleaning is best. Always check your filter regularly.
Can I use any soap to clean my AC filter?
No, you should use only mild dish soap or a gentle all-purpose cleaner. Avoid harsh chemicals, strong detergents, or abrasive cleaners. These can damage the filter material. They may also leave residues that attract more dirt or cause odors when the AC runs.
How long does it take for a reusable AC filter to dry completely?
A reusable AC filter can take several hours to a full day to dry completely. This depends on environmental factors like humidity and airflow. Always ensure the filter is bone dry before reinstalling it. Reinstalling a damp filter promotes mold growth inside your AC system.
What if my reusable AC filter has mold?
If your reusable AC filter has mold, you can try cleaning it with a diluted bleach solution (1 part bleach to 10 parts water) or a 50/50 white vinegar and water solution. Spray, let it sit, then rinse thoroughly. If the mold is extensive or the filter is degraded, it is safest to replace it entirely.
Can I put my reusable AC filter in a washing machine or dishwasher?
No, you should not put a reusable AC filter in a washing machine or dishwasher. The harsh detergents, high heat, and agitation cycles can damage the filter material, warp its frame, or reduce its effectiveness. Hand washing with a hose or utility sink is the safest method.
When should I replace my reusable AC filter instead of cleaning it?
You should replace your reusable AC filter if it has significant tears, holes, or if its frame is bent and no longer fits snugly. If mold growth is persistent and cannot be fully removed, or if the filter material appears degraded and brittle, replacement is also recommended for optimal air quality and system protection.
Conclusion
Maintaining your reusable AC filters is a small effort for big rewards. We have covered the critical steps. You now know how to safely remove, thoroughly clean, and properly dry your filters. This ensures your AC unit runs efficiently. It saves you money on energy bills. Most importantly, it vastly improves your indoor air quality. I always feel a sense of satisfaction after cleaning my filters. It is a tangible way to make my home healthier and more comfortable.
Remember the key takeaways. Always prioritize safety by turning off the power. Use gentle cleaning methods. Allow ample drying time to prevent mold. Make filter cleaning a regular part of your home maintenance routine.
It is a simple task that protects your investment in your AC system. It also protects your family’s health. Do not wait for your AC to struggle. Start cleaning your reusable AC filters today. Breathe easier and enjoy a cleaner, cooler home. Explore other cleaning guides on our site, like how to clean your AC unit inside for even more comprehensive care. Your home will thank you.
- reusable AC filter cleaning
- air filter maintenance
- HVAC cleaning tips
- home air quality
- energy efficiency