· Landscaping & Outdoor Living · 15 min read
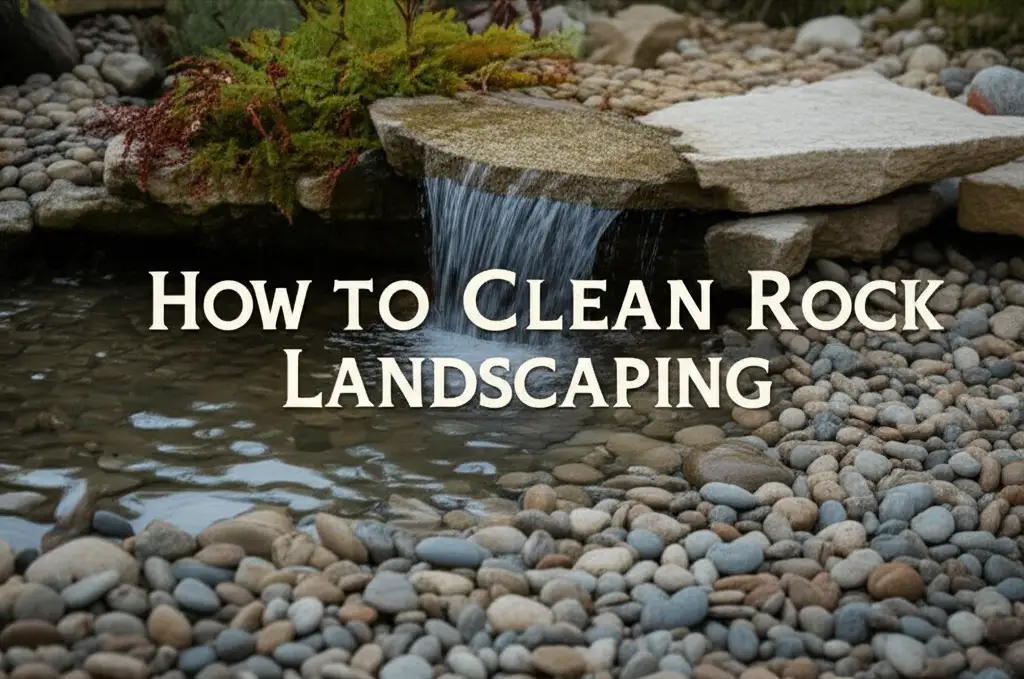
How To Clean Rock Landscaping

Revive Your Yard: How To Clean Rock Landscaping Effectively
Your rock landscaping adds natural beauty to your yard. Over time, however, these rocks can accumulate dirt, moss, algae, and various stains. This diminishes their visual appeal and can even impact plant health. Learning how to clean rock landscaping correctly helps preserve your outdoor investment. I am here to guide you through effective methods to restore your rocks to their original splendor. This article covers everything from basic upkeep to tackling stubborn problems, ensuring your landscape always looks its best.
Takeaway:
- Always begin by removing loose debris like leaves and twigs.
- Choose cleaning solutions based on the type of stain and rock material.
- Prioritize safety by wearing protective gear during cleaning.
- Use pressure washing for large areas, but exercise caution to avoid damage.
- Implement preventative measures to keep rocks cleaner longer.
To clean rock landscaping, start by removing loose debris. Apply a diluted cleaning solution like vinegar or a specialized rock cleaner. Scrub stubborn areas with a stiff brush. Rinse thoroughly with water. For widespread issues, consider pressure washing or professional help, ensuring safety and protecting nearby plants.
Understanding Common Rock Landscaping Issues
Rocks in your landscaping face many challenges from nature. Over time, these challenges make your rocks look dull and dirty. Recognizing these common problems is the first step in effective cleaning. I have seen many yards where understanding the issue made cleaning much easier.
Moss and Algae Growth
Moss and algae are common issues, especially in shady, damp areas. These green growths cling to rock surfaces. They make rocks slippery and look unsightly. Moss forms a thick, carpet-like layer, while algae creates a slick, slimy film. Both thrive in moisture and can quickly spread across your landscaping rocks.
Dirt and Grime Accumulation
Everyday elements like dust, soil, and debris settle on your rocks. Rain can splash mud onto them, creating layers of grime. Foot traffic or pets can also track dirt onto the rocks. This dirt accumulation makes your once vibrant rocks appear dull and neglected. Regular removal prevents this buildup from becoming permanent.
Stubborn Stains: Rust, Mold, and Mildew
Beyond dirt, rocks can suffer from more persistent stains. Rust stains come from metal objects or iron-rich irrigation water. These leave orange or brown marks. Mold and mildew appear as black or dark patches, thriving in damp, poorly ventilated spots. These stains are not just ugly; mold can even pose health concerns. Treating these specific stains requires a targeted approach. Learning how to clean mold off various surfaces can be helpful, including how to clean mold with vinegar. For mold issues, consider checking how to clean mold with vinegar.
Weeds and Plant Growth
Weeds often sprout between rocks or in gravel beds. Their roots can become deeply embedded, dislodging smaller stones. These unwanted plants compete with your desired landscaping. They also make your rock features look messy and untamed. Addressing weeds early saves you effort in the long run.
Essential Tools and Safety Gear for Rock Cleaning
Before you start cleaning your rock landscaping, gather the right tools. Having everything ready saves time and effort. Safety is also important; protecting yourself prevents injuries. I always make sure I have my gear prepared before I begin any outdoor cleaning task.
Basic Cleaning Tools
You will need some basic items for a thorough clean. A sturdy broom or leaf blower helps clear loose debris. A stiff-bristled brush or scrub brush works well for scrubbing dirt. Buckets are useful for holding water and cleaning solutions. A garden hose with a strong nozzle provides the rinsing power you need. These tools form the core of your rock cleaning arsenal.
Pressure Washer Considerations
A pressure washer can be a powerful tool for large areas or stubborn grime. It uses high-pressure water to blast away dirt, moss, and algae. However, you must use it with caution. Too much pressure can damage softer rocks or blast away smaller landscaping stones. Always start with a low-pressure setting and test it on an inconspicuous area. Pressure washing is efficient for widespread cleaning.
Protective Safety Gear
Protecting yourself is crucial during any cleaning project. Wear sturdy gloves to shield your hands from chemicals and rough surfaces. Safety glasses protect your eyes from splashes or flying debris. A mask can prevent you from inhaling dust or cleaning solution fumes. Long pants and closed-toe shoes also offer protection. These items ensure your safety throughout the cleaning process.
Natural and Eco-Friendly Cleaning Solutions for Rocks
Choosing eco-friendly cleaning solutions is good for your garden and the environment. These options are often safer for plants and pets than harsh chemicals. I prefer using natural methods whenever possible for outdoor cleaning. Many effective solutions can be made from common household items.
Vinegar Solutions for Moss and Algae
Vinegar is a versatile, natural cleaner. Its acidic nature effectively breaks down moss and algae. Mix equal parts white vinegar and water in a spray bottle. For tougher spots, use a stronger solution, up to pure vinegar. Spray the affected areas liberally. Let it sit for 15-30 minutes, allowing the vinegar to work its magic. Then, scrub with a brush and rinse thoroughly. Vinegar is also great for many other cleaning tasks, like how to clean a shower with vinegar. You can learn more about using vinegar for cleaning by checking how to clean shower with vinegar.
Baking Soda for Mild Stains and Odors
Baking soda is a gentle abrasive and odor neutralizer. It works well for light dirt, grime, and minor organic stains. Make a paste by mixing baking soda with a little water. Apply this paste directly onto the stained areas. Let it sit for a few minutes. Then, scrub gently with a brush and rinse well. Baking soda is safe for most rock types and will not harm nearby plants.
Dish Soap for General Dirt and Grime
Basic dish soap is excellent for everyday dirt and grime. It cuts through grease and helps lift loose particles. Mix a few drops of mild dish soap into a bucket of warm water. Apply this soapy water to your rocks using a brush or sponge. Scrub the surfaces thoroughly. The soap helps loosen the dirt, making it easier to rinse away. Always rinse very well to prevent any slippery residue.
Borax for Tougher Organic Stains
Borax is a natural mineral that can tackle more stubborn organic stains, like mildew or heavy algae. Dissolve one cup of borax in a gallon of warm water. Apply the solution to the affected rocks. Allow it to sit for at least 30 minutes, or longer for severe stains. Scrub vigorously with a stiff brush. Rinse the area completely with fresh water. Borax is stronger than vinegar, so use it with care and rinse thoroughly.
Deep Cleaning Methods: Pressure Washing and Manual Scrubbing
Sometimes, natural solutions alone are not enough for heavily soiled rocks. That is when you need to bring in more powerful cleaning methods. Both pressure washing and manual scrubbing offer deep cleaning. Choosing the right method depends on the size of the area and the severity of the dirt. I combine both techniques often for the best results.
Effective Pressure Washing Techniques
Pressure washing is fast and effective for large rock areas. First, clear all loose debris from the rocks. Use a fan tip or a wider spray setting on your pressure washer. Start at a lower PSI (pounds per square inch) setting. Hold the nozzle a safe distance from the rock, usually 12-18 inches. Move the spray steadily back and forth, overlapping each pass slightly. Work in small sections to ensure even cleaning. Be careful not to blast away smaller stones or damage the rock surface. Test the pressure on an inconspicuous area first.
Manual Scrubbing for Detailed Cleaning
Manual scrubbing offers control and precision. This method is ideal for smaller areas, intricate rock features, or delicate stones. Use a stiff-bristled brush or a wire brush for tough spots. Apply your chosen cleaning solution directly to the rock. Scrub in circular motions, applying firm pressure to dislodge dirt and stains. For very detailed areas, a smaller brush or even an old toothbrush can reach tight crevices. This method takes more effort but allows for a thorough, detailed clean. It is perfect for getting into all the nooks and crannies.
Combining Methods for Optimal Results
Often, the best approach combines both pressure washing and manual scrubbing. Use the pressure washer for the general bulk cleaning of large surfaces. This removes most of the loose dirt, moss, and algae quickly. Then, switch to manual scrubbing for the remaining stubborn stains or hard-to-reach areas. This combination maximizes efficiency and effectiveness. You get the power of the pressure washer for the big jobs and the precision of manual scrubbing for the fine details. This ensures your rock landscaping is truly spotless.
Tackling Stubborn Stains: Mold, Mildew, and Rust
Some stains are more challenging than general dirt. Mold, mildew, and rust require specific treatments to remove them effectively. These stains can ruin the appearance of your rock landscaping. I have successfully removed these difficult stains with the right approach. Addressing them promptly prevents them from spreading.
Removing Mold and Mildew Stains
Mold and mildew appear as black, green, or white fuzzy patches. They thrive in damp, shady conditions. To remove them, mix a solution of one part bleach to three parts water. You can also use a vinegar solution for this task; sometimes, vinegar works better than bleach on specific mold types. Spray the solution onto the affected rocks. Let it sit for 10-15 minutes. The solution will kill the mold spores and loosen the stains. Scrub the areas vigorously with a stiff brush. Rinse thoroughly with plenty of fresh water. Ensure proper ventilation and wear protective gear. For more specific mold cleaning tips, check out how to clean mold in shower.
Treating Rust Stains on Rocks
Rust stains often come from metal landscaping elements or iron-rich water. These leave orange or reddish-brown marks. For light rust, a paste of lemon juice and salt can be effective. Apply the paste, let it sit for a few hours, then scrub and rinse. For heavier rust stains, you may need a specialized rust remover formulated for concrete or stone. Follow the product instructions carefully. These removers often contain oxalic acid, which dissolves rust. Always test on an inconspicuous area first to ensure it does not discolor the rock. Rinse the area very thoroughly after treatment.
Dealing with Stubborn Algae and Lichen
Algae forms a slick, green film, while lichen appears as crusty, patchy growths. Both are persistent. For algae, a strong vinegar solution or a commercial algaecide can work. Apply and let it sit before scrubbing. For lichen, it is often necessary to scrape it off carefully after applying a loosening agent. You can try a mix of baking soda and water or a specialized cleaner. Some products are designed to kill lichen and make removal easier. Regular pressure washing can prevent heavy lichen buildup. Consistent cleaning prevents these growths from taking hold again.
Preventative Measures for Long-Term Rock Landscaping Cleanliness
Cleaning your rock landscaping is hard work. Preventing future build-up saves you time and effort in the long run. By taking a few proactive steps, you can keep your rocks cleaner for longer. I always recommend these preventative measures to my clients. They make a big difference in maintaining a beautiful landscape.
Improving Drainage and Sunlight Exposure
Moss and algae thrive in damp, shady conditions. Improving drainage around your rock features reduces moisture buildup. Consider adding a French drain or regrading the area to direct water away. Pruning overhanging tree branches or shrubs increases sunlight exposure. More sunlight helps dry out rocks faster. This makes the environment less hospitable for moss and algae growth. A dry surface naturally stays cleaner.
Using Landscape Fabric and Edging
Landscape fabric creates a barrier between the soil and your rocks. It prevents weeds from growing up through the stones. Lay the fabric down before placing your rocks. This physical barrier stops weed seeds from germinating in the rock bed. Edging materials, like metal or plastic borders, help keep soil and mulch from washing onto your rocks. They maintain a clear separation. This prevents dirt from accumulating on the rocks.
Regular Debris Removal
Preventative cleaning starts with simple, regular maintenance. Regularly sweep or blow leaves, twigs, and other organic debris from your rock landscaping. This prevents organic matter from decomposing on the rocks, which can lead to stains and encourage moss growth. A quick pass with a leaf blower or broom once a week can make a huge difference. Removing debris also limits food sources for weeds.
Applying Sealants or Algae Inhibitors
For long-term protection, consider applying a sealant to your rocks. Sealants create a protective barrier on the rock surface. This barrier makes rocks less porous. It repels water and prevents stains from penetrating deeply. Some sealants also contain algaecides or fungicides, which inhibit growth. Choose a breathable sealant that will not alter the natural appearance of the rocks. Reapply according to the product’s instructions, typically every few years. This extra step significantly extends the time between deep cleans.
Special Considerations for Different Rock Types
Not all rocks are the same. Different types of landscaping rocks have different characteristics. This means they might need slightly varied cleaning approaches. Understanding your rock type helps ensure you clean them safely and effectively. I always assess the rock type before recommending a cleaning method.
Cleaning Lava Rock and Porous Stones
Lava rock and other porous stones, like some types of flagstone, absorb more moisture. This makes them prone to moss, algae, and mold growth. When cleaning lava rock, avoid extremely high pressure with a pressure washer. The porous nature means water can penetrate and cause internal damage or dislodge loose bits. Use a wider fan tip and keep the nozzle further away. Gentle scrubbing with a soft brush and a natural cleaner is often best. For specific advice on lava rock, refer to how to clean lava rock.
Cleaning Smooth Pebbles and River Rocks
Smooth pebbles and river rocks are less porous than lava rock. Dirt and grime tend to sit on their surface rather than soaking in. These rocks are generally durable. You can often use a stronger pressure washer setting on them. However, be careful not to blast them out of place. A strong rinse with a garden hose can often remove loose dirt. A stiff brush works well for any remaining grime. These rocks are relatively low maintenance to clean.
Cleaning Large Boulders and Decorative Stones
Large boulders and decorative stones are features in your landscape. Their size makes them less prone to being dislodged. They are also less likely to get covered by small debris. Cleaning often involves targeting specific stains like moss, lichen, or dirt accumulated in crevices. A pressure washer is very effective for these large surfaces. For intricate details or deeply set stains, manual scrubbing with a brush is necessary. Focus on making the entire surface uniform in cleanliness.
Protecting Nearby Plants and Soil
Regardless of the rock type, always protect surrounding plants and soil. When using cleaning solutions, especially those containing bleach or strong acids, rinse nearby vegetation with plain water before and after application. This dilutes any runoff. Consider covering delicate plants with plastic sheeting during cleaning. Ensure runoff from your cleaning process drains away from plant beds or bodies of water. This prevents harm to your garden ecosystem. Always prioritize environmental safety during any cleaning project.
FAQ Section
How often should I clean my rock landscaping?
The frequency depends on your climate and the amount of organic debris. In damp, shady areas, you might need to clean every 6-12 months. In drier, sunnier spots, a yearly clean or spot treatment might suffice. Regular sweeping and debris removal extends the time between deep cleans.
Can I use bleach on all types of landscaping rocks?
Use bleach solutions with caution. While effective for mold and algae, bleach can discolor some rocks, especially lighter or more porous types. It can also harm nearby plants. Always dilute bleach heavily and test on an inconspicuous area first. Natural alternatives like vinegar are often safer.
Is pressure washing safe for all landscaping rocks?
Pressure washing is generally safe but requires careful technique. High pressure can chip or dislodge softer rocks like sandstone or lava rock. It can also blast away smaller pebbles. Always start with a low PSI setting and a wide fan nozzle. Maintain a safe distance from the rock surface.
How do I prevent weeds from growing in my rock landscaping?
Prevent weeds by laying down quality landscape fabric before placing rocks. This creates a barrier. Regular removal of leaves and debris also helps, as these can provide a bed for weed seeds. Consider using an edging material to separate the rock area from soil or grass.
What is the best way to remove rust stains from rocks?
For light rust, a paste of lemon juice and salt can work. Apply it, let it sit, then scrub and rinse. For heavier rust, specialized rust removers for stone or concrete are available. Follow product instructions carefully and test on a hidden spot first to prevent discoloration.
Can I use a regular garden hose instead of a pressure washer?
A regular garden hose with a strong nozzle can remove loose dirt and light debris. It is effective for rinsing after scrubbing. However, it may not have enough power to remove deeply embedded dirt, heavy moss, or stubborn stains like a pressure washer can. A hose is suitable for maintenance, but a pressure washer provides a deeper clean.
Conclusion
Keeping your rock landscaping clean enhances the beauty and value of your home. It might seem like a big job, but with the right tools and techniques, it is manageable. We have covered everything from simple sweeping to tackling tough stains. Remember to consider your rock type and always prioritize safety during cleaning.
By regularly maintaining your rock landscaping, you ensure it remains a stunning feature in your yard for years. Choose the methods that best suit your needs, whether it’s a gentle natural solution or a powerful pressure wash. Consistent care saves you time and effort in the long run. Your efforts will pay off with a vibrant, welcoming outdoor space. Enjoy the beauty of your perfectly clean rock landscaping!
- rock cleaning
- landscaping maintenance
- outdoor cleaning
- moss removal
- algae control
- stain removal
- natural cleaners
- garden care
- pressure washing
- vinegar cleaning


