· RV Maintenance · 18 min read
How To Clean Rv Ac
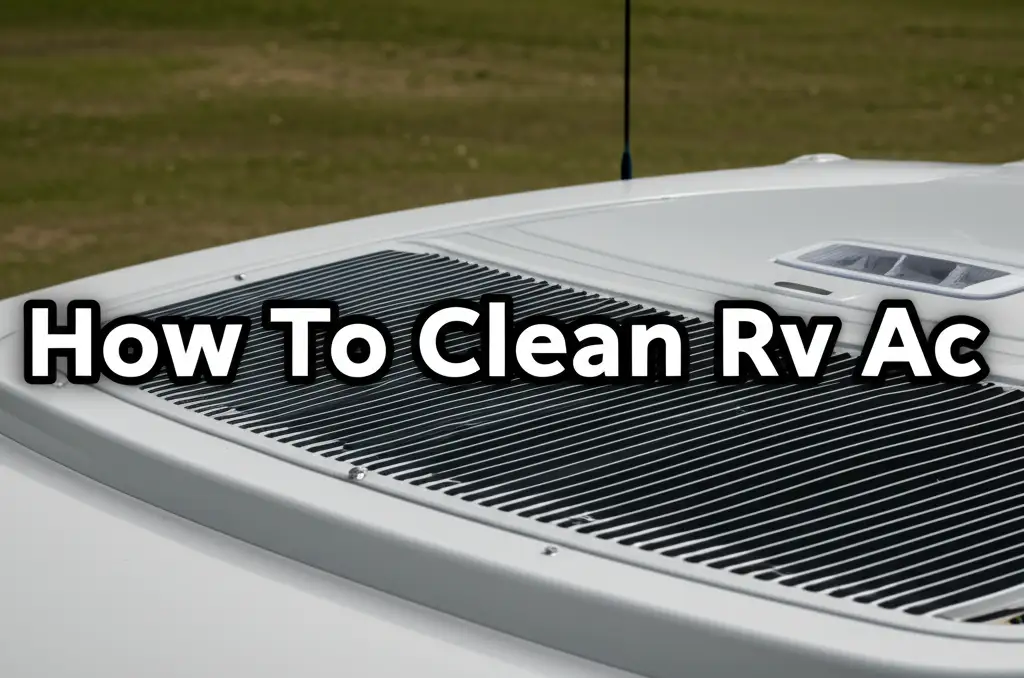
Clean Your RV AC: A Guide to Efficient Cooling
Embarking on RV adventures promises open roads and new sights. Your RV air conditioner (AC) keeps you cool and comfortable during these trips. A clean AC unit ensures enjoyable travel, especially in warm climates. Learning how to clean RV AC systems boosts their performance. It also improves air quality inside your vehicle.
This comprehensive guide shows you how to clean RV AC components thoroughly. We will cover everything from filters to coils and drain lines. You will discover the right tools and steps for a DIY cleaning project. Regular maintenance saves money and extends the life of your unit. Let us ensure your RV stays a cool sanctuary on wheels.
Takeaway:
- Regularly clean your RV AC filters to maintain airflow.
- Inspect and clean evaporator and condenser coils for peak efficiency.
- Clear the drain pan and line to prevent water damage and mold.
- Prioritize safety by disconnecting power before any cleaning.
- Follow a seasonal cleaning schedule for optimal performance.
To clean an RV AC, first disconnect power. Remove and clean or replace air filters. Next, access and gently clean the evaporator coils and drain pan inside. Finally, clean the condenser coils and check the fan on the rooftop unit.
Why Your RV AC Needs Regular Cleaning
Your RV air conditioner works hard. It pulls air from outside and cools it before sending it into your living space. This process inevitably collects dirt, dust, and allergens. Over time, these particles build up inside the unit. This buildup reduces cooling efficiency significantly. A dirty RV AC struggles to cool the air. It also uses more energy, which can strain your RV’s electrical system or generator.
Think about the air you breathe inside your RV. A dirty AC unit can circulate stale, dusty, or even moldy air. This affects your comfort and your health. Regular cleaning prevents these issues. It ensures fresh, cool air circulates freely. Keeping your RV AC clean protects your investment. It helps your unit last longer. You get more years of reliable cooling on the road.
I always notice a difference after cleaning my RV AC. The air feels crisper, and the unit runs quieter. It is a small effort for a big reward. Proper maintenance avoids costly repairs. It also prevents unexpected breakdowns during a trip.
Essential Tools and Supplies for RV AC Cleaning
Gathering the right tools makes the cleaning process smooth. You do not need many specialized items. Most supplies are simple household cleaning products. Having everything ready saves time and frustration. Let us go through the list.
What You Will Need:
- Screwdrivers: Philips and flathead types help remove covers and panels.
- Soft Brush or Coil Cleaning Brush: This gently removes debris from delicate coils.
- Vacuum Cleaner with Hose Attachment: Use this for sucking up loose dust and dirt.
- Mild Household Cleaner or Coil Cleaner: Choose a non-acidic cleaner safe for AC components. Dish soap mixed with water often works well.
- Spray Bottle: For applying your cleaning solution evenly.
- Gloves and Safety Glasses: Protect your hands and eyes from dirt and cleaning solutions.
- Bucket and Rags/Microfiber Cloths: For wiping surfaces and catching drips.
- Garden Hose with Spray Nozzle: For rinsing the outdoor coils.
- New Air Filters (if applicable): Some RV AC filters are disposable. Check your manual.
- Shop-Vac (optional): Useful for sucking water from drain pans.
Make sure your cleaning solution is safe for AC units. Harsh chemicals can damage parts. Always read the cleaner’s label before use. Using the correct tools prevents accidental damage to your RV AC components. I keep a dedicated cleaning kit in my RV for these tasks. This way, I am always ready for a quick clean.
Pre-Cleaning Safety Checks and Preparations
Safety comes first when working with electrical appliances. Your RV AC unit runs on electricity. Ignoring safety steps can lead to serious injury. Proper preparation also makes the cleaning job easier and more effective. Before you touch any part of your RV AC, follow these steps.
Critical Safety Steps:
- Disconnect All Power: This is the most important step. Turn off your RV’s main shore power breaker. Turn off the inverter. Disconnect from any external power sources. Also, turn off your RV’s house batteries at the main disconnect switch. This ensures no power reaches the AC unit during cleaning. Never assume power is off without double-checking.
- Read Your RV AC Manual: Every RV AC model is slightly different. Your unit’s manual provides specific instructions. It shows how to remove covers and access components. It also lists recommended cleaning solutions. Refer to your manual to avoid damaging parts or voiding warranties.
- Position Your RV: If possible, park your RV on level ground. This helps with water drainage during cleaning. It also provides a stable platform if you need to work on the roof.
- Clear the Area: Remove any items from around the AC unit inside your RV. Move furniture or decorations that might block access. For rooftop work, ensure the area around the RV is clear for a ladder.
I always take a few extra minutes for these safety checks. It gives me peace of mind. A little preparation prevents big problems. You will thank yourself later for being careful.
Cleaning the RV AC Filter(s)
The air filter is your RV AC’s first line of defense. It traps dust, pollen, and other airborne particles. A dirty filter restricts airflow significantly. This forces your AC unit to work harder. It reduces cooling power and wastes energy. Cleaning or replacing the filter is the simplest yet most effective maintenance task. You should do this regularly, often every few weeks during heavy use.
Steps for Filter Cleaning:
- Locate the Air Filter: Most RV AC units have filters behind a return air grille. This grille is usually on the ceiling inside your RV. It is often a rectangular panel with vents.
- Remove the Filter: The grille typically has latches, tabs, or screws. Gently open or unlatch it to access the filter. The filter is often a thin foam pad or a pleated material. Carefully pull it out.
- Inspect the Filter Type:
- Reusable Foam Filters: These are common in RVs. They are washable.
- Disposable Pleated Filters: Some units use these. They are not washable. You must replace them when dirty.
- Clean Reusable Filters:
- Take the foam filter outside.
- Use a vacuum cleaner to remove loose dust.
- Wash the filter with mild soap and warm water. Gently squeeze it to remove dirt.
- Rinse thoroughly until the water runs clear.
- Allow the filter to air dry completely before reinstallation. A damp filter can cause mold growth.
- For more specific tips on cleaning reusable filters, check out our guide on How To Clean Reusable AC Filters.
- Replace Disposable Filters: If your filter is disposable, simply discard the old one. Insert a new, clean filter of the correct size.
- Clean the Grille: Wipe down the plastic grille cover with a damp cloth. This removes dust and grime.
- Reinstall the Filter: Once the reusable filter is dry, or you have a new disposable one, place it back into the grille. Secure the grille cover.
I make it a habit to check my RV AC filter before every major trip. It only takes a few minutes. This simple step keeps my AC running smoothly. A clean filter ensures good airflow. It also helps prevent dust from entering the rest of the unit.
Cleaning the RV AC Evaporator Coils (Inside Unit)
The evaporator coils are inside your RV. They cool the air that blows into your living space. As the AC runs, moisture from the air condenses on these coils. Dust and debris can stick to the wet surface. This creates a grimy layer. Dirty evaporator coils reduce heat exchange. They also can become a breeding ground for mold and mildew. This leads to unpleasant odors and less effective cooling.
Cleaning these coils requires care. They are delicate. Always follow safety precautions before you start. Make sure the power is off.
Steps for Cleaning Evaporator Coils:
- Access the Evaporator Coils:
- Locate the main indoor air return grille. You already removed the filter from here.
- You might need to remove a few more screws or clips to fully expose the evaporator coil. Consult your RV AC manual for specific instructions.
- Be gentle. Do not bend or damage any fins.
- Remove Loose Debris:
- Use a soft-bristle brush or a coil cleaning brush.
- Gently brush off any loose dust, dirt, or lint from the coil fins. Brush in the direction of the fins to avoid bending them.
- Use a vacuum cleaner with a brush attachment to suck up the dislodged debris.
- Apply Coil Cleaner:
- Mix a mild coil cleaner solution according to product instructions. Many non-rinse cleaners are available. You can also use a solution of warm water and a few drops of mild dish soap.
- Pour the solution into a spray bottle.
- Generously spray the entire evaporator coil surface. Ensure it covers all fins.
- Allow the cleaner to sit for 10-15 minutes. This lets it break down grime and mold.
- For stubborn mold, a dedicated mold cleaner might be needed. If you encounter mold, you might find our guide on How To Clean Mold From AC Unit helpful.
- Allow to Drain (Self-Rinsing Cleaners): Many coil cleaners are “self-rinsing.” The condensation from the AC unit will wash away the cleaner and dissolved grime when the unit runs again.
- Wipe Down Housing: While the coils are soaking, wipe the surrounding plastic housing. Use a damp cloth. Remove any dust or dirt.
- Reassemble: Once the cleaner has worked, and the coils appear clean, reattach any panels or grilles you removed. Remember to put the air filter back in.
Cleaning the evaporator coils makes a big difference. The air flow improves. The air smells fresher. I perform this task at least once a season. It keeps my RV AC running efficiently. For a more general guide on cleaning the inside of an AC unit, you can also refer to How To Clean Ac Unit Inside.
Cleaning the RV AC Condenser Coils (Outside/Rooftop Unit)
The condenser coils are on the rooftop of your RV. They release the heat collected from inside. These coils are exposed to the elements. They collect dirt, leaves, insects, and road grime. A dirty condenser coil cannot dissipate heat effectively. This makes the compressor work harder. It reduces cooling capacity and increases energy use. Cleaning these coils is crucial for efficient operation.
You will need a sturdy ladder for this task. Ensure your ladder is stable on level ground. Always exercise caution when working on your RV roof.
Steps for Cleaning Condenser Coils:
- Access the Rooftop Unit:
- Climb safely onto your RV roof.
- Locate the main AC unit cover. This is typically a large plastic shroud.
- Remove the screws or clips holding the cover in place. Carefully lift and set the cover aside.
- You will see the condenser coils, a large fan, and the compressor.
- Be careful not to step directly on the AC unit. Distribute your weight evenly on the roof.
- Clear Large Debris:
- Use your hands (with gloves) or a soft brush.
- Remove any large debris like leaves, twigs, or insect nests from around the coils and fan.
- Be gentle around the delicate fins.
- Brush and Vacuum Coils:
- Use a soft-bristle brush or coil cleaning brush. Brush gently to dislodge dirt from the condenser fins. Brush in the direction of the fins.
- Use a vacuum cleaner with a brush attachment to suck up loose dirt.
- Apply Coil Cleaner (Optional but Recommended):
- Mix a specialized outdoor coil cleaner or a solution of warm water and mild dish soap in a spray bottle.
- Liberally spray the condenser coils. Make sure the solution covers all the fins.
- Let the cleaner sit for about 10-15 minutes. It will dissolve stubborn grime.
- Rinse the Coils:
- Use a garden hose with a spray nozzle.
- Spray the coils from the inside out if possible. This pushes dirt outward.
- Use low to moderate water pressure. High pressure can bend the delicate fins.
- Rinse until the water runs clear. Avoid spraying electrical components directly.
- For more detailed advice on cleaning outdoor AC units, consider our article on How To Clean Outside Ac Unit.
- Inspect and Clean Fan Blades:
- While the cover is off, inspect the fan blades.
- Wipe them clean with a damp cloth if they are dusty or dirty.
- Ensure the fan spins freely without obstruction.
- For deeper insights into compressor maintenance, you may find our guide on How To Clean Ac Compressor useful.
- Allow to Dry: Let the coils and fan dry completely before replacing the cover. This prevents moisture from being trapped.
- Reinstall Cover: Once dry, replace the plastic shroud. Secure it with the screws or clips you removed earlier.
I usually clean my outdoor unit in the spring. This prepares it for the summer heat. It ensures maximum cooling efficiency. A clean outdoor unit makes a huge difference in performance.
Cleaning the RV AC Drain Pan and Drain Line
When your RV AC runs, it removes moisture from the air. This moisture condenses into water. It collects in a drain pan located under the evaporator coils. From the drain pan, the water flows out through a drain line. If the drain pan or line becomes clogged with dirt, algae, or mold, water cannot drain properly.
A clogged drain system causes several problems. Water can overflow the pan. It can leak into your RV, causing water damage to ceilings or walls. Stagnant water in the pan also promotes mold and mildew growth. This leads to musty odors in your RV. Cleaning this system is essential for preventing these issues and maintaining good air quality.
Steps for Cleaning the Drain Pan and Line:
- Locate the Drain Pan: The drain pan is usually directly under the evaporator coils inside the indoor unit. You will see it after you have removed the filter and accessed the coils.
- Inspect for Standing Water and Debris:
- Look for any standing water in the pan. This indicates a clog.
- Check for slime, mold, or debris like dirt and lint.
- Clean the Drain Pan:
- Use a wet/dry vacuum (shop-vac) to suck up any standing water.
- Wipe the drain pan clean with a rag soaked in a mild cleaning solution. A solution of bleach (1 part bleach to 10 parts water) or white vinegar can effectively kill mold and algae.
- Scrub away any visible slime or mold.
- Clear the Drain Line:
- The drain line is a small tube connected to the drain pan. It usually leads outside.
- You can try to clear minor clogs by pouring a small amount of diluted bleach or white vinegar down the drain line. Let it sit for 15-20 minutes.
- For stubborn clogs, you might need to use compressed air or a thin, flexible brush (like a bottle brush) to gently push through the line. Be careful not to damage the line.
- Sometimes, the drain line outlet on the RV’s exterior might be visible. Check it for blockages from insects or dirt.
- If your RV AC unit has a split system, you might find more detailed information about cleaning its drain pipe in our guide on How To Clean Split Ac Drain Pipe.
- Flush the Line:
- After cleaning, pour a cup of clean water into the drain pan.
- Observe if the water drains freely out of the RV. If it drains slowly or not at all, the clog persists. Repeat the cleaning process.
- Prevent Future Clogs:
- Consider using an algaecide tablet specifically designed for AC drain pans. These slowly dissolve and prevent slime and mold growth.
- Regularly check the drain pan and line, especially during humid weather.
I learned the hard way about clogged drain lines. A small leak turned into a big mess. Now, I always make sure the drain pan is spotless. It saves me from water damage worries.
Reassembling and Testing Your RV AC
You have put in the hard work. Now, it is time to put your RV AC back together. This final step is quick. It ensures everything is secure before you restore power. Testing the unit confirms your cleaning efforts paid off. You want to see cool air flowing and no strange noises.
Steps for Reassembling and Testing:
- Reassemble Components:
- Ensure all filters are back in place.
- Securely reattach any covers, grilles, or panels you removed. Double-check all screws and clips. Make sure they are tight but do not overtighten.
- Confirm the outdoor AC shroud is properly seated and screwed down. This protects the unit from weather.
- Restore Power:
- Go back to your RV’s power source.
- Reconnect your house batteries.
- Turn on the main shore power breaker.
- Reconnect any external power, like from a pedestal.
- Test the AC Unit:
- Turn on your RV AC unit. Set it to a cool temperature.
- Listen for any unusual noises. A clean unit should run quieter.
- Feel the airflow from the vents. It should be strong and steady.
- Check the temperature of the air. It should feel significantly cooler than the ambient air.
- Allow the unit to run for 15-30 minutes. This allows it to reach full operating temperature. It also helps any self-rinsing coil cleaners drain.
- Check for Proper Drainage:
- After the AC runs for a while, condensation will form.
- Go outside and check the drain line (if visible). You should see water dripping or flowing from it. This confirms the drain system is clear.
- Inside, quickly check for any leaks around the AC unit.
I always feel a sense of accomplishment after hearing that clean, strong airflow. It is like the RV breathes a sigh of relief. This testing phase is important. It confirms your hard work resulted in a perfectly running AC. If you notice any issues, turn off the power and investigate.
Tips for Maintaining Optimal RV AC Performance
Cleaning your RV AC is a big step. However, ongoing maintenance is key to keeping it running well. A few simple habits can extend the life of your unit. They also ensure you stay cool on every adventure. Think of it as preventative care for your comfort system.
Preventative Maintenance Tips:
- Regular Filter Checks: Check your RV AC filter frequently. During heavy use, check it every 2-4 weeks. Clean or replace it as needed. This is the easiest way to maintain airflow and efficiency.
- Use a Cover When Stored: When your RV is not in use, especially during off-season storage, cover the rooftop AC unit. An AC cover protects it from dust, leaves, bird droppings, and harsh weather. This reduces internal buildup.
- Park Strategically: Whenever possible, park your RV in the shade. Direct sunlight makes your AC work much harder to cool the interior. Shade significantly reduces the load on your unit.
- Monitor Your Thermostat: Set your thermostat to a reasonable temperature. Avoid setting it too low, as this can make the unit run constantly. A comfortable temperature around 75-78°F is often efficient.
- Seal Your RV: Check your RV’s doors, windows, and roof vents for proper seals. Air leaks make your AC less efficient. Seal any gaps with caulk or weatherstripping.
- Clear Roof Debris: Regularly inspect your RV roof. Remove any leaves, twigs, or debris that might accumulate around the AC unit. This prevents blockages and protects the outdoor coils.
- Professional Service: Consider professional RV AC service every 1-2 years. A technician can perform a deeper inspection. They can check refrigerant levels, electrical connections, and fan motors. They can spot problems you might miss.
I always follow these tips. They are simple actions that make a big difference. My RV AC has served me well for many years. Regular maintenance is the reason why. It gives me confidence on the road.
FAQ Section
How often should I clean my RV AC?
You should check your RV AC filter every 2-4 weeks during regular use. Clean the evaporator and condenser coils at least once or twice a year. This schedule should be more frequent if you travel in dusty areas or use your RV heavily. Regular checks keep your unit efficient.
Can I use household cleaners on my RV AC?
For basic cleaning, a mild solution of dish soap and warm water is generally safe. However, avoid harsh chemical cleaners or abrasive scrubbers. They can damage delicate coils and plastic parts. For stubborn grime or mold, use specialized non-acidic coil cleaners or diluted white vinegar. Always test a small area first.
What if my RV AC still smells after cleaning?
A persistent odor, even after cleaning, often indicates mold or mildew. This usually grows on the evaporator coils or in the drain pan. You might need a stronger mold-specific cleaner. Ensure the drain pan and line are completely clear. Good airflow and proper drainage prevent moisture buildup. If the smell persists, professional inspection may be needed.
Is professional RV AC cleaning necessary?
While you can do most maintenance yourself, professional service is beneficial every 1-2 years. Technicians have specialized tools. They can check refrigerant levels, inspect electrical components, and identify issues you might miss. This deeper service can prevent major breakdowns. It extends the overall life of your RV AC unit.
What are signs my RV AC needs cleaning?
Key signs include reduced airflow from vents or the air feeling less cold. Musty or stale odors when the AC runs indicate mold. Increased noise from the unit, like humming or rattling, can also signal a dirty fan or clogged components. Higher electricity consumption for less cooling is another indicator.
Conclusion
Cleaning your RV AC is a vital part of RV ownership. It ensures your comfort on the road. A clean unit provides strong, cool airflow. It also maintains healthy air quality inside your motorhome. We covered how to clean RV AC components thoroughly. This includes filters, evaporator coils, condenser coils, and drain lines.
Remember the simple steps: disconnect power, gather your tools, and work carefully through each section. Regular maintenance saves you money on energy bills and costly repairs. It also extends the life of your air conditioner. Prioritize cleaning your RV AC. You will enjoy a more comfortable and refreshing journey every time. Do not let a dirty AC unit spoil your next adventure. Take action today for a cooler tomorrow.
- RV AC
- AC maintenance
- RV cleaning
- air conditioner
- camper AC
- mobile living