· Appliance Care · 15 min read
How To Clean Sandwich Maker

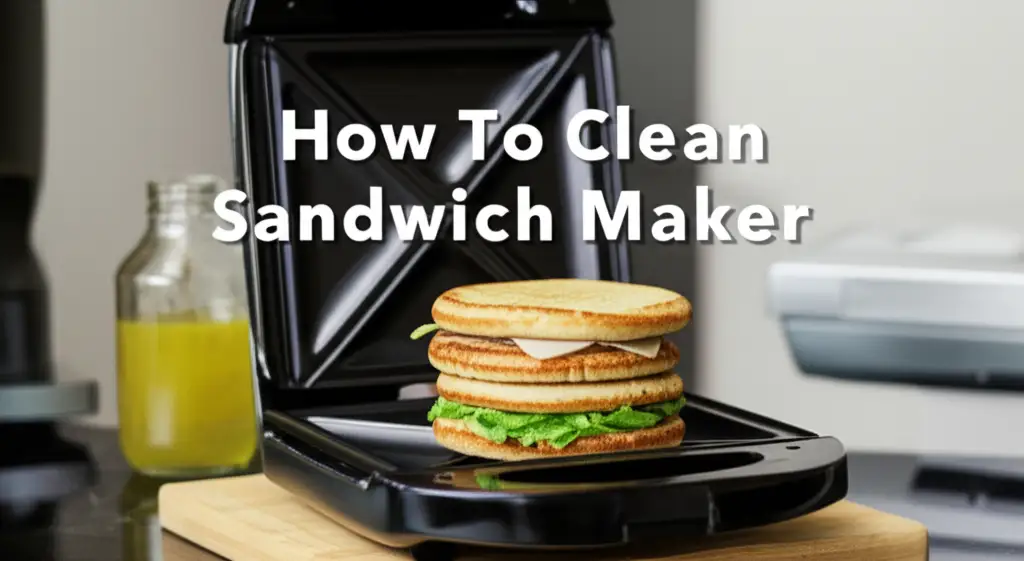
Unlock the Secrets: How to Clean Your Sandwich Maker for Perfect Meals
A sandwich maker is a fantastic kitchen tool. It quickly makes warm, delicious meals. However, this convenience often comes with a messy aftermath. Melted cheese, crumbs, and grease can build up fast.
Learning how to clean a sandwich maker properly is important. It keeps your appliance hygienic and working well. A clean sandwich maker means tastier sandwiches and a longer life for your device. This guide will walk you through daily cleaning, deep cleaning, and important maintenance tips. We will cover common mistakes to avoid.
Takeaway
Keeping your sandwich maker clean is simple and extends its life.
- Always unplug the appliance and let it cool completely before cleaning.
- Use damp cloths or paper towels for quick wipe-downs after each use.
- For stuck-on food, soften it with a wet cloth before gentle scraping.
- Avoid abrasive cleaners and harsh tools that can damage non-stick surfaces.
- Clean external surfaces with a damp cloth and mild soap.
To clean a sandwich maker effectively, first, unplug it and let it cool. Then, wipe away loose crumbs with a paper towel. For stuck-on food, dampen a cloth with warm, soapy water and gently scrub the plates. Use a soft brush or spatula for stubborn bits. Finally, wipe with a clean, damp cloth and dry thoroughly before storing.
Why Cleaning Your Sandwich Maker Matters Beyond the Obvious
Keeping your sandwich maker clean offers many benefits. It is more than just about a tidy kitchen. A clean appliance works better and lasts longer. This saves you money in the long run.
Food residue left on the plates can harden. This makes future cleaning harder. It also creates uneven heat distribution. Your sandwiches might cook poorly. Regular cleaning prevents these problems. It ensures your appliance heats evenly every time.
Hygiene is another important reason. Food particles can attract pests. They can also grow bacteria if left for long. A clean sandwich maker helps keep your kitchen safe and sanitary. You want to make sure your meals are safe to eat.
A well-maintained sandwich maker looks better too. A shiny, clean appliance enhances your kitchen space. It shows you care about your tools. Regular cleaning protects the non-stick coating. This coating is key for easy food release and cooking.
Essential Tools and Supplies for Cleaning Your Sandwich Maker
Gathering the right tools makes cleaning easy. You likely have most of these items already. Using the correct tools prevents damage to your appliance. It also makes the job more effective.
Here is a list of what you will need:
- Soft cloths or paper towels: These are for wiping down surfaces. They absorb grease and crumbs.
- Warm water: This is the primary cleaning agent. It helps loosen food debris.
- Mild dish soap: A small amount helps cut through grease. Choose one that is gentle.
- Rubber or silicone spatula: This tool helps scrape off stubborn food. It will not scratch non-stick surfaces.
- Soft-bristled brush: An old toothbrush or a dedicated cleaning brush can reach small crevices.
- Cotton swabs or toothpicks: These are perfect for tight spots and corners.
- Baking soda (optional): This can help with tough stains or odors.
- Vinegar (optional): A natural disinfectant and grease cutter.
Avoid using abrasive scrubbers or metal tools. These can scratch the non-stick coating. Once scratched, food sticks easily. This makes cleaning much harder in the future. Always prioritize gentle methods to protect your appliance.
Daily Cleaning Your Sandwich Maker: Quick and Easy Steps
Cleaning your sandwich maker right after use is the best practice. This prevents food from hardening. It makes the next cleaning a breeze. I always do this while my food cools down.
Step 1: Unplug and Cool Down. First, always unplug your sandwich maker. Let it cool completely. Never clean a hot appliance. This prevents burns and potential damage. Safety is always my top priority.
Step 2: Wipe Away Loose Crumbs. Once cool, use a dry paper towel or soft cloth. Wipe away any loose crumbs. Get into the grooves. This removes the easiest mess.
Step 3: Wipe Down Plates with Damp Cloth. Dampen a soft cloth or paper towel with warm water. Add a tiny drop of mild dish soap if needed. Gently wipe the non-stick plates. Remove any grease or food residue. For light messes, water alone often works.
Step 4: Tackle Sticky Spots. If you have sticky spots, dampen a paper towel. Lay it over the sticky area for a few minutes. This softens the residue. Then, gently wipe it away. This works great for melted cheese.
Step 5: Clean the Exterior. Wipe down the outside of the sandwich maker. Use a slightly damp cloth. This keeps the whole appliance looking good. Make sure no water gets into electrical parts.
Step 6: Dry Thoroughly. Use a dry cloth to wipe all surfaces. Ensure the sandwich maker is completely dry before storing it. Moisture can cause issues over time. This daily routine only takes a few minutes. It keeps your sandwich maker ready for its next use.
Deep Cleaning Your Sandwich Maker: Tackling Stubborn Messes
Sometimes, daily cleaning is not enough. Burnt-on food or excessive grease may require a deeper clean. This process needs a bit more time and effort. It is still important to be gentle.
Cleaning Sandwich Makers with Non-Removable Plates
Most sandwich makers have fixed plates. These are part of the main unit. This means you cannot submerge them in water. You must clean them while attached.
Step 1: Cool Down and Scrape. Unplug your sandwich maker. Let it cool completely. Use a rubber or silicone spatula to gently scrape off any large, burnt-on pieces. Be careful not to scratch the surface. This removes the bulk of the stubborn mess.
Step 2: Soften with a Wet Towel. Dampen a thick paper towel or soft cloth. Place it directly over the stubborn spots. Close the lid for 5-10 minutes. The moisture and steam will help soften the dried-on food. This makes it easier to remove.
Step 3: Scrub Gently. Open the lid. Use a damp cloth or soft-bristled brush. Gently scrub the softened residue. For very tough spots, a paste of baking soda and a little water can help. Apply the paste, let it sit for a few minutes, then scrub lightly. Rinse your cloth often.
Step 4: Clean Crevices. Use cotton swabs or toothpicks for tight corners and grooves. Dip them in warm, soapy water. This helps remove trapped crumbs and grease. These small tools make a big difference in getting truly clean.
Step 5: Final Wipe and Dry. Wipe down the entire interior with a clean, damp cloth. Make sure all soap residue is gone. Then, dry the plates thoroughly with a clean, dry cloth. Ensure no moisture remains before closing or storing the appliance.
Cleaning Sandwich Makers with Removable Plates
Some higher-end models have removable plates. This makes deep cleaning much easier. It is like cleaning a regular pan.
Step 1: Remove Plates and Cool. Unplug the sandwich maker. Allow it to cool. Unlatch and carefully remove the plates according to your model’s instructions. These plates often click out.
Step 2: Scrape and Soak. Scrape off any large food bits with a silicone spatula. For tough residue, let the plates soak in warm, soapy water for 15-20 minutes. This significantly loosens the grime. This process is similar to cleaning the bottom of a pan. how-to-clean-bottom-of-pan
Step 3: Wash and Scrub. Wash the plates by hand with dish soap and a sponge. Use a soft brush for grooves. If your plates are dishwasher safe, you can place them in the dishwasher. Always check your appliance manual first.
Step 4: Rinse and Dry. Rinse the plates thoroughly under running water. Ensure all soap is removed. Dry them completely with a clean towel. Reattach them to your sandwich maker only when they are fully dry.
Cleaning removable plates is generally less effort. It makes the deep cleaning process much more effective. This is a good feature to look for if you cook messy foods often.
Cleaning Specific Sandwich Maker Types: Waffle, Panini, and More
While the basic cleaning principles remain, different types of sandwich makers have unique needs. Understanding these nuances helps you clean more effectively. Each design may present its own challenges.
Cleaning Waffle Makers
Waffle makers are a type of sandwich maker. They often have deeper, more intricate grids. These grids can trap batter and syrup easily. This makes them particularly prone to sticky messes.
Special Considerations:
- Deep Grids: These require a soft brush or a firm toothbrush. This helps get into all the nooks and crannies. Do not use metal brushes.
- Syrup Residue: Syrup can caramelize and become very sticky. After cooling, place a damp cloth on the grids. Close the lid for a few minutes to rehydrate the residue. Then, gently scrub.
- Overflow Channels: Many waffle makers have channels around the grids. These catch overflow batter. Clean these areas thoroughly with a damp cloth or cotton swab.
For more detailed information on cleaning these specific appliances, you can check out our guide on how to clean a waffle maker. It provides comprehensive tips for maintaining their unique surfaces.
Cleaning Panini Presses
Panini presses often have flatter, ridged plates. They are designed for grilling sandwiches. These ridges can collect melted cheese and grilled vegetables. Cleaning them requires a bit of focused effort.
Special Considerations:
- Ridges: Use a damp cloth or paper towel to wipe along the direction of the ridges. A soft-bristled brush or an old toothbrush is very effective. It helps remove bits stuck in the valleys.
- Grease Buildup: Panini presses often handle oily foods. After use, wipe down plates with a dry paper towel while still warm (but not hot) to absorb excess oil. Then clean with a damp, soapy cloth once cool.
- Hinge Area: Grease can drip into the hinge mechanism. Clean this area with a cotton swab or a damp cloth wrapped around a toothpick. This keeps the hinge moving smoothly.
Cleaning Standard Sandwich Toasters
These are the classic triangle-cut sandwich makers. They often have very distinct pockets. These pockets are prone to trapping crusts and cheese overflow.
Special Considerations:
- Pocket Edges: The edges of the pockets can collect crust bits. Use a small, soft brush or a cotton swab. Gently dislodge any stuck-on food.
- Overflow Wells: Many designs include small wells around the cooking plates. These catch cheese or butter that melts over. Clean these out with a damp paper towel or sponge.
- Simple Design: Generally, these are simpler to clean due to fewer complex moving parts. The focus is on the pockets and edges.
No matter the type, always ensure the appliance is unplugged and cool before cleaning. Always refer to your specific model’s manual for unique cleaning instructions. Using the right technique for each type extends the life and performance of your appliance.
Common Cleaning Mistakes to Avoid with Your Sandwich Maker
Cleaning a sandwich maker seems straightforward. However, common mistakes can damage your appliance. They can also make future cleaning harder. I learned some of these lessons the hard way.
Mistake 1: Cleaning a Hot Appliance. This is perhaps the biggest mistake. Cleaning a hot surface is dangerous. You risk burns. Hot non-stick coatings can also be more easily damaged. Always wait until the appliance is completely cool. Patience is key here.
Mistake 2: Using Abrasive Cleaners or Tools. Metal scrubbers, steel wool, or harsh chemicals (like oven cleaner) are a definite no-go. These will scratch or strip the non-stick coating. Once the coating is gone, food will stick every time. It becomes a nightmare to clean. Stick to soft cloths and plastic/silicone tools. This applies to cleaning many kitchen surfaces, like the bottom of an oven. how-to-clean-bottom-of-oven
Mistake 3: Submerging the Appliance in Water. Unless your specific model has completely removable, dishwasher-safe plates, never submerge the main unit. This can damage electrical components. It can also lead to rust. Always wipe down the exterior and interior with a damp cloth only.
Mistake 4: Leaving Food Residue to Dry. If you let melted cheese or crumbs dry for hours or days, they become rock-hard. This makes them much harder to remove. Clean as soon as the appliance cools down. This saves you significant effort later.
Mistake 5: Not Drying Thoroughly. Moisture left behind can promote mold or mildew growth. It can also damage electrical parts over time. Always ensure all surfaces are completely dry before closing or storing your sandwich maker. Wipe every last bit of water.
Mistake 6: Using Too Much Soap. Excessive soap can leave a residue. This residue can affect the taste of your next sandwich. It can also be hard to rinse off completely. Use only a small amount of mild dish soap. Then, wipe thoroughly with a clean, damp cloth.
Avoiding these common pitfalls protects your sandwich maker. It ensures it remains a valuable and efficient kitchen tool. Proper care means more delicious sandwiches for you.
Maintaining Your Sandwich Maker for Longevity and Performance
Beyond regular cleaning, ongoing maintenance ensures your sandwich maker lasts for years. It also guarantees consistent performance. Small habits make a big difference.
Pre-heating Properly: Always allow your sandwich maker to pre-heat fully. This ensures even cooking and prevents food from sticking. When the plates are hot enough, food releases more easily. This reduces the amount of residue left behind.
Using Release Agents Wisely: For stickier foods, a very light spray of cooking oil or butter can help. Use minimal amounts. Too much oil can build up and become sticky grime. It can also affect the non-stick coating over time.
Regular Inspections: Periodically check the power cord for fraying or damage. Look at the hinges to ensure they move smoothly. If the hinges feel stiff, a tiny bit of food-grade mineral oil can help. Do not over-lubricate.
Proper Storage: Store your sandwich maker in a clean, dry place. Ensure it is fully dry before storing. If possible, store it upright or in a way that minimizes pressure on the plates. Some models have a cord wrap. Use it to keep the cord tidy and safe.
Addressing Odors: Sometimes, even after cleaning, lingering food odors can remain. A mixture of water and a small amount of white vinegar can help. Wipe down the plates with this solution. Then, wipe with plain water and dry. This helps neutralize smells. This method is similar to how you might clean an oven after self-cleaning. how-to-clean-oven-after-self-clean
Don’t Overfill: Overfilling your sandwich maker leads to spills. Spills drip into hard-to-clean areas. This creates extra work. Be mindful of how much filling you put in your sandwiches. A little less mess now means less cleaning later.
These simple maintenance tips extend the life of your appliance. They ensure that every sandwich you make is perfect. A well-cared-for sandwich maker is a happy sandwich maker.
FAQ Section
Can you put a sandwich maker in water?
No, you should never submerge the main body of a sandwich maker in water. Doing so can severely damage the electrical components and pose a shock hazard. If your model has removable plates, you can wash those in a sink or dishwasher, but always check your specific appliance manual first.
How do you remove burnt food from a sandwich maker?
To remove burnt food, first unplug the maker and let it cool. Place a damp paper towel or cloth over the burnt area for 5-10 minutes to soften the residue. Then, gently scrape with a rubber or silicone spatula. For stubborn spots, a paste of baking soda and water can be applied before gentle scrubbing.
How do you clean the outside of a sandwich maker?
Clean the exterior of your sandwich maker with a soft cloth dampened with warm, soapy water. Gently wipe down all surfaces. For persistent spots, a mild all-purpose cleaner can be used sparingly on the cloth, not directly on the appliance. Always ensure no water seeps into electrical openings. Finish by wiping with a clean, dry cloth.
How often should I clean my sandwich maker?
You should perform a quick wipe-down after every use to prevent food from hardening. A deeper clean is recommended weekly or bi-weekly, depending on how often you use it and how messy your cooking gets. Regular, light cleaning prevents the need for intense scrubbing later.
Can I use steel wool on a non-stick sandwich maker?
No, absolutely not. Steel wool and other abrasive scrubbers will scratch and ruin the non-stick coating on your sandwich maker plates. Once the non-stick surface is damaged, food will stick much more easily, making the appliance very difficult to clean and less effective. Always use soft cloths or silicone tools.
Is it okay to use dish soap?
Yes, mild dish soap is perfectly fine and often recommended for cleaning sandwich makers. Use only a small amount mixed with warm water on a damp cloth. Avoid harsh or abrasive dish soaps. Always wipe the plates thoroughly with a clean, damp cloth afterward to remove all soap residue, then dry completely.
Conclusion
Cleaning your sandwich maker does not have to be a chore. It is a simple process that keeps your favorite appliance in top condition. By following these easy steps, you ensure hygiene, extend the life of your device, and guarantee delicious results every time. I find that a clean sandwich maker makes cooking much more enjoyable.
Remember to always prioritize safety by unplugging the unit and letting it cool. Use gentle tools and methods to protect the non-stick coating. Regular, swift cleaning after each use saves you from bigger tasks later. Make deep cleaning a routine for stubborn messes.
A well-maintained sandwich maker is a valuable asset in any kitchen. It is ready to create perfect grilled sandwiches, paninis, or waffles whenever you crave them. Take these tips to heart and give your sandwich maker the care it deserves. Your taste buds will thank you for it!
- sandwich maker cleaning
- appliance care
- kitchen cleaning
- deep cleaning
- grill maintenance


