· Home Safety · 21 min read
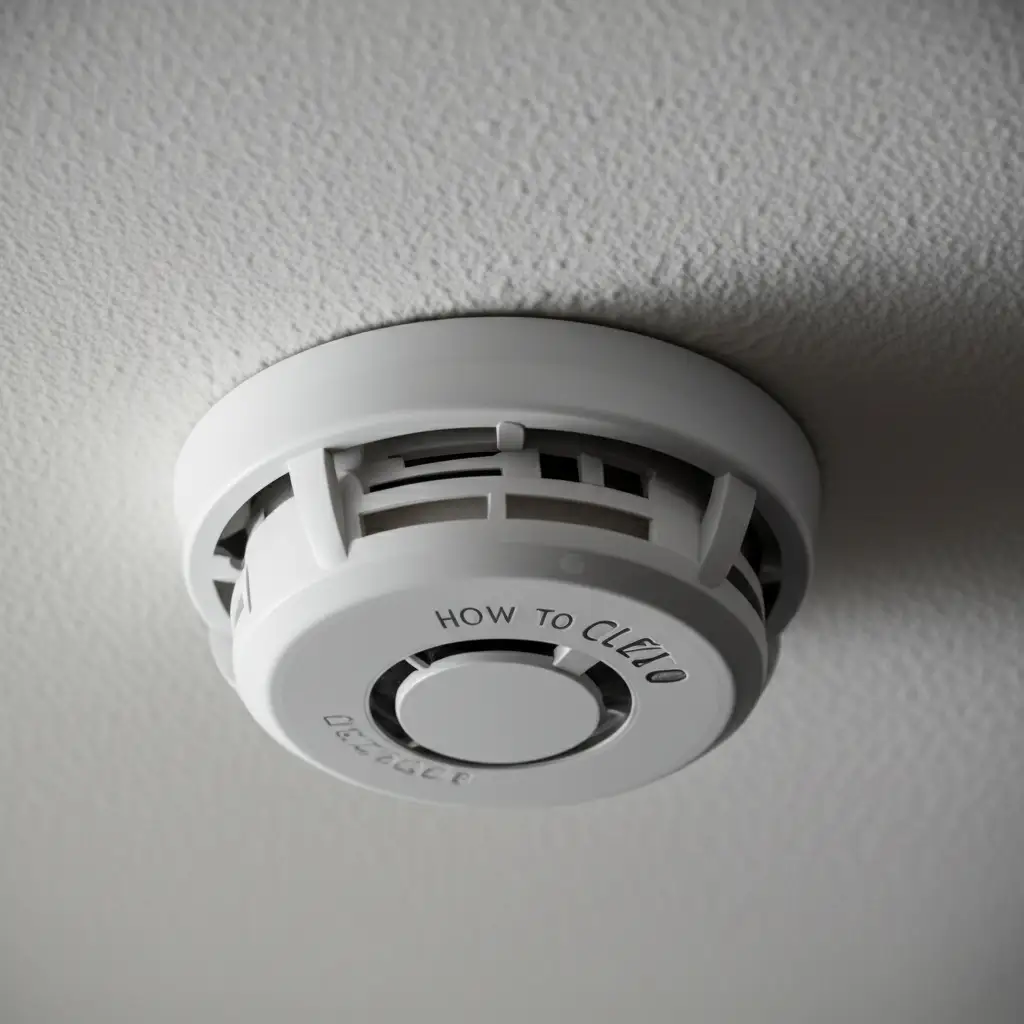
How To Clean Smoke Detector
Clean Your Smoke Detector: A Crucial Safety Guide
Your home’s smoke detectors are silent guardians. They protect your family from fire dangers. These devices work hard every day. They constantly monitor the air for smoke. A functioning smoke detector gives you early warning. This warning provides precious time to escape a fire. Yet, many people forget these vital devices need care. We think they work forever once installed.
The truth is, smoke detectors get dirty. Dust, cobwebs, and airborne particles collect inside them. This build-up harms their ability to detect smoke. A dirty detector might not sound an alarm. It could also trigger false alarms. This article will show you how to clean smoke detector units properly. We will explain why cleaning is important. We will guide you through each step. You will learn about different types of detectors. You will also get tips for regular maintenance. Keeping your smoke alarms clean means keeping your home safe.
Takeaway:
- Regularly clean your smoke detectors to ensure proper function.
- Dust and debris cause false alarms and prevent smoke detection.
- Use a vacuum cleaner or compressed air; avoid water or harsh chemicals.
- Always turn off power and remove batteries before cleaning.
- Test your detectors after cleaning and replace old units as needed.
Cleaning a smoke detector involves safely removing dust and debris from its sensing chamber. You must turn off power, use a vacuum with a soft brush attachment, or compressed air. Never use water or cleaning chemicals directly on the unit. This simple maintenance helps prevent false alarms and ensures your alarm works when you need it most.
Why Cleaning Your Smoke Detector Matters for Safety
A smoke detector is your first line of defense against fire. It detects smoke particles in the air. Then it sounds a loud alarm. This alarm warns everyone in the house. Early warning saves lives. It gives people time to leave the building. It also allows firefighters to arrive faster. My family always feels safer knowing our detectors work.
However, smoke detectors are not maintenance-free. They are sensitive devices. They contain small chambers. Air flows through these chambers. This airflow allows them to sense smoke. Over time, household dust and airborne particles enter these chambers. These particles build up inside the detector. This build-up causes several problems.
First, dust can block the sensing elements. This blockage makes the detector less effective. It might not detect real smoke. This puts your family at great risk. Imagine a fire starting silently. Your detector stays quiet because of dirt. This scenario is frightening. Cleaning ensures the sensors remain clear.
Second, dust can cause false alarms. A build-up of dust might make the detector “think” it senses smoke. This leads to annoying beeping. False alarms can happen at any time. They are often triggered by cooking steam or even just air currents. People sometimes remove batteries from detectors that frequently false alarm. This action defeats the purpose of the alarm. A detector without batteries cannot protect anyone. Cleaning significantly reduces false alarms. It restores peace of mind.
Third, cleaning extends the life of your detector. Just like any electronic device, regular care helps it last longer. Dust can interfere with internal components. It can cause them to fail prematurely. While detectors have a lifespan, proper cleaning helps them reach that lifespan effectively. We want our safety devices to work for their full expected period.
Ignoring smoke detector cleaning is a major safety oversight. It compromises the very function of these critical alarms. I always tell my friends that a few minutes of cleaning can make a huge difference. It helps ensure your home fire safety system performs its job correctly. A clean detector is a reliable detector. It protects your loved ones and your property. Ensure you also address any smoke stains on walls if you have had a small incident. This shows a complete approach to fire aftermath and prevention.
Understanding Your Smoke Detector Type: Key to Proper Cleaning
Knowing your smoke detector type helps you clean it best. Most homes have one of two main types. These are ionization smoke detectors and photoelectric smoke detectors. Some homes may also have combination units. These units include both technologies. Each type detects smoke differently. This affects how dust might impact them.
Ionization Smoke Detectors
Ionization smoke detectors are very common. They contain a small amount of radioactive material. This material ionizes the air between two plates. This creates a tiny electric current. Smoke particles disrupt this current. This disruption triggers the alarm. Ionization alarms are generally better at detecting fast-flaming fires. These fires produce small smoke particles.
These detectors are sensitive to invisible combustion particles. They can also be sensitive to other airborne particles. Dust can easily interfere with the tiny current. A dusty ionization detector might be more prone to false alarms from cooking fumes. It may also give false alarms when no smoke is present. Cleaning the sensing chamber is crucial for these models. It removes anything that might mimic smoke particles.
Photoelectric Smoke Detectors
Photoelectric smoke detectors work differently. They use a light source and a light sensor. The light source shines away from the sensor. When smoke enters the chamber, it scatters the light. This scattered light then hits the sensor. The alarm sounds when enough light hits the sensor. Photoelectric alarms are generally better at detecting slow, smoldering fires. These fires produce large smoke particles.
These detectors are less prone to false alarms from cooking. They are also sensitive to dust. Large dust particles can scatter light, just like smoke. This can also lead to false alarms. Cobwebs are a particular problem for photoelectric detectors. They can physically block the light path. This stops the detector from working properly. A thorough cleaning helps keep the light path clear.
Combination Alarms and Carbon Monoxide Detectors
Many modern homes use combination alarms. These units include both ionization and photoelectric sensors. They offer broader protection. They detect both types of fires effectively. Some combination units also include carbon monoxide detection. Carbon monoxide (CO) is an odorless, colorless, deadly gas. A CO detector senses levels of this gas. It does not detect smoke.
Cleaning a combination smoke and CO alarm is similar. You clean the smoke detection chamber. The CO sensor does not usually require physical cleaning. It is a chemical sensor. However, regular dusting helps keep all parts of the unit clear. Always check your specific alarm’s manual. It will provide the best cleaning advice for your model. Understanding your detector helps you maintain it properly. This ensures your home stays safe from all threats.
Essential Tools and Safety Steps for Cleaning Smoke Detectors
Before you start cleaning your smoke detector, gather the right tools. Proper tools make the job easier. They also ensure your safety. We must prioritize safety above all else. Working with electrical devices always requires caution. I always take a moment to collect everything before I begin.
Necessary Tools:
- Step Ladder or Sturdy Chair: Most smoke detectors are on ceilings or high walls. You need a stable way to reach them. Make sure your ladder is secure. Do not use wobbly chairs or climb on furniture not designed for standing.
- Small Vacuum Cleaner with Brush Attachment: This is your primary cleaning tool. A handheld vacuum works great. The brush attachment helps dislodge dust. It then sucks the dust away. This method is gentle and effective.
- Can of Compressed Air (Duster): This is excellent for blowing dust out of crevices. It can reach areas the vacuum cannot. Ensure you hold it upright. Read its instructions carefully.
- Soft, Lint-Free Cloth: A microfiber cloth is perfect. You will use this for wiping the exterior. It helps remove smudges and light dust.
- New Batteries (Optional but Recommended): This is a great time to replace your detector’s batteries. Even if they seem fine, fresh batteries offer peace of mind.
- Pillowcase or Drop Cloth (Optional): You can place this under the detector. It catches any falling dust or debris. This helps keep your floor clean. Consider cleaning your ceiling if it’s very dusty, as dust from above can fall on the detector. Learn how to clean a ceiling for comprehensive high-area cleaning.
Crucial Safety Steps Before You Begin:
- Turn Off Power at the Breaker: This is the most important step. If your smoke detector is hardwired, you must turn off its power circuit. Go to your home’s electrical panel. Find the breaker switch labeled for the smoke detectors. Flip it to the “off” position. This prevents any accidental electrical shock. If you are unsure, turn off the main power to your home. It is always better to be safe than sorry.
- Remove Batteries: Even if the detector is hardwired, it likely has a backup battery. Remove these batteries. Most detectors have a battery compartment door. Open it and take out the old batteries. This completely de-energizes the unit.
- Read Your Detector’s Manual: Every smoke detector model is slightly different. Your manual will have specific cleaning instructions. It might warn against certain methods. It might also show how to properly open the battery compartment. If you cannot find your manual, look up the model number online.
- Work Safely: Ensure your ladder is stable. Have someone spot you if possible. Do not overreach. Move the ladder instead. Take your time with each step. Rushing can lead to mistakes or accidents.
By following these preparations, you create a safe environment for cleaning. You also ensure you have everything needed. This makes the cleaning process smooth and effective. Remember, a few minutes of preparation saves potential problems.
Step-by-Step Guide: How to Safely Clean Your Smoke Detector
Now that you have your tools and have completed the safety steps, you are ready to clean. This process is straightforward. It takes only a few minutes per detector. Let’s walk through it together.
Step 1: Access the Detector
Carefully position your step ladder or sturdy chair directly under the smoke detector. Make sure it is stable. Ascend slowly and steadily. Bring your small vacuum cleaner, compressed air, and soft cloth with you. You want to be comfortable and balanced while working. Do not rush this step.
Step 2: Detach the Detector (If Necessary)
Many smoke detectors twist off their mounting bracket. Some older models might be screwed in. Most modern ones simply rotate counter-clockwise. This allows you to bring the unit down. It makes cleaning easier. If your detector is hardwired, it will remain connected by wires. You cannot remove it completely. Just let it hang gently. If it has only batteries, you can take it to a workbench for cleaning. Always check your specific model’s manual for detachment instructions.
Step 3: Vacuum the Exterior and Vents
Use the small vacuum cleaner with the brush attachment. Gently run the brush around the outside of the detector. Pay close attention to the vents and openings. Dust often accumulates in these areas. The brush will dislodge loose dust. The vacuum will suck it up. This prevents dust from entering the sensing chamber later. Ensure you cover all sides of the detector. This step handles the visible dirt.
Step 4: Clean the Interior Sensing Chamber
This is the most critical part. Your detector’s sensing chamber is where smoke enters. This area needs to be clear.
- Using a Vacuum: Carefully insert the vacuum’s brush attachment into the vents. Move it around gently inside the chamber. Do not force it. The goal is to vacuum out any dust or cobwebs that have settled inside. Be thorough but gentle.
- Using Compressed Air: If you cannot reach inside with the vacuum, or for a more powerful clean, use compressed air. Hold the can upright. Insert the nozzle into the vents. Give short, controlled bursts of air. Direct the air into the sensing chamber. This will blast out dust and debris. Do not spray for too long. Excessive cold can damage electronics. Also, avoid tilting the can too much, as propellant can spray out. I usually aim for a few quick bursts from different angles.
Step 5: Wipe the Outer Casing
Once the interior is clean, use your soft, lint-free cloth. Gently wipe down the outer casing of the smoke detector. This removes any remaining dust or smudges. It also ensures the detector looks clean. Do not use any wet cloths or cleaning sprays here. Just a dry cloth is enough.
Step 6: Replace Batteries (if applicable) and Reattach
If you removed the batteries, insert fresh ones now. Ensure they are correctly oriented (+ and - terminals). If you detached the detector from its base, reattach it now. Twist it clockwise until it locks into place. Make sure it is secure. If it is a hardwired unit that you merely let hang, carefully push it back onto its mounting bracket.
Step 7: Restore Power and Test the Detector
Go back to your electrical panel. Flip the circuit breaker for the smoke detectors back to the “on” position. Once power is restored, press and hold the “Test” button on your smoke detector. It should sound a loud alarm. This confirms it is working properly. If it does not alarm, check the batteries again. If it is still silent, there might be a problem. Consider replacing the unit.
Following these steps ensures a clean and functioning smoke detector. This routine contributes greatly to your home’s safety. My family tests our detectors monthly. Cleaning them annually is a simple addition to this routine.
Crucial Mistakes to Avoid When Cleaning Your Fire Alarms
Cleaning your smoke detector is important. But doing it incorrectly can cause damage. It might even make your detector unsafe. Avoiding common mistakes is as vital as following the correct steps. I’ve seen people make these errors. I always advise against them.
Mistake 1: Using Water or Liquid Cleaners
This is the biggest mistake. Smoke detectors are electronic devices. Water and electronics do not mix. Introducing any liquid can short-circuit the internal components. This will destroy the detector. It can also create an electrical hazard. Never spray water directly onto the unit. Do not wipe it with a wet cloth. Even damp cloths are too risky. Keep all liquids far away from the detector. This includes spray cleaners, even if they are mild. While you might use vinegar to clean walls or mold off walls, these methods are completely unsuitable for electronics.
Mistake 2: Using Harsh Chemicals or Solvents
Do not use cleaning sprays, aerosols, or chemical solvents. Products like window cleaner, furniture polish, or strong detergents can damage the plastic casing. More importantly, their fumes can leave residues inside the sensing chamber. These residues might interfere with the detector’s sensitivity. They could even corrode internal parts. Only use dry methods. A soft, lint-free cloth is sufficient for the exterior. Compressed air or a vacuum are best for the interior.
Mistake 3: Painting Over the Detector
Never paint over a smoke detector. Paint can completely block the sensing vents. It can seal the openings. This prevents smoke from entering the chamber. A painted detector is a blind detector. It cannot detect fire. If you are painting a room, carefully remove the detector first. If you cannot remove it, cover it completely with plastic. Ensure no paint seeps into it. My friend once painted his detector without thinking. He had to replace it immediately.
Mistake 4: Disassembling the Unit Beyond Instructions
Smoke detectors are sealed units for a reason. They contain sensitive electronics. Some models might allow you to remove a cover for battery access. Do not try to take apart the entire unit. Do not remove screws unless the manual specifically tells you to. You could damage the delicate sensors. You could also break the alarm mechanism. If you break the seal, it might also void the warranty. Stick to external cleaning and what the manual allows.
Mistake 5: Not Turning Off Power (Hardwired Units)
Failing to turn off power to a hardwired smoke detector is dangerous. It poses a risk of electrical shock. Always go to your circuit breaker panel first. Locate the correct breaker. Flip it to the “off” position. Double-check that the power is off before touching the unit. Safety is always paramount.
Mistake 6: Ignoring Manufacturer Instructions
Every smoke detector comes with a user manual. This manual contains specific cleaning guidelines. It tells you about your model’s unique features. It also provides important safety warnings. Always read it. If you cannot find the physical manual, look it up online using the model number. Following the manufacturer’s advice ensures optimal performance and safety.
By avoiding these common mistakes, you ensure your smoke detector remains functional. You also protect yourself during the cleaning process. A little care goes a long way.
Maintaining Your Smoke Detector: Beyond Just Cleaning
Cleaning your smoke detector is a vital part of its maintenance. However, effective fire safety goes beyond just dusting. There are other crucial steps. These steps ensure your detectors are always ready. I always remind people of these additional maintenance tasks.
Regular Testing: The Most Important Step
You should test your smoke detectors monthly. This is not optional. It is a fundamental part of home safety. Most detectors have a “Test” button. Press and hold this button for a few seconds. The alarm should sound loudly. If it does not, replace the batteries immediately. Test it again. If it still does not work, the unit needs replacement. Monthly testing confirms the alarm circuit and horn are functional. It gives you peace of mind.
Battery Replacement Schedule
Even hardwired smoke detectors usually have a battery backup. These batteries ensure the alarm works during a power outage. You should replace these batteries at least once a year. A good rule of thumb is to change them when you change your clocks for daylight saving time. That way, you won’t forget. If your detector chirps, it means the battery is low. Replace it right away. Do not delay. A dead battery means a dead detector.
For battery-only smoke detectors, changing batteries annually is even more critical. These units rely solely on battery power. Their effectiveness depends entirely on fresh batteries. Never remove batteries from a chirping detector and leave it without power. This creates a dangerous situation.
Detector Replacement Age
Smoke detectors do not last forever. They have a lifespan. Most manufacturers recommend replacing smoke detectors every 10 years. This applies even if they seem to be working fine. Over time, internal components can degrade. The sensing chamber can become less accurate. The alarm can become less reliable. The “manufacture date” is usually printed on the back of the unit. Make a note of this date. Set a reminder to replace your detectors when they reach their 10-year mark. Carbon monoxide detectors typically have a shorter lifespan, often 5-7 years. Check their specific expiration dates.
Keeping the Area Clear
Ensure nothing blocks your smoke detector. This includes new light fixtures, curtains, or decorations. The area around the detector should be free from obstructions. Air needs to circulate freely around it. This allows smoke to enter the sensing chamber without delay. Proper placement is also critical. Detectors should be on every level of your home. They should be inside and outside sleeping areas. They should also be in basements.
Addressing Other Smoke Sources
Sometimes, persistent false alarms are not due to a dirty detector. They might be from other sources. For example, excessive cooking smoke can trigger alarms. Improving kitchen ventilation helps here. If you have a fireplace, ensure it is properly vented. If your home has had fire damage, or if you smoke indoors, you might have lingering smoke residue. You may need to clean your walls from smoke stains or candle smoke residue. Addressing these sources can help prevent future false alarms.
By combining regular cleaning with these maintenance tasks, you create a robust fire safety system. You ensure your smoke detectors are always ready to protect your home. This commitment to safety protects your most valuable assets.
Troubleshooting False Alarms and When to Seek Help
False alarms can be frustrating. Your smoke detector might suddenly go off without any visible smoke. This can be startling. It often leads people to disable their alarms. However, disabling an alarm is very dangerous. It leaves your home unprotected. Understanding why false alarms happen can help you manage them.
Common Causes of False Alarms
- Dust and Debris: This is the most frequent cause. As we discussed, accumulated dust or tiny insects inside the sensing chamber can mimic smoke. They scatter light (photoelectric) or disrupt the current (ionization). A good cleaning usually resolves this.
- Cooking Fumes: Overcooked food or high-temperature cooking creates smoke or fine particles. These can trigger alarms. Ionization detectors are particularly sensitive to these. Placing detectors too close to the kitchen is a common mistake. Ensure proper ventilation while cooking. Open windows or use an exhaust fan.
- Steam or High Humidity: Steam from a shower or humidifier can also set off an alarm. The moisture particles can be mistaken for smoke. This often happens if a detector is too close to a bathroom.
- Insects: Small spiders or bugs crawling into the sensing chamber can trigger an alarm. They interrupt the sensor’s operation.
- Chemical Fumes: Strong cleaning products or paint fumes can sometimes cause alarms. These chemicals release particles or vapors.
- Low Battery: A chirping sound indicates a low battery. However, some older models might emit random, full alarms when their battery is dying. This is less common but possible.
- Power Surges/Fluctuations: Hardwired detectors can sometimes react to brief power interruptions or surges.
- Age of Detector: Older detectors, especially those past their 10-year lifespan, can become overly sensitive or unreliable. They may start alarming for no apparent reason.
What to Do When a False Alarm Occurs
When an alarm sounds without a fire, do not panic.
- Silence the Alarm: Most detectors have a silence button. Press it to temporarily stop the sound.
- Investigate: Look for any obvious sources of smoke or fumes. Check the kitchen, bathroom, or any area with potential sources.
- Ventilate: Open windows and doors to air out the area. Use fans to clear the air.
- Clean the Detector: If false alarms are frequent, clean the detector thoroughly as described in this guide. This is often the solution.
When to Seek Professional Help or Replace
If false alarms persist after thorough cleaning and addressing common causes, you might need further action.
- Repeated False Alarms: If a detector consistently triggers without reason, even after cleaning, it might be faulty.
- Detector Age: If your smoke detector is approaching or past its 10-year replacement date, replace it. Faulty old units often cause false alarms. This is the most reliable solution.
- Electrical Issues: If only hardwired detectors are faulting and you suspect electrical problems, contact a qualified electrician.
- No Test Button Response: If the detector does not sound when you press the test button, even with new batteries, it is broken. Replace it immediately.
Never ignore or permanently disable a smoke detector. A malfunctioning detector provides no protection. Replace it promptly. Your family’s safety depends on it. If you suspect that lingering smoke from previous incidents, like a small kitchen flare-up, is contributing to your false alarms, consider deep cleaning your walls. Methods for cleaning yellow walls from smoke or smoke off walls can help eliminate residual odors and particles that might still be present in the environment.
FAQ Section
How often should I clean my smoke detector?
You should clean your smoke detectors at least once a year. More frequent cleaning is helpful if your home is particularly dusty, if you have pets, or if you live in an older home. Regular annual cleaning aligns well with battery replacement schedules, often when you change your clocks for daylight saving time.
Can I use water or cleaning sprays on my smoke detector?
No, never use water or liquid cleaning sprays on your smoke detector. They are electronic devices, and moisture can cause damage, short circuits, or even create an electrical hazard. Only use dry cleaning methods, such as a vacuum cleaner with a brush attachment or compressed air.
Why does my smoke detector keep going off for no reason?
Frequent false alarms are often caused by dust, cobwebs, or tiny insects inside the sensing chamber. Other culprits include cooking fumes, steam from showers, or high humidity. A thorough cleaning of the unit usually resolves these issues. If it persists, the detector might be faulty or too old.
What’s the difference between ionization and photoelectric smoke detectors for cleaning?
Both ionization and photoelectric smoke detectors need cleaning. Ionization detectors are sensitive to invisible combustion particles and can be affected by dust disrupting their current. Photoelectric detectors use light and are sensitive to dust and cobwebs blocking their light path. The cleaning method is the same for both types: gentle vacuuming or compressed air.
When should I replace my smoke detector instead of just cleaning it?
You should replace your smoke detector every 10 years, regardless of whether it seems to be working. The manufacture date is usually on the back of the unit. Additionally, replace it if it constantly malfunctions after cleaning, fails the test button check with new batteries, or shows visible damage.
Do carbon monoxide detectors need cleaning too?
While carbon monoxide (CO) detectors have different sensing technology than smoke detectors, it’s still a good idea to gently dust their exterior. This prevents dust buildup in vents and keeps the unit looking clean. However, the CO sensor itself typically doesn’t require internal cleaning like a smoke sensor. Always check your specific CO detector’s manual for precise maintenance advice and its replacement lifespan, which is often shorter than smoke detectors.
- smoke detector cleaning
- fire safety
- home maintenance
- dust removal
- carbon monoxide detector