· Snowblower Maintenance · 16 min read
How To Clean Snowblower Carburetor
Clean Your Snowblower Carburetor for Peak Performance
Winter brings snow, and a reliable snowblower makes clearing it simple. Imagine going out to tackle a fresh snowfall, only to find your machine sputters, struggles, or refuses to start. Often, the culprit is a dirty or clogged carburetor. This small part is vital to your snowblower’s engine health. A clean carburetor ensures your snowblower runs smoothly and efficiently, making your snow removal tasks easy.
A snowblower carburetor mixes air and fuel in the correct ratio for combustion. Over time, fuel deposits, especially from old or ethanol-rich gasoline, can block its tiny passages. This article provides a comprehensive guide on how to clean a snowblower carburetor effectively. I will walk you through the entire process, from understanding how the carburetor works to performing thorough cleaning and reassembly. You will learn the necessary safety precautions, the tools you need, and expert tips to prevent future issues. Get ready to give your snowblower the care it needs to perform its best all winter long.
Takeaway
- Identify symptoms of a clogged snowblower carburetor before starting.
- Always prioritize safety by disconnecting the spark plug and draining fuel.
- Gather all necessary tools and protective gear before disassembly.
- Systematically disassemble the carburetor, taking pictures to aid reassembly.
- Clean all components, especially jets and passages, with specialized cleaner and compressed air.
- Inspect and replace old gaskets or O-rings for a proper seal.
- Reassemble the carburetor carefully, ensuring all connections are secure.
- Test the snowblower after cleaning and adjust if needed.
- Use fresh, stabilized fuel to prevent future clogs.
A clean snowblower carburetor ensures smooth engine operation and easy starting by properly mixing fuel and air. Cleaning involves disassembling the carburetor, removing clogs from jets and passages with carburetor cleaner and compressed air, then reassembling it carefully.
Understanding Your Snowblower Carburetor’s Role
Your snowblower’s engine relies on a precise mix of air and fuel to create power. The carburetor is the component responsible for this vital task. It acts like the heart of the fuel system, drawing fuel from the tank and mixing it with air before sending it to the engine’s combustion chamber. This mixture must be perfect for the engine to run efficiently.
Over time, this precise system can develop problems. The most common issue is clogging. Gasoline, especially if left in the tank for extended periods, can break down. This breakdown leaves behind sticky varnish and gummy deposits. These deposits build up inside the tiny passages and jets within the carburetor, restricting fuel flow. Ethanol in modern gasoline makes this problem worse, as it attracts moisture and can corrode metal parts inside the carburetor. When these passages become blocked, the carburetor cannot deliver the correct fuel-air mixture. This causes your snowblower to run poorly, or not at all.
Recognizing the signs of a dirty or clogged snowblower carburetor is the first step toward fixing the problem. You might notice your snowblower refusing to start. It may also start but quickly die, or run rough and sputter. Other symptoms include reduced power, uneven engine speed, or excessive smoke. If you experience these issues, a thorough carburetor cleaning is likely needed. This essential maintenance ensures your small engine runs reliably. Understanding how a carburetor works helps you diagnose and fix common problems. If you want more general details on small engine carburetor cleaning, you can read about how to clean small engine carburetor.
Safety First: Preparing for Carburetor Cleaning
Working on any engine requires strict adherence to safety guidelines. Your snowblower is no exception. Before you even think about touching the carburetor, make sure the machine is completely safe to work on. Ignoring these steps can lead to injury or damage. I always prioritize safety when I am working on my own equipment.
First, disconnect the spark plug wire. This prevents the engine from accidentally starting while you work. Just pull the rubber boot off the spark plug to break the electrical connection. Next, drain all fuel from the gas tank. Old fuel can be a fire hazard, and it often contains the very deposits you are trying to remove. Use a siphon pump or tilt the machine to drain the fuel into an approved container. Proper disposal of old fuel is also important. Never pour it down a drain.
Work in a well-ventilated area. Carburetor cleaner products produce strong fumes. An open garage door or outdoor space is ideal. Wear personal protective equipment (PPE). Safety glasses protect your eyes from splashes and debris. Chemical-resistant gloves protect your skin from harsh cleaners. Having the right tools makes the job easier and safer. You will need a good quality carburetor cleaner, a set of wrenches and screwdrivers, a small wire brush or carburetor cleaning tool kit, and compressed air. A tray or old rag helps catch any drips and keeps small parts from getting lost. Your snowblower’s owner’s manual also contains valuable diagrams and specific instructions for your model. For more detailed tips on cleaning a snowblower’s carburetor specifically, you might find additional insights on how to clean carburetor on snowblower.
Step-by-Step Guide: Removing the Snowblower Carburetor
Taking the carburetor off your snowblower might seem intimidating at first. However, if you follow a systematic approach, it becomes a manageable task. I find that taking pictures at each stage helps immensely with reassembly. This is a critical step because many small parts and linkages are involved.
Start by locating the carburetor on your snowblower’s engine. It is usually bolted to the side of the engine block, often behind the air filter housing. Most snowblowers have a single-barrel carburetor, making it easier to work with. Your first step is to remove the air filter and its housing. This usually involves undoing a few screws or clips. Set these parts aside in a clean area.
Next, you need to disconnect the fuel line. This is the rubber hose running from the fuel tank to the carburetor. Use pliers to slide back the clamp, then gently pull the hose off the carburetor’s inlet barb. Be prepared for a small amount of fuel to spill, even if you drained the tank. Have a rag ready. Then, carefully note and disconnect all linkages and springs connected to the carburetor. These control the throttle and choke. They are usually small rods or wires that hook into various points. Take a picture or draw a diagram if you are unsure. This visual reference will be invaluable when putting everything back together. Finally, locate the two or three bolts that secure the carburetor to the engine. These bolts often pass through an insulator block or spacer. Carefully loosen and remove these bolts. Once the bolts are out, you can gently pull the carburetor away from the engine. Make sure no small parts fall off as you remove it.
Thoroughly Cleaning Snowblower Carburetor Components
With the carburetor removed from the snowblower, you are ready for the core cleaning process. This involves careful disassembly and cleaning of its internal parts. Each component plays a specific role, and any obstruction can affect performance. Take your time with this step; precision is key to a functional carburetor.
Begin by placing the carburetor on a clean work surface, preferably over a tray or old cloth to catch any stray parts or cleaner. The first part to remove is typically the fuel bowl, located at the bottom of the carburetor. It is usually held by a single bolt or a few screws. Carefully remove the bolt, and the bowl will come off, often along with a gasket. Inside the bowl, you will see the float, which looks like a small plastic or brass pontoon. The float is usually held by a small pin. Remove this pin to free the float and its attached needle valve. The needle valve seals the fuel inlet, regulating fuel flow into the bowl. Inspect the tip of the needle for wear.
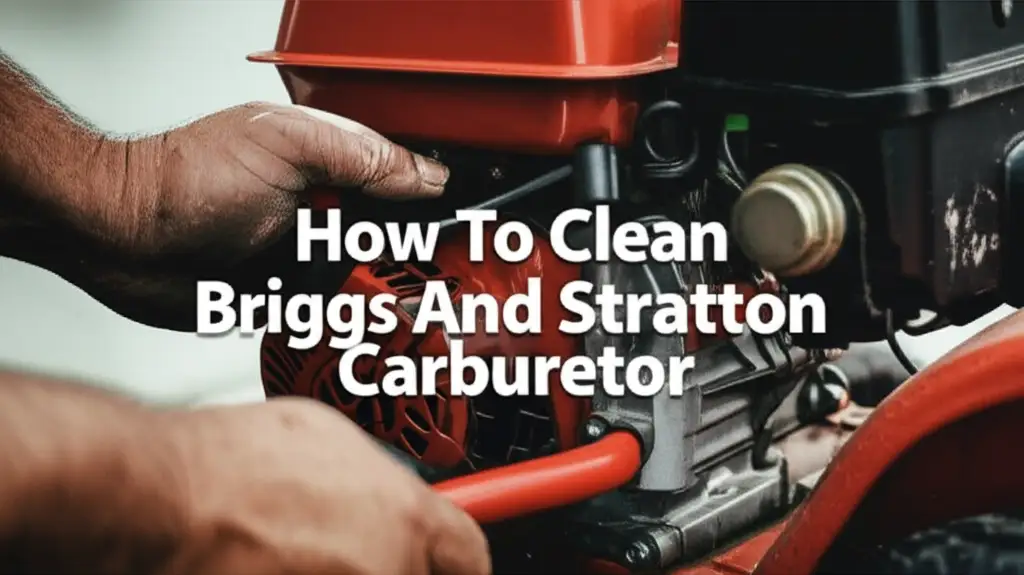
Once these parts are off, you can access the crucial jets. These are tiny brass screws or inserts with very small holes. The main jet is often located in the center post, and the pilot jet (or idle jet) is usually on the side. These tiny holes are easily clogged by fuel varnish. Spray all carburetor components thoroughly with a specialized carburetor cleaner. This cleaner dissolves varnish and carbon deposits. For the jets and tiny passages, use the thin wire tools found in a carburetor cleaning kit, or a strand from a wire brush, to gently poke through any obstructions. Do not force anything. Follow up by blowing compressed air through all passages and jets. This ensures all loosened debris is cleared. You can also get more specific guidance on how to clean jets on carburetor. Ensure the fuel bowl is completely clean, as debris here can quickly clog jets again. While you are at it, many snowblowers use Briggs & Stratton engines. If yours does, you can find specific information on cleaning these carburetors at how to clean Briggs and Stratton carburetor. Inspect all gaskets and O-rings for cracks or damage. These seals are essential for proper carburetor operation. Replace any that look worn.
Reassembling and Reinstalling Your Cleaned Carburetor
After all components are sparkling clean and dry, it is time to put your snowblower carburetor back together. This step requires patience and attention to detail. Any misplacement or forgotten part can prevent the snowblower from running correctly. I always refer to the pictures I took during disassembly to ensure everything goes back precisely where it belongs.
Start by installing any new gaskets or O-rings you decided to replace. These fresh seals ensure an airtight and leak-free connection, which is vital for proper fuel-air mixture. Begin reassembly with the smallest internal parts first. Carefully insert the needle valve back into its seat, then slide the float and its retaining pin into place. Ensure the float moves freely up and down without sticking. Next, screw the main jet and pilot jet back into their respective positions. Make sure these are snug but do not overtighten them, as they are often made of soft brass and can strip easily.
Once the internal components are secure, attach the fuel bowl to the bottom of the carburetor. Place a new gasket, if applicable, and secure the bowl bolt or screws. Confirm the bowl is seated correctly and tighten the fasteners evenly. With the carburetor fully reassembled, you are ready to reinstall it on the snowblower engine. Carefully align the carburetor with the intake manifold studs on the engine. Make sure the gasket between the carburetor and the engine is properly positioned. Then, thread the mounting bolts back into place and tighten them evenly. Do not overtighten, as this can warp the carburetor body. Reconnect all the throttle and choke linkages and springs that you disconnected earlier. This is where your photos become very useful. Ensure they move freely and do not bind. Finally, reattach the fuel line to the carburetor’s inlet barb and secure it with its clamp. Reinstall the air filter and its housing, making sure it seals properly. This careful reassembly ensures your snowblower carburetor is ready for prime performance. The principles here are similar across various small engines, so if you’ve ever reassembled one, such as a push mower carburetor, the process feels familiar, like with how to clean carburetor on push mower.
Priming and Testing Your Snowblower After Cleaning
You have done the hard work of cleaning and reassembling the carburetor. Now comes the exciting part: seeing your snowblower run like new. Proper priming and a thorough test ensure your efforts paid off. I always feel a sense of satisfaction when the engine fires up cleanly after maintenance.
First, refill your snowblower’s fuel tank with fresh, stabilized gasoline. Using fresh fuel is important because it prevents immediate re-clogging. Make sure the fuel valve, if present, is in the “open” position. Before attempting to start the engine, prime it. This usually involves pressing a primer bulb a few times until you see fuel entering the bulb or the fuel line fills up. This action draws fuel into the carburetor, preparing it for the initial start. Some snowblowers might have a choke lever; set it to the “choke” position for starting.
With the fuel system primed, reconnect the spark plug wire you disconnected earlier. Pull the starter cord or engage the electric start. The engine should now start more easily and run more smoothly than before the cleaning. Let the snowblower run for a few minutes to warm up. Listen for consistent engine speed and a lack of sputtering. If the engine idles too high, too low, or rough, you may need to adjust the idle speed screw on the carburetor. This screw usually has a spring around it and can be turned with a screwdriver to fine-tune the idle. Some carburetors also have a mixture screw, which controls the fuel-air ratio. However, these are often factory-set and should only be adjusted if absolutely necessary, following your manual’s guidelines. As the engine runs, carefully check for any fuel leaks around the carburetor connections. A small leak can be a fire hazard and indicates a poorly seated gasket or loose connection. If you find leaks, shut off the engine and tighten the connections or recheck the gaskets. Successful cleaning means a snowblower that starts on the first pull and runs strong, ready for the next snowfall. The principles of priming and testing are universal for small engines. For example, testing a snowblower is much like testing other small power equipment after carburetor work, such as after cleaning a carburetor on a weedeater. If you have done work on other small engines like this, you will find the testing procedure familiar to how to clean carburetor on weedeater.
Preventing Future Snowblower Carburetor Issues
Cleaning your snowblower carburetor is a rewarding task. However, preventing future clogs is even better. Regular preventive maintenance can save you time and frustration down the line. I have found that a few simple habits make a big difference in keeping my snowblower ready for winter.
The most important prevention tip is to use fresh, stabilized fuel. Gasoline begins to degrade quickly, sometimes in as little as 30 days. This degradation is what causes the sticky varnish and gum that clog carburetors. Always use fresh gasoline, preferably one labeled “ethanol-free” for small engines if available. If ethanol-free gas is not an option, use a high-quality fuel stabilizer every time you fill the tank. Add the stabilizer according to the product’s instructions. It helps prevent fuel breakdown and keeps your fuel system clean.
Proper storage is also key. When the snow season ends, do not leave fuel in the tank over the summer. Run the snowblower until it runs out of gas, or drain the fuel tank completely. Then, start the engine again and let it run until it stops. This ensures all fuel is out of the carburetor bowl and lines. This prevents fuel from sitting and forming deposits during long periods of inactivity. An even better practice is to drain the fuel and then add a small amount of fresh, stabilized fuel before running it dry. This leaves a protective coating inside the carburetor. Periodically running your snowblower for a few minutes, even during the off-season, can also help circulate fuel and prevent stagnation. Finally, check and replace your snowblower’s fuel filter regularly, especially if your model has one. A clean fuel filter prevents debris from reaching the carburetor in the first place. By following these simple steps, you significantly reduce the chances of needing another carburetor cleaning.
FAQ Section
Q1: How often should I clean my snowblower carburetor? You should clean your snowblower carburetor when you notice signs of clogging, such as difficulty starting, rough running, or loss of power. For preventative maintenance, a thorough cleaning every 2-3 years, or at the end of each season if you do not drain the fuel, is a good practice. Regular use of fuel stabilizer can extend intervals between cleanings.
Q2: Can I clean a snowblower carburetor without removing it? Yes, you can attempt a “without removal” cleaning. This typically involves adding carburetor cleaner to the fuel tank or spraying it directly into the air intake while the engine is running. While this can clear minor clogs, it is often less effective for severe blockages. A full disassembly provides the best clean. For more insights on cleaning a carburetor without removal, see our guide on how to clean lawn mower carburetor without removing.
Q3: What carburetor cleaner is best for snowblowers? Aerosol carburetor cleaner is effective for dissolving varnish and gum deposits. Look for products specifically designed for small engines. Brands like Gumout, Berryman B-12 Chemtool, or Sea Foam are popular and effective. Always use these products in a well-ventilated area and wear appropriate safety gear.
Q4: What are the signs of a completely clogged snowblower carburetor? A completely clogged snowblower carburetor will prevent the engine from starting at all. You might get a momentary sputter, but it will not run. Even with a full tank of fresh fuel and proper priming, the engine will crank but not fire up. This indicates a complete blockage of the fuel passages.
Q5: Why is my snowblower still not running right after cleaning the carburetor? If your snowblower still has issues after cleaning, check for common problems. You might have missed a small passage or jet during cleaning. Ensure all gaskets and O-rings are correctly seated and not damaged, as air leaks can cause issues. Also, check the spark plug, air filter, and fuel filter, as these can also affect engine performance.
Q6: Can stale gas damage a snowblower carburetor? Yes, stale gas is a primary cause of carburetor damage and clogging. As gasoline ages, it oxidizes and breaks down, leaving sticky varnish and gum deposits. Ethanol in modern fuels also attracts water, which can corrode internal carburetor components. Always use fresh, stabilized fuel to prevent these issues.
Conclusion
Keeping your snowblower’s carburetor clean is crucial for reliable performance, especially during the cold winter months. We have covered the entire process, from understanding how this vital component works to safely removing, thoroughly cleaning, and carefully reassembling it. I hope this detailed guide helps you tackle this important maintenance task with confidence. Remember, a clean carburetor means easier starts, smoother operation, and a longer life for your snowblower.
By investing a little time in preventative measures, such as using fresh, stabilized fuel and proper off-season storage, you can significantly reduce the likelihood of future carburetor issues. Regular maintenance is not just about fixing problems; it is about ensuring your equipment is ready when you need it most. Do not let a clogged carburetor ruin your day. Take action now to clean snowblower carburetor components and ensure your machine is always prepared for the next snowfall. Your efforts will be rewarded with a snowblower that performs consistently and efficiently, making snow removal a breeze.
- snowblower maintenance
- carburetor cleaning
- small engine repair
- winter equipment care
- fuel system