· Home Maintenance · 13 min read
How To Clean Sprinkler Valve
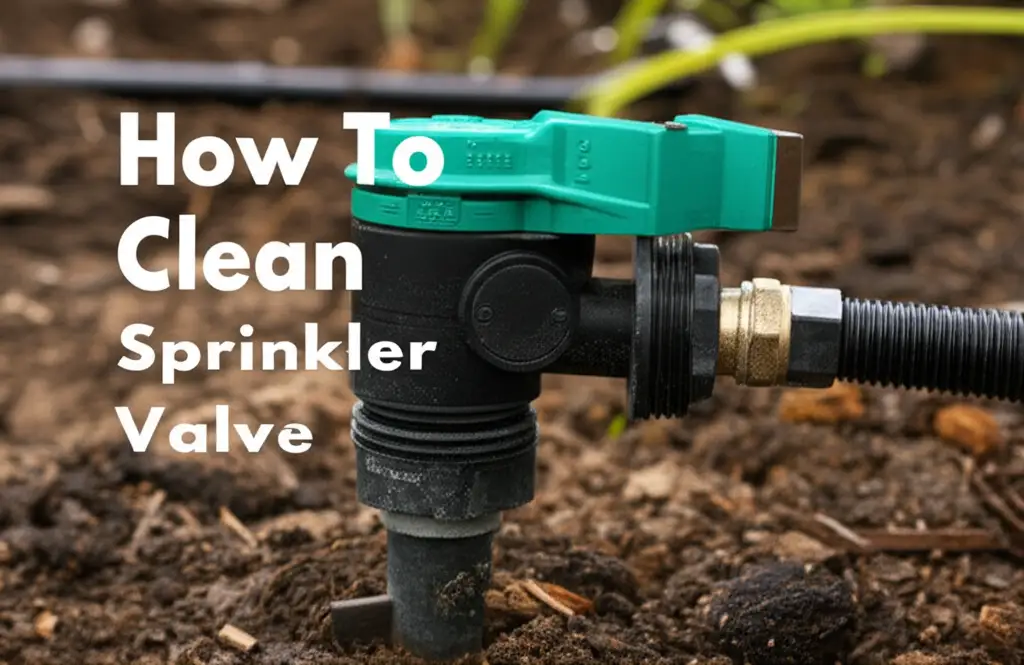
How to Clean Your Sprinkler Valve for Optimal Performance
Do you notice dry patches in your lawn? Maybe some sprinkler heads seem weak, or water runs constantly when it should not. These are common signs of a dirty or faulty sprinkler valve. Cleaning your sprinkler valve helps your irrigation system work its best. It also saves you money on water bills and repairs.
Your sprinkler system needs proper care to keep your landscape healthy. Valves control water flow to specific zones. When dirt or debris clogs these valves, your system cannot work correctly. This guide shows you how to clean sprinkler valve components. We will cover identifying problems, gathering tools, and step-by-step cleaning. You will learn how to maintain your system effectively.
Takeaway
- Restore water flow: Cleaning removes clogs that block water delivery to sprinkler heads.
- Prevent system failures: Regular maintenance stops minor issues from becoming major, costly repairs.
- Improve lawn health: Even water distribution promotes a lush, green lawn.
- Save money: Efficient valves reduce water waste and prevent unexpected repair expenses.
- Extend lifespan: Proper cleaning helps your sprinkler system last longer.
Cleaning a sprinkler valve involves shutting off water, carefully disassembling the valve, removing debris from internal parts like the diaphragm and solenoid, rinsing components, and reassembling it. This process restores proper water flow and valve operation.
Why Sprinkler Valve Cleaning Matters for Your Yard
Your sprinkler system is a vital part of your lawn care. It keeps your plants watered and healthy. Sprinkler valves act as gates for water. They open and close to send water to different parts of your yard. Over time, these valves can collect dirt. Sediment, sand, or other small particles can build up inside. This buildup stops the valve from working properly.
A dirty sprinkler valve causes many problems. Water flow becomes uneven. Some areas get too much water, while others get too little. This leads to dry spots or waterlogged areas in your lawn. Your plants may suffer if they do not receive proper hydration. A clogged valve can also cause constant leaks. This wastes a lot of water. You might see higher water bills as a result.
Cleaning your sprinkler valve is a simple maintenance task. It ensures your system delivers water efficiently. Regular cleaning prevents larger issues from developing. It helps your entire irrigation system last longer. This saves you money on replacements and repairs. A well-maintained system keeps your landscape looking its best. It gives you peace of mind knowing your lawn is getting the care it needs.
Identifying Common Sprinkler Valve Problems and Signs of Clogs
Before you clean your sprinkler valve, you need to know if it is truly the problem. Many issues can affect a sprinkler system. A bad valve often shows specific signs. Knowing these signs helps you diagnose the issue correctly. This prevents you from doing unnecessary work.
One common sign is uneven watering. You might see some sprinkler heads spraying weakly. Other heads might not spray at all. This suggests a blockage inside the valve for that zone. Another clear sign is water running constantly. If a zone stays on even when the system is off, the valve is stuck open. Debris often holds the diaphragm open. You might also hear a humming sound from the valve. This sound can mean the solenoid tries to open or close but cannot.
Low water pressure across an entire zone points to a valve issue. The valve might not open fully. You might also notice standing water around a valve box. This indicates a leak from the valve itself. Inspecting your system regularly helps you catch these problems early. Pay attention to how each zone performs. Compare the water spray from one zone to another. This helps you confirm if a specific valve needs cleaning.
Gathering Essential Tools and Safety Precautions for Valve Cleaning
Before you start any work on your sprinkler system, prepare properly. Having the right tools makes the job easier. It also helps you stay safe. Most of these tools are common household items. You might already own them. Gathering everything beforehand saves time. It prevents interruptions during the cleaning process.
You will need a few basic tools. A screwdriver (flat-head and Phillips) is essential for opening the valve. A wire brush helps scrub away stubborn dirt. A small bucket or container is good for holding parts. You will also need towels or rags to clean components. Some general cleaning solution or white vinegar can help dissolve mineral deposits. Water is also necessary for rinsing.
Safety comes first when working with water and electricity. Always turn off the main water supply to your irrigation system. Find the shut-off valve, usually near your main water meter or backflow preventer. This stops water from spraying everywhere when you open the valve. Wear safety glasses to protect your eyes from debris or water splashes. Gloves can protect your hands from dirt and cleaning solutions. Also, make sure the power to the controller is off. This prevents accidental activation of the system. Taking these steps ensures a safe and smooth cleaning experience.
Step-by-Step Guide to Disassembling and Inspecting Your Sprinkler Valve
Once you have gathered your tools and taken safety steps, you can start the cleaning process. Disassembling the valve allows you to access its internal parts. Each part plays a role in the valve’s function. Understanding them helps you clean effectively. This is where the actual work of how to clean sprinkler valve components begins.
First, locate the problematic sprinkler valve. Dig around it carefully if it is buried. You need enough space to work. Use your hands or a small shovel to clear away soil. Once the valve box is visible, remove the lid. Next, make sure the water supply to the system is fully off. Turn off the main shut-off valve for the irrigation system.
Now, you can start taking the valve apart. Most sprinkler valves have a few screws on top. Use your screwdriver to remove these screws. Keep them in a safe place, like your bucket. Gently lift the top cap or bonnet off the valve body. Be careful not to lose any small parts. Under the cap, you will see the diaphragm. This is a flexible rubber disc. It controls water flow. A spring often sits above or below the diaphragm. Carefully lift out the diaphragm and spring. Inspect these parts for dirt or damage. The solenoid is another key part. It is usually a small, cylindrical component with wires. You can unscrew it by hand. This part creates the magnetic force that moves the diaphragm. Remove the solenoid and check its small filter screen. This step is similar in principle to cleaning other water flow components. For example, knowing how to clean a water inlet valve on a washing machine involves similar careful disassembly and inspection of flow regulators.
As you remove each part, inspect it. Look for any grit, sand, mineral deposits, or plant matter. These are the common culprits for clogs. The inside of the valve body also needs inspection. Feel inside for rough spots or stuck debris. Note the condition of the O-rings or gaskets. These ensure a tight seal. Damaged O-rings can cause leaks. Learning how to clean a toilet fill valve also requires similar attention to these small sealing components. Remember to keep parts organized. This makes reassembly much easier.
Thoroughly Cleaning Sprinkler Valve Components
Now that you have disassembled your sprinkler valve, it is time to clean each part. This is the core of how to clean sprinkler valve debris. Cleaning each component properly ensures the valve works like new. Do not rush this step. Thoroughness here prevents future problems.
Start with the valve body. This is the largest part. Use your wire brush to scrub away any loose dirt or sediment inside. You can also rinse it with water. For stubborn mineral deposits, mix a solution of white vinegar and water. Use a brush dipped in this solution to scrub the inside of the valve body. Make sure to get into all crevices. Rinse the body thoroughly with clean water afterward. You want no residue left.
Next, clean the diaphragm. This rubber piece is crucial. Gently wipe it with a rag to remove any grit. Check for tears or holes. If the diaphragm is damaged, you will need to replace it. A damaged diaphragm cannot seal correctly, leading to leaks or constant water flow. You can use mild soap and water to clean it. Rinse it completely. The spring also needs a quick wipe down. Make sure it is not bent or corroded. If it looks weak, replace it.
Finally, clean the solenoid and its screen. The solenoid often has a small filter screen at its base. This screen catches particles before they enter the solenoid. Remove any debris from this screen. A small brush or even a toothpick can help. You can also rinse the solenoid with water. Make sure the plunger inside the solenoid moves freely. If it sticks, gently clean it with a little lubricant or a drop of silicone spray. Ensure all parts are free of dirt. They must be dry before reassembly. This attention to detail improves valve performance significantly.
Reassembling and Testing Your Cleaned Sprinkler Valve
After cleaning all parts, it is time to put your sprinkler valve back together. Reassembly must be precise. Incorrect assembly can cause leaks or prevent the valve from working. Follow the steps carefully. This part of the process is just as important as the cleaning itself.
Start by placing the spring back into its position in the valve body. Next, carefully place the diaphragm. Ensure it seats correctly. The diaphragm usually has a small notch or tab. This aligns with a corresponding spot on the valve body. Make sure it lies flat and smooth. Any crimps or improper seating will cause issues. The valve will leak or not close fully.
Now, place the top cap or bonnet back onto the valve body. Align the screw holes. Insert the screws and tighten them. Do not overtighten. This can crack the plastic valve body. Hand-tighten them first. Then, use your screwdriver for a final snug turn. Next, screw the solenoid back into its port on the valve cap. Hand-tighten this as well. Make sure the wires are not twisted.
Once the valve is reassembled, you can test it. Slowly turn the main water supply back on to your irrigation system. Listen for any leaks. Check for drips around the valve body and connections. If you hear a hiss or see water, turn off the water supply immediately. Recheck the diaphragm seating and screw tightness. Once you confirm no leaks, go to your sprinkler controller. Manually activate the zone connected to the cleaned valve. Watch the sprinkler heads. They should now operate with proper water pressure and even distribution. This testing ensures your hard work paid off.
Preventing Future Sprinkler Valve Clogs and Ensuring Longevity
Cleaning your sprinkler valve is effective. However, preventing future clogs is even better. Regular maintenance stops problems before they start. This keeps your system running smoothly year after year. It also extends the lifespan of your entire irrigation system.
One key prevention step is installing a filter. A main line filter at the start of your irrigation system catches sediment and debris. This stops these particles from ever reaching your valves. Filters come in different types and sizes. Choose one suitable for your system and water source. Regularly clean or replace this filter. Knowing how to clean a water filter for your main line ensures it works effectively.
Another good practice is regular system flushing. Periodically, manually open your sprinkler valves. Let the water run for a few minutes. This flushes out any minor debris that might have entered the lines. You can also do a system check each season. Look for any signs of wear or potential issues. Fix small problems quickly.
Proper winterization is also vital in colder climates. Draining your system prevents water from freezing inside pipes and valves. Frozen water can expand. This causes cracks and damage. If you live in an area with hard water, consider using a water softener. Hard water contains minerals that build up as scale inside valves. A softener reduces this mineral content. Finally, consider professional inspections. An expert can spot issues you might miss. They can offer advice on optimal system health. By following these steps, you minimize the need for frequent valve cleaning.
FAQ Section
How often should I clean my sprinkler valves?
You should clean your sprinkler valves as needed. If you notice signs of clogs or poor performance, then clean them. A good general practice is to inspect and clean them every 1-2 years. This frequency may increase if your water source has high sediment content.
What causes sprinkler valves to get clogged?
Sprinkler valves get clogged by debris in the water. This debris includes sand, silt, mineral deposits from hard water, and small pieces of organic matter. Old pipes can also shed rust or scale. These particles enter the valve and obstruct its internal parts.
Can I use household chemicals to clean the valve components?
It is best to use mild solutions. White vinegar works well for mineral deposits. Mild dish soap mixed with water can remove dirt. Avoid harsh chemicals. They can damage rubber diaphragms or plastic valve bodies. Always rinse components thoroughly with clean water.
When should I replace a sprinkler valve instead of cleaning it?
Replace a sprinkler valve if parts are broken or heavily corroded. If the diaphragm has tears, or the spring is bent, replacement is usually best. If cleaning does not fix the problem, the valve may have internal damage beyond repair.
How do I know if my valve’s solenoid is bad?
A bad solenoid often causes the valve to not open or close at all. You can test it by unscrewing it while the system is on. If you hear a click, it may be working. If you do not hear a click, or the plunger does not move, the solenoid is likely faulty.
Is it hard to clean a sprinkler valve myself?
No, cleaning a sprinkler valve is a straightforward DIY task. It requires basic tools and following clear steps. The most important steps are turning off the water supply and carefully reassembling parts. Patience makes the job easy.
Conclusion
Cleaning your sprinkler valve is a simple yet crucial maintenance task. It helps your irrigation system perform at its best. You can prevent common issues like uneven watering and leaks. Following the steps in this guide allows you to restore full functionality to your system. This saves you money on water and repairs. It also ensures your lawn stays lush and healthy.
Remember to prioritize safety by turning off the water and power. Carefully disassemble, clean, and reassemble each part. Regular cleaning and preventative measures extend the life of your entire system. Do not let a dirty sprinkler valve ruin your landscape efforts. Take action today. Keep your irrigation system in top shape for a vibrant, thriving yard.
- sprinkler maintenance
- irrigation system
- valve cleaning
- lawn care
- water efficiency