· Home Maintenance · 16 min read
How To Clean Tineco Roller
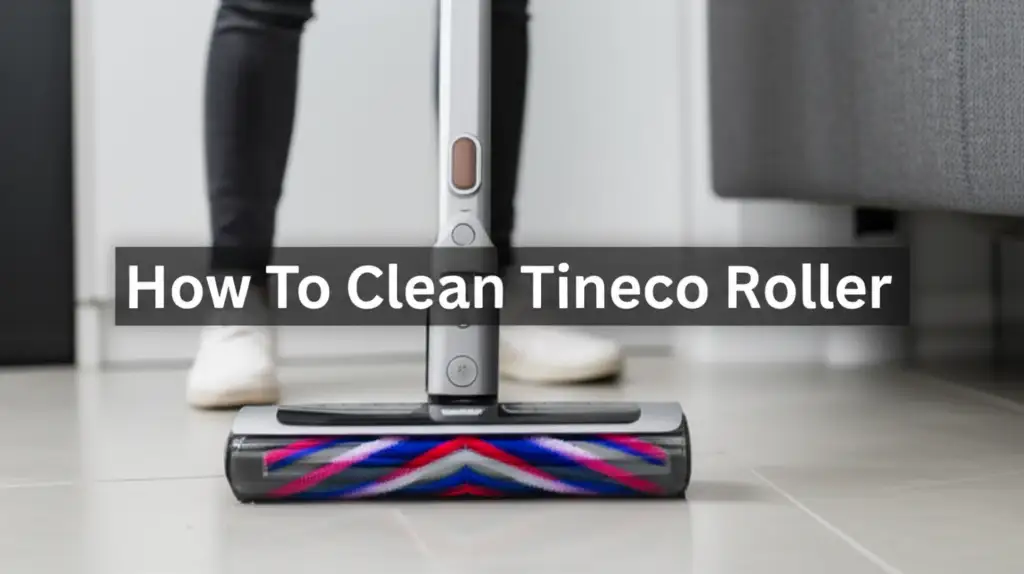
How To Clean Your Tineco Roller for Optimal Performance
Do you notice your Tineco floor cleaner leaves streaks, or its cleaning power feels reduced? The roller brush is often the culprit. Over time, hair, dirt, and grime build up on this essential component, hindering its effectiveness. Knowing how to clean Tineco roller brushes properly is crucial for maintaining your device’s efficiency and extending its lifespan.
I understand the frustration of a less-than-perfect cleaning experience. A dirty roller brush not only performs poorly but can also cause unpleasant odors and spread dirt instead of removing it. This guide provides a comprehensive approach to cleaning your Tineco roller, ensuring it remains in top condition. We will cover everything from daily maintenance to deep cleaning techniques. You will learn the exact steps to disassemble, clean, dry, and reassemble the roller, restoring your Tineco’s cleaning power.
Takeaway
- Regularly clean your Tineco roller after each use.
- Deep clean the roller monthly or as needed.
- Always ensure the roller is completely dry before reassembling.
- Replace worn rollers to maintain cleaning efficiency.
Cleaning your Tineco roller involves removing it from the device, rinsing off loose debris under water, and then allowing it to air dry completely. For deep cleaning, use mild soap or a specialized cleaner to scrub away stubborn dirt and hair tangled in the bristles, ensuring all parts are thoroughly dried before reinstallation.
Understanding Your Tineco Roller: Why Cleaning is Key
Your Tineco vacuum’s roller brush is the part that directly touches your floors. It scrubs and absorbs dirt and liquid. Because it handles so much mess, it gets dirty quickly. Hair, pet fur, food particles, and dust wrap around the roller. This buildup makes the roller less effective. A dirty roller cannot pick up debris well. It can also leave streaks on your floors.
I learned that neglecting the roller can even damage the vacuum. The motor works harder when the roller is clogged. This leads to overheating or reduced battery life. Regular cleaning prevents these problems. It keeps your Tineco working like new. Proper roller care is a simple way to protect your investment. It also ensures clean floors every time you use your device.
The Importance of Regular Roller Maintenance
Regular maintenance of your Tineco roller is not just about keeping things tidy. It directly impacts your cleaner’s performance. A clean roller means efficient dirt removal. It prevents dirty water from spreading back onto your floors. This is especially important for hard floors where streaks are visible.
Think of the roller as the heart of your Tineco’s cleaning system. If the heart is struggling, the whole system suffers. I always make sure to check the roller after each use. This quick check saves time and effort in the long run. It also stops small problems from becoming big ones.
Preparing to Clean Your Tineco Roller: Essential Steps
Before you start cleaning, prepare your workspace. This makes the cleaning process smooth and efficient. First, always turn off your Tineco vacuum. Unplug it from the charger too. This step is critical for safety. It prevents accidental activation during the cleaning process.
Next, find a suitable area for cleaning. A sink or a large basin works well. You will need water and some basic cleaning tools. Gather everything before you begin. This avoids interruptions once you start. I find having everything ready saves a lot of time.
Tools and Supplies You Will Need
You do not need many special tools to clean your Tineco roller. Most items are common household supplies. I recommend having a small pair of scissors or a hair removal tool. These help cut away tangled hair. A soft brush or an old toothbrush is also useful for scrubbing.
Here is a simple list:
- Scissors or Hair Removal Tool: For cutting tangled hair and fibers.
- Small Brush/Old Toothbrush: For scrubbing stubborn dirt.
- Mild Dish Soap or Tineco Cleaning Solution: For dissolving grime.
- Warm Water: For rinsing and soaking.
- Microfiber Cloth or Paper Towels: For drying.
- Gloves (Optional): To keep your hands clean.
Having these items ready helps streamline the cleaning process. You can quickly tackle any mess on the roller. Remember, you should also consider cleaning the rest of your device for overall maintenance. You can find more tips on how to effectively clean your entire Tineco vacuum to ensure all components work in harmony.
Step-by-Step Guide to Removing Your Tineco Roller
Removing the roller brush from your Tineco is straightforward. Each model might have slight variations, but the general steps are similar. Most Tineco floor cleaners have an easily accessible roller cover. You will typically find a latch or button to release it. This design makes routine maintenance simple for users.
I always consult my Tineco user manual first if I am unsure. The manual shows exact diagrams for your specific model. Taking the roller out properly prevents damage to the cleaner. It ensures you can put it back correctly later.
Detaching the Roller Brush
Follow these steps to safely remove your Tineco roller:
- Power Off and Unplug: As mentioned, always turn off your Tineco and unplug it. Safety comes first.
- Open the Roller Cover: Locate the roller cover on the bottom of the cleaning head. There is usually a release button or tab. Press or slide it to open the cover. The cover might swing open or detach completely.
- Lift Out the Roller: The roller brush typically has a handle or a raised edge. Grip this part firmly. Lift the roller straight out from its compartment. It should come out easily. Do not force it if it feels stuck. Double-check for any remaining clips or locks.
Once the roller is out, you can begin the cleaning process. Set the Tineco aside in a safe, dry place. Make sure no water gets into the main unit. This prevents electronic damage.
Deep Cleaning Your Tineco Roller: Getting Rid of Stubborn Grime
Now that the roller is removed, you can begin the deep cleaning process. This step is crucial for removing all built-up dirt and debris. A quick rinse might handle light messes, but deep cleaning tackles stubborn grime and odors. I find that taking the time for this step greatly improves my Tineco’s performance. It also extends the roller’s life.
Begin by removing any visible hair or large debris. Use your scissors or hair removal tool for this. Cut along the length of the roller to loosen tangled hair. Then, pull the hair off with your hands. This initial step makes subsequent cleaning much easier.
Washing and Soaking the Roller
After removing surface debris, it’s time to wash the roller. You can use warm water and a mild dish soap. Fill a basin or sink with enough warm water to submerge the roller. Add a few drops of dish soap. You can also use a small amount of a specialized floor cleaner if you prefer.
Submerge the roller in the soapy water. Let it soak for 10-15 minutes. This helps loosen stubborn dirt and grime. For particularly dirty rollers, I sometimes let it soak a bit longer. While it soaks, the water softens the dried-on debris. This makes scrubbing more effective.
Scrubbing and Rinsing Thoroughly
After soaking, use a small brush or an old toothbrush to scrub the roller. Focus on the bristles and the base of the roller. Brush away any remaining dirt, grim, or small particles. Pay attention to the ends of the roller where hair tends to accumulate. Make sure to clean the inner core of the roller if your model allows.
Once you have scrubbed the roller clean, rinse it under running warm water. Rinse until all soap suds are gone. Continue rinsing until the water runs clear. Make sure no residue remains. Soap residue can attract more dirt later. A clean rinse ensures the roller performs optimally when dry. For overall cleaning best practices, remember that techniques often overlap. For example, methods to clean your shower with vinegar can provide insights into using natural solutions for other household items, including parts of your vacuum if the material is suitable.
Drying Your Tineco Roller: A Crucial Step
After cleaning, drying the Tineco roller is one of the most important steps. If you put a damp roller back into your Tineco, it can cause problems. A wet roller creates a breeding ground for mold and mildew. This leads to unpleasant odors and can damage the internal components of your vacuum. I always stress the importance of complete dryness. It protects your machine and keeps your home smelling fresh.
Moisture can also affect the motor or bearings of the Tineco. This shortens the lifespan of your appliance. A fully dry roller ensures proper air circulation during operation. It also prevents the roller from getting stiff. Patience in this step pays off in the long run.
Air Drying for Best Results
The best method for drying your Tineco roller is air drying. Avoid using heat sources like hair dryers or direct sunlight. High heat can warp or damage the plastic parts or bristles of the roller. Place the cleaned roller in a well-ventilated area. You can stand it upright or lay it on a clean, dry towel.
I usually place mine near an open window or in a room with good air flow. Allow at least 24 hours for the roller to dry completely. For humid environments, it might take longer. Flip the roller periodically to ensure all sides dry evenly. You can also use a fan to speed up the drying process. Just ensure the fan is not too close. Check for any damp spots before reassembly. The roller should feel completely dry to the touch.
Reassembling and Maintaining Your Tineco Roller
Once your Tineco roller is completely dry, it is time to put it back into your vacuum. Reassembly is just as important as removal. Improper reinstallation can affect your Tineco’s performance. It can also cause unusual noises or even damage the roller compartment. I always take a moment to ensure everything clicks into place correctly. This confirms the roller is ready for action.
Reinsert the roller into its compartment. Make sure it aligns with the gears or grooves. Gently push it until it locks into position. You should hear a click or feel it seat firmly. Then, close the roller cover. Ensure the cover latches securely. Try to spin the roller by hand slightly to confirm it moves freely. This check confirms proper installation.
Routine Maintenance for Longevity
Cleaning your Tineco roller is not a one-time event. Routine maintenance extends its lifespan and performance. I make it a habit to perform quick checks after every use. This includes removing any hair or large debris. It takes only a minute or two but makes a big difference. For broader Tineco care, understanding how to clean your entire Tineco vacuum is also vital. This ensures all parts of your machine contribute to a truly clean home.
Here are some tips for ongoing care:
- Quick Clean After Each Use: Remove visible hair and rinse the roller under water. Shake off excess water and allow it to air dry.
- Deep Clean Regularly: Perform a deep clean at least once a month. Increase frequency if you have pets or use your Tineco daily.
- Check for Wear and Tear: Inspect the bristles for signs of wear. If bristles are flattened or missing, it might be time for a replacement.
- Proper Storage: Store your Tineco in a clean, dry place. Avoid extreme temperatures.
- Empty and Clean Tanks: Always empty and rinse the dirty water tank after each use. A clogged filter or dirty tank can affect roller performance. You should also periodically learn how to clean your water filter within the vacuum system, as accumulated debris there can impact overall suction and cleaning power.
Following these simple steps ensures your Tineco roller remains effective. It keeps your floors spotless and your vacuum in excellent working order.
Troubleshooting Common Tineco Roller Issues
Even with regular cleaning, you might encounter issues with your Tineco roller. Recognizing these common problems helps you address them quickly. Sometimes, a simple adjustment is all that is needed. Other times, it might indicate a need for a replacement part. I find that being proactive with troubleshooting saves me a lot of hassle. It keeps my cleaning routine smooth.
One common issue is the roller not spinning. This often means something is blocking it. Check for large debris or tangled hair that you missed during cleaning. Another problem can be a persistent foul odor. This usually points to mildew or bacteria buildup from incomplete drying.
Addressing Performance Problems
- Roller Not Spinning:
- Check for Obstructions: Remove the roller and inspect its compartment. Look for anything lodged around the axle or within the bristles.
- Proper Reinstallation: Ensure the roller is correctly seated. It should click into place. The roller cover must be fully closed.
- Motor Issue: If no obstructions exist and the roller is installed correctly, there might be a motor issue. Contact Tineco support for further assistance.
- Foul Odor:
- Thorough Drying: Re-clean the roller. Ensure it dries completely for at least 24-48 hours in a well-ventilated area. Consider using a small fan.
- Clean Dirty Water Tank: A dirty water tank also contributes to odors. Clean and dry it thoroughly after each use. For a comprehensive cleaning experience, it’s wise to review general Tineco vacuum cleaning guides, as overall machine cleanliness impacts performance.
- Leaving Streaks or Dirt:
- Roller Condition: Inspect the bristles. If they are flattened, matted, or heavily worn, the roller needs replacement.
- Cleaning Solution: Ensure you are using the correct Tineco cleaning solution or plain water. Using too much or the wrong type of solution can leave residue.
- Dirty Water Tank/Filter: A full or dirty dirty water tank, or a clogged filter, can cause dirty water to be redistributed. Clean all components regularly.
By addressing these issues, you can restore your Tineco’s cleaning power. Prompt action prevents small problems from escalating. This ensures your vacuum operates at peak efficiency.
When to Replace Your Tineco Roller
Even with the best cleaning practices, Tineco roller brushes do not last forever. They are wear-and-tear parts. Over time, the bristles become worn, flattened, or frayed. This reduces their ability to scrub effectively. Knowing when to replace your Tineco roller is as important as knowing how to clean it. A worn-out roller will compromise your cleaning results.
I typically inspect my roller every few months. Look closely at the bristles. If they no longer stand upright or feel soft, it is likely time for a new one. The cleaning performance will drop noticeably. You might see more streaks or less debris pickup.
Signs It’s Time for a New Roller
- Flattened or Frayed Bristles: This is the most common sign. The bristles lose their stiffness and scrubbing power.
- Visible Wear: Deep grooves or missing sections on the roller itself.
- Reduced Cleaning Performance: Your Tineco struggles to pick up dirt, or leaves more water behind.
- Persistent Odor: Despite thorough cleaning and drying, an unpleasant smell remains. This could indicate deep-set bacteria or mold within the roller material that cannot be removed.
- Unusual Noises: A worn roller might cause your Tineco to make grinding or squeaking sounds during operation. This happens if the roller itself is damaged or if its bearings are failing.
Most Tineco rollers are designed for easy replacement. You can typically find replacement rollers on the Tineco website or from authorized retailers. Replacing the roller is a simple process. It typically involves removing the old roller and inserting the new one. Always ensure you purchase the correct roller type for your specific Tineco model. A fresh roller brush makes a significant difference. It brings back the “like new” performance you expect from your Tineco.
Frequently Asked Questions (FAQ)
How often should I clean my Tineco roller?
You should perform a quick clean of your Tineco roller after every use. This involves rinsing off loose debris and hair. A deep clean, including soaking and scrubbing with soap, should be done at least once a month. If you have pets or use your Tineco daily, deep clean it more frequently, perhaps every two weeks.
Can I put my Tineco roller in the dishwasher?
No, you should not put your Tineco roller in the dishwasher. The high heat from a dishwasher can warp the plastic components of the roller brush. It can also damage the bristles or cause the roller to shrink. Always stick to hand washing with warm water and mild soap.
How long does it take for a Tineco roller to dry?
A Tineco roller needs to air dry completely. This process typically takes at least 24 hours. In humid environments, it might take up to 48 hours. Ensure the roller is placed in a well-ventilated area. Do not use heat sources like hair dryers, as this can damage the roller.
What should I do if my Tineco roller still smells after cleaning?
If your Tineco roller still smells after cleaning, it likely means there is persistent bacteria or mold. Ensure it is completely dry. You can try soaking it in a solution of warm water with a small amount of white vinegar for an hour before re-scrubbing and rinsing. If the smell persists, it might be time to replace the roller.
Can I use bleach to clean my Tineco roller?
No, do not use bleach to clean your Tineco roller. Bleach is too harsh for the roller materials. It can damage the bristles and plastic parts. It might also leave a residue that could harm your floors or the vacuum itself. Stick to mild dish soap or a Tineco-approved cleaning solution.
Are Tineco rollers universal across models?
No, Tineco roller brushes are typically specific to different Tineco models. While some models might share a similar roller design, it is crucial to check your specific Tineco model number before purchasing a replacement roller. Using the wrong roller can damage your vacuum or reduce its cleaning performance.
Conclusion
Mastering how to clean Tineco roller brushes is a simple yet powerful way to enhance your Tineco floor cleaner’s performance. Regular maintenance ensures your device continues to deliver spotless results on your floors. By following the steps outlined in this guide – from careful removal and thorough deep cleaning to crucial drying and proper reassembly – you empower your Tineco to perform at its best.
I encourage you to make Tineco roller cleaning a regular part of your home maintenance routine. It saves you time and effort in the long run. A clean roller means efficient cleaning, a longer machine lifespan, and a healthier home environment. Do not let dirt diminish your Tineco’s potential. Take action today to keep your Tineco roller spotless. Your floors will thank you, and you will enjoy the satisfaction of a truly clean home.
```json
{
  "publishDate": "2025-07-14T00:00:00Z",
  "title": "How To Clean Tineco Roller",
  "excerpt": "Learn how to clean Tineco roller brushes for better performance and a longer lifespan. This guide covers deep cleaning steps, routine care, and tips.",
  "image": "https://res.cloudinary.com/dky6urpy2/image/upload/v1752395330/blog_image_1752395329_ophak4.webp",
  "category": "Home Maintenance",
  "tags": [
    "Tineco cleaning",
    "vacuum roller care",
    "floor cleaner maintenance",
    "Tineco roller"
  ],
  "metadata": {
    "canonical": "https://www.beacleaner.com/how-to-clean-tineco-roller"
  }
}- Tineco cleaning
- vacuum roller care
- floor cleaner maintenance
- Tineco roller