· Home Maintenance · 18 min read
How To Clean Under Sink Water Filter
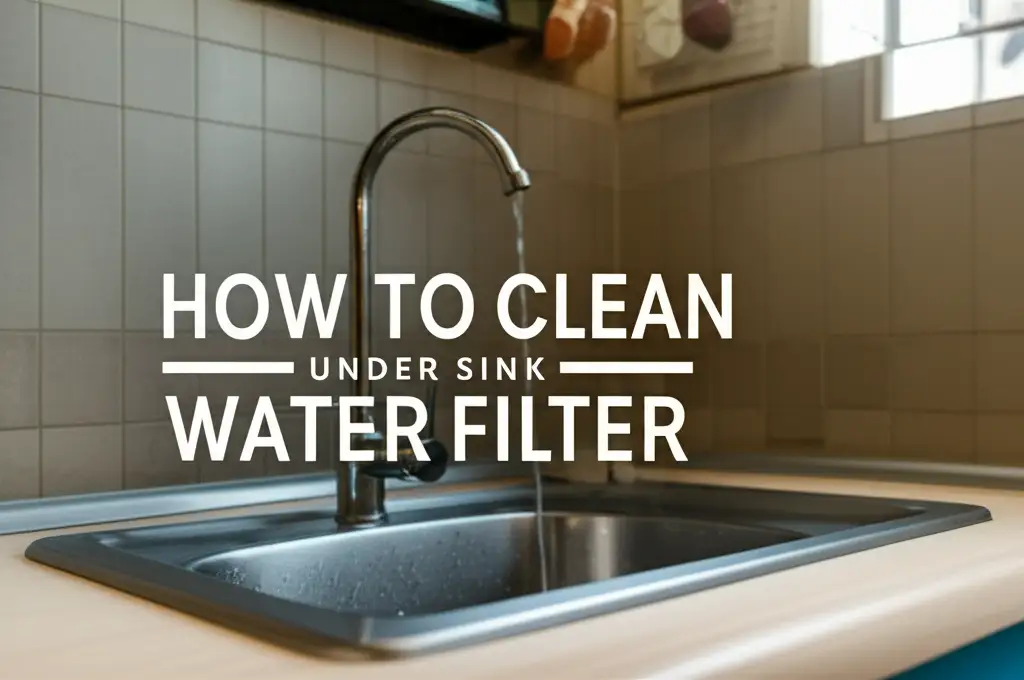
Keep Your Water Fresh: How to Clean Your Under Sink Filter
Clean, fresh water is essential for your family’s health and daily life. An under sink water filter system works hard to provide this. Over time, these filters collect impurities. Knowing how to clean your under sink water filter keeps it working its best. It also makes sure your drinking water stays pure and safe. This guide shows you why filter maintenance matters and how to clean your system effectively. We cover everything from spotting issues to step-by-step cleaning and troubleshooting tips.
Takeaway
- Prioritize Regular Maintenance: Clean your under sink water filter system to ensure peak performance and water quality.
- Watch for Warning Signs: Low flow, bad taste, or cloudy water signal it’s time for filter attention.
- Gather Proper Tools: Have a bucket, towels, filter wrench, and mild soap ready before you start.
- Follow Steps Carefully: Turn off water, depressurize, clean housing, and replace filters according to instructions.
- Address Specific Components: Clean sediment filters; replace, do not clean, carbon and RO membrane filters.
Cleaning an under sink water filter involves shutting off the water supply, depressurizing the system, disassembling the filter housing, and thoroughly scrubbing the housing with mild soap and warm water. You must replace the filter cartridge itself, as most types are not designed for cleaning. Then, reassemble the system, turn the water back on, and flush it.
Why Maintaining Your Under Sink Water Filter Matters
Your under sink water filter works hard every day. It removes many unwanted substances from your tap water. This includes chlorine, sediment, and other contaminants. Regular maintenance is not just about cleaning; it is about protecting your health. A well-maintained filter provides truly clean drinking water.
Ignoring filter upkeep can lead to several problems. First, the filter’s efficiency drops. This means it stops removing impurities as well as it should. You might end up drinking water with more contaminants. Second, a neglected filter can become a breeding ground for bacteria. This happens when trapped particles sit inside the filter system for too long. Third, the lifespan of your filter system shortens. Parts can clog or wear out faster.
Think of it like regular oil changes for your car. You do it to keep the engine running smoothly. Similarly, maintaining your under sink water filter keeps your water pure and safe. It extends the life of your whole system. This saves you money in the long run by avoiding costly repairs or replacements. A clean filter ensures a consistent flow of fresh-tasting water right from your tap.
When and How Often to Clean Your Water Filter
Knowing when to clean your under sink water filter is as important as knowing how. Your filter system will give you signs when it needs attention. Pay close attention to these signals. They can tell you a lot about the filter’s condition.
One common sign is a noticeable drop in water pressure. If your filtered water starts flowing slowly, it probably means the filter cartridges are clogged. Sediment and other particles build up, restricting water flow. Another clear indicator is a change in the taste or smell of your water. If your water starts tasting or smelling like chlorine again, or if it has an earthy odor, your filter is likely exhausted. This means it can no longer remove these impurities effectively. Lastly, if your water appears cloudy or has visible particles, the filter is definitely past its prime. This indicates contaminants are passing right through.
Manufacturers typically provide guidelines for filter replacement. Most under sink water filter cartridges need replacement every 6 to 12 months. This depends on your water quality and usage. The filter housing, which holds the cartridges, usually needs cleaning less often. I clean my filter housing every time I replace the cartridges. This ensures no old grime remains inside. Always check your specific filter model’s manual for precise recommendations. Following these guidelines helps keep your water clean and your system running efficiently.
Gathering Your Tools: What You’ll Need
Before you start cleaning your under sink water filter, gather all necessary tools. Having everything ready makes the process smooth and quick. You do not want to stop in the middle to look for something. This preparation step is crucial for an efficient cleaning session.
Here is a list of what you will likely need:
- Bucket or small basin: This catches any water spills when you open the filter housing.
- Old towels or rags: These protect your cabinet floor from splashes. They also help wipe up any drips.
- Filter housing wrench: Most under sink filters come with a plastic wrench. This helps loosen the filter housing. If you do not have one, you might need to purchase a universal one.
- New filter cartridges: Remember, you typically clean the housing, but replace the cartridges. Make sure you have the correct size and type for your system.
- Mild dish soap: Use a gentle, unscented soap for cleaning the housing. Avoid harsh chemicals that could damage the plastic or leave residues.
- Soft brush or sponge: A clean, soft brush helps scrub away grime from inside the housing. An old toothbrush can work for tight spots.
- Silicone grease (food-grade): This is for lubricating the O-rings when you reassemble the system. It helps create a good seal.
- Safety glasses: Protect your eyes from any splashing water or debris.
- Gloves: Keep your hands clean and protect them from grime.
Having these items on hand ensures you can complete the job without interruption. It makes the entire cleaning and replacement process much simpler. Always prioritize safety, especially when working with water and plumbing.
Step-by-Step Guide to Cleaning Your Under Sink Filter System
Cleaning your under sink water filter system is a straightforward process. Follow these steps carefully to ensure proper cleaning and reassembly. Taking your time here will prevent leaks and ensure good performance. I always make sure I am calm and focused before I start.
Turning Off the Water Supply
First, locate the cold water supply line that feeds your under sink filter. There is usually a shut-off valve on this line. Turn it clockwise until the water flow stops completely. You may also need to turn off the main water supply to your house if there is no separate valve for the filter. This step is critical to prevent flooding your cabinet.
Depressurizing the System
After turning off the water, open your filtered water faucet above the sink. Let any remaining water drain out. This releases the pressure from the filter system. You will hear the water slow to a drip and then stop. Leave the faucet open while you work. This prevents a vacuum from forming inside the housing.
Disassembling the Filter Housing
Place your bucket and towels directly under the filter unit. Use your filter housing wrench to slowly loosen the sumps (the clear or opaque lower parts of the filter housings). Turn the wrench counter-clockwise. Water will drip out as you loosen them, so be prepared with your bucket. Once loosened, unscrew the sumps by hand. Remove the old filter cartridges from each housing. These cartridges usually cannot be cleaned and must be replaced.
Cleaning the Filter Housing
Empty any water from the sumps. Inspect the inside for sediment, slime, or discoloration. Wash the sumps thoroughly with warm water and a small amount of mild dish soap. Use your soft brush or sponge to scrub away any buildup. Pay close attention to the threads and the bottom of the sumps. Rinse them completely to remove all soap residue. You want the housing to be spotless. This step is crucial for preventing future buildup.
Inspecting and Lubricating O-Rings
Locate the large rubber O-rings around the top of each sump. These rings create a watertight seal. Remove them and inspect them for cracks, nicks, or dryness. If an O-ring looks damaged, replace it. Apply a thin layer of food-grade silicone grease to each O-ring. This keeps them pliable and ensures a good seal when you reassemble the system. This small step helps prevent leaks.
Installing New Filter Cartridges and Reassembling
Insert the new filter cartridges into their respective sumps. Make sure they are seated properly. Screw the sumps back onto the filter heads, hand-tightening them first. Then, use your filter wrench to give them a final snug turn. Do not over-tighten, as this can crack the housing or damage the O-rings. Ensure all connections are secure.
Turning Water Back On and Flushing
Slowly turn the cold water supply valve back on. Watch for any leaks around the filter housings. If you see a leak, turn the water off and re-tighten the sump gently. With the filtered water faucet still open, let water run for about 10-15 minutes. This flushes any air out of the system and rinses away any carbon fines from new carbon filters. The water might look cloudy at first due to air or carbon dust. It will clear up. Once clear, you can close the faucet. Your under sink water filter system is now clean and ready to provide fresh water again. Maintaining your overall water system can include tasks like how to clean sediment from water heater which also contributes to cleaner water in your home.
Cleaning Specific Filter Components
Under sink water filters often use multiple stages, each with a different type of filter cartridge. Knowing how to handle each component is key. Not all filters are designed to be cleaned; many need simple replacement. I always check my system’s specific setup.
Sediment Filters
Sediment filters are usually the first stage in an under sink system. They trap larger particles like dirt, sand, and rust. These are the most common type of filter where cleaning (rinsing) the reusable pre-filter is sometimes possible. If your system uses a washable pleated sediment filter, you can typically rinse it under running water. Use a soft brush to gently remove trapped particles from the pleats. Do not use soap or chemicals on the filter material itself. After rinsing, inspect the filter for damage. If it is severely discolored, torn, or compressed, it needs replacement. Most disposable sediment filters are not meant for cleaning and should simply be thrown away when clogged.
Carbon Filters
Carbon filters are crucial for removing chlorine, odors, and bad tastes from water. These filters work by adsorption, where contaminants stick to the activated carbon. Carbon filters, whether granular activated carbon (GAC) or carbon block, are not cleanable. Once the carbon media is saturated with contaminants, its effectiveness drops. Trying to rinse a carbon filter will not remove the trapped impurities. It might even push them deeper into the filter. Always replace carbon filters according to the manufacturer’s recommendations. This typically ranges from 6 to 12 months.
Reverse Osmosis (RO) Membranes
An RO membrane is the heart of a reverse osmosis system. It removes a wide range of dissolved solids, heavy metals, and microorganisms. RO membranes are highly sensitive and are generally not cleaned by the homeowner. Some commercial or industrial RO systems have backwashing or chemical cleaning cycles, but this is complex. For residential systems, the RO membrane usually requires replacement every 2-3 years. Signs of a failing RO membrane include very slow water production or a noticeable increase in total dissolved solids (TDS) in the filtered water. You can often test the TDS with a handheld meter. Maintaining your water system’s overall cleanliness, like knowing how to clean hot tub filter with dishwasher detergent for hot tubs, can give you a broader understanding of filtration principles.
Specialty Filters (e.g., KDF, UV)
Some under sink systems include specialty filters. KDF (Kinetic Degradation Fluxion) filters use a chemical process to remove chlorine and heavy metals. UV (ultraviolet) filters sterilize water to kill bacteria and viruses. Like carbon filters, these specialty cartridges are typically replaced, not cleaned. UV lamps need replacement annually. Always consult your specific filter system’s manual for maintenance instructions on these components. Understanding the needs of each filter type ensures your system provides the best water quality.
Troubleshooting Common Filter Issues After Cleaning
Even after a thorough cleaning and filter replacement, you might encounter some minor issues. Do not worry; most of these are easy to fix. I always double-check these points if I notice anything off.
Low Water Pressure
If your filtered water flow is still slow after cleaning, check a few things. First, ensure the new filter cartridges are installed correctly. Sometimes, they are not seated properly, which restricts water flow. Take them out and reinsert them carefully. Second, verify that the cold water supply valve to the filter is fully open. A partially closed valve will limit flow. Third, new carbon filters can release a small amount of carbon dust, which can temporarily clog the restrictor in the faucet. Let the water run for a longer period (15-20 minutes) to flush it out. Lastly, check if your main house water pressure is low. If unfiltered water also has low pressure, the issue is not with your under sink system. Hard water can cause buildup, and you might also be interested in general hard water cleaning tips like how to clean hard water from shower head for other fixtures.
Leaks Around the Housing
Seeing drips or puddles after reassembly is frustrating. The most common cause of leaks is an improperly seated or damaged O-ring. Turn off the water supply immediately. Disassemble the leaking sump. Remove the O-ring and inspect it closely for any nicks, cracks, or twists. If it looks fine, reapply food-grade silicone grease generously. Then, carefully reseat the O-ring in its groove. Make sure it lies flat and is not pinched. Screw the sump back on, tightening it by hand first, then a quarter turn with the wrench. Do not over-tighten, as this can also cause leaks by deforming the O-ring. A small leak might also come from loose connections on the inlet or outlet lines. Ensure all hoses are securely attached.
Odd Taste or Cloudy Water
New carbon filters often release fine carbon particles. This makes the water appear cloudy or grayish for the first few minutes after installation. This is normal and harmless. Continue flushing the system for 10-15 minutes until the water runs clear. If the water still tastes “off” after flushing, it could be for a few reasons. Ensure you installed the correct filter types in the correct order. Some multi-stage systems require specific filters in specific positions. Also, verify that the filters are fresh and not expired. Lastly, if you skipped the flushing step, some manufacturing residue might be present. A longer flush usually resolves this. If the taste persists, you might have a filter defect or a broader water quality issue.
No Water Flow
If no water comes out at all, start by checking the water supply valve. Is it fully open? Next, check the bypass valve on your filter system if it has one. Ensure it is in the “filter” position, not “bypass.” A severely clogged pre-filter could also stop flow completely. If you just installed new filters, remove them and check for any packaging or caps that might have been left on the filter ends. This is a common mistake. Sometimes, air gets trapped in the system; reopening the filtered water faucet and letting it run for a while can help release it.
Addressing these common issues systematically will help you restore your under sink water filter to optimal performance.
Tips for Extending Your Filter’s Life
While cleaning your under sink water filter housing is important, extending the life of your actual filter cartridges can save you money and hassle. I follow these tips to get the most out of my filter system.
Regular Pre-Filter Maintenance
Many multi-stage under sink systems include a sediment pre-filter. This filter catches larger particles before they reach the more expensive carbon or RO filters. Cleaning or replacing this pre-filter regularly is vital. If you have a reusable sediment filter, rinse it more frequently than your main filter change schedule. For disposable sediment filters, replace them every 3-6 months. A fresh pre-filter protects the subsequent stages from premature clogging. This extends the life of your more advanced, and often more expensive, filter cartridges significantly.
Use Quality Replacement Filters
The quality of your replacement filters matters. Cheap, low-quality filters may not perform as well or last as long. They might not remove contaminants effectively, or they might clog faster. Invest in reputable brands that are certified by organizations like NSF International. While they might cost a bit more upfront, they provide better performance and longevity. This means fewer filter changes and consistently cleaner water.
Monitor Your Water Quality
Understanding your local water quality can help you manage your filter’s life. If you live in an area with very hard water or high sediment content, your filters might clog faster. You might need to change them more frequently than the general recommendations. Consider testing your tap water periodically. Simple test kits can reveal levels of chlorine, hardness, or total dissolved solids (TDS). This information helps you tailor your filter replacement schedule. For instance, if you have a lot of hard water, you might find other cleaning challenges, and articles like how to clean hard water off windows could be useful for other parts of your home.
Avoid Using Hot Water Through the Filter
Under sink water filters are typically designed for cold water use. Running hot water through them can damage the filter media or the plastic components of the housing. Hot water can degrade carbon and other filter materials, reducing their effectiveness and shortening their lifespan. Always make sure you are only directing cold water through your filter system. Use a separate hot water tap for hot water needs.
Install a Whole House Sediment Filter (Optional)
If your home has consistently high sediment in its water supply, consider installing a whole house sediment filter. This filter is placed where the main water line enters your home. It removes sediment from all water used in the house, not just at your under sink faucet. This significantly reduces the load on your under sink filter. It can drastically extend the life of all your household filters, including the under sink unit. This extra layer of protection can be a smart investment for very sandy or silty water sources.
By following these tips, you can maximize the efficiency and lifespan of your under sink water filter system. This ensures a steady supply of clean, great-tasting water for your home.
Frequently Asked Questions About Under Sink Water Filter Cleaning
Can you wash an under-sink water filter?
You can clean the external housing of an under sink water filter, but most filter cartridges themselves are not washable. Sediment pre-filters are sometimes rinseable, but carbon filters, RO membranes, and specialty filters must be replaced. Rinsing these types of filters will not remove contaminants effectively and can damage them. Always check your specific filter’s instructions for proper maintenance.
How often should I clean my under-sink filter housing?
You should clean the under sink filter housing every time you replace the filter cartridges. For most systems, this means cleaning the housing every 6 to 12 months. Regular cleaning prevents the buildup of slime, mold, or sediment inside the housing. This helps ensure the longevity of your system and maintains optimal water quality.
What are the signs my under-sink filter needs cleaning?
Signs that your under sink filter system needs attention include a decrease in water flow or pressure. You might also notice a change in the taste or smell of your filtered water, such as a return of chlorine taste. Visible cloudiness or particles in the filtered water also indicate a clogged or expired filter.
Can I clean a carbon filter?
No, you cannot clean a carbon filter. Carbon filters work by adsorbing contaminants onto their activated carbon surface. Once these surfaces are full, the filter is exhausted. Attempting to wash a carbon filter will not regenerate its ability to filter water. It might even release trapped contaminants back into your water. Always replace carbon filters.
What if my water tastes bad after cleaning the filter?
If your water tastes bad after cleaning and replacing filters, first, make sure you flushed the system adequately. New carbon filters can release harmless carbon fines, causing a temporary off-taste or cloudiness. Run the water for 10-15 minutes. If the taste persists, ensure all new filters are installed correctly and are not expired. Also, check that you installed the correct filter types in the right order for multi-stage systems.
Does cleaning a water filter extend its life?
Cleaning the filter housing extends the system’s life and efficiency by preventing buildup. However, for most filter cartridges like carbon or RO membranes, cleaning does not extend their life. These cartridges have a finite capacity for trapping contaminants and must be replaced at recommended intervals. Regular cleaning of washable pre-filters, however, can help extend the life of subsequent, more expensive filters.
Conclusion
Taking care of your under sink water filter system is a simple yet powerful way to ensure clean, great-tasting water for your home. We have explored why regular maintenance is vital for your health and the system’s longevity. You now understand the signs that tell you when your filter needs attention. We also covered the tools you need and provided a clear, step-by-step guide for cleaning the housing and replacing the cartridges.
Remember, while the housing can be cleaned, most filter cartridges need replacing. Paying attention to each component type ensures your system works effectively. Troubleshooting common issues like low pressure or leaks will help you quickly resolve problems. By following our tips for extending filter life, you can maximize your investment. Regular filter maintenance not only provides pure water but also saves you money on replacements and repairs. Make cleaning your under sink water filter a regular part of your home maintenance routine. Enjoy the peace of mind that comes with crystal-clear water every day.
- under sink water filter
- water filter cleaning
- filter maintenance
- water purification
- home plumbing