· Kitchen Cleaning · 17 min read
How To Clean Vegetable Oil
Tackle Vegetable Oil Messes: A Complete Cleaning Guide
Dealing with vegetable oil can be a tricky business. A simple splash during cooking or a misplaced bottle can create a greasy mess. I know how frustrating it feels to see oil spread across the floor or soak into fabric. Cleaning vegetable oil properly is not just about aesthetics; it helps prevent slips and keeps your home hygienic.
This article shares practical steps to clean vegetable oil effectively. We will look at fresh spills and old stains. You will learn about the right tools and cleaning products. I will also cover responsible disposal and helpful tips for preventing future messes. Get ready to transform your approach to kitchen cleanliness.
Takeaway
Cleaning vegetable oil requires quick action and the right methods.
- Act Fast: Blot spills immediately to limit spread.
- Use Absorbents: Apply baking soda or cornstarch to soak up oil.
- Apply Dish Soap: Dish soap effectively cuts through grease.
- Dispose Responsibly: Never pour oil down the drain.
- Prevent Spills: Store oil safely and use splatter guards.
To clean vegetable oil, first blot fresh spills with paper towels. Then, cover the area with an absorbent like baking soda or cornstarch to soak up the remaining oil. After a few minutes, sweep up the powder. Finally, scrub the affected surface with hot, soapy water, using a degreasing dish soap, to remove any lingering residue.
Understanding Vegetable Oil Messes: Spills vs. Stains
Vegetable oil is a common ingredient in most kitchens. It adds flavor and helps cook food. However, it can create a real mess when spilled. We need to understand the difference between fresh spills and set-in stains. Each type of mess requires a different approach for effective cleaning.
A fresh vegetable oil spill happens right when the oil leaves its container. This could be a bottle tipping over or oil splattering from a hot pan. Time is essential when a fresh spill occurs. The oil has not yet soaked deeply into the surface. Quick action can prevent the oil from causing lasting damage or creating a large stain.
Fresh Spills: The First Response
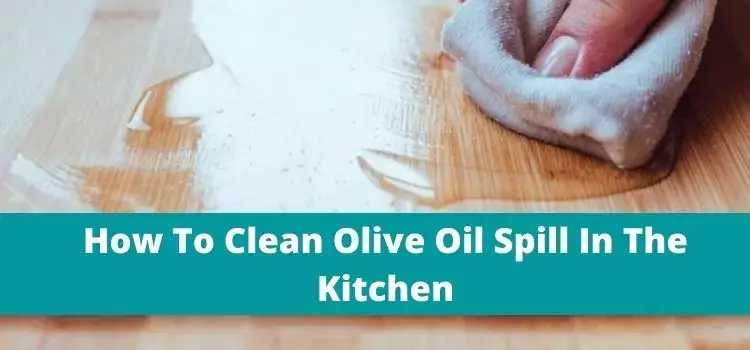
When a spill happens, do not panic. My first move is always to grab paper towels. I blot the oil, but I never wipe it. Wiping spreads the oil further. Blotting helps lift the oil directly from the surface. Use a generous amount of paper towels. Keep blotting until you have removed as much liquid oil as possible. This initial step is critical for minimizing the mess. You can learn more about managing oil accidents by reading about how to clean up spilled oil.
After blotting, apply an absorbent material. Baking soda, cornstarch, or even salt work well. These materials draw the oil out of the surface. Sprinkle a thick layer over the entire oiled area. Let it sit for at least 15-20 minutes, or even longer for larger spills. The powder will clump as it absorbs the oil.
Set-in Stains: A Different Challenge
A set-in stain occurs when oil has dried or seeped deep into a material. This happens if a spill goes unnoticed for a while. It also happens when initial cleaning efforts are not enough. These stains are harder to remove. The oil molecules have bonded with the fibers or surface. They require a more aggressive cleaning method.
You cannot simply blot set-in stains away. You need cleaners that break down oil. Degreasing agents are very helpful here. They dissolve the oil, making it easier to lift. Patience is also a key factor. Multiple applications or longer soaking times may be necessary to fully remove an old stain. Understanding the nature of the stain guides your cleaning process.
Essential Tools and Materials for Oil Cleaning
Having the right tools ready makes cleaning vegetable oil much easier. You do not need many specialized items. Most are common household products. I keep these items handy for quick clean-up jobs. Being prepared saves time and reduces stress when a spill occurs.
Absorbents
Absorbent materials are your first line of defense against fresh oil spills. They soak up the liquid oil before it can set in.
- Baking Soda: This is my go-to absorbent. It is highly effective at drawing out oil. It also helps neutralize odors.
- Cornstarch: Similar to baking soda, cornstarch is excellent for oil absorption. It is gentle on most surfaces.
- Salt: Table salt can also absorb oil. It is often used for immediate spills on hard surfaces. Apply these liberally to the spill. Give them time to work.
Cleaning Agents
Once the bulk of the oil is absorbed, you need agents to break down the grease.
- Dish Soap: This is a powerful degreaser. Its surfactants lift oil from surfaces. I use a strong, grease-cutting brand.
- White Vinegar: Vinegar is an acidic cleaner. It can help cut through grease, especially when combined with dish soap. It also disinfects.
- Commercial Degreasers: Products specifically designed for grease removal are very effective. Always follow the product instructions carefully. They are useful for tough stains.
- Rubbing Alcohol: For some fabric stains, rubbing alcohol can dissolve oil. Test it in an inconspicuous area first.
Cleaning Tools
These tools help apply cleaners and scrub away residues.
- Paper Towels: Essential for blotting fresh spills. Use them to absorb initial liquid.
- Old Rags or Microfiber Cloths: These are great for scrubbing and wiping down surfaces. Microfiber is especially good at picking up grease.
- Soft-Bristle Brush: Useful for scrubbing stains on resilient surfaces like concrete or tile. Avoid harsh brushes on delicate materials.
- Sponge: A regular kitchen sponge works well for applying soapy water. The abrasive side helps with light scrubbing.
- Vacuum Cleaner (with attachments): For sweeping up absorbent powders from carpets or hard floors.
Safety Gear
Protect yourself during the cleaning process.
- Rubber Gloves: Protect your hands from harsh chemicals and grease. Oil can be irritating to skin over time.
- Good Ventilation: Open windows or use fans when cleaning with strong chemicals. This prevents fume buildup.
Gathering these items before you start ensures a smooth cleaning process. You can tackle any vegetable oil mess with confidence. Being prepared makes the job much less daunting.
How to Clean Vegetable Oil Spills on Various Surfaces
Vegetable oil can spill on many different surfaces in a home. Each surface material reacts differently to oil. This means the cleaning method needs to change. Knowing the right approach prevents damage and ensures a thorough clean. I have faced spills on almost every surface imaginable. Here is what I learned.
Kitchen Floors (Tile, Laminate, Wood)
Kitchen floors are common spill zones. My kitchen floor is tile, which handles oil well if cleaned quickly. For any hard floor, act fast.
- Blot: Use paper towels to blot up as much oil as possible. Do not rub.
- Absorb: Sprinkle a generous amount of baking soda or cornstarch over the spill. Let it sit for 15-30 minutes. The powder will absorb the oil.
- Sweep: Sweep up the absorbent powder.
- Clean: Mop the area with hot water mixed with a strong degreasing dish soap. For persistent oil film, a second wash may be needed.
- For tile and linoleum, a mix of dish soap and hot water usually works.
- For laminate and sealed wood, use less water and a gentle cleaner. Excess water can damage these floors. Always check the manufacturer’s cleaning recommendations.
- Discover more ways to handle spills on various surfaces by reading our guide on how to clean up cooking oil. You can also find detailed steps on how to clean oil spill on floor which offers universal advice.
Countertops and Appliances
Oil frequently splatters on countertops, stoves, and oven doors. These surfaces are often non-porous.
- Wipe Immediately: Use a damp cloth with dish soap for fresh splatters.
- Soapy Solution: For larger or older spills, mix hot water and dish soap. Dip a microfiber cloth into the solution. Wipe down the affected areas.
- Rinse and Dry: Wipe with a clean, damp cloth to remove soap residue. Then dry with a clean towel. This prevents streaks.
- For stainless steel, wipe in the direction of the grain to avoid streaks.
- For inside the oven, especially after splatters, a degreaser can be very effective. Get comprehensive advice on how to clean oil out of oven if you have stubborn residue inside.
Carpets and Upholstery
Cleaning oil from fabrics requires care.
- Blot: Blot the oil with paper towels. Do not rub.
- Absorbent: Sprinkle baking soda or cornstarch generously over the stain. Let it sit for several hours, or overnight. The longer it sits, the more oil it absorbs.
- Vacuum: Vacuum up the powder.
- Dish Soap: Mix a small amount of dish soap with water. Dab the solution onto the stain with a clean cloth. Work from the outside in.
- Rinse: Blot with a clean, damp cloth to remove soap.
- Dry: Blot with a dry towel. Repeat if necessary. For large or stubborn stains, a professional cleaner might be needed.
Clothing
Oil stains on clothes are common, especially on aprons and kitchen towels.
- Pre-treat Immediately: Do not put oil-stained clothes in the dryer. Heat sets oil stains.
- Dish Soap Application: Apply a few drops of liquid dish soap directly onto the oil stain. Rub it gently with your fingers or a soft brush.
- Work In: Let the soap sit on the stain for 5-10 minutes.
- Launder: Wash the item in the hottest water safe for the fabric.
- Check: Check the stain before drying. If it remains, repeat the process.
Each surface presents a unique challenge for vegetable oil. With the right technique, you can clean any spill. Your home will remain spotless and safe.
Removing Stubborn Vegetable Oil Stains
Sometimes, vegetable oil stains go unnoticed. They can also appear after initial cleaning attempts fail. These stubborn, set-in oil stains require more targeted treatment. I have learned that patience and the right products make all the difference. Do not give up on a stain too quickly.
Pre-treatment Methods
Pre-treating is key for old or difficult oil stains. It helps break down the oil before the main cleaning.
- Powder Application: For fabric, generously apply baking soda or cornstarch to the stain. Let it sit for several hours or overnight. The powder will continue to draw oil out of the fibers. After, vacuum or brush off the powder.
- Dish Soap Rub: Apply a small amount of concentrated degreasing dish soap directly onto the dry stain. Use your finger or an old toothbrush to gently rub it into the fabric or surface. This helps the soap penetrate the oil. Let it sit for 10-15 minutes before washing.
Dish Soap and Warm Water Technique
This method is powerful for many surfaces, especially kitchenware and non-porous areas.
- Prepare Solution: Fill a basin or sink with warm water. Add a generous amount of degreasing dish soap.
- Soak (if possible): For items like greasy stove grates or pans, soak them in the hot soapy water. Let them sit for at least 30 minutes. For heavily soiled items, an overnight soak works wonders.
- Scrub: After soaking, scrub the stain with a brush or sponge. The oil should lift more easily.
- Rinse: Rinse thoroughly with clean water.
- For burnt oil on stainless steel pans, this method combined with a bit of elbow grease can be very effective. Learn more specific tips on how to clean burnt oil from stainless steel pan.
Baking Soda Paste
A baking soda paste creates a stronger, more concentrated cleaning action. This is great for hard surfaces like countertops or floors.
- Mix Paste: Combine baking soda with a small amount of water to form a thick paste. It should be similar to toothpaste.
- Apply: Spread the paste over the oil stain. Ensure the stain is completely covered.
- Let Sit: Allow the paste to sit on the stain for 30 minutes to an hour. For very stubborn stains, leave it for several hours or overnight.
- Scrub and Wipe: Use a damp cloth or soft brush to scrub the paste and the stain. The abrasive action helps lift the oil.
- Rinse: Wipe away the paste with a clean, damp cloth. Repeat if necessary.
Commercial Stain Removers
When home remedies are not enough, commercial degreasers or stain removers can be effective.
- Choose Product: Select a product specifically designed for grease or oil stains. Read the label to ensure it is safe for your surface.
- Test: Always test the product in an inconspicuous area first. This prevents damage or discoloration.
- Follow Instructions: Apply the product according to the manufacturer’s instructions. This usually involves spraying, letting it sit, and then wiping. These professional products often contain stronger chemicals. Use them with caution and good ventilation. Removing stubborn oil stains can seem challenging. With the right approach and a bit of persistence, you can restore your surfaces.
Dealing with Used Vegetable Oil: Disposal and Reuse
Cooking with vegetable oil often leaves us with used oil. Knowing how to handle this oil is important. Proper disposal prevents damage to your plumbing. It also protects the environment. Sometimes, you can even reuse cooking oil safely. I have learned to manage my used oil carefully, and you can too.
Proper Disposal Methods (Never Down the Drain)
This is a critical rule: never pour used vegetable oil down the sink or toilet. Oil might seem liquid when warm, but it cools and solidifies. This clogs pipes. It creates expensive plumbing problems. It also harms water treatment systems.
- Cool It: Let the used oil cool completely. Warm oil can burn you.
- Containerize It: Pour the cooled oil into a non-recyclable container. An old milk carton, a plastic jug, or a resealable plastic bag works well. Ensure the container is securely sealed.
- Trash It: Place the sealed container in your regular household trash. Some communities have special oil recycling programs. Check with your local waste management facility. These facilities can often turn cooking oil into biofuels.
For small amounts of oil, like residue in a pan, wipe it out with a paper towel. Then dispose of the paper towel in the trash. This prevents oil from going down the drain. If you’ve been cooking with oil, it’s wise to learn more about how to clean up cooking oil to ensure all residues are handled correctly.
Tips for Reusing Deep-Fry Oil
Reusing deep-fry oil can save money. It also reduces waste. But you must do it safely.
- Assess Condition: Only reuse oil that has not been overheated or discolored. It should not have a strong, burnt smell. If it looks dark, smells rancid, or foams excessively, discard it.
- Strain It: After cooking, let the oil cool down. Then, pour it through a fine-mesh sieve or cheesecloth. This removes food particles. Food particles break down and spoil the oil faster.
- Store Properly: Store strained oil in a sealed, airtight container. Keep it in a cool, dark place. The refrigerator is an excellent choice for extending shelf life.
- Number of Uses: Most oils can be reused 2-3 times. Some oils, like peanut oil, can be reused more. Avoid mixing different types of oils.
- Monitor Quality: Pay attention to the oil’s smell, color, and taste. If it shows signs of degradation, it is time to dispose of it. For more detailed advice on managing and extending the life of your frying oil, refer to our guide on how to clean deep fry oil.
Filtering and Storage
Filtering is key to oil reuse. Even if you are not deep-frying, straining cooking oil can remove bits of food. This extends its usable life for light cooking.
- Filtering Methods:
- Coffee Filter: Place a coffee filter in a funnel. Pour cooled oil through it. This is slow but very effective.
- Cheesecloth: Layer several pieces of cheesecloth in a colander. Pour oil through it.
- Fine-Mesh Sieve: Use a sieve for quick removal of larger particles.
- Container Choice: Use glass jars with tight-fitting lids. Plastic containers are also fine, but glass does not absorb odors. Proper disposal and thoughtful reuse make handling vegetable oil much simpler. You protect your home and the environment.
Preventing Future Vegetable Oil Accidents and Splatters
The best way to deal with vegetable oil messes is to prevent them. A little caution in the kitchen goes a long way. I have learned to implement several simple habits. These habits drastically reduce the chances of spills and splatters. Prevention saves time and effort in cleaning.
Best Practices for Cooking
Thoughtful cooking methods can minimize mess.
- Control Heat: Do not overheat oil. Oil smokes when too hot, indicating breakdown. This creates airborne particles that settle as grease. Keep oil at the appropriate temperature for cooking.
- Add Food Carefully: Gently place food into hot oil. Dropping food in can cause splatters. Use tongs or a slotted spoon.
- Dry Food Thoroughly: Water is the enemy of hot oil. Excess moisture on food creates vigorous splattering. Pat food dry with paper towels before frying. This reduces dangerous reactions.
Using Splatter Guards
Splatter guards are simple but effective tools.
- Mesh Guards: These are metal screens with handles. Place them over frying pans. They allow steam to escape while catching oil droplets. This keeps your stovetop and backsplash clean.
- Lids: A pan lid can also contain splatters. However, it traps steam. This can make fried foods soggy. Use a lid when you need to contain major splatters, but lift it periodically to release steam. I find a good splatter guard is one of the best investments for a clean kitchen.
Storing Oil Safely
Proper storage prevents accidental spills.
- Original Containers: Keep oil in its original bottle. These bottles are designed for safe storage.
- Stable Location: Store oil bottles on a flat, stable surface. Avoid storing them near the edge of counters. Keep them away from high traffic areas.
- Cool, Dark Place: Store oil away from direct sunlight and heat. Heat can make oil go rancid faster. A pantry or cupboard is ideal.
- Secure Lids: Ensure all oil bottle caps are tightly closed. A loose lid can lead to spills if the bottle tips.
- Use Spout Attachments: For bulk oil containers, consider using a pouring spout attachment. This provides more control when pouring. It minimizes drips.
Maintaining Cleanliness as You Cook
Clean as you go. This helps manage small spills before they become big problems.
- Wipe Up Drips: If oil drips on the counter during pouring, wipe it immediately. A quick wipe prevents it from spreading.
- Clean Utensils: Wipe off greasy spatulas or tongs after use. This keeps them from transferring oil to other surfaces.
- Regular Wipes: After cooking, give your stovetop and adjacent counters a quick wipe. Use a cloth with a bit of dish soap. This removes any unseen splatters.
Implementing these preventive measures will keep your kitchen much cleaner. You will spend less time scrubbing and more time enjoying your meals.
Special Scenarios: Outdoor Vegetable Oil Stains
Vegetable oil spills are not just confined to the kitchen. Outdoor cooking, like grilling or deep-frying turkeys, can lead to spills on concrete or patio surfaces. These stains can be stubborn. They also attract dirt and grime. Cleaning vegetable oil from outdoor surfaces requires specific techniques.
Concrete Driveways
Concrete is porous. Oil can seep deep into it, making stains difficult to remove. I have successfully cleaned oil from my driveway.
- Act Quickly: For fresh spills, immediately cover the oil with a generous amount of absorbent material. Cat litter, sand, or baking soda work well. Let it sit for several hours or overnight to draw out the oil.
- Sweep and Scrub: Sweep up the absorbent. Then, apply a strong degreaser directly to the stain. You can use a commercial concrete cleaner or a heavy-duty dish soap.
- Brush Vigorously: Use a stiff-bristle brush or a scrub brush. Work the degreaser into the stain. Let it sit for 15-30 minutes.
- Rinse Thoroughly: Rinse the area with hot water using a garden hose. A pressure washer can be very effective for rinsing and loosening remaining residue.
- Repeat if Needed: Old, deep stains may require multiple applications.
- For comprehensive guidance on tackling oil stains on concrete, refer to our dedicated article on how to clean oil from concrete. This covers various types of oil, including vegetable oil.
Patios and Decks (Wood and Pavers)
Cleaning vegetable oil from patio surfaces depends on the material.
- Wood Decks:
- Blot and Absorb: Blot fresh spills with paper towels. Cover with baking soda or cornstarch. Let it sit.
- Soapy Water: For remaining residue, use warm water and dish soap. Scrub gently with a soft brush. Avoid harsh scrubbing that can damage wood.
- Rinse: Rinse thoroughly with a garden hose. Ensure all soap residue is gone.
- Sanding (for stubborn stains): For very old, deep stains, light sanding might be the only option. After sanding, re-seal the deck.
- Pavers:
- Absorbent: Treat fresh spills with cat litter or baking soda. Let it sit for a few hours.
- Degreaser and Scrub: Sweep up the absorbent. Apply a degreaser suitable for pavers. Use a stiff brush to work it into the stain.
- Rinse: Rinse with a garden hose or pressure washer.
- Reseal: After cleaning, consider resealing your pavers. This protects them from future stains.
Outdoor oil stains can be tough. But with the right approach, you can restore your outdoor living spaces.
- vegetable oil cleaning
- oil stain removal
- cooking oil disposal
- kitchen spills