· Home Cleaning · 20 min read
Discover How To Clean Velvet Hangers Effectively
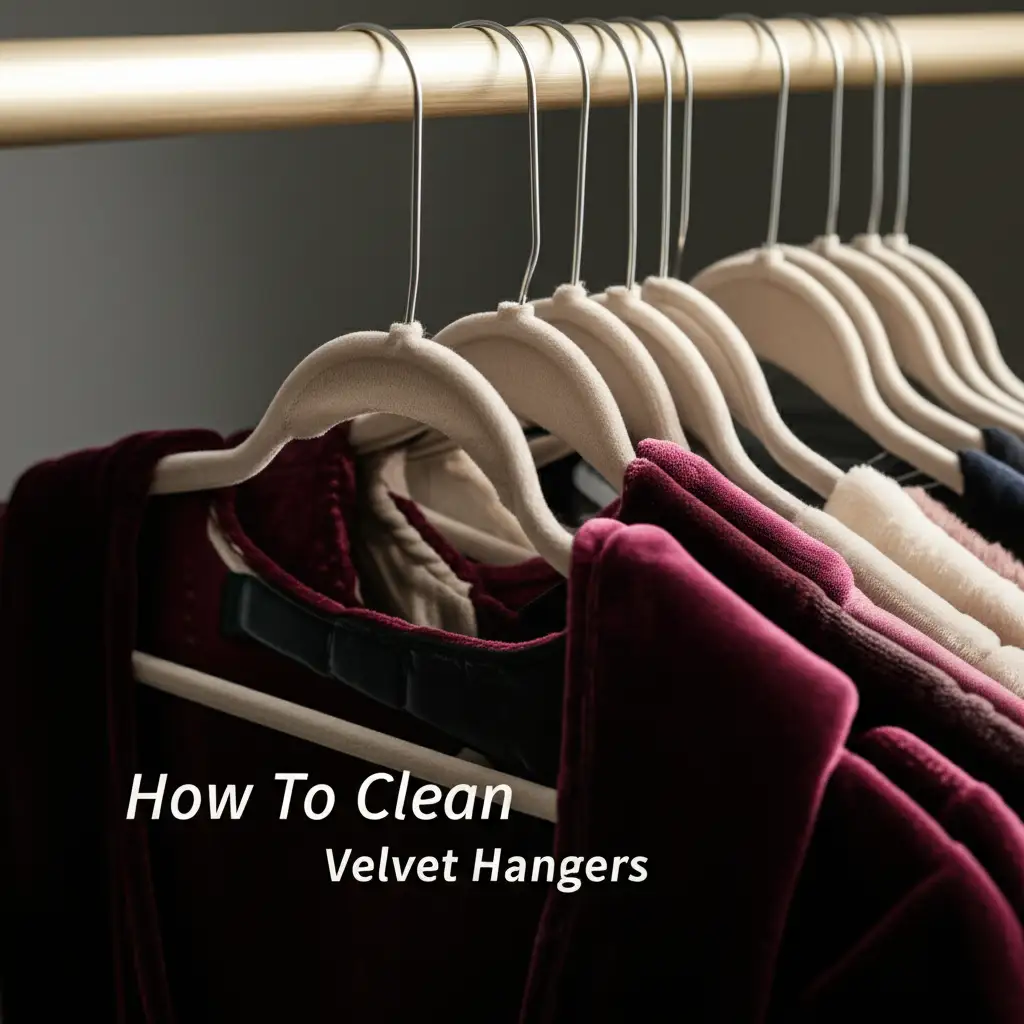
Discover How To Clean Velvet Hangers Effectively
Velvet hangers are a wardrobe game-changer. They save space, prevent clothes from slipping, and create a uniform look in your closet. However, like any household item, they collect dust, lint, and sometimes even minor stains over time. Keeping them clean ensures your clothes stay pristine and your closet remains fresh.
I understand the desire for a well-maintained closet. Learning how to clean velvet hangers is simple and rewarding. This guide will walk you through easy steps to refresh your hangers. We will cover routine maintenance, spot treatment, and proper drying techniques. By the end, you will know exactly how to keep your velvet hangers in top condition, making your closet a cleaner, more inviting space.
Takeaway
- Regularly dust velvet hangers with a lint roller or soft brush.
- Spot clean minor stains using a damp cloth and mild soap.
- Always test cleaning solutions on an inconspicuous area first.
- Air dry velvet hangers completely to prevent mildew.
- Store hangers properly to reduce dust and damage.
How to Clean Velvet Hangers: Quick Answer
To clean velvet hangers, use a lint roller or soft brush for routine dust and lint removal. For spots, lightly dab with a damp cloth containing a mild detergent solution. Avoid saturating the velvet. Allow hangers to air dry completely in a well-ventilated area, away from direct heat or sunlight, before reuse.
Why Keeping Your Velvet Hangers Clean Matters
Velvet hangers offer many benefits, but they can also attract dust and lint. Over time, this accumulation can transfer to your clean clothes. Dirty hangers also look unappealing in your closet. I know you want your clothes to look their best.
Keeping your hangers clean directly impacts your wardrobe’s freshness. Dust and fibers from the hangers can cling to garments, especially dark fabrics. This means you might pull a seemingly clean shirt off the hanger, only to find it covered in lint. Regular cleaning prevents this frustrating situation. It helps maintain the quality of your clothes.
Moreover, a clean hanger contributes to a cleaner closet environment. A dusty hanger sitting among fresh garments detracts from overall cleanliness. By maintaining your hangers, you are upholding the hygiene of your entire wardrobe system. This simple habit keeps your closet looking tidy and smelling fresh. It also helps preserve the integrity of the velvet material itself, extending the life of your hangers.
Clean hangers also prevent the transfer of oils or residues from hands or previously worn clothes. This is especially important for delicate garments. Imagine hanging a silk blouse on a hanger with accumulated grime. You risk marking or staining your garment. Therefore, regular cleaning is not just about aesthetics; it is about protecting your valuable clothing items.
Essential Tools and Supplies for Cleaning Velvet Hangers
Before you start cleaning, gather all the necessary items. Having everything ready saves time and ensures a smooth process. You likely have most of these supplies at home already. Preparation makes the cleaning task much easier to manage.
Here is a list of the basic tools and supplies you will need:
- Lint Roller: This is your primary tool for routine dust and lint removal. Its sticky surface picks up loose fibers easily. A good lint roller is essential for quick touch-ups.
- Soft-Bristled Brush: A clean clothes brush or a soft toothbrush works well. This helps dislodge more stubborn dust or debris from the velvet nap. Choose one with very soft bristles to avoid damaging the velvet.
- Microfiber Cloths: You will need a couple of these. They are great for damp cleaning because they are highly absorbent and gentle on surfaces. Ensure they are clean and lint-free themselves.
- Mild Detergent or Dish Soap: A small amount of a gentle, colorless liquid soap is perfect. Avoid harsh chemicals or anything with bleach. You can also consider a specialized fabric cleaner if you prefer.
- Small Bowl or Spray Bottle: For mixing your cleaning solution. A spray bottle can offer more controlled application for spot cleaning.
- Clean Water: For diluting soap and rinsing. Use distilled water if your tap water is hard to prevent mineral deposits.
- Vacuum Cleaner with Brush Attachment (Optional): For a deeper clean, a vacuum can pull out embedded dust. Use the lowest suction setting and a soft brush attachment.
- Hair Dryer (on cool setting, optional): To speed up drying for minor spots. Always use the cool setting to avoid heat damage to the velvet.
Having these items on hand will make the cleaning process efficient. It ensures you have the right tools for both routine maintenance and deeper cleaning tasks. This thoughtful preparation is key to successful velvet hanger care.
Step-by-Step Guide to Dust and Lint Removal
Removing dust and lint is the most common cleaning task for velvet hangers. This step is crucial for maintaining your hangers and keeping your clothes clean. It is a quick and easy process that you should do regularly. I often find myself doing this as part of my closet tidying routine.
H3: Using a Lint Roller Effectively
The lint roller is your best friend for quick dust and lint removal. Its sticky sheets lift off superficial debris without wetting the velvet. This method is ideal for weekly or bi-weekly maintenance. It keeps the hangers looking neat and prevents buildup.
To use a lint roller:
- Lay the Hanger Flat: Place the velvet hanger on a clean, flat surface. This gives you a stable base to work on.
- Roll Firmly: Roll the lint roller across the velvet surface. Apply firm, even pressure. Make sure the sticky sheet contacts the entire velvet area.
- Replace Sheets: Peel off used sheets as they lose their stickiness. Fresh sheets ensure maximum lint pickup. Continue until the velvet looks clean and free of fibers.
- Repeat on All Sides: Turn the hanger over and repeat the process on the other side. Do this for all hangers you are cleaning.
This method is fast and effective for routine cleaning. It helps maintain the appearance of your velvet hangers.
H3: Brushing Away Stubborn Debris
Sometimes, a lint roller is not enough for embedded dust or pet hair. A soft-bristled brush comes in handy here. It can dislodge more stubborn debris that the lint roller might miss. Remember, gentleness is key to protect the velvet nap.
To use a soft-bristled brush:
- Choose the Right Brush: Select a brush with very soft bristles. A clean clothes brush or a baby brush works well. Avoid stiff brushes, which can damage the velvet.
- Brush in One Direction: Gently brush the velvet surface in one consistent direction. This helps to lift and sweep away dust particles. Brushing against the nap can disrupt the velvet’s texture.
- Shake Off Debris: Periodically shake the hanger or tap it lightly to dislodge loosened dust. You can also use a vacuum with a soft brush attachment for this.
- Finish with Lint Roller: After brushing, a final pass with a lint roller can pick up any remaining loose particles. This ensures a clean finish.
This two-pronged approach ensures your velvet hangers are free from both loose and embedded dust. It keeps them looking pristine and ready for your clothes.
Tackling Spots and Stains with Care
Even with regular dusting, velvet hangers can acquire spots or stains. This happens from accidental spills, dirt from clothes, or even just dust combined with humidity. Spot cleaning is the best approach for these issues. It focuses on the affected area without saturating the entire hanger. I always test cleaning solutions on a hidden spot first to prevent damage.
H3: Preparing a Mild Cleaning Solution
The key to cleaning velvet is using a very mild solution. Harsh chemicals or too much moisture can damage the fabric. You want just enough solution to lift the stain, not soak the material. This careful approach protects the delicate velvet fibers.
Here is how to prepare your cleaning solution:
- Choose Your Soap: Use a tiny amount of mild liquid dish soap or a gentle fabric cleaner. Ensure it is colorless to avoid transferring dye to the velvet.
- Dilute with Water: Mix about a pea-sized drop of soap with one cup of cool, clean water. Stir gently until the soap is fully dissolved. You want a very dilute, slightly sudsy mixture.
- Consider Vinegar: For some stains or general freshening, a mild vinegar solution can also work. Mix equal parts white vinegar and water. Vinegar helps break down grime and odors. This method is similar to how you might use a mild vinegar solutions for other household surfaces.
- Test First: Always test your chosen solution on an inconspicuous area of the hanger. Dab a tiny bit onto the metal hook or the underside of the hanger. Wait a few minutes to ensure no discoloration or damage occurs. This step is critical before proceeding to the stain.
Having the right, tested solution ensures effective and safe stain removal.
H3: Spot Cleaning Techniques for Velvet
Once your solution is ready, you can tackle the specific spots. Remember to work gently and avoid scrubbing. Aggressive cleaning can flatten the velvet nap or spread the stain. Patience and light pressure are your allies here.
Follow these steps for effective spot cleaning:
- Dampen a Microfiber Cloth: Dip a clean microfiber cloth into your prepared solution. Wring it out thoroughly. The cloth should be damp, not wet. Excess water is harmful to velvet.
- Blot the Stain: Gently blot the stained area with the damp cloth. Work from the outside of the stain inwards. This prevents the stain from spreading. Do not rub or scrub, as this can embed the stain further.
- Rotate the Cloth: As the cloth picks up dirt, rotate it to a clean section. This ensures you are lifting the stain, not reapplying it. Repeat blotting until the stain appears to lift.
- Rinse with Clean Water: Dampen another clean microfiber cloth with plain water (no soap). Wring it out well. Gently blot the area again to remove any soap residue. This is important, as soap can attract more dirt if left on the fabric.
- Address Tough Stains: For particularly stubborn marks, you might need a second attempt. You can also consider using specific spot cleaning techniques. However, always exercise caution and gentle pressure. A vinegar solution can be effective for tougher grime due to its mild acidity.
- Avoid Over-Wetting: Never saturate the velvet. Too much moisture can cause water marks, mildew, or damage the hanger’s core. Always err on the side of caution with water.
Proper spot cleaning can remove most minor stains from your velvet hangers. This keeps them looking fresh and extends their usability.
Drying Velvet Hangers Properly
Drying velvet hangers after cleaning is just as important as the cleaning process itself. Improper drying can lead to watermarks, mildew, or even damage to the hanger’s structure. You want to ensure the velvet is completely dry before returning it to the closet. This prevents unwanted moisture from transferring to your clothes.
H3: Air Drying Best Practices
Air drying is the safest and most recommended method for velvet hangers. It allows the moisture to evaporate naturally without subjecting the velvet to harsh heat or direct sunlight. Patience is key here.
Here are the best practices for air drying:
- Hang in a Well-Ventilated Area: After cleaning, hang the hangers in a spot with good air circulation. A doorway, a laundry rack, or even an open window can work. Avoid hanging them in a closed closet, as this traps moisture.
- Avoid Direct Sunlight: Do not place wet hangers in direct sunlight. Strong sunlight can fade the velvet color or degrade the material over time. Indirect light or a shaded area is preferable.
- Allow Ample Time: Depending on the humidity and how damp the hangers became, drying can take several hours to a full day. Touch the velvet periodically to check for any dampness. Ensure it feels completely dry to the touch before proceeding.
- Do Not Rush the Process: Resist the urge to use direct heat sources like radiators or hair dryers on high heat. Excessive heat can damage the velvet fibers, causing them to stiffen or melt.
Proper air drying ensures your velvet hangers remain soft, vibrant, and free from moisture-related issues.
H3: Restoring the Velvet Nap
Sometimes, after drying, the velvet nap might appear slightly flattened or matted. This is normal, especially after a deeper clean. Restoring the nap is a simple step to bring back the hanger’s original look and feel.
To restore the velvet nap:
- Use a Soft Brush: Once the hanger is completely dry, take a soft-bristled brush. This could be a clean clothes brush or a clean, soft toothbrush.
- Gently Brush Against the Nap: Lightly brush the velvet surface in an upward or opposing direction to the nap. Use very gentle, short strokes. This helps to lift the crushed fibers.
- Maintain Evenness: Work across the entire velvet surface, ensuring an even texture. Avoid pressing too hard, as this can re-flatten the fibers.
- Final Lint Roll (Optional): A quick pass with a lint roller can pick up any fibers dislodged during brushing. This leaves the velvet looking pristine.
By following these drying and nap restoration steps, your velvet hangers will look and feel as good as new. This care ensures they continue to protect your clothes effectively.
Addressing Specific Velvet Hanger Issues
While general cleaning handles most needs, sometimes specific issues arise with velvet hangers. These can include stubborn stains, mildew, or a severely matted nap. Knowing how to address these unique problems helps you preserve your hangers. I find that being prepared for these situations prevents permanent damage.
H3: Dealing with Mold or Mildew
Mold and mildew can develop on velvet hangers if they are exposed to high humidity or not dried properly after cleaning. They appear as black, green, or white fuzzy spots and often have a musty smell. Prompt action is crucial to prevent spread.
To tackle mold or mildew:
- Isolate the Hanger: Immediately remove the affected hanger from your closet. This prevents mold spores from spreading to other hangers or clothes.
- Brush Off Loose Mold: Take the hanger outdoors if possible. Use a stiff brush (or a dedicated mold brush that you will clean afterward) to gently brush off any loose, visible mold. This reduces the amount of mold you bring indoors.
- Prepare a Solution: Mix one part white vinegar with one part water. This mold with vinegar solution is effective for killing mold spores. Vinegar is a natural disinfectant and deodorizer.
- Apply and Blot: Dampen a clean cloth with the vinegar solution. Blot the moldy areas gently. Do not rub vigorously. Let the solution sit for 10-15 minutes to penetrate the mold.
- Rinse and Dry Thoroughly: Dampen another cloth with plain water and blot to remove vinegar residue. Air dry the hanger completely in a well-ventilated area. Ensure there is no residual dampness. For severe cases, consider discarding the hanger to prevent mold spread. Proper drying is crucial to avoid future mold issues.
H3: Reviving Severely Matted Velvet
Velvet nap can become severely matted from heavy use, friction, or improper storage. This makes the hangers less effective at gripping clothes. While you cannot fully restore severely damaged velvet, you can often improve its appearance.
Here’s how to try and revive severely matted velvet:
- Steam Method: Hold the hanger carefully over a steaming pot of water or use a handheld garment steamer. Do not let the hanger touch the water. The steam helps to relax the velvet fibers. Hold it for a few seconds, then remove.
- Brush Gently: Immediately after steaming, use a soft-bristled brush. Gently brush the velvet against the nap to lift the fibers. Brush in multiple directions to fluff the velvet.
- Repeat if Necessary: You might need to repeat the steaming and brushing process a few times. Allow the hanger to cool and dry between repetitions.
- Avoid Over-Wetting: Be careful not to over-steam or soak the velvet. Too much moisture can cause irreversible damage or watermarks.
These methods can significantly improve the look and function of problematic velvet hangers. Regular care reduces the need for such intensive interventions.
Preventative Maintenance for Velvet Hangers
Preventing dirt and damage is easier than cleaning. A few simple habits can keep your velvet hangers in excellent condition for longer. This saves you time and effort in the long run. I always advise thinking about prevention when it comes to cleaning any household item.
H3: Storing Hangers Properly
How you store your hangers when not in use impacts their cleanliness and longevity. Throwing them into a messy pile can attract more dust and lead to crushed velvet. Proper storage is a simple preventative step.
Here are tips for storing hangers:
- Keep Them in the Closet: The best place for velvet hangers is in your closet, filled with clothes. This protects them from open dust.
- Avoid Dusty Areas: If you have empty hangers, store them in a clean, enclosed container or a drawer. This prevents dust accumulation. Do not leave them exposed on shelves or floors where they can easily collect dirt.
- Stack Neatly: If stacking empty hangers, do so carefully to avoid crushing the velvet nap. You can use a hanger caddy or simply stack them flat. This keeps them organized and protected.
Proper storage minimizes dust exposure and helps maintain the velvet’s texture.
H3: Regular Dusting and Inspection
Consistent, light dusting is your primary defense against dirty velvet hangers. It prevents dust and lint from building up and becoming embedded. Regular inspection also helps you catch minor issues before they become major problems.
Implement these practices:
- Weekly Dusting: Make it a habit to quickly run a lint roller over your hangers once a week or every other week. This takes less than a minute per hanger and makes a huge difference. You might also want to generally clean a ceiling periodically to reduce dust falling onto your clothes and hangers.
- Before Hanging Clothes: Give hangers a quick glance and a pass with a lint roller before hanging freshly laundered garments. This ensures you are not transferring any hidden dust or lint to your clean clothes.
- Inspect for Wear: During dusting, quickly inspect each hanger for signs of wear, damage, or developing stains. Catching these early allows for quick intervention. Look for flattened spots, loose velvet, or any discoloration.
- Address Spills Immediately: If anything spills on a hanger, address it right away. Fresh stains are always easier to remove than dried-in ones. Blot immediately with a clean, dry cloth.
By incorporating these preventative measures, you significantly reduce the need for intensive cleaning. Your velvet hangers will stay looking great and performing their best for years to come. This commitment to small, regular actions results in long-term benefits for your entire wardrobe.
Common Mistakes to Avoid When Cleaning Velvet Hangers
Cleaning velvet hangers seems straightforward, but certain mistakes can damage them permanently. Knowing what to avoid is as important as knowing what to do. I have learned from experience that a little caution goes a long way with delicate materials. These tips will help you protect your hangers and keep them looking their best.
H3: Over-Wetting the Velvet
One of the most critical errors is applying too much moisture. Velvet is not designed to be soaked. Excess water can lead to several problems:
- Water Marks: These are difficult, if not impossible, to remove. They appear as dark, unsightly stains where the water has altered the velvet fibers.
- Mildew Growth: If the hanger stays damp for too long, mold and mildew can flourish. This causes unpleasant odors and can spread to your clothes.
- Adhesive Failure: Many velvet hangers use adhesive to attach the velvet flocking to the plastic core. Too much water can weaken or dissolve this adhesive, causing the velvet to peel off.
- Rusting of Metal Hook: Water can cause the metal hook to rust, which can then stain your clothes.
Always ensure your cloth is just damp, not wet. Wring it out thoroughly before touching the velvet.
H3: Using Harsh Chemicals or Abrasive Tools
Velvet is a delicate fabric, and it reacts poorly to strong cleaning agents or rough treatment.
- Bleach or Strong Cleaners: These can permanently discolor the velvet, weaken its fibers, or even cause holes. Stick to mild, pH-neutral detergents.
- Stiff Brushes or Scrubbing: Using brushes that are too hard or scrubbing aggressively can crush and flatten the velvet nap. This destroys the soft texture and makes the hanger look worn. Always use soft brushes and gentle blotting motions.
- Solvents: Chemicals like paint thinner or nail polish remover can dissolve the velvet fibers or the adhesive. Never use these on velvet.
Remember, the goal is to clean gently, not to strip or abrade the material.
H3: Skipping the Test Spot
It is easy to get eager and jump straight to cleaning a visible stain. However, skipping the test spot is a significant risk. Different velvet hangers might use slightly different dyes or adhesives. What works for one might not work for another.
Always apply a tiny amount of your chosen cleaning solution to an inconspicuous area first. This could be on the metal hook, the very edge, or the back of the hanger. Wait a few minutes to observe any adverse reactions like discoloration or damage. This simple step can save your hangers from irreversible harm. It is a fundamental rule in cleaning any new surface.
By avoiding these common pitfalls, you will ensure your velvet hangers remain in excellent condition. This extends their lifespan and keeps your wardrobe looking its best. Thoughtful cleaning practices make a big difference.
Frequently Asked Questions About Cleaning Velvet Hangers
Q1: Can I wash velvet hangers in a washing machine?
No, you should never wash velvet hangers in a washing machine. The excessive water, agitation, and detergent can damage the velvet fabric, weaken the adhesive, or cause the metal hook to rust. Machine washing can permanently distort the hanger’s shape or ruin its velvet flocking. Stick to spot cleaning or gentle dry cleaning methods.
Q2: How often should I clean my velvet hangers?
The frequency depends on how much dust accumulates in your closet and how often you use them. For general maintenance, a quick lint roll every one to two weeks is ideal. Spot clean stains as soon as they appear. A deeper clean, if necessary, can be done every few months or as needed.
Q3: What if my velvet hanger gets wet?
If a velvet hanger gets wet, immediately blot the excess moisture with a clean, dry microfiber cloth. Do not rub. Then, hang the hanger in a well-ventilated area to air dry completely. Ensure there is good airflow. Avoid direct heat sources. If it gets very wet, you might experience watermarks or adhesive issues.
Q4: Can I use rubbing alcohol to clean velvet hangers?
It is best to avoid using rubbing alcohol on velvet hangers. While it can dry quickly, alcohol can also strip the color from some velvet dyes or damage the fibers, leaving permanent marks or a stiff texture. Stick to mild soap and water solutions or white vinegar dilutions for safer cleaning.
Q5: How do I remove pet hair from velvet hangers?
Pet hair can be effectively removed from velvet hangers using a lint roller. Roll it firmly over the velvet surface to pick up the hair. For more embedded hair, a slightly damp rubber glove rubbed across the velvet can also gather pet hair. Always follow up with a dry lint roller or brush.
Q6: Can I use fabric freshener sprays on velvet hangers?
Using fabric freshener sprays directly on velvet hangers is generally not recommended. These sprays can leave residue, attract more dust, or even cause discoloration on some velvet types. If you want to freshen your hangers, ensure they are clean, and then use a closet deodorizer or sachets placed nearby, not directly on the hangers
- velvet hangers
- hanger cleaning
- wardrobe organization

