· Home Maintenance · 15 min read
How To Clean Vent Covers Without Removing

Clean Vent Covers Without Removing Them
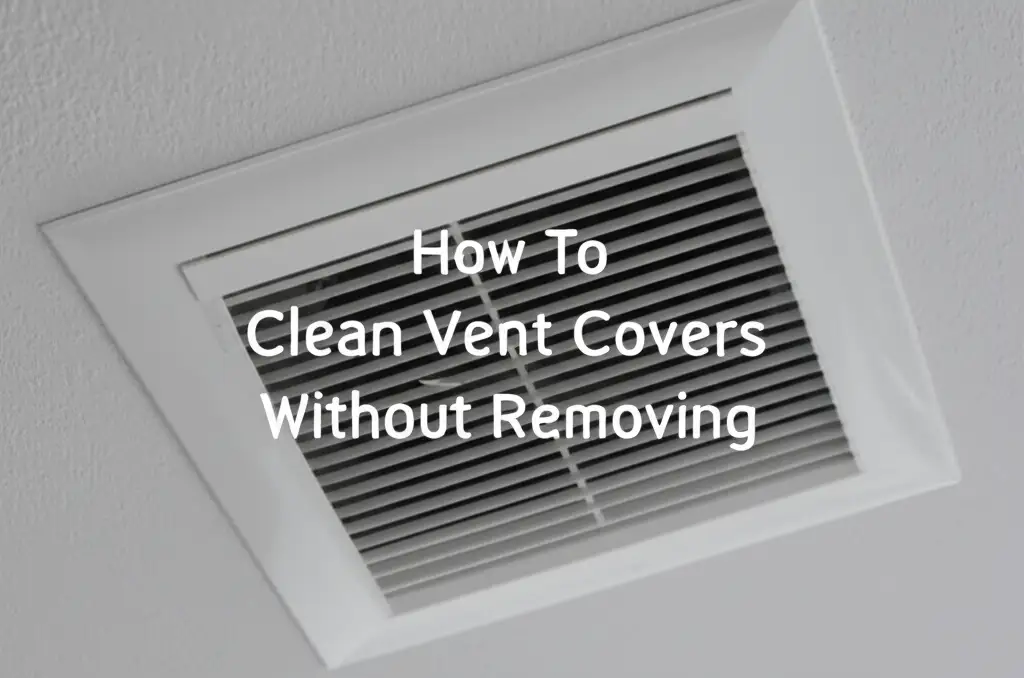
Dirty vent covers are a common sight in many homes. They collect dust, pet hair, and other particles from the air. You might think you need to take them off for a thorough cleaning. But what if I told you there’s an easier way? You can effectively clean vent covers without removing them. This method saves you time and effort. It helps keep your home’s air clean and your HVAC system working well.
This guide explores simple, effective strategies for cleaning all types of vent covers while they stay in place. We will cover the necessary tools, step-by-step instructions for various cleaning challenges, and tips for ongoing maintenance. You will learn how to tackle light dust, stubborn grime, and even hard-to-reach areas. Get ready to improve your home’s air quality with less fuss.
Takeaway
- You can thoroughly clean vent covers without removing them.
- This approach saves time and prevents potential damage.
- Regular in-place cleaning improves air quality and HVAC efficiency.
- Basic tools like vacuums, brushes, and cloths are usually enough.
- Choose the right cleaning method for different dirt levels and vent types.
You can clean vent covers without removing them by using tools like a vacuum with brush attachments, microfiber cloths, a duster, and a mild cleaner or soap. Apply the cleaner directly or to a cloth, wipe the surfaces, and use brushes for tight spaces, ensuring all dust and grime are gone.
Why Clean Vent Covers Without Removing Them?
Cleaning vent covers without removing them offers many advantages. First, it saves you a lot of time. Taking off each vent cover, cleaning it, and putting it back can be a long process, especially if you have many vents. Keeping them in place makes the job faster. This means you are more likely to clean them regularly.
Second, it reduces the risk of damage. Vent covers, especially older ones, can be delicate. They might bend, break, or lose their paint if you try to pry them off. Screws can get stripped, or the ceiling or wall around the vent might get damaged. Cleaning them in place avoids these problems completely. It protects your home’s finishes and your vent covers.
Third, cleaning vents in place often allows for more frequent cleaning. Dust builds up quickly on vent covers. Regular, quick cleanings are easier to fit into your schedule than a major removal project. More frequent cleaning leads to better indoor air quality. It helps your heating and cooling system work more efficiently too. Clogged vents restrict airflow, making your system work harder.
Finally, it is simply more convenient. You do not need a toolbox or special skills. Most people can clean their vent covers effectively with common household cleaning items. This simple approach makes vent maintenance accessible for everyone. It helps maintain a cleaner, healthier home environment with minimal effort.
Essential Tools and Supplies for No-Removal Cleaning
Before you start cleaning your vent covers, gather the right tools and supplies. Having everything ready makes the job smoother and faster. You likely have most of these items already in your home. This list focuses on tools that help you clean thoroughly without needing to detach anything.
First, you need a good vacuum cleaner. A vacuum with a brush attachment is ideal for lifting loose dust and debris. The brush bristles reach into the small slats of the vent covers. This attachment is very effective at getting rid of surface dirt. It prevents dust from scattering around the room.
Next, have several microfiber cloths on hand. These cloths are great for trapping dust and wiping down surfaces. They are soft and will not scratch your vent covers. You can use them dry for dusting or damp for wiping away grime. Pair them with a spray bottle filled with a mild cleaning solution. A mix of warm water and a few drops of dish soap works well. You can also use a diluted all-purpose cleaner.
Consider a small, soft-bristled brush or an old toothbrush. These are perfect for getting into the tight corners and narrow gaps of the vent slats. They can dislodge stubborn dirt that a vacuum brush might miss. A duster with a long handle can also be useful for ceiling vents. This tool helps you reach high vents safely without a ladder.
Finally, you might want a small bucket of clean water for rinsing your cloths. Safety glasses can protect your eyes from falling dust. Gloves keep your hands clean. Having these essential items ensures you are ready for an effective, damage-free cleaning session.
Step-by-Step Guide for Surface Dust & Light Grime
Cleaning vent covers that only have light dust or surface grime is straightforward. This method is great for regular maintenance. It helps prevent heavy buildup. You will keep your air flowing freely and your home looking neat. I find this quick routine very effective for weekly or bi-weekly tidying.
Start by placing a drop cloth or old newspaper on the floor directly below the vent. This step catches any dust or debris that falls during cleaning. It saves you from extra cleanup later. For ceiling vents, make sure your ladder is stable. Always prioritize your safety when working at heights.
Next, grab your vacuum cleaner with the brush attachment. Turn on the vacuum and carefully run the brush attachment over the entire surface of the vent cover. Move the brush along the slats and edges. The vacuum will suction away loose dust, pet hair, and small particles. Work slowly to pick up as much as possible. This first pass removes the majority of the dry debris. Many people find this step satisfying.
After vacuuming, dampen a clean microfiber cloth with your mild cleaning solution. You can use a mix of water and dish soap, or a diluted all-purpose cleaner. Wring out the cloth so it is not dripping wet. Gently wipe down all visible surfaces of the vent cover. This includes the outer frame and each individual slat. The damp cloth will pick up any remaining dust and light grime. For narrow slats, fold the cloth to make a thin edge. You can also spray the solution onto the cloth, not directly onto the vent. This prevents liquid from dripping into the ductwork. If you are cleaning a window AC unit, a similar careful approach works well for its vents. You can learn more about how to clean a window AC unit without removing it for additional tips.
For any tricky spots, use a small, soft-bristled brush or an old toothbrush. Dip the brush in the cleaning solution. Scrub gently to loosen any sticky dirt. Wipe the area immediately with a clean, damp cloth. Finish by wiping the entire vent cover with a dry microfiber cloth. This step removes any streaks and helps the vent dry quickly. Your vent covers will look fresh and clean in no time.
Tackling Stubborn Stains and Deep-Seated Dirt
Sometimes, vent covers have more than just light dust. They can accumulate stubborn stains, greasy buildup, or deeply embedded dirt. This requires a more focused approach. Do not worry, you can still achieve a deep clean without removing the covers. I have found these methods work wonders on even the grimiest vents.
First, identify the type of stain. If it is greasy buildup, like on a kitchen exhaust vent, you need a degreaser. For other stubborn dirt or discoloration, a stronger all-purpose cleaner or a paste of baking soda and water works well. Always test any new cleaning solution on a small, inconspicuous area first. This ensures it does not damage or discolor the vent cover’s finish.
Start by vacuuming the vent thoroughly as described earlier. This removes any loose surface debris. Next, apply your chosen cleaner. For greasy stains, spray a degreaser directly onto the affected areas. Let it sit for a few minutes. This dwell time allows the cleaner to break down the grease. If using a baking soda paste, apply a thick layer over the stains. For standard dirt, spray your all-purpose cleaner onto a microfiber cloth. Then, wipe down the vent covers.
Now, use a stiff-bristled brush or a nylon scrub brush. Gently scrub the stained areas. The brush helps lift the stubborn dirt. For very tight spaces or between slats, an old toothbrush is very effective. Apply gentle pressure, working the cleaner into the grime. You might see the dirt starting to lift away. For cleaning other household components without removal, consider similar approaches. For example, learning how to clean an AC blower wheel without removing it involves targeted cleaning of internal components. Similarly, a mini-split blower wheel can be cleaned in place with specific tools; insights into how to clean a mini split blower wheel without removing can offer parallel strategies.
After scrubbing, wipe away the loosened dirt and cleaner with a clean, damp microfiber cloth. Rinse the cloth often in clean water. Repeat the wiping process until all residue is gone. You might need to make several passes. Finish by drying the vent cover with a fresh, dry cloth. This prevents water spots and ensures the vent looks sparkling clean. Stubborn stains need patience, but they will come off.
Cleaning Different Types of Vent Covers In-Place
Not all vent covers are the same. Different types require slightly different cleaning approaches to be most effective. Understanding these variations helps you clean each vent properly without causing damage. I have worked with many kinds of vents, and specific techniques make a big difference.
Plastic Vent Covers: These are common in bathrooms and some ceiling applications. Plastic is durable but can scratch if scrubbed too hard. Use a soft-bristled brush and a mild all-purpose cleaner or soapy water. Avoid abrasive scrubbers. A damp microfiber cloth works well for wiping. For bathroom exhaust fans, regular cleaning of the vent cover is essential for air quality. You can find more detailed advice on how to clean a bathroom exhaust fan without removing for specific methods.
Metal Vent Covers: Often found on walls or floors, metal vents can be painted or bare. They are generally robust. You can use a slightly stiffer brush on these if needed, especially for floor vents that collect more debris. However, still avoid steel wool or harsh chemicals that could corrode or strip paint. A mix of white vinegar and water can work wonders on bare metal for shine. Ensure to dry metal vents thoroughly to prevent rust.
Wood Vent Covers: These are less common but beautiful. Wood needs gentle care. Avoid excessive moisture, which can warp or damage the wood. Use a dry vacuum brush first. Then, lightly dampen a cloth with a wood-safe cleaner or just water, and wipe gently. Immediately dry with another soft cloth. You might apply a wood polish after cleaning to protect the finish. Treat wood vents like fine furniture to preserve their look.
Louvered or Slatted Vent Covers: These have many narrow openings, making them dust traps. A small, soft-bristled brush or an old paintbrush is excellent for reaching into these tight spaces. Use it to dislodge dust before vacuuming. Then, use a damp cloth folded thinly to wipe each slat individually. This takes time, but it ensures a thorough clean. You can also use canned air to blow dust out, aiming it into a vacuum cleaner’s nozzle to catch the dust.
By tailoring your cleaning method to the vent cover material and design, you ensure a safe and effective clean every time.
Advanced Techniques for Hard-to-Reach Areas
Some vent covers sit high on ceilings or walls, making them difficult to access. Others have complex designs with many tiny crevices that seem impossible to clean. But even these challenging spots can be cleaned effectively without removal. I have picked up a few tricks over the years that make these tasks much easier.
For high ceiling vents, safety is paramount. Use a sturdy ladder or a step stool. Make sure it is stable on a flat surface before you climb. Do not overreach. If a ladder is still not enough, consider tools with extension handles. A vacuum extension wand with a brush attachment can reach high spots. Some dusters also have long, flexible handles that can curve into awkward angles. These tools help you clean safely from the ground or a lower step.
For vents with very narrow slats or intricate patterns, specialized brushes are incredibly helpful. Detail brushes, small bottle brushes, or even pipe cleaners can get into those tiny gaps where dust loves to hide. Dip these tools into a mild cleaning solution. Then, carefully work them into the crevices. The goal is to dislodge the dirt without damaging the vent. After dislodging, use a vacuum to suck up the loosened debris.
Another effective technique for tight spaces is using compressed air or a hairdryer on a cool setting. Blow the dust out from between the slats. Direct the blown dust towards your vacuum cleaner’s nozzle. This way, you capture the dust instead of just blowing it into the room. This method is particularly useful for areas where a cloth or brush cannot reach.
For heavily soiled, intricate vents, you might need a steam cleaner with a small nozzle attachment. The steam can loosen grime and sanitize without harsh chemicals. Hold the nozzle close to the vent, letting the steam penetrate the dirt. Immediately wipe away the loosened grime with a microfiber cloth. Always test steam on a hidden spot first. Ensure the vent material can handle moisture. These advanced techniques help you achieve a truly deep clean, even on the most challenging vents.
Maintaining Clean Vents: Prevention and Regular Care
Keeping your vent covers clean does not have to be a big chore. Regular maintenance prevents heavy buildup and keeps your home’s air fresh. Prevention is always easier than a deep clean. I make a habit of including vents in my regular cleaning routine.
The simplest way to maintain clean vents is frequent dusting. Use a duster with a long handle for ceiling and high wall vents. A microfiber cloth is perfect for lower vents. A quick pass once a week can remove surface dust before it settles deeply. This simple step makes a huge difference. Think of it like dusting any other surface in your home.
Consider adding vent cover cleaning to your vacuuming routine. When you vacuum your floors, take an extra minute to vacuum the accessible vent covers. Use the brush attachment to quickly pull off loose dust. This integrates vent cleaning into a task you already do regularly. It does not feel like an extra burden.
Address spills or marks immediately. If something splatters onto a vent cover, wipe it off right away with a damp cloth. Fresh spills are always easier to clean than dried-on stains. This proactive approach prevents deep-seated grime from forming. Just like cleaning spills on kitchen cabinets is easier right away, and you can learn how to clean kitchen cabinets without removing finish to maintain their look.
Remember to check and change your HVAC air filters regularly. Dirty air filters allow more dust and particles to pass through and settle on your vent covers. A clean filter captures more airborne debris, reducing the amount that reaches your vents. Follow your HVAC system’s recommendations for filter replacement, usually every 1-3 months. This is perhaps the most important preventive measure.
For areas prone to high dust, like bedrooms or living rooms, you might clean vent covers more often. For bathrooms or kitchens, focus on potential moisture or grease buildup. By incorporating these small steps into your routine, your vent covers will stay cleaner, your air quality will improve, and your home will feel fresher year-round.
FAQ Section
Q1: How often should I clean my vent covers without removing them? A1: You should clean your vent covers at least once a month. If you have pets or allergies, or if you live in a dusty area, clean them more often, perhaps every two weeks. This regular maintenance prevents heavy dust buildup. It helps keep your indoor air quality high.
Q2: Can I use harsh chemicals to clean my vent covers in place? A2: No, you should avoid harsh chemicals. Strong cleaners can damage the vent cover’s finish or paint. They can also release harmful fumes into your home. Stick to mild cleaners like soapy water, diluted all-purpose cleaner, or a white vinegar solution. Always test any cleaner in a small, hidden spot first.
Q3: Will cleaning vent covers in place truly improve my indoor air quality? A3: Yes, cleaning vent covers helps improve indoor air quality. Vent covers collect dust, allergens, and other airborne particles. Cleaning them removes these contaminants from your living space. This results in cleaner air circulated throughout your home, benefiting everyone, especially those with allergies or respiratory issues.
Q4: Is it safe to use water on vent covers without removing them? A4: Yes, it is safe to use water on vent covers as long as you do so carefully. Avoid saturating the vent or letting water drip into the ductwork. Always wring out your cleaning cloths thoroughly. Wipe the vent dry immediately after cleaning. This prevents rust on metal vents and moisture damage to other materials.
Q5: What if my vent covers are still dirty after cleaning them in place? A5: If your vent covers remain dirty, they might have very stubborn grime or deep dust within the ductwork. For persistent stains, you might need a stronger, but still safe, cleaning solution and more scrubbing. For dust deep inside the ducts, consider having your HVAC system and ducts professionally cleaned.
Conclusion
You have learned that cleaning vent covers does not need to be a difficult task. You can effectively clean vent covers without removing them. This approach saves time and effort. It also protects your vent covers and the surrounding surfaces from damage. We covered the right tools, detailed steps for different types of dirt, and maintenance tips. My hope is you feel more confident about tackling this important home cleaning chore.
Regular vent cleaning greatly improves your home’s air quality. It helps your HVAC system work better and reduces allergens. Make vent maintenance a simple part of your routine. A few minutes of effort can lead to a cleaner, healthier, and more comfortable living space. Start cleaning your vents today and breathe easier tomorrow.
- Vent Cleaning
- HVAC Maintenance
- Dust Removal


