· Outdoor Cleaning · 18 min read
How To Clean Vinyl Fence
Make Your Vinyl Fence Shine Again
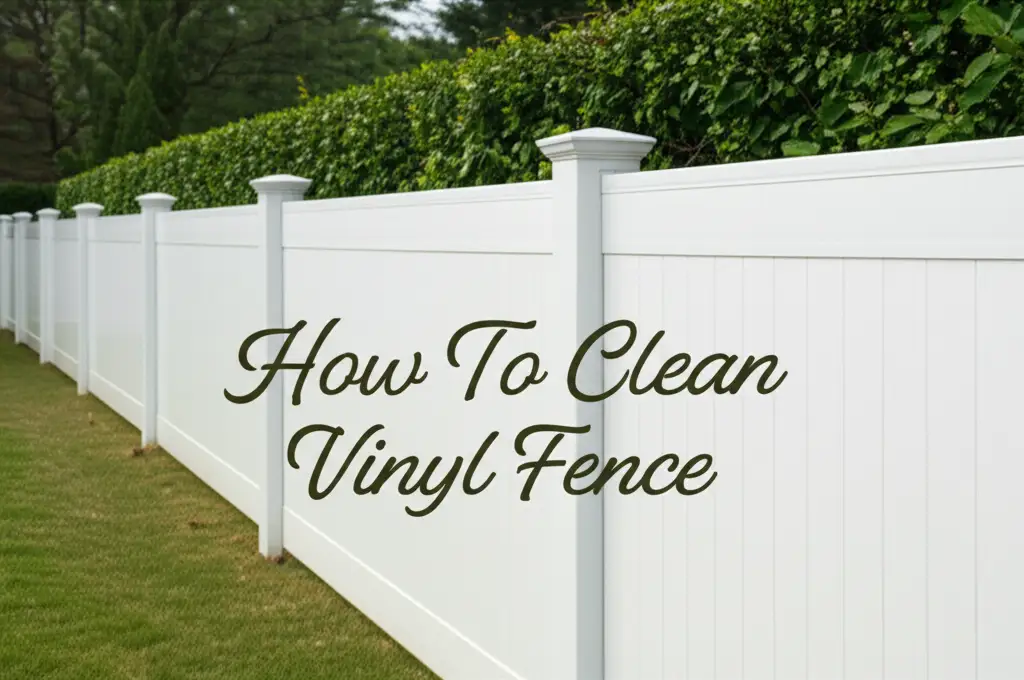
Is your vinyl fence looking dull or green with algae? You are not alone. Many homeowners wonder how to clean vinyl fence to restore its bright, clean appearance. Vinyl, also known as PVC, is a durable material. It resists rot and pests, but it still collects dirt, mildew, and grime. A clean fence boosts your home’s curb appeal. It also protects your outdoor living space.
This article provides a complete guide on how to clean vinyl fence effectively. We cover everything from simple soap and water washes to tackling tough stains. You will learn about safe cleaning solutions. We also discuss tools you need for the job. We will help you maintain your fence’s beauty for years. Get ready to transform your outdoor area.
Takeaway:
- Regular cleaning prevents buildup and maintains your vinyl fence’s look.
- Start with gentle cleaning solutions like soap and water.
- Address stubborn stains like mold and mildew with specific cleaners.
- Pressure washing can be effective, but use it carefully to avoid damage.
- Proper maintenance extends the life and beauty of your vinyl fence.
The most effective way to clean vinyl fence is by starting with a mild detergent and water solution, scrubbing gently to remove surface dirt and grime, and then using targeted cleaners like white vinegar or bleach for tougher stains such as mold or mildew, always rinsing thoroughly afterward.
Understanding Your Vinyl Fence Material
Vinyl fences are popular for good reason. They offer durability and low maintenance. Understanding the material helps you clean it correctly. Vinyl, or PVC (polyvinyl chloride), is a type of plastic. It is strong and resists many outdoor elements.
However, vinyl is not immune to dirt. It can get dusty, especially after wind. Rain can splash mud onto the fence. Over time, environmental factors cause staining. Pollen, tree sap, and insect droppings stick to the surface. These things make your fence look dirty. Knowing this helps you pick the right cleaning method. You want to remove stains without harming the vinyl.
Why Your Vinyl Fence Needs Cleaning
Even though vinyl does not rot, it still gets dirty. Algae and mold are common problems. These organisms thrive in damp, shady areas. They create green or black patches on your fence. Dirt and grime also stick to the surface. This buildup makes your fence look old and neglected. Regular cleaning keeps your vinyl fence looking new. It also prevents stains from setting in deeply. You protect your investment by keeping it clean.
Gathering Your Essential Cleaning Supplies
Before you start cleaning, gather all your supplies. Having everything ready makes the job easier. You will need a few basic items for general cleaning. For tougher spots, you might need extra products. Prepare these items beforehand to save time. This preparation helps ensure a smooth cleaning process.
Basic Cleaning Toolkit
For most light cleaning jobs, simple tools work best. You likely have many of these items already. They are safe for your vinyl fence and easy to use.
- Garden Hose: A standard garden hose with a spray nozzle is essential. You will use it to pre-rinse and rinse the fence. Water pressure helps loosen dirt.
- Large Bucket: You need a bucket for mixing cleaning solutions. A 5-gallon bucket is a good size.
- Soft-Bristled Brush or Sponge: These tools help scrub away dirt without scratching the vinyl. A car wash brush on an extendable pole works well for higher spots.
- Mild Dish Soap: Basic dish soap is a gentle cleaner. It cuts through grease and grime. Look for a biodegradable option.
- Microfiber Cloths or Old Towels: Use these for drying or wiping down small sections. They are also good for spot cleaning.
Specialized Cleaning Agents for Tough Stains
Sometimes, basic soap and water are not enough. Tough stains like mold or mildew need stronger solutions. Always test these on an inconspicuous area first. This step ensures the cleaner does not discolor your fence.
- White Vinegar: White vinegar is a natural acid. It effectively kills mold and mildew. Mix equal parts vinegar and water for a powerful cleaning solution. This solution is safe and eco-friendly. It is also good for cleaning other vinyl surfaces like vinyl shower curtains or vinyl window frames.
- Oxygen Bleach (e.g., OxiClean): This is a non-chlorine bleach. It works well on mold, mildew, and general discoloration. Mix it according to package directions. It is generally safer than chlorine bleach for plants.
- Chlorine Bleach (Diluted): For severe mold or algae, a diluted chlorine bleach solution can be used. Mix one part bleach with four parts water. Be very careful with this. Protect nearby plants and wear gloves and eye protection. It is a powerful disinfectant but can harm landscaping.
- Commercial Vinyl Fence Cleaner: Many brands offer cleaners specifically for vinyl fences. These often contain agents to break down various stains. Read the product label carefully for instructions. These products are formulated to be safe for vinyl.
Having these supplies ready will make your fence cleaning project more efficient. You will be able to tackle any type of stain or dirt.
Step-by-Step Guide to Cleaning Your Vinyl Fence
Cleaning your vinyl fence does not have to be difficult. Follow these steps for a shiny, fresh look. This method works for most types of dirt and grime. It focuses on gentle yet effective cleaning. You will see good results with minimal effort.
Step 1: Prepare the Area and Pre-Rinse
Preparation is key for any cleaning project. Clear the area around your fence. Move potted plants, lawn furniture, and decorations. This protects them from cleaning solutions. It also gives you clear access to the fence.
Next, pre-rinse the entire fence with your garden hose. Use a strong stream of water. This initial rinse removes loose dirt, dust, and cobwebs. It also helps loosen caked-on mud. Pre-rinsing makes the main cleaning step more effective. It also prevents scratching the surface with abrasive dirt.
Step 2: Apply a Gentle Cleaning Solution
Once the fence is wet, it is time to apply your cleaning solution. For general dirt and grime, a simple soap and water mixture works wonders.
- Mix Your Solution: Fill your bucket with warm water. Add a few squirts of mild dish soap. Stir until suds form.
- Apply the Solution: Dip your soft-bristled brush or sponge into the soapy water. Start at the top of a fence section. Work your way down. Apply the solution evenly. Cover a manageable section at a time.
- Gentle Scrubbing: Gently scrub the vinyl surface. Focus on areas with visible dirt or stains. The soap helps lift the grime. Do not use abrasive scrubbers. They can scratch the vinyl.
Let the solution sit on the fence for a few minutes. This allows the soap to break down the dirt. Do not let it dry on the fence. You can apply the solution to other vinyl surfaces like vinyl boat seats using similar methods.
Step 3: Tackle Stubborn Stains (Mold, Mildew, Algae)
If your fence has mold, mildew, or green algae, you need a stronger approach. These organic growths need specific cleaning agents.
Using White Vinegar
White vinegar is an excellent natural choice. It kills mold and mildew without harsh chemicals.
- Prepare Vinegar Solution: Mix equal parts white vinegar and water in a spray bottle.
- Spray and Wait: Spray the solution directly onto the affected areas. Make sure the mold or algae is fully saturated. Let it sit for 10-15 minutes. The vinegar needs time to work.
- Scrub and Rinse: Scrub the stained areas with your soft brush. You should see the growth disappear. Rinse thoroughly with your garden hose.
Using Oxygen Bleach
Oxygen bleach is another effective option for mold and general discoloration. It is safer for plants than chlorine bleach.
- Mix Oxygen Bleach: Follow the product instructions for mixing. Usually, it involves dissolving powder in warm water.
- Apply and Scrub: Apply the solution to the stained areas. Let it sit for the recommended time (usually 5-10 minutes). Scrub gently with a brush.
- Rinse Well: Rinse the fence completely with clean water. Ensure no residue remains.
Using Diluted Chlorine Bleach (Use with Caution)
For very severe, widespread mold or algae, diluted chlorine bleach can be used as a last resort. Always wear gloves and eye protection. Protect nearby plants by covering them or wetting them down thoroughly.
- Dilute Bleach: Mix one part chlorine bleach with four parts parts water in a bucket.
- Apply Carefully: Apply the solution to the affected spots using a sponge or spray bottle. Avoid splashing. Do not let it sit for more than a few minutes.
- Rinse Immediately and Thoroughly: Rinse the area with clean water right away. Flush the plants and surrounding soil with water if any bleach solution contacts them.
Step 4: Rinse Thoroughly
Rinsing is a crucial step. It removes all cleaning solutions and loosened dirt. Any residue left behind can attract new dirt or leave streaks.
- Start from the Top: Begin rinsing at the top of the fence section you are working on. Let the water run down.
- High Pressure Rinse (Garden Hose): Use your garden hose with a strong spray nozzle. Ensure all soap suds and dirt are washed away.
- Check for Residue: Walk along the fence and look closely. Make sure no soapy film remains. If you see streaks, rinse again.
Step 5: Air Dry
After rinsing, allow your vinyl fence to air dry completely. Vinyl dries relatively quickly. Sunlight and airflow help speed up the process. Do not worry about wiping it down unless you want to remove water spots. Water spots are rare on vinyl unless your water is very hard.
Following these steps will help you clean vinyl fence effectively. Your fence will look fresh and bright again. Regular cleaning prevents major buildup.
Using a Pressure Washer for Vinyl Fence Cleaning
A pressure washer can make cleaning large vinyl fences much faster. However, using it incorrectly can damage your fence. You must use the right nozzle and pressure setting. Always exercise caution when operating a pressure washer. It is a powerful tool. You can find more tips on cleaning vinyl siding with a pressure washer.
Choosing the Right Nozzle and Pressure
The most common mistake is using too much pressure. This can gouge the vinyl or force water behind the panels.
- Nozzle Choice: Use a wide-angle nozzle. A 25-degree (green) or 40-degree (white) nozzle is ideal. These nozzles spread the water pressure over a larger area. Never use a 0-degree (red) or 15-degree (yellow) nozzle on vinyl. They are too strong.
- Pressure Setting: Keep the pressure setting low. For vinyl, 1200-1500 PSI (pounds per square inch) is usually sufficient. Some electric pressure washers have lower PSI, which is often perfect. High PSI can damage the vinyl.
Pressure Washing Technique
Once you have the right setup, use proper technique to clean your vinyl fence safely.
- Test a Small Area: Always test a small, inconspicuous section of the fence first. This helps you confirm the pressure and nozzle are safe.
- Maintain Distance: Hold the pressure washer wand about 12-18 inches away from the fence surface. Moving closer increases the pressure.
- Overlap Strokes: Use smooth, even strokes. Work in sections. Start from the top and work down. Overlap your strokes slightly to avoid streaks.
- Angle the Spray: Angle the spray downwards. This helps water run off and prevents it from getting behind the fence panels.
- Be Careful Around Joints: Reduce pressure or increase distance around fence posts and panel joints. These areas can be more vulnerable to water intrusion.
- Rinse Thoroughly: After applying any cleaning solution with the pressure washer’s soap dispenser, rinse the fence completely. Switch to a clean water setting or use your garden hose.
Pressure washing can save time. But knowing how to clean vinyl fence with this tool means using it wisely.
Dealing with Specific Stains and Problems
Vinyl fences are durable. But certain stains require special attention. Understanding how to handle them helps maintain your fence’s appearance. Do not panic if you see these common problems. There are good solutions for them.
Rust Stains
Rust stains often come from metal objects leaning against the fence. Sprinkler systems can also leave rust if they use well water with high iron content.
- Oxalic Acid: Products containing oxalic acid are effective for rust removal. These are often sold as rust removers or deck brighteners. Follow product directions carefully.
- Lemon Juice and Salt: For small rust spots, a paste of lemon juice and salt can work. Apply the paste, let it sit for a few minutes, then scrub gently. Rinse well.
- Avoid Bleach: Chlorine bleach can set rust stains, making them harder to remove. Do not use it for rust.
Hard Water Spots
If you live in an area with hard water, you might see white mineral deposits. These spots are leftover minerals after water evaporates.
- White Vinegar: A solution of equal parts white vinegar and water is excellent for hard water spots. Spray it on, let it sit, then wipe or scrub.
- Commercial Descalers: You can buy commercial products designed to remove hard water stains. Choose one safe for vinyl surfaces. Always test in a hidden area first.
Greasy Stains or Tree Sap
Grease from barbecue areas or sticky tree sap can be stubborn.
- Strong Dish Soap: For greasy stains, a more concentrated solution of warm water and dish soap can work. Let it sit on the stain for a few minutes before scrubbing.
- Rubbing Alcohol: For tree sap, rubbing alcohol can dissolve the sticky residue. Apply it to a cloth and dab the sap. Then wipe it away. Rinse the area with soap and water afterwards.
Graffiti or Paint
Graffiti or accidental paint splatters are the toughest stains.
- Non-Abrasive Cleaners: Start with gentle cleaners like mineral spirits or paint thinner. Apply to a cloth and rub the stain gently. Test this in an inconspicuous spot first. These can be strong.
- Specialized Graffiti Removers: If mild solvents fail, consider a commercial graffiti remover designed for vinyl. These are powerful chemicals. Always follow manufacturer instructions and wear protective gear.
- Avoid Harsh Solvents: Do not use acetone or lacquer thinner. They can damage or melt the vinyl surface.
Dealing with specific stains requires patience and the right product. Always start with the least aggressive method. Move to stronger options only if necessary. This approach helps protect your vinyl fence.
Maintaining Your Vinyl Fence for Lasting Beauty
Cleaning your vinyl fence is only one part of its care. Regular maintenance ensures it stays beautiful for many years. A little consistent effort goes a long way. This helps avoid big cleaning jobs later. You protect your outdoor investment.
Regular Inspections
Inspect your fence periodically. Look for any signs of damage or wear. This includes loose caps, broken panels, or leaning posts. Catching problems early makes repairs easier.
- Check for Damage: Look for cracks, chips, or holes. These can be entry points for water or dirt.
- Assess Stability: Gently push on fence posts. Make sure they are firm in the ground.
- Inspect Gates: Ensure gate latches and hinges work properly. Lubricate them if needed.
Preventative Measures Against Algae and Mold
Preventing mold and algae is easier than removing it. Take steps to reduce moisture around your fence.
- Trim Foliage: Keep bushes, trees, and shrubs trimmed away from the fence. This improves air circulation. It also reduces shade. Sunlight helps keep vinyl dry.
- Improve Drainage: Ensure water drains away from the fence base. Standing water promotes growth.
- Apply Mold Inhibitors (Optional): Some commercial products offer a protective layer. These can deter mold and algae growth. Apply them after cleaning. Always check product compatibility with vinyl.
Routine Cleaning Schedule
Establish a cleaning routine. This keeps your fence looking great with minimal effort.
- Annual Deep Clean: Plan for one thorough cleaning each year. This involves washing the entire fence with soap and water or a mild solution. This deep clean tackles accumulated dirt.
- Spot Cleaning as Needed: Address small stains or dirty spots as they appear. Do not let them set in. A quick wipe with a damp cloth can handle most fresh marks.
- After Storms: After heavy storms, check your fence. Rinse off any mud or debris that splashed onto it. This prevents dirt from drying and sticking.
By following these maintenance tips, you can extend the life and beauty of your vinyl fence. It will remain a bright, clean feature of your property. Consistent care makes a big difference.
Common Mistakes to Avoid When Cleaning Vinyl Fence
Cleaning your vinyl fence effectively also means avoiding common pitfalls. Certain actions can damage the vinyl or make cleaning harder. Knowing these mistakes helps you protect your fence. You ensure a safe and successful cleaning process.
Using Harsh Abrasives
Vinyl is a relatively soft material. Abrasive cleaners or tools can scratch its surface.
- Avoid Steel Wool or Scouring Pads: These will leave permanent scratches. Scratches collect dirt and make the fence harder to clean in the future.
- Skip Abrasive Powders: Some cleaning powders contain abrasive particles. These are not suitable for vinyl. Stick to liquid or gel cleaners.
- Choose Soft Brushes: Always use a soft-bristled brush or a sponge. This prevents surface damage.
Applying Undiluted Strong Chemicals
Concentrated chemicals can damage vinyl, discolor it, or leave streaks.
- Always Dilute Bleach: Never use undiluted chlorine bleach directly on your vinyl fence. It is too strong. Always mix it with water as recommended.
- Read Labels: For any commercial cleaner, follow the dilution instructions precisely. More is not always better.
- Test in an Inconspicuous Spot: Before applying any strong chemical to a large area, test it. Choose a small, hidden spot. Check for discoloration or damage.
Ignoring Weather Conditions
Cleaning in the wrong weather can affect cleaning results and your safety.
- Avoid Direct Sunlight: Cleaning in direct, hot sunlight can cause cleaning solutions to dry too quickly. This leaves streaks and makes rinsing difficult. It also makes some chemicals less effective.
- Choose an Overcast Day: An overcast day or cooler morning/evening is ideal for cleaning. This allows solutions to work before drying.
- Check for Wind: High winds can spray cleaning solutions onto areas you do not want them. They can also make it difficult to control water from a hose or pressure washer.
Neglecting Thorough Rinsing
Leaving cleaning solution residue on your fence can lead to new problems.
- Soap Scum: Any soap left behind will attract dirt and grime. It can also leave a dull film.
- Chemical Residue: Bleach or other chemical residues can cause discoloration over time. They can also harm nearby plants if not fully rinsed away.
- Take Your Time: Dedicate enough time to rinse every section thoroughly. Ensure all suds and solutions are gone.
By avoiding these common mistakes, you ensure your vinyl fence cleaning is safe and effective. Your fence will look its best without damage.
FAQs About Cleaning Vinyl Fence
How often should I clean my vinyl fence?
You should clean your vinyl fence at least once a year. This annual deep clean helps remove accumulated dirt and grime. For areas with heavy pollen, high humidity, or significant tree coverage, more frequent cleaning, perhaps twice a year, might be needed. Spot clean any new stains or dirt as they appear.
Can I use a pressure washer on my vinyl fence?
Yes, you can use a pressure washer, but with caution. Use a wide-angle nozzle (25-degree or 40-degree) and a low-pressure setting, ideally between 1200-1500 PSI. Hold the wand 12-18 inches away from the fence surface. Test a small area first. High pressure can damage the vinyl or force water behind panels.
What is the best homemade cleaner for vinyl fence?
A simple mixture of mild dish soap and warm water is excellent for general cleaning. For mold, mildew, or algae, a solution of equal parts white vinegar and water works very well. For tougher organic stains, oxygen bleach mixed according to its package directions is another effective homemade option.
How do I remove green algae from my vinyl fence?
To remove green algae, spray the affected areas with a solution of equal parts white vinegar and water. Let it sit for 10-15 minutes to penetrate the algae. Then, scrub with a soft-bristled brush and rinse thoroughly with a garden hose. Oxygen bleach solution can also be used for stubborn algae.
Will cleaning agents harm my plants or lawn?
Mild dish soap is generally safe for plants, but always rinse surrounding areas well. White vinegar is also relatively safe but can temporarily acidify soil; rinse plants well. Chlorine bleach can harm or kill plants; always dilute it heavily and protect or thoroughly pre-wet and rinse any nearby vegetation before and after use.
What causes discoloration on vinyl fences?
Discoloration on vinyl fences often comes from dirt, pollen, mold, mildew, or algae accumulation. Rust stains from metal contact or iron in well water can cause orange-brown marks. Environmental pollutants and certain chemicals can also lead to yellowing or other color changes over time if not regularly cleaned.
Conclusion
A clean vinyl fence significantly enhances your home’s appearance. It provides a beautiful backdrop for your outdoor space. Cleaning your vinyl fence does not require special skills. It simply needs the right approach and a little effort. You have learned simple yet effective methods. You can now tackle everything from light dust to stubborn mold and mildew.
Remember to start with gentle cleaners. Progress to stronger solutions only when necessary. Always prioritize safety. Protect your plants and yourself. Regular cleaning and preventative measures will keep your vinyl fence looking new for years. Take action today. Give your fence the cleaning it deserves. Enjoy a bright, clean, and beautiful outdoor area.
- vinyl fence cleaning
- fence maintenance
- PVC fence
- outdoor cleaning
- mold removal

