· Home Care · 18 min read
How To Clean Walgreens Humidifier
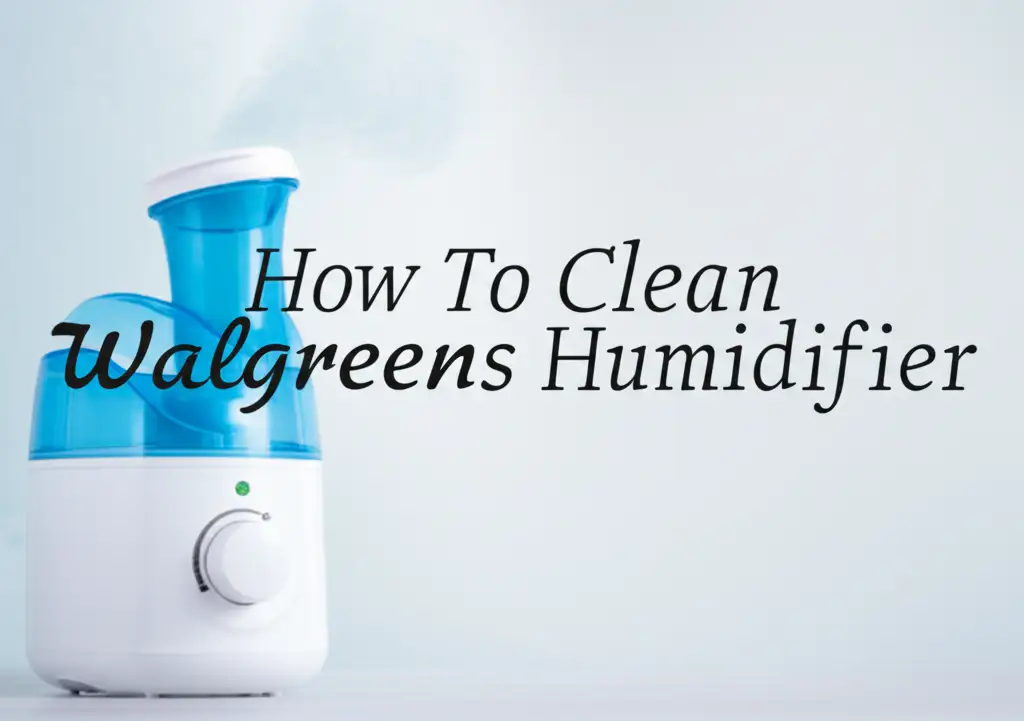
Keep Your Air Fresh: How to Clean Your Walgreens Humidifier
A humidifier adds much-needed moisture to your home’s air. It helps relieve dry skin, eases congestion, and improves overall comfort. However, your Walgreens humidifier can become a breeding ground for mold and bacteria if you do not clean it regularly. These airborne contaminants can harm your health and reduce your humidifier’s effectiveness.
Keeping your humidifier clean is a simple task that yields big benefits. I will walk you through the proper steps to clean your Walgreens humidifier. We will cover necessary supplies, deep cleaning methods, and routine maintenance. Follow these guidelines to ensure your humidifier provides fresh, healthy mist for years to come.
Takeaway
- Disassemble and rinse daily: Remove water and rinse components after each use.
- Deep clean weekly: Use white vinegar to descale and disinfect all parts.
- Use distilled water: Prevent mineral buildup and white dust.
- Air dry completely: Ensure all parts are dry before reassembly to prevent mold.
- Check filters: Replace or clean filters as the manufacturer advises.
Cleaning your Walgreens humidifier involves simple steps. First, unplug the unit. Then, disassemble it and empty any remaining water. Soak removable parts in a white vinegar solution to remove mineral buildup and kill germs. Rinse all parts thoroughly with clean water, and then let them air dry completely before reassembling. This routine keeps your humidifier working well and your air clean.
Why Regular Humidifier Cleaning Matters
Your humidifier pushes moisture into the air. This moisture can improve your breathing and soothe dry skin. Yet, the same moisture creates a damp environment inside the unit. This environment is perfect for mold and bacteria to grow. These microorganisms can then spread into your indoor air.
Breathing in mold spores or bacteria can cause health problems. You might experience allergies, respiratory issues, or even infections. Children, the elderly, and people with asthma are especially vulnerable. Regular cleaning prevents these harmful elements from circulating in your home. It protects your family’s health.
Mineral deposits also build up inside humidifiers over time. These deposits come from tap water. They can clog the unit and make it less efficient. A clogged humidifier uses more power and produces less mist. Eventually, it might stop working altogether. Proper cleaning removes these deposits. It keeps your unit running smoothly. This prolongs the life of your Walgreens humidifier.
Ignoring cleaning can lead to unpleasant odors. A musty smell often signals mold growth. You might also notice white dust settling on furniture. This dust consists of minerals from tap water. Cleaning eliminates these issues. It ensures your humidifier provides clean, fresh air, free from odors and unwanted dust. Remember, a clean humidifier gives you clean air. Learn more about keeping your cool mist humidifier clean by visiting our guide on how to clean cool mist humidifier.
Essential Supplies for Cleaning Your Walgreens Humidifier
Before you start cleaning your Walgreens humidifier, gather all the necessary supplies. Having everything ready makes the process smoother and more efficient. Most of these items are common household products. You might already have them in your pantry or cleaning cabinet. I always make sure I have these on hand for cleaning tasks.
First, you will need white vinegar. This is your main cleaning agent. White vinegar is a natural disinfectant and descaler. It breaks down mineral deposits and kills mold and bacteria. Its acidic nature makes it highly effective without using harsh chemicals. I find it much safer than bleach for humidifier cleaning.
Next, have a soft brush or an old toothbrush ready. These tools help you scrub hard-to-reach areas. They are perfect for cleaning crevices and the base of the water tank. A microfiber cloth or a soft sponge is also crucial. You will use it for wiping surfaces and drying parts. These materials are gentle and will not scratch your humidifier.
You will also need a large basin or sink. This provides a space to soak the humidifier parts. It also helps contain any water or cleaning solution. Lastly, access to clean, running water is essential for rinsing. Distilled water is also good to have for rinsing the final parts, as it leaves no mineral residue.
Avoid abrasive cleaners, harsh chemicals, or scouring pads. These can damage your humidifier’s plastic parts or internal components. Stick to the recommended supplies. They will ensure a safe and effective cleaning process for your Walgreens humidifier. Preparing your supplies saves time. It also ensures you clean your unit correctly.
Step-by-Step Guide to Deep Clean a Walgreens Humidifier
Deep cleaning your Walgreens humidifier regularly is crucial. It prevents the buildup of mold, mildew, and mineral deposits. This process ensures your humidifier operates efficiently and delivers clean mist. I will walk you through each step. You will see how simple it is to keep your unit pristine.
Disassembly
First, unplug your humidifier from the power outlet. Safety always comes first. Never clean an appliance while it is still plugged in. This prevents electric shock. Next, carry the humidifier to a sink or bathtub. Empty any remaining water from the water tank and the base.
Now, disassemble the humidifier. Most Walgreens humidifiers have a removable water tank, a base unit, and possibly a mist nozzle or a filter tray. Carefully remove each part. Refer to your specific humidifier’s manual if you are unsure how to take it apart. I find that taking a quick picture with my phone before disassembling helps remember how to put it back together.
Descaling with Vinegar
This step targets mineral buildup, also known as scale. Fill the water tank with undiluted white vinegar. If your humidifier has a smaller opening, you can use a funnel. Pour some vinegar into the base of the humidifier as well. Ensure all areas with mineral deposits are covered.
Let the vinegar sit for at least 30 minutes to an hour. For heavy buildup, you can let it soak for several hours or even overnight. The vinegar’s acidity will break down the mineral deposits. Use a soft brush or an old toothbrush to gently scrub any stubborn areas. I like to use an old toothbrush to get into all the nooks and crannies.
Disinfecting
After descaling, it is time to disinfect. You can use the same white vinegar solution. Wipe down all other removable parts with a cloth dampened with white vinegar. Pay close attention to the mist nozzle and any narrow tubes. These areas can harbor bacteria.
For parts that cannot be submerged, like the base unit with electrical components, wipe them carefully with a vinegar-dampened cloth. Do not submerge the base unit in water or vinegar. This prevents damage to the electrical parts. Many parts of cleaning humidifiers are similar. If you own a Crane model, you can check out our guide on how to clean a Crane humidifier for more insights. Also, for Vicks humidifier owners, we have a detailed article on how to clean a Vicks humidifier that might be helpful.
Rinsing Thoroughly
Once the soaking and scrubbing are complete, rinse all parts thoroughly with fresh, clean water. Rinse until the smell of vinegar is gone. Any residual vinegar can cause a strong odor when the humidifier operates. It can also leave a taste in the air.
Ensure no vinegar residue remains. This might require multiple rinses. I usually rinse each part two or three times to be safe. This step is critical for preventing any lingering odors. For those with a TaoTronics model, you might find our cleaning tips on how to clean a TaoTronics humidifier useful as well.
Drying and Reassembly
Allow all parts to air dry completely before reassembling your Walgreens humidifier. Lay them out on a clean towel or drying rack. Air drying prevents mold and mildew from growing immediately after cleaning. Do not rush this step. I find letting them dry overnight is best.
Once everything is bone dry, reassemble the humidifier. Put all the parts back in their correct positions. Now, your Walgreens humidifier is ready to provide fresh, clean mist once more. Follow these steps regularly. Your humidifier will stay clean and efficient.
Cleaning Different Types of Walgreens Humidifiers
Walgreens offers various types of humidifiers. Each type may have slight differences in its cleaning process. Understanding these differences ensures a thorough clean. It also protects your specific model. Let’s look at the most common types you might find.
Cool Mist Humidifiers (Evaporative and Ultrasonic)
Most Walgreens humidifiers are cool mist models. These either use a fan to blow air through a wet wick filter (evaporative) or a vibrating diaphragm (ultrasonic) to create a fine mist.
- Evaporative Cool Mist Humidifiers: These often have a wicking filter. The filter absorbs water, and a fan blows air over it. This releases moisture. You must clean the water tank and base regularly as described above. The filter itself is not cleanable in the same way. Filters accumulate minerals and mold spores. You need to replace the filter every 1-3 months, depending on usage and water hardness. Check your humidifier’s manual for specific filter replacement guidelines.
- Ultrasonic Cool Mist Humidifiers: These use high-frequency vibrations to produce a cool mist. They do not typically have wicking filters. Instead, they have a small metal disc called the nebulizer or transducer. This disc creates the mist. During cleaning, pay special attention to this disc. Mineral buildup on the nebulizer can reduce mist output. Use a soft brush or cotton swab dipped in vinegar to gently clean it. Do not scratch or damage the disc. Cleaning a HoMedics humidifier involves similar steps, so our guide on how to clean a HoMedics humidifier might be useful if you encounter similar parts. Some premium models sold elsewhere, like Dyson, also use ultrasonic technology. Our guide on how to clean a Dyson humidifier can offer additional insights for ultrasonic units.
Warm Mist Humidifiers
Warm mist humidifiers boil water to create steam. This steam then cools slightly before release. Because they boil water, some people believe they are self-cleaning. This is not entirely true. Boiling kills some germs, but it does not prevent mineral buildup.
Warm mist humidifiers will develop hard mineral scale on their heating element and water reservoir. You must descale them regularly with white vinegar. The principle is the same as for cool mist humidifiers. Soak the heating element and any parts that come into contact with water in vinegar. Scrub gently to remove buildup. Ensure you unplug the unit and let it cool completely before cleaning. These units often have a medicine cup for essential oils. Clean this cup thoroughly as well.
Regardless of the type, the core steps of unplugging, disassembling, soaking in vinegar, rinsing, and air-drying remain the same. Always consult your specific Walgreens humidifier’s user manual. It will provide the most accurate instructions for your model. It may also suggest specific cleaning products or methods unique to your unit.
Daily and Weekly Humidifier Maintenance
Keeping your Walgreens humidifier clean is an ongoing task. Daily and weekly maintenance routines extend the life of your unit. They also ensure you breathe consistently clean, healthy air. I make sure to incorporate these simple steps into my routine. They save me time in the long run.
Daily Maintenance
Daily care is quick and easy. It prevents major issues from developing.
- Empty and Rinse the Water Tank: At the end of each day, or before each refill, empty any leftover water from the tank. Do not let water sit in the tank overnight. Stagnant water is a breeding ground for bacteria and mold.
- Rinse the Base: Briefly rinse the water reservoir or base unit with fresh water. You do not need to use soap or vinegar daily. A quick rinse helps flush out loose minerals and potential contaminants.
- Refill with Fresh Water: Always refill your humidifier with fresh, clean water. Using distilled water is best. It dramatically reduces mineral buildup, which means less frequent deep cleaning. If you use tap water, be prepared for more frequent descaling.
Weekly Maintenance
Once a week, dedicate a little more time to a deeper clean. This is where your white vinegar comes in handy.
- Perform a Vinegar Soak: Follow the deep cleaning steps outlined previously. Disassemble the unit. Soak the water tank, base, and any other removable parts in white vinegar for at least 30 minutes. This dissolves mineral deposits and sanitizes the components.
- Scrub and Rinse: Use a soft brush to scrub away any remaining residue. Pay attention to crevices and the mist outlet. Rinse all parts thoroughly until the vinegar smell is gone.
- Air Dry Completely: This step is crucial for preventing mold. Ensure all components are completely dry before you reassemble the humidifier. I often leave parts to dry overnight on a clean towel.
- Check and Replace Filters: If your Walgreens humidifier has a filter, check its condition weekly. Some filters are washable, while others need replacement. Replace disposable filters as the manufacturer recommends. A dirty filter can spread bacteria and reduce efficiency. Our article on how to clean an Aprilaire humidifier filter provides additional tips on filter maintenance that could be broadly applicable.
Consistent daily and weekly maintenance stops problems before they start. It keeps your humidifier working at its best. This means cleaner air and a healthier home for you and your family. It is a small effort for a big reward.
Troubleshooting Common Humidifier Issues After Cleaning
Even after a thorough cleaning, you might encounter a few common issues with your Walgreens humidifier. Do not worry; most problems have simple solutions. I can help you identify and fix them. Understanding these issues will make you a more confident humidifier owner.
Issue 1: White Dust on Furniture
You just cleaned your humidifier, but you still see white dust settling on surfaces. This dust is a common complaint, especially with ultrasonic humidifiers.
- The Cause: White dust is a result of minerals in your tap water. When the humidifier creates mist, these minerals become airborne and settle as fine white powder. Cleaning removes mold and bacteria, but it does not remove minerals from the water itself.
- The Solution: The best way to prevent white dust is to use distilled water in your humidifier. Distilled water has had its minerals removed. This eliminates the source of the dust. If distilled water is too expensive, consider using demineralization cartridges if your humidifier supports them. Some people also use filtered water, but this may not remove all minerals.
Issue 2: Persistent Odors
You cleaned your humidifier, but it still smells musty, or you notice a strange odor when it runs.
- The Cause: This usually means you missed some mold or bacteria during cleaning. It could also indicate that the parts did not dry completely before reassembly. A lingering vinegar smell means you did not rinse thoroughly enough.
- The Solution: Disassemble the humidifier again. Re-examine all parts carefully, especially crevices, the mist nozzle, and the base. Use a small brush or cotton swab to clean every tiny spot. Increase your vinegar soak time if needed. Ensure every single part is bone dry before putting it back together. If the odor is a strong chemical smell, it might be due to a faulty heating element or internal component. In that case, contact the manufacturer or consider replacement.
Issue 3: Reduced Mist Output or No Mist
Your humidifier is running, but the mist is weak, or no mist comes out at all.
- The Cause: This is often due to mineral buildup on the ultrasonic nebulizer (the vibrating disc) or in the water lines. Even after cleaning, some stubborn deposits might remain. For evaporative humidifiers, a clogged or old filter is the most likely culprit.
- The Solution: For ultrasonic humidifiers, gently clean the nebulizer again with a cotton swab dipped in white vinegar. Be very careful not to scratch it. If the issue persists, the nebulizer might be faulty and need replacement. For evaporative humidifiers, check the filter. If it looks discolored or hard with mineral deposits, it needs replacement. Filters are crucial for performance. Always ensure the water tank is properly seated. Sometimes, a loose tank prevents water from flowing to the base.
Issue 4: Leaking Humidifier
Your humidifier is leaking water onto your surface.
- The Cause: Leaks often result from improper reassembly after cleaning. A seal might be out of place, or a component is not securely fastened. Cracks in the water tank or base can also cause leaks.
- The Solution: Unplug the humidifier immediately. Disassemble it and inspect all seals, gaskets, and connections. Ensure the water tank is seated correctly and securely locked into place. Check for any visible cracks in the plastic. If you find cracks, the unit might be damaged beyond repair and needs replacement.
Troubleshooting these issues helps maintain your humidifier’s efficiency. It keeps your indoor air clean and comfortable. Always refer to your Walgreens humidifier’s manual for specific troubleshooting tips for your model.
When to Replace Your Walgreens Humidifier
While regular cleaning can significantly extend the life of your Walgreens humidifier, there comes a time when replacement is the best option. Recognizing these signs helps you make an informed decision. Replacing an old, inefficient, or contaminated unit is better for your health and wallet.
Persistent Mold Growth: You clean your humidifier regularly, but black mold keeps reappearing quickly. This suggests the mold has deeply embedded itself into parts you cannot reach or clean effectively. This often happens in older units where plastic has become porous. If you see mold returning even after aggressive cleaning, it is a sign to replace the unit. You do not want to be inhaling mold spores.
Poor Performance: Your humidifier is not putting out as much mist as it used to, even after cleaning and filter replacement. It might struggle to maintain the desired humidity level. This indicates internal components are wearing out. The motor could be failing, or the nebulizer disc might be deteriorating. An inefficient humidifier uses more energy without providing adequate moisture.
Unusual Noises: A healthy humidifier operates with a consistent, quiet hum. If your unit starts making loud grinding, rattling, or squealing noises, it usually means mechanical parts are failing. This can include the fan, motor, or other internal mechanisms. These noises are not only annoying but also signal an impending breakdown.
Visible Damage or Leaks: Cracks in the water tank or base are clear signs of damage. Even small cracks can lead to leaks, creating water damage to your furniture or floors. If seals are worn out or broken, the unit will leak. Such damage is often irreparable and poses a safety risk. Never use a leaking humidifier.
Foul Odors that Persist: If your humidifier emits a strange, persistent odor even after thorough cleaning and drying, it is a problem. This might indicate mold growth deep inside the unit or the breakdown of internal plastic. A foul smell directly affects your indoor air quality. It defeats the purpose of having a humidifier.
Old Age: Most humidifiers have a lifespan of 3-5 years, depending on usage and maintenance. After this period, components naturally wear down. Even with diligent cleaning, efficiency decreases, and problems become more frequent. Consider replacing your Walgreens humidifier if it is past its expected lifespan, especially if you notice any of the above issues. Investing in a new unit ensures optimal performance and cleaner air.
FAQ Section
Q1: How often should I clean my Walgreens humidifier? A: You should rinse your humidifier’s water tank and base daily. Perform a deep clean with white vinegar at least once a week. If you use your humidifier continuously or use tap water, increase deep cleaning to twice a week. Regular cleaning prevents mineral buildup and the growth of mold and bacteria.
Q2: Can I use bleach to clean my Walgreens humidifier? A: It is generally not recommended to use bleach. Bleach can be harsh on plastic components and may leave a chemical residue. Inhaling bleach fumes from a humidifier can be harmful. White vinegar is a safer and equally effective alternative for descaling and disinfecting. Always prioritize natural cleaners.
Q3: Why does my Walgreens humidifier have white dust? A: White dust is caused by minerals present in tap water. When your humidifier atomizes water into a mist, these minerals become airborne and settle on surfaces. To prevent white dust, use distilled water in your humidifier. You can also use demineralization cartridges if your model supports them.
Q4: What type of water should I use in my Walgreens humidifier? A: Distilled water is the best choice for your humidifier. It contains no minerals, preventing white dust and reducing mineral buildup inside the unit. This extends your humidifier’s life and reduces the frequency of deep cleaning. If using tap water, be prepared for more frequent descaling.
Q5: How do I remove mold from my Walgreens humidifier? A: To remove mold, disassemble your humidifier completely. Soak all water-contacting parts in a solution of equal parts white vinegar and water for at least 30 minutes. Scrub any visible mold with a soft brush or cloth. Rinse thoroughly with clean water, then air dry all parts completely before reassembling.
Conclusion
Keeping your Walgreens humidifier clean is a simple yet vital task. It directly impacts your indoor air quality and overall health. We have walked through the entire process, from daily rinses to thorough weekly deep cleans using white vinegar. You now know the importance of regular maintenance. You also understand how to troubleshoot common issues.
Remember to always unplug your unit first. Use gentle, effective solutions like white vinegar. Rinse thoroughly and allow all parts to air dry completely. This routine prevents mold and mineral buildup. It ensures your humidifier delivers fresh, clean mist every time. Prioritizing your humidifier’s cleanliness helps you breathe easier and supports a healthier home environment. Make humidifier maintenance a regular part of your home care routine.
- Walgreens humidifier
- humidifier cleaning
- mold prevention
- indoor air quality