· Craft Tool Maintenance · 19 min read
How To Clean Wax Seal Spoon
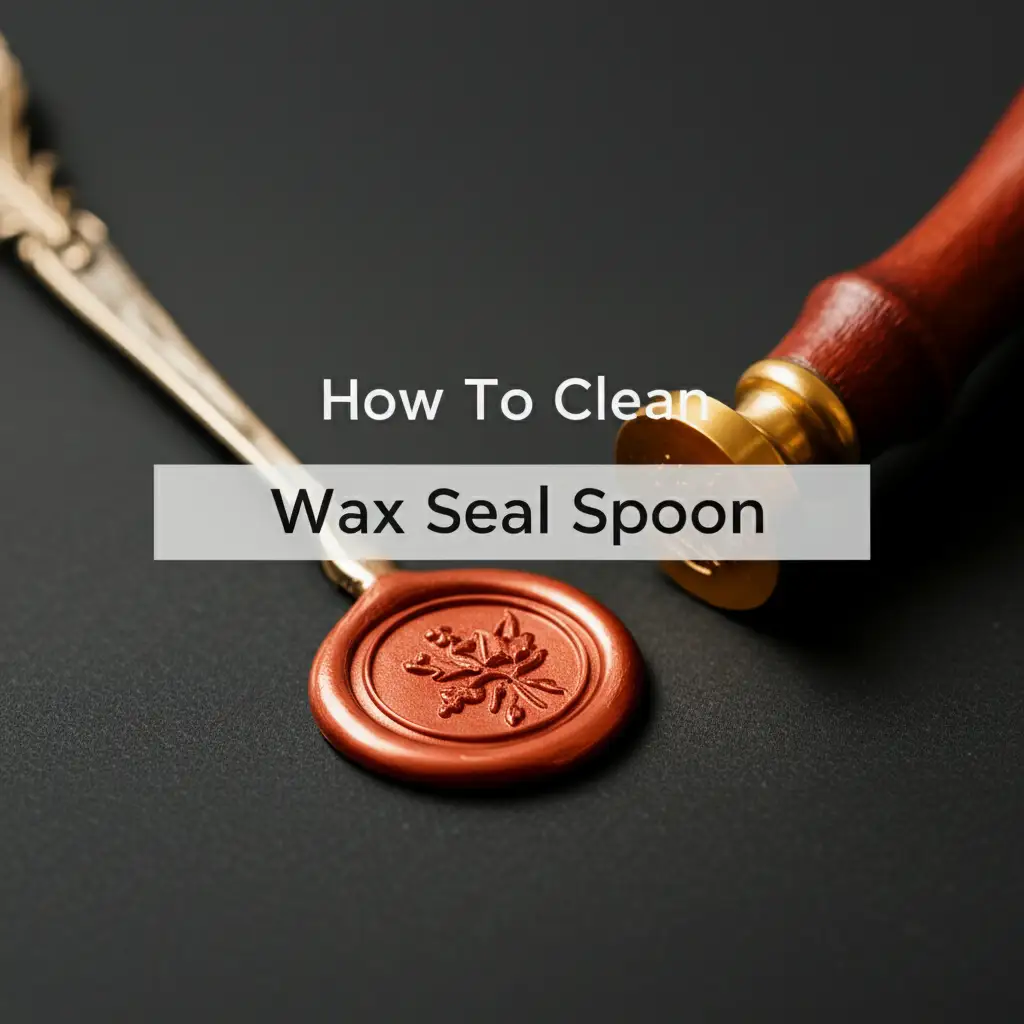
How To Clean Your Wax Seal Spoon for Perfect Results
Have you ever noticed your wax seal spoon looks a little dull after many uses? Or perhaps you see residue from different wax colors mixing? A clean wax seal spoon is crucial for beautiful, crisp wax seals. If you love creating personalized invitations, letters, or gift tags, maintaining your tools helps you get the best results.
Cleaning your wax seal spoon keeps it in good working order. It prevents old wax from contaminating new colors. This guide helps you understand how to clean wax seal spoons effectively. We will cover simple heat methods, advanced techniques for stubborn wax, and important safety tips. You will learn the best ways to care for your essential crafting tool. Let us make sure your wax seals always look their best.
Takeaway
- Heat Method is Key: Gently warm the spoon to soften wax for easy removal.
- Scrape, Don’t Scrub: Use non-abrasive tools to lift softened wax without damaging the spoon.
- Use Solvents for Stubborn Spots: Isopropyl alcohol works well for sticky or burnt-on residue.
- Prevent Build-Up: Clean after each use and consider using a release agent.
- Safety First: Always handle hot spoons with care and ensure proper ventilation with solvents.
Clear Answer
To clean a wax seal spoon, gently reheat residual wax until it softens, then scrape it off with a non-abrasive tool like a wooden stick or silicone spatula. For stubborn residue, use rubbing alcohol or a specialized wax remover on a soft cloth. Ensure the spoon is cool before handling to prevent burns.
Understanding Your Wax Seal Spoon and Wax Types
Your wax seal spoon is a simple yet vital tool for crafting beautiful wax seals. It holds and melts the wax over a heat source. Different spoons exist, from basic stainless steel to ornate brass or copper designs. Understanding your spoon’s material helps you choose the best cleaning method.
Wax types also play a role in how they adhere to the spoon. Traditional sealing wax, often made from resin, tends to be harder when cool. Modern wax sticks, especially those with flexible additives, might leave a softer, stickier residue. These differences affect how easily the wax comes off. A clean spoon ensures new wax melts smoothly and pours without impurities. It also prevents cross-contamination of colors, keeping your seals vibrant and true to hue. Proper care extends your spoon’s life and enhances your crafting experience.
Maintaining your spoon prevents frustrating issues. Bits of old wax can fall into your fresh seal, creating blemishes. Burnt wax residue can change the melting point of new wax. It may even release smoke or odors during use. Keeping your spoon clean is a quick task that saves you from bigger problems. I always clean my spoon right after I finish a sealing session. This prevents wax from hardening too much.
Different waxes also melt at different temperatures. Some traditional waxes need more heat than modern flexible waxes. This temperature difference impacts how easily residual wax can be softened for cleaning. A spoon used for various wax types will likely accumulate a mix of residues. Knowing your wax helps you anticipate the cleaning effort needed. Always check the wax type if you are having trouble removing it.
Basic Heat Method: The Easiest Way to Clean Wax Seal Spoon
The most effective way to clean wax seal spoon residue is often by gently reheating it. This method softens the wax, allowing for easy removal. It is simple, requires minimal supplies, and works for most wax types. You should always use a heat source you are comfortable with. A tea light candle, a heat gun on a low setting, or even a stovetop burner can work.
Tools You Will Need
You will need just a few items for this basic cleaning method. Gather a heat-resistant surface to work on. A ceramic tile or a glass cutting board works well. You will also need a soft, lint-free cloth or paper towels. A non-abrasive scraping tool is important; a wooden craft stick, a silicone spatula, or a blunt plastic tool works best. Avoid metal scrapers, as these can scratch your spoon’s surface. Finally, have your heat source ready.
Step-by-Step Guide
- Prepare Your Workspace: Place your heat-resistant surface on a stable table. This prevents damage to your furniture. Make sure you have good lighting so you can see the wax clearly.
- Apply Gentle Heat: Hold the wax seal spoon over your heat source. Move it slowly, allowing the residual wax to warm up. Do not hold it in one spot for too long. You want the wax to soften, not to burn or smoke. Watch for the wax to become glossy and pliable. This means it is ready to be removed.
- Scrape Away Wax: Once the wax softens, immediately use your non-abrasive scraping tool. Gently push the melted wax off the spoon and onto your cloth or paper towel. The wax should slide off easily. Repeat this process for any remaining spots. You can reheat small areas if needed.
- Wipe Clean: After scraping, use a clean part of your cloth or paper towel to wipe the spoon. This removes any thin film or small bits of wax left behind. You can wipe it while it is still slightly warm for the best results. Make sure the spoon is completely clean before letting it cool.
- Cool Down: Allow the spoon to cool completely before storing it. Handling a hot spoon can cause burns. This method is effective for routine cleaning and prevents wax build-up. I always make sure the spoon cools fully before putting it back with my other tools.
This heat method is excellent for general cleaning. It effectively removes most wax without harsh chemicals. This approach also helps maintain the spoon’s finish. For larger wax spills or stubborn drips, principles of wax removal from other surfaces can be helpful. For instance, cleaning wax off glass often involves similar softening and scraping techniques, as described in guides like how to clean wax off glass. Similarly, the methods used for how to clean candle wax off glass can be adapted for spoon cleaning. These methods highlight the universal effectiveness of heat and gentle scraping for wax removal.
Advanced Cleaning: Tackling Stubborn Wax Residue
Sometimes, the basic heat method is not enough. Wax can become burnt onto the spoon, or it can be a particularly sticky type. For these stubborn cases, you need more advanced cleaning solutions. These methods involve specific cleaning agents to break down the wax. Always use these agents in a well-ventilated area. This protects you from fumes.
Alcohol and Cotton Swab Method
Isopropyl alcohol, commonly known as rubbing alcohol, is a very effective solvent for wax. It dissolves many types of wax without harming most metal spoon finishes. This method is good for small, sticky spots or films that heat did not remove. You need isopropyl alcohol (70% or 91% concentration works well) and cotton swabs or soft cotton pads.
- Ensure Spoon is Cool: Make sure your wax seal spoon is completely cool before starting. Applying alcohol to a hot surface can be dangerous. It can also cause the alcohol to evaporate too quickly.
- Apply Alcohol: Dampen a cotton swab or a small piece of cotton pad with isopropyl alcohol. Do not soak the spoon directly in alcohol. A little goes a long way.
- Rub Stubborn Spots: Gently rub the alcohol-dampened cotton swab over the stubborn wax residue. You will see the wax start to dissolve and lift onto the cotton. For tougher spots, you might need to apply a little pressure. Keep rubbing in small circles.
- Wipe Clean: Once the wax is gone, use a clean, dry cloth to wipe the spoon. This removes any alcohol residue and ensures the spoon is dry. Make sure no moisture remains, especially if your spoon is made of a metal that can tarnish. This method is very efficient for dried-on wax.
Commercial Wax Removers
Several commercial products are designed to remove wax. These often come as sprays or liquids. They are formulated to break down wax safely. If you find yourself frequently dealing with very sticky or hard-to-remove wax, a commercial wax remover might be a good investment. Always read the product label carefully before use. Follow the manufacturer’s instructions for application and safety.
- Check Spoon Compatibility: Ensure the commercial wax remover is safe for your spoon’s metal type. Some strong removers might be too harsh for delicate finishes.
- Apply as Directed: Most commercial removers instruct you to spray or apply the liquid to the wax. You then let it sit for a few minutes. This dwell time allows the chemicals to work on the wax.
- Wipe and Rinse: After the recommended time, wipe away the wax and remover with a clean cloth. Some products may require a rinse with water. Always dry the spoon completely afterward.
- Ventilation is Key: Use commercial wax removers in a well-ventilated area. Open windows or use a fan. Some products can have strong fumes. This step protects your health.
These advanced methods help you get your spoon looking like new. They are great for occasional deep cleaning. Remember to always handle chemicals with care. For some cleaning tasks that involve general household items, you might find other guides helpful. For example, some cleaning situations can benefit from a mix of common kitchen ingredients. The principles discussed in how to clean with vinegar and baking soda involve natural reactions that can sometimes loosen dirt or grime, though direct application for wax might be less common.
Preventive Measures for a Cleaner Wax Seal Spoon
The best way to deal with a dirty wax seal spoon is to prevent it from getting too dirty in the first place. A few simple habits can significantly reduce wax build-up. These tips make your cleaning routine much easier. They also ensure your spoon is always ready for your next project. I find that prevention is always better than cure for my crafting tools.
One key preventive measure is to clean your spoon after every use. Do not let wax cool and harden inside the spoon for long periods. A quick wipe while the spoon is still warm is often enough. This removes most residual wax before it becomes a problem. This simple step saves you time and effort later. It keeps your spoon in top condition.
Consider using a release agent, especially if you work with very sticky wax types. A tiny amount of cooking oil or a specialized silicone release spray can coat the inside of your spoon. This creates a barrier between the wax and the metal. The wax will then slide out more easily when melted. Apply the release agent with a cotton swab before you start melting the wax. Make sure to use only a very thin layer. Too much can affect the wax quality.
Using the right amount of wax also helps. Do not overfill the spoon. Filling it just enough for one or two seals prevents wax from overflowing and burning onto the spoon’s exterior. This also reduces drips onto your work surface. Practice makes perfect in judging the right amount. I always try to measure my wax beads carefully.
Finally, manage your heat source. Too much heat can burn the wax, making it stick to the spoon more stubbornly. Keep your flame low and hold the spoon at an appropriate distance. The goal is to melt the wax smoothly, not to scorch it. A consistent, gentle heat helps the wax melt evenly. This also prevents carbon build-up on the spoon’s bottom.
These preventive steps are easy to integrate into your crafting process. They ensure your wax seal spoon remains clean and efficient. A little proactive care goes a long way. This makes your sealing experience more enjoyable and your results more professional.
Dealing with Different Spoon Materials
Wax seal spoons come in various materials, each with its own properties. The most common materials are brass, copper, and stainless steel. Understanding these differences helps you choose the best cleaning approach. This ensures you do not damage your spoon. Proper care extends the life and beauty of your specific tool.
Brass Wax Seal Spoons
Brass spoons are popular for their classic look and good heat retention. However, brass can tarnish over time. This tarnish appears as a dull, darkened layer on the metal. When cleaning brass, avoid harsh abrasives or strong acids. These can strip the finish or cause permanent damage.
For cleaning wax, use the heat method as described earlier. After removing the wax, you might notice the brass looks dull. You can polish brass spoons gently with a brass cleaner or a mild abrasive like baking soda paste. Mix baking soda with a little water to form a paste. Rub it onto the brass with a soft cloth. Rinse thoroughly with water and dry immediately. This helps restore its shine. I always dry my brass spoon carefully to prevent water spots.
Copper Wax Seal Spoons
Copper spoons also have a beautiful, warm appearance. Like brass, copper can tarnish, often turning greenish or brownish. It is also a softer metal than stainless steel. This means it is more prone to scratches. Be extra gentle when cleaning a copper spoon.
Again, the heat method is the safest for wax removal. For tarnish, you can use a copper cleaner. A natural method involves a mixture of lemon juice and salt. Rub this mixture onto the tarnished areas with a soft cloth. The acid in lemon juice helps break down the tarnish. Rinse the spoon well with water and dry it completely. Prompt drying is crucial for copper to prevent new tarnish formation. I find that a quick polish after cleaning keeps my copper spoon looking great.
Stainless Steel Wax Seal Spoons
Stainless steel spoons are durable and resistant to rust and tarnish. They are generally the easiest to clean and maintain. They can withstand more vigorous cleaning than brass or copper. This makes them a practical choice for frequent use.
The heat method works perfectly for stainless steel. For any stubborn, burnt-on wax or discoloration, you can use a slightly more abrasive approach if needed. A fine steel wool pad (like 0000 grade) can remove tough spots without scratching. However, use it gently and only if necessary. Rubbing alcohol is also safe and effective for stainless steel. After cleaning, simply wipe it dry. Stainless steel rarely needs special polishing. It maintains its shine easily. I appreciate how low-maintenance my stainless steel spoon is.
Understanding your spoon’s material helps you apply the right cleaning and maintenance techniques. This keeps your tools looking good and performing well for years.
Safety First: Important Precautions When Cleaning Wax Spoons
Cleaning a wax seal spoon involves heat and sometimes chemicals. Therefore, safety is paramount. Taking proper precautions protects you from burns and exposure to fumes. Always prioritize your well-being during the cleaning process. A small amount of caution goes a long way.
Handle Hot Spoons with Care: The most obvious risk is burns from the hot spoon. Wax melts at high temperatures, and the metal spoon absorbs this heat.
- Use Heat-Resistant Gloves: Wear thick, heat-resistant gloves, like oven mitts or welding gloves, when holding the spoon over a flame. This protects your hands from direct heat.
- Allow to Cool: After removing wax, let the spoon cool down completely on a heat-resistant surface before touching it with bare hands. Do not rush this step. I always set my spoon aside for several minutes.
- Avoid Touching Melted Wax: Melted wax is also very hot and can cause burns. Do not touch it directly. Use your scraping tool to push it away.
Ensure Proper Ventilation with Solvents: When using isopropyl alcohol or commercial wax removers, fumes can be a concern.
- Work in a Well-Ventilated Area: Open windows, turn on a fan, or work outdoors if possible. This prevents the buildup of potentially harmful vapors.
- Avoid Inhaling Fumes: Do not intentionally breathe in the fumes from cleaning agents. If you are sensitive, consider wearing a basic face mask.
- Flammable Liquids: Isopropyl alcohol is flammable. Keep it away from open flames, heat sources, and sparks. Do not clean a hot spoon with alcohol. This is a crucial safety rule.
Protect Your Work Surface: Melted wax can drip. Cleaning agents can spill. Protect your furniture and other surfaces.
- Use a Protective Mat: Place a heat-resistant mat, old newspapers, or a cutting board under your spoon while heating and cleaning. This catches any drips or spills.
- Clean Spills Immediately: If wax or cleaning solution spills, wipe it up quickly. This prevents stains or damage to your surfaces.
Keep Cleaning Supplies Away from Children and Pets: Cleaning agents can be toxic if ingested.
- Store Safely: Always store chemicals in their original containers, out of reach of children and pets.
- Dispose Properly: Dispose of used cotton swabs or cloths with wax or chemicals in a sealed bag. This prevents exposure to others.
By following these safety measures, you can clean your wax seal spoon effectively and without worry. Your crafting hobby should be enjoyable and safe. I always double-check these safety points before I begin cleaning.
Long-Term Care and Storage of Your Wax Seal Tools
Proper long-term care and storage ensure your wax seal spoon and other tools remain in excellent condition. This extends their lifespan and keeps them ready for your next project. Neglecting these steps can lead to tarnish, damage, or simply a disorganized crafting space. A little organization goes a long way in preserving your tools.
After each cleaning session, ensure your wax seal spoon is completely dry. Moisture, especially with brass or copper spoons, can lead to tarnish or oxidation. Use a soft, lint-free cloth to thoroughly wipe down the spoon. For extra protection on brass or copper, you might apply a tiny amount of mineral oil or a specialized metal protectant. This creates a barrier against air and moisture. It helps maintain the spoon’s shine.
Store your wax seal spoon in a clean, dry place. A dedicated craft drawer or a small storage box is ideal. This protects the spoon from dust, scratches, and accidental damage. Avoid storing it in areas with high humidity, like bathrooms or basements. Humidity accelerates tarnishing and can even cause rust on certain metals. I keep all my wax sealing supplies together in a small, clear container. This helps me find everything easily.
If your spoon came with a specific stand or holder, use it. This keeps the spoon upright and prevents its bowl from touching other surfaces. It also allows air to circulate around the spoon. Some crafters prefer to hang their spoons. This can also be a good storage method if it keeps the spoon protected. Ensure it hangs in a way that prevents it from scratching other items.
Periodically inspect your wax seal spoon for any signs of wear or damage. Check the handle for looseness. Look at the bowl for deep scratches or pits that might affect wax melting. Address minor issues promptly. For example, if a handle is loose, you might be able to tighten it. Early detection of problems helps prevent them from worsening.
Think about the material of your spoon when storing. Stainless steel is very forgiving. Brass and copper need a little more attention. You might consider storing these in a fabric pouch or wrapping them in acid-free tissue paper. This adds an extra layer of protection against tarnish-causing elements.
By incorporating these long-term care and storage practices, you ensure your wax seal spoon remains a treasured and functional part of your crafting toolkit for many years. A well-cared-for tool makes crafting more enjoyable and effective.
Frequently Asked Questions
Can I use water to clean my wax seal spoon?
Using water directly to clean melted wax is generally not recommended. Wax repels water. It will cool down quickly and harden, making it harder to remove. Water can also cause rust or tarnish on certain metal spoons, like brass or copper. Stick to the heat method or alcohol-based cleaners for best results.
What if wax is burnt onto the spoon?
If wax is burnt onto your spoon, the basic heat method might not be enough. The burnt residue is very stubborn. Try gently scraping it with a wooden tool first. If that does not work, use isopropyl alcohol on a cotton swab. For very tough cases, a fine-grade steel wool (0000) can work on stainless steel spoons, but use it with extreme care to avoid scratches.
How often should I clean my wax seal spoon?
You should clean your wax seal spoon after every use. A quick wipe while the spoon is still warm is often sufficient. This prevents wax build-up and color mixing. For deeper cleaning or stubborn residue, clean it as needed. Regular, light cleaning saves you from more difficult tasks later on.
Does the wax color matter for cleaning?
The wax color itself does not directly affect how you clean the spoon. However, dark colors like black or dark blue might leave more visible residue or stains. Always clean the spoon thoroughly when switching between very different wax colors. This prevents unintended color contamination in your new seals.
Can I put my wax seal spoon in a dishwasher?
No, you should not put your wax seal spoon in a dishwasher. The high heat can damage the spoon’s finish or loosen the handle. Dishwashers also use harsh detergents that can cause discoloration or tarnish on certain metals. Hand cleaning with the heat method or alcohol is always the best and safest approach.
What kind of scraping tool should I use?
Use a non-abrasive scraping tool to avoid scratching your spoon. Good options include wooden craft sticks, bamboo skewers, silicone spatulas, or blunt plastic tools. Avoid metal tools like knives or metal scrapers. These can scratch the spoon’s surface, especially if it is brass or copper.
Conclusion
Keeping your wax seal spoon clean is a simple step that greatly improves your crafting results. We have explored the most effective ways to clean wax seal spoon residue, from the easy heat method to more advanced solvent techniques. We also discussed how to care for different spoon materials. Understanding these methods ensures your tools stay in pristine condition.
By adopting regular cleaning habits and understanding prevention, you extend the life of your beloved wax seal tools. Always prioritize safety when dealing with heat and cleaning agents. Remember to handle hot spoons with care and ensure good ventilation. A little effort in maintenance leads to perfectly formed, beautiful wax seals every time you craft. You now have the knowledge to keep your wax seal spoon sparkling. Go make some impressive seals!
- wax seal cleaning
- craft tool care
- wax removal
- spoon cleaning
- sealing wax tips
- craft supplies
- tool maintenance