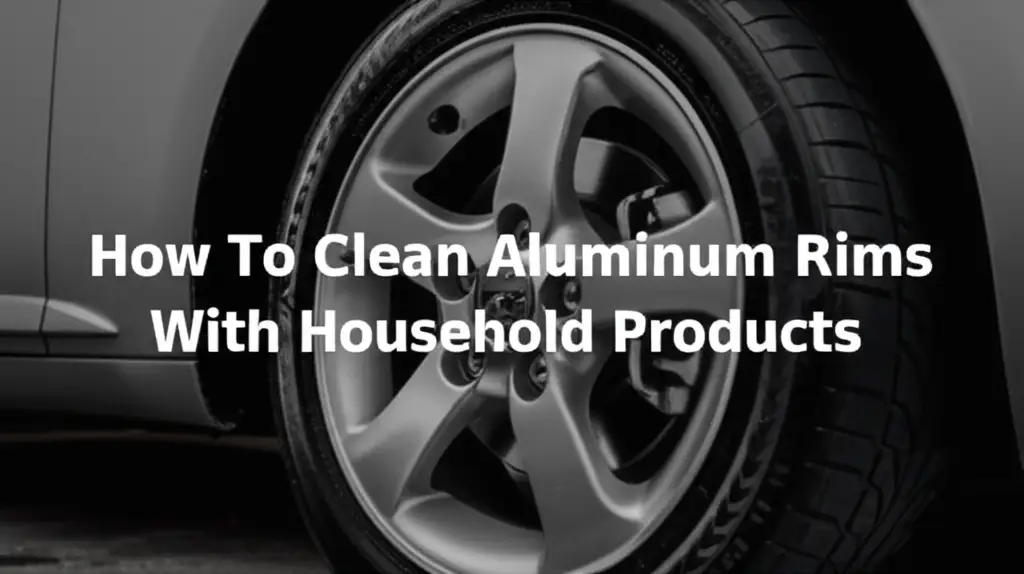
· Auto Care · 16 min read
How To Clean White Walls On Tires
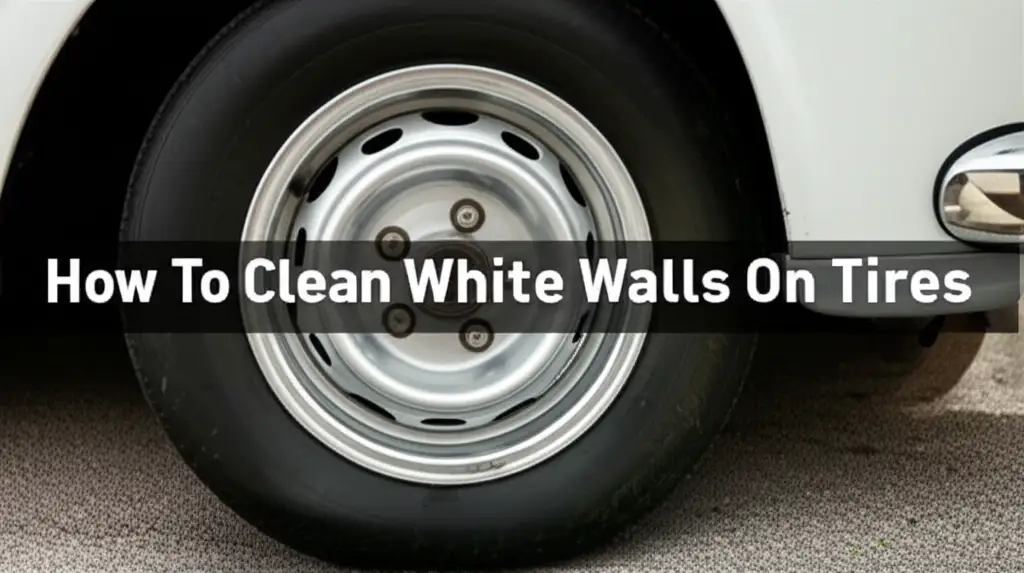
Restore Your Ride: How To Clean White Walls On Tires
Classic white wall tires add a distinct touch of elegance to any vehicle. They evoke a sense of nostalgia and style. However, these iconic white sections easily pick up dirt, brake dust, and grime from the road. This build-up makes them appear dull or even yellow. Keeping them clean is important for maintaining their aesthetic appeal. It also helps preserve the rubber itself.
I know the frustration of seeing beautiful white walls lose their luster. I also know the satisfaction of bringing them back to life. This article will show you exactly how to clean white walls on tires. We will cover the best tools, effective cleaning methods, and maintenance tips. You can keep your white walls looking pristine.
Takeaway
To effectively clean white walls on tires:
- Gather the right tools: specialized cleaner, stiff brush, and microfiber towels.
- Pre-rinse tires thoroughly to remove loose dirt.
- Apply cleaner, let it dwell, then scrub vigorously with a stiff brush.
- Rinse immediately and completely to prevent streaking.
- Regularly clean and apply a protectant to prevent future discoloration and maintain their bright white appearance.
The Direct Answer
To clean white walls on tires, apply a dedicated white wall tire cleaner or a heavy-duty degreaser directly to the wet tire surface. Let the product sit for a few minutes to break down grime. Then, scrub vigorously with a stiff-bristled brush or Scotch-Brite pad. Finish by rinsing the tire completely with water to reveal a bright, clean white wall.
Why White Walls Get Dirty and Why It Matters
White wall tires are a stylish feature. They are also highly susceptible to dirt and discoloration. Understanding why they get dirty helps in cleaning them effectively. It also highlights the importance of regular maintenance. White rubber compounds absorb contaminants differently than black rubber. This makes them prone to specific types of staining.
Road grime is a primary culprit. It consists of oil, asphalt residue, and general road dust. This dirt sticks to the porous surface of the white wall. Brake dust is another major contributor. It is tiny metal particles shed from brake pads. This dust can embed itself into the rubber. These particles create dark spots and streaks. Over time, sunlight exposure can also cause the rubber to oxidize. This leads to a yellowed or brownish appearance. This oxidation degrades the rubber’s flexibility and appearance.
Neglecting these issues impacts both looks and longevity. Dirty white walls detract from a vehicle’s overall appeal. They make even a well-maintained car look uncared for. More importantly, accumulated grime can accelerate rubber degradation. Certain chemicals in road tar or brake dust can break down the rubber compound. This leads to cracking or fading. Regular cleaning removes these harmful substances. This extends the life of your tires. It also keeps them looking their best.
Common Contaminants
White walls encounter many types of dirt daily. The most common are road film and mud. These create a dull, gray layer. Oil and grease splashes from the road also adhere readily. They create stubborn, dark spots that are hard to remove with water alone. Brake dust from your own vehicle’s braking system is also a major issue. This fine, black powder settles directly onto the white surface. It creates dark, gritty stains that can be tough to scrub away.
The Impact of Neglect
Ignoring dirty white walls has clear consequences. Their bright white color dulls quickly. They become discolored, often turning yellow or brown. This significantly reduces the aesthetic appeal of your vehicle. Beyond looks, prolonged exposure to contaminants can cause rubber degradation. Brake dust is abrasive. Road chemicals can slowly eat away at the rubber. This leads to premature aging and cracking. Regular cleaning prevents these problems. It ensures your white walls stay vibrant and protected for longer.
Essential Tools and Supplies for White Wall Cleaning
Before you start cleaning, gather the right materials. Having the correct tools makes the job easier and more effective. It also helps prevent damage to your tires. Using the wrong products or brushes can scratch the white surface or dull its finish. I always ensure I have everything ready before I begin. This saves time and ensures a thorough clean.
The most important item is a dedicated white wall tire cleaner. These products are formulated to lift stubborn dirt and oxidation. They are also safe for the rubber compound. You will also need a sturdy brush. A stiff-bristled brush works well for scrubbing the white rubber. For very tough stains, a fine-grade steel wool pad or a specialized scrubbing pad, like a Scotch-Brite pad, can be effective. I also use a bucket of water for rinsing. Several clean microfiber towels are essential for drying. Finally, always wear protective gloves and eyewear. This protects your hands and eyes from cleaning chemicals.
Basic Cleaning Kit
A good basic kit includes several key items. Start with a reliable spray bottle. This allows for even application of your chosen cleaner. You will need a strong scrubbing brush. A stiff nylon brush works well for the rubber. Consider a separate soft brush for the black tire section if you plan to clean the entire tire. Two buckets are helpful. One bucket holds clean water for rinsing your brush. The other bucket holds soapy water for initial washes. I also keep a stack of old towels or rags handy for wiping off excess cleaner.
Specialized White Wall Cleaners
Not all tire cleaners are equal for white walls. Look for products specifically labeled for “white wall tires” or “whitewall cleaner.” These formulas are designed to remove browning and yellowing without harming the rubber. Some contain mild bleaching agents. Others use strong surfactants. Avoid harsh chemicals like oven cleaner or pure bleach unless explicitly recommended for tires. These can dry out the rubber or cause permanent discoloration. Always read the product label. Follow the instructions carefully to ensure safety and effectiveness.
Step-by-Step Guide: The Basic Cleaning Method
Cleaning white walls effectively follows a simple sequence of steps. Patience and thoroughness are key to achieving bright results. I always take my time with each stage. This ensures I remove all grime and prevent new stains. Follow these steps for a gleaming finish every time.
First, park your vehicle on a flat, shaded surface. This helps prevent cleaners from drying too quickly. Begin by hosing down the tires thoroughly. This removes loose dirt and debris. It also wets the surface, preparing it for the cleaner. Next, apply your chosen white wall cleaner directly to the wet white wall section. Let it sit for the recommended dwell time. This allows the cleaner to penetrate and break down the grime. After the dwell time, take your stiff-bristled brush and vigorously scrub the white wall. Apply firm pressure. Work in small sections to ensure full coverage. Rinse the area immediately and thoroughly with water. Do not let the cleaner dry on the tire. Repeat this process if necessary for heavily soiled areas. Finally, dry the white walls with a clean microfiber towel to prevent water spots.
Preparation is Key
Proper preparation sets the stage for a successful clean. Begin by positioning your vehicle in a cool, shaded area. Direct sunlight can cause cleaning products to evaporate too quickly. This leaves streaks or residues. I always make sure my tires are cool to the touch. Start by rinsing the entire tire and wheel assembly with water. This removes loose dirt, dust, and any large debris. A strong stream from a hose works best. This pre-rinse also helps activate the cleaning solution later. It prevents it from drying too fast.
Scrubbing and Rinsing
After applying your white wall cleaner, give it time to work. Check the product label for the recommended dwell time, usually a few minutes. Do not let it dry completely. Then, grab your stiff-bristled brush. Start scrubbing the white wall section with firm, circular motions. Pay extra attention to any heavily stained areas or yellowed spots. If needed, reapply a small amount of cleaner directly to the brush. Continue scrubbing until the white wall appears clean. Immediately rinse the tire thoroughly with water. Rinse until all suds and cleaner residue are gone. This prevents streaking or re-depositing dirt. For areas with tough mud, a pre-soak and initial scrub might be necessary, similar to how one might clean mud off white shoes.
Advanced Techniques for Stubborn Stains and Yellowing
Sometimes, the basic cleaning method isn’t enough for deeply embedded dirt or severe yellowing. White walls can accumulate years of road grime and oxidation. This requires a more aggressive approach. I have encountered many tires that seemed beyond hope. With the right advanced techniques, they shine bright again. These methods tackle the most challenging discoloration issues.
For stubborn stains, consider using a stronger degreaser designed for automotive use. Apply it directly to the stain. Let it penetrate for a short period. Then scrub with even more vigor. For yellowing, the issue is often oxidation of the rubber itself. Here, a mild abrasive cleaner can work wonders. Products containing very fine polishing agents or a gentle scrub with a melamine foam eraser (like a Magic Eraser) can carefully remove the top layer of discolored rubber. Always test a small, inconspicuous area first. This ensures no damage occurs. Rinse thoroughly after each application. Consistent pressure and repeated short treatments are better than one harsh attempt.
Tackling Yellowing and Browning
Yellowing or browning is a common problem for white walls. It often comes from rubber oxidation or embedded contaminants. Standard cleaners might not fully remove it. For these issues, I often turn to a mild abrasive. A good option is a fine-grade steel wool (0000 grade). Used gently with a dedicated white wall cleaner, it can lightly abrade the surface. This removes the discolored layer without damaging the tire. Alternatively, specific “whitewall restorer” products exist. These contain mild bleaching agents or strong degreasers. They are formulated to reverse the discoloration process. Apply these products as directed, usually with a generous coat, and let them sit before scrubbing. When dealing with yellowing on white surfaces, techniques can sometimes overlap, just as one might approach how to clean white cabinets that have yellowed or how to clean white leather that has yellowed. The principle is removing the discolored layer or treating the oxidation.
Deep Cleaning Solutions
When dirt is truly embedded, you need a powerful solution. Stronger automotive degreasers are an option. They cut through oil, tar, and brake dust more effectively. Apply these products undiluted to the stained area. Allow them a slightly longer dwell time. Another deep cleaning option involves a paste of powdered laundry detergent and water. Apply this thick paste to the white wall. Let it dry to a haze. Then scrub it off with a stiff brush and rinse. The abrasive nature of the powder combined with the detergent’s cleaning power can lift deep stains. Always rinse thoroughly to remove all residues.
Protecting Your White Walls: Maintenance Tips
Cleaning white walls is only half the battle. Protecting them from future dirt and discoloration is equally important. Regular maintenance saves you time and effort in the long run. It also keeps your tires looking fresh and vibrant between deep cleans. I always recommend proactive steps to my clients. Prevention is simpler than a cure.
The key to protection is consistent, light cleaning. Do not wait for the white walls to become heavily soiled. A quick wash after a few drives can make a big difference. After cleaning, consider applying a tire dressing specifically designed for white walls. Some products offer UV protection and create a barrier against dirt. Avoid dressings that leave a greasy, shiny finish. These can attract more dust. Instead, look for matte or satin finishes that condition the rubber. Regular application of a protectant helps repel contaminants. It also reduces the rate of oxidation and yellowing. This simple routine keeps your white walls looking their best for longer periods.
Regular Cleaning Habits
Consistency is vital for white wall maintenance. Make cleaning your white walls part of your regular car washing routine. Do not let dirt build up for weeks. A quick scrub with a mild cleaner and a soft brush during your weekly car wash can prevent tough stains. This routine removes fresh road grime before it can embed itself. It also helps prevent the rubber from oxidizing and turning yellow. I find that quick, frequent cleans are far easier than intense, infrequent ones. This approach preserves the white appearance effortlessly.
Applying Tire Protectants
After cleaning, applying a tire protectant is a smart step. Choose a non-silicone, water-based tire dressing specifically for white walls. These products condition the rubber. They also provide a protective barrier against UV rays and road contaminants. Apply the dressing evenly with a foam applicator. Wipe off any excess immediately to prevent sling onto your vehicle’s paint. This protective layer makes future cleaning easier. It also helps prevent the dreaded yellowing that often plagues white wall tires.
Common Mistakes to Avoid When Cleaning White Walls
Cleaning white walls seems straightforward, but mistakes can lead to damage or frustration. I have seen common errors that ruin the look of a tire. Understanding these pitfalls helps you avoid them. This ensures a successful and safe cleaning process. My goal is always to achieve bright white results without causing harm.
One major mistake is using overly harsh chemicals. Bleach, strong acids, or aggressive degreasers not meant for tires can dry out the rubber. They can also cause permanent discoloration or cracking over time. Another common error is neglecting to pre-rinse. This leaves loose grit on the surface. When you scrub, this grit acts like sandpaper, scratching the white wall. Also, never let cleaning solutions dry on the tire. This causes stubborn streaks and can leave residue that attracts more dirt. Finally, using the wrong type of brush can cause damage. A wire brush, for example, will scratch the rubber severely. Always choose a brush designed for tire cleaning.
Using Harsh Chemicals
Resist the temptation to use strong, non-automotive chemicals. Products like oven cleaner, household bleach, or highly acidic wheel cleaners are too aggressive for white walls. They can strip the protective layers of the rubber. This leads to dryness, cracking, or permanent discoloration like yellowing or browning. These chemicals also pose a risk to your skin and eyes. Always opt for cleaners specifically formulated for white wall tires. These products are designed to be effective yet safe for the rubber compound.
Neglecting Safety
Safety should always be a priority when working with cleaning chemicals. Always wear protective gloves to shield your hands from harsh solutions. Safety glasses are also essential. They protect your eyes from splashes and fumes. Work in a well-ventilated area to avoid inhaling strong odors. Follow the product instructions carefully. Do not mix different cleaning chemicals. Mixing chemicals can create dangerous fumes or reactions. Being cautious ensures both your safety and the integrity of your tires.
When to Call a Professional (and Why)
While DIY methods are effective for most white wall cleaning, there are situations when professional help is best. Recognizing these limits saves you time and prevents potential damage. I understand the desire to do everything yourself. However, some problems require specialized tools or expertise. Knowing when to step back is a sign of a smart car owner.
You should consider a professional detailer if your white walls exhibit severe, deep-seated yellowing or browning that home methods cannot remove. This often indicates extensive rubber oxidation or deeply embedded contaminants. Professionals have access to stronger, specialized chemicals and tools. They can sometimes machine polish or restore the rubber surface. Another reason is persistent staining that seems impervious to all your efforts. This might be from specific road chemicals or tire manufacturing defects. If you lack the time or proper equipment, a professional can deliver superior results efficiently. They also have the knowledge to avoid damaging the tires or wheels.
Signs of Severe Damage
Look for specific signs indicating professional help might be needed. If your white walls show deep, dark brown streaks that do not respond to any cleaning method, it could be permanent staining. If the rubber feels brittle or shows visible cracks, the tire might be severely aged or damaged. These issues go beyond surface dirt. They indicate problems with the rubber compound itself. Professional detailers can assess the extent of the damage. They can advise on restoration versus replacement.
Professional Benefits
Hiring a professional detailer offers several advantages. They have commercial-grade cleaners and equipment. These are often more powerful than consumer products. Professionals also possess extensive experience. They understand different types of stains and rubber compounds. This allows them to choose the safest and most effective method. They can also restore the entire tire and wheel assembly. This provides a uniform, high-quality finish. Their service saves you time and effort. It ensures your white walls look their absolute best without personal risk or frustration.
FAQ Section
Can I use household cleaners on white walls?
Using household cleaners like dish soap or general-purpose cleaners is generally not recommended. They might clean the surface, but they can dry out the rubber over time. This leads to cracking or fading. Always use cleaners specifically formulated for automotive tires or white walls. These products are safer and more effective.
How often should I clean white walls?
The frequency depends on how often you drive and road conditions. For daily drivers, cleaning white walls once every two to four weeks is ideal. If your car sits, or you drive on very clean roads, less frequent cleaning might be fine. Regular, light cleaning prevents heavy build-up.
What causes white walls to turn yellow?
White walls turn yellow primarily due to rubber oxidation and embedded road grime. Exposure to UV light causes the rubber to break down and discolor. Brake dust, tar, and other road contaminants can also embed themselves into the porous white rubber, leading to a brownish-yellow appearance.
Is it safe to use bleach on white walls?
Using pure household bleach on white walls is not recommended. While it might whiten, it can also dry out the rubber, making it brittle and prone to cracking. It can also cause permanent discoloration or streaking. Always opt for specialized white wall cleaners, which are designed to be safe for tire rubber.
How can I prevent scuff marks?
Preventing scuff marks on white walls involves careful driving and parking. Avoid rubbing against curbs or other obstacles. Apply a quality tire protectant after cleaning. This creates a slicker surface, making it harder for minor scuffs to adhere. Regularly clean the tires to quickly remove any marks that do occur. For stubborn marks, treatments similar to removing scuff marks off walls can be explored, focusing on gentle abrasion or specialized cleaners.
Conclusion
Cleaning white walls on tires brings back their iconic appeal. It transforms the entire look of your vehicle. You now have the knowledge and tools to effectively restore these classic features. My experience shows that dedicated effort leads to stunning results. You can confidently tackle even the toughest stains and yellowing.
Remember, consistent care is key. Regular cleaning prevents build-up and maintains the bright white finish. Use the right products and techniques for best results. Always prioritize safety. Your white walls are more than just part of your tires; they are a statement. Keep them shining. Take pride in your ride. Start your white wall cleaning project today and enjoy the renewed beauty of your vehicle.
- white wall tires
- tire cleaning
- car detailing