· Hearing Aid Care · 17 min read
How To Clean Widex Hearing Aids

Clean Widex Hearing Aids: A Complete Guide
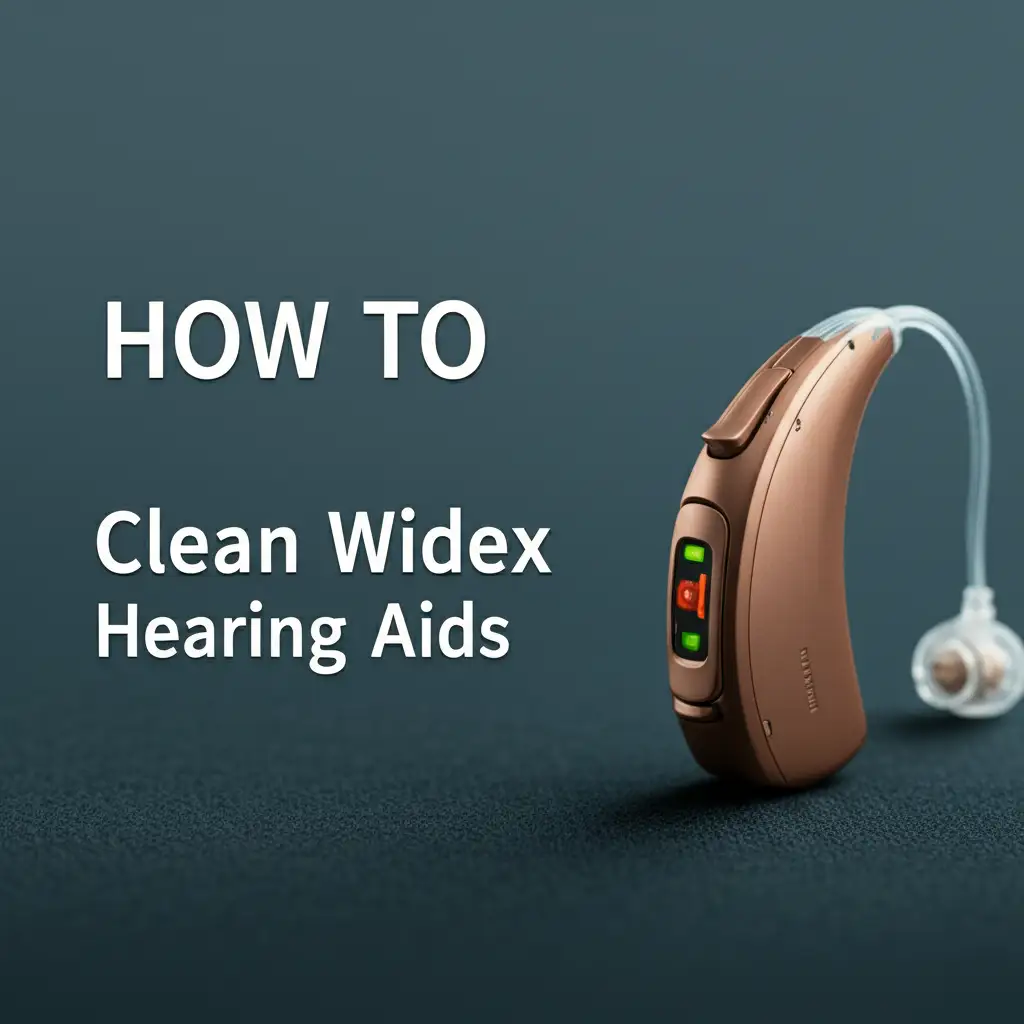
Keeping your Widex hearing aids clean is very important. These small devices work hard every day. They help you hear the world around you. Proper cleaning prevents earwax and debris from causing problems. This guide will show you exactly how to clean Widex hearing aids, ensuring they work their best. I will cover daily care, deep cleaning steps, and useful tips. You will learn about the right tools and methods for each Widex model. This helps extend the life of your valuable devices.
Takeaway
- Clean Widex hearing aids daily to remove earwax and debris.
- Use specific tools like a soft cloth, brush, and wax pick.
- Never use water, alcohol, or harsh chemicals directly on hearing aids.
- Regularly check and replace earwax filters (wax guards) and domes.
- Dry your hearing aids in a drying kit or dehumidifier every night.
- Seek professional help for persistent issues or deep cleaning beyond daily care.
To clean Widex hearing aids, you must gently brush away earwax and debris, wipe the surfaces with a dry, soft cloth, and use a wax pick to clear openings. Always ensure the aids stay dry, and regularly replace components like wax guards to prevent blockages and maintain sound quality.
Understanding Your Widex Hearing Aid Models for Cleaning
Widex offers many types of hearing aids. Each type has specific cleaning needs. Knowing your model helps you clean it correctly. I find this knowledge makes cleaning easier. Improper cleaning can damage your device.
Behind-The-Ear (BTE) Models
BTE hearing aids sit behind your ear. A clear tube connects them to a custom earmold or a small dome in your ear canal. Earwax usually collects on the earmold or dome. The tube itself can also get clogged. You need to detach these parts for cleaning. This prevents moisture or debris from entering the main unit. Always be gentle when disconnecting components.
Receiver-In-Canal (RIC) Models
RIC hearing aids are popular. The main part sits behind your ear. A thin wire goes into your ear canal. At the end of the wire is a small speaker, called the receiver. This receiver sits inside a dome or a custom tip. The speaker part is very delicate. Most earwax build-up happens on the dome or the wax guard covering the speaker. You must be careful not to damage the speaker when cleaning.
In-The-Ear (ITE) and In-The-Canal (ITC) Models
ITE and ITC hearing aids fit completely inside your ear or ear canal. Their outer shell is custom-made for your ear. These models are exposed to earwax and moisture more directly. Earwax filters are very important for these types. They protect the delicate internal parts. Cleaning these requires precise movements. You clean the entire outer surface.
Completely-In-Canal (CIC) and Invisible-In-Canal (IIC) Models
CIC and IIC hearing aids are the smallest. They sit deep inside your ear canal. This makes them almost invisible. They are also most prone to earwax blockages. Their small size means you must be extra careful. A tiny pull string helps you remove them. The earwax filter on these models is crucial. It often needs frequent checks. My experience shows these models need daily, careful attention.
Essential Tools for Widex Hearing Aid Cleaning
Having the right tools makes cleaning your Widex hearing aids simple and effective. You do not need many items. I keep my cleaning kit in a small box. This ensures everything is always ready. Using the wrong tools can damage your device. Always choose tools approved for hearing aid care.
Soft, Dry Cloth
A soft, lint-free cloth is your primary cleaning tool. I use a microfiber cloth. It removes smudges and light debris from the hearing aid body. You should wipe down your hearing aids every night. This removes oils and residue from the day. Always make sure the cloth is completely dry. Moisture is harmful to hearing aids.
Cleaning Brush
Most Widex hearing aids come with a small cleaning brush. This brush has soft bristles. It helps gently sweep away earwax and skin particles. I use it around the microphone ports and battery door. For BTE models, use it on the earmold. The brush is great for clearing small openings without pushing debris further inside. Regular brushing prevents significant buildup.
Wax Pick or Wire Loop Tool
A wax pick or wire loop tool is essential for clearing earwax. This tool usually has a tiny hook or loop on one end. You use it to carefully scoop out earwax from the sound outlet or vents. Be very gentle when using this tool. Never push it deep into the hearing aid. You could damage sensitive components. I find using it at an angle works best.
Earwax Filters (Wax Guards) and Domes
These are not cleaning tools, but they are crucial for maintenance. Earwax filters protect the speaker from earwax. Domes are soft tips that sit in your ear canal. They get dirty quickly. You will need to replace them regularly. Widex provides specific wax guards and domes for their models. Always use the correct type. Replacing them is part of a deep cleaning routine. My own devices often need new wax guards every few weeks.
Hearing Aid Drying Kit or Dehumidifier
Moisture is a big enemy of hearing aids. A drying kit or dehumidifier is a must-have. These devices remove moisture that builds up during the day. I place my hearing aids in the drying kit every night. This prevents corrosion and extends their life. Some kits use desiccant tablets, others use UV light and gentle heat. Always follow the manufacturer’s instructions for your specific drying kit. Preventing moisture build-up is key to maintaining your hearing aids, much like managing moisture in your home prevents issues like mold in a shower.
Daily Cleaning Routine for Widex Hearing Aids
A consistent daily cleaning routine is important. It prevents earwax from hardening. It also keeps your hearing aids working well. I clean my Widex hearing aids every night before bed. This simple habit saves me from bigger problems later. A quick clean takes only a few minutes.
Step 1: Wash Your Hands
Always start with clean hands. I wash my hands with soap and water. Then I dry them completely. This prevents transferring dirt or oils to your hearing aids. Clean hands also mean less risk of germs.
Step 2: Inspect Your Hearing Aids
Look closely at your Widex hearing aids. Check for any visible earwax or debris. See if the dome or earmold looks discolored. Notice if the sound outlet seems blocked. This quick check helps you know where to focus your cleaning efforts.
Step 3: Brush Away Debris
Take your small cleaning brush. Gently brush all surfaces of the hearing aid. Focus on the microphone ports. Brush around the battery door. For BTE models, brush the earmold and the opening of the tube. For RIC and ITE models, brush around the sound outlet. This action removes loose earwax and skin flakes.
Step 4: Wipe Down the Surfaces
Use your soft, dry, lint-free cloth. Wipe down the entire surface of your hearing aid. Be gentle. This removes any oils or residue. For BTE models, wipe the main casing. For RIC models, wipe the unit behind the ear and the wire. For ITE/ITC models, wipe the entire shell. Do not use any cleaning sprays or liquids. They can damage the delicate electronics inside.
Step 5: Clear the Sound Outlet (If Applicable)
If you have an earmold or a dome, check its opening. Use the small wax pick or wire loop tool. Carefully scoop out any visible earwax. For ITE/ITC models, clear the sound outlet. Always pull the earwax out. Do not push it deeper. This step is critical for good sound quality. My own experience shows this step prevents 90% of sound issues.
Step 6: Place in Drying Kit
After cleaning, place your Widex hearing aids in a drying kit or dehumidifier. I do this every night. It removes any moisture that collected during the day. This step is especially important if you live in a humid area. It helps prevent internal damage from moisture. Let them dry overnight. They will be ready to go in the morning.
Deep Cleaning Your Widex Hearing Aids: Specific Components
Daily cleaning is important, but some components need more attention. Deep cleaning involves replacing parts. It ensures optimal performance. I perform these deeper cleaning tasks regularly. This keeps my Widex hearing aids working like new.
Replacing Earwax Filters (Wax Guards)
Earwax filters are small, white screens. They protect the receiver or speaker from earwax. These filters become clogged over time. When clogged, sound quality drops. You might hear crackling or no sound at all.
- Identify Your Filter Type: Widex uses different types of wax guards. Check your manual or ask your audiologist.
- Use the Tool: Widex provides a tool for changing wax guards. It often has a new filter on one end and a removal tool on the other.
- Remove Old Filter: Insert the removal end of the tool into the old filter. Pull it straight out.
- Insert New Filter: Insert the new filter end of the tool into the opening. Push it gently until it clicks into place.
- Discard Old Filter: Throw away the old, dirty filter.
I usually replace my wax guards every few weeks. This frequency depends on how much earwax I produce.
Cleaning and Replacing Domes
Domes are the small, soft tips on RIC and some BTE hearing aids. They sit inside your ear canal. Domes collect earwax and debris. They are easy to clean or replace.
- Remove the Dome: Gently pull the dome off the receiver or tube.
- Clean or Replace: You can wipe a reusable dome with a dry cloth. If it is heavily soiled or damaged, replace it.
- Attach New Dome: Push a new dome firmly onto the receiver or tube. Ensure it sits securely.
- Inspect: Make sure the dome is straight and not squashed.
I replace domes monthly or whenever they look dirty or damaged.
Cleaning BTE Earmolds and Tubes
BTE earmolds and tubes carry sound from the hearing aid to your ear. They can accumulate earwax and moisture.
- Disconnect: Carefully disconnect the earmold and tube from the hearing aid. Twist gently if needed.
- Wash Earmold (Not Tube): You can wash plastic earmolds (but NOT the tubing or hearing aid) in warm, soapy water. Use a mild soap. Use a small brush to clean inside the earmold.
- Rinse Thoroughly: Rinse the earmold completely under running water. Ensure no soap residue remains.
- Dry Completely: This step is critical. Use an air blower or a bulb syringe to push water out of the tube and earmold. Then, let them air dry overnight on a lint-free cloth. They must be bone dry before reattaching. Any moisture will damage the hearing aid.
- Reattach: Once completely dry, reattach the tube and earmold to the hearing aid. Ensure a snug fit.
I clean my earmolds weekly. The tubes usually get replaced by an audiologist if they harden or discolor, usually every six months.
Battery Care and Maintenance for Widex Devices
Batteries are the power source for your Widex hearing aids. Proper battery care extends their life. It also ensures your hearing aids work reliably. My routine includes careful battery handling. This prevents common issues.
Disposable Batteries
Many Widex hearing aids use disposable zinc-air batteries. These batteries activate when exposed to air.
- Remove the Tab: When you open a new battery pack, peel off the small sticker tab.
- Wait: Let the battery sit for about 1-2 minutes after removing the tab. This allows air to activate it fully. I find this waiting period helps the battery last longer.
- Insert Correctly: Open the battery door on your hearing aid. Insert the battery with the flat side (positive, usually marked with a +) facing up. Close the door firmly.
- Open Door at Night: When you take your hearing aids off for the night, open the battery door. This turns them off and helps conserve battery life. It also allows moisture to escape from the battery compartment.
- Dispose Safely: Dispose of old batteries properly. Many stores that sell hearing aid batteries also have recycling bins. Do not throw them in regular trash.
Rechargeable Batteries
Widex offers many models with rechargeable batteries. These are convenient. They reduce waste from disposable batteries.
- Charge Daily: Place your rechargeable Widex hearing aids in their charging unit every night. I make this part of my bedtime routine.
- Follow Charger Instructions: Each Widex charger has specific instructions. Ensure the hearing aids are seated correctly in the charging slots. They usually light up to show they are charging.
- Keep Charger Clean: Keep the charging case clean and free of dust. You can wipe the outside of the charger with a dry, soft cloth. When cleaning delicate surfaces, always use the right tools and solutions; for tougher spots elsewhere, some might even consider methods like cleaning glass with vinegar. Do not use liquids inside the charging ports.
- Avoid Overcharging: Modern chargers are smart. They stop charging when full. Still, only use the charger provided by Widex.
- Battery Life Expectancy: Rechargeable batteries have a lifespan. Over years, their ability to hold a charge may decrease. If you notice a significant drop in battery life, talk to your audiologist. They can assess if the batteries need replacement. This usually requires professional service.
Proper battery care is a simple way to boost your hearing aid’s reliability. It ensures you always have power when you need it.
Troubleshooting Common Cleaning-Related Issues
Even with regular cleaning, you might face some issues. Most problems relate to blockages. Knowing how to troubleshoot helps fix them quickly. I have solved many minor issues myself. This saves trips to the audiologist.
No Sound or Weak Sound
This is the most common issue. Usually, earwax is the culprit.
- Check the Wax Guard: For RIC and ITE/ITC models, the earwax filter is often blocked. Remove the dome. Inspect the wax guard. If it looks clogged, replace it. This often solves the problem instantly.
- Check the Tube/Earmold: For BTE models, the tube or earmold might be blocked. Disconnect it from the hearing aid. Check for earwax or moisture inside. Clean it thoroughly as described in the deep cleaning section. Ensure it is completely dry before reattaching.
- Inspect for Debris: Use your cleaning brush and wax pick. Check all openings, like microphone ports and vents. Gently remove any visible debris.
Feedback or Whistling
Feedback sounds like a whistling noise. It can be annoying.
- Improper Fit: The most common cause is a poor seal in your ear. Reinsert the hearing aid. Make sure the dome or earmold sits snugly. If your dome or earmold feels loose, it might be the wrong size or need replacement.
- Earwax in Ear Canal: Sometimes, your own earwax can cause feedback. It blocks the sound from leaving your ear, making it reflect back into the hearing aid. Consider having your ears checked by a doctor for earwax removal.
- Cracked Tube/Earmold: For BTE models, inspect the tube and earmold. A small crack can allow sound to leak out, causing feedback. If you find a crack, contact your audiologist for replacement parts.
Intermittent Sound
Sound that cuts in and out suggests a loose connection or partial blockage.
- Battery Door: Ensure the battery door is fully closed. A slight opening can break the circuit.
- Loose Connections: For BTE models, check if the tube and earmold are securely connected to the main unit. For RIC models, check the connection of the receiver wire to the main unit.
- Moisture: Moisture inside the hearing aid can cause intermittent sound. Place your hearing aids in a drying kit overnight. This often resolves moisture-related issues.
Hearing Aid Feels Sticky or Dirty
This indicates a need for a more thorough surface clean.
- Thorough Wiping: Use your soft, dry cloth. Wipe down all surfaces. Pay attention to areas that touch your skin.
- Avoid Liquids: Never use water, alcohol, or cleaning sprays on the hearing aid itself. These liquids can damage the internal components.
- Maintaining a clean environment for your hearing aids is part of overall hygiene, similar to how you keep common surfaces like walls free of stains.
If these steps do not solve the problem, it is time to contact your audiologist. They have specialized tools and expertise. They can diagnose and fix issues beyond simple cleaning.
When to Seek Professional Widex Hearing Aid Service
While daily cleaning and basic troubleshooting are important, some issues require an expert. Knowing when to contact your audiologist saves time and prevents further damage. I always consult my audiologist for complex problems. They have the right equipment and knowledge.
Persistent Sound Issues
You should seek professional help if:
- No Sound After Cleaning: You have cleaned your hearing aid thoroughly. You have replaced the wax guard and battery. Still, there is no sound. This indicates a deeper internal problem.
- Weak Sound Continues: The sound quality remains poor or weak despite all your cleaning efforts. This might mean the receiver or microphone is faulty.
- Constant Feedback: The hearing aid continuously whistles or produces feedback. You have checked the fit and for earwax in your ear. The issue could be internal.
Physical Damage
Any visible damage needs professional attention.
- Cracked Casing: If the plastic casing of your hearing aid is cracked. Moisture or debris can enter the device.
- Broken Wire/Tube: A broken receiver wire on a RIC aid or a snapped tube on a BTE aid needs replacement by a professional. Trying to fix it yourself can cause more harm.
- Loose Components: If any part of the hearing aid feels loose or detached, and you cannot reattach it easily.
Ear-Related Concerns
Your audiologist can also help with ear health related to your hearing aids.
- Excessive Earwax: If you produce a lot of earwax that clogs your hearing aids frequently. Your audiologist can advise on earwax management. They can also refer you for professional earwax removal.
- Ear Discomfort: If wearing your hearing aids causes discomfort, pain, or skin irritation. The earmold or dome might not fit correctly. They might also need a different material.
Annual Check-Ups and Deep Cleaning
Even without specific problems, regular professional check-ups are beneficial.
- Professional Cleaning: Audiologists have vacuum systems and special tools. They can perform a deeper clean than you can at home. They remove microscopic debris.
- Performance Check: They can test your hearing aids. This ensures they are working at their optimal levels.
- Component Replacement: They can replace tubes, domes, or even receivers if needed. These parts sometimes wear out.
Remember, your audiologist is your partner in hearing health. Do not hesitate to reach out to them. They can keep your Widex hearing aids in top condition for years.
FAQ Section
How often should I clean my Widex hearing aids?
You should clean your Widex hearing aids daily. Perform a quick wipe-down and brush every night. Replace wax guards and domes every few weeks or monthly. Deep clean earmolds weekly for BTE models. This consistent routine prevents earwax buildup and keeps your devices working well.
Can I use alcohol or water to clean my Widex hearing aids?
No, never use alcohol, water, or any other liquids to clean your Widex hearing aids directly. Liquids can damage the delicate internal electronics and cause corrosion. Always use a dry, soft cloth, a special cleaning brush, and a wax pick. Moisture is the biggest enemy of hearing aids.
What if my Widex hearing aid stops working after cleaning?
If your Widex hearing aid stops working after cleaning, first check the battery or recharge it fully. Then, ensure the wax guard is new and unblocked. Make sure all components are dry and correctly attached. If the issue persists, contact your audiologist. They can diagnose internal problems and perform necessary repairs.
How do I change the earwax filter (wax guard) on my Widex hearing aid?
Widex hearing aids use small earwax filters, often white. Use the specific tool provided by Widex. Insert the removal end of the tool into the old filter and pull it out. Then, use the other end with the new filter to push it gently into the opening. Discard the old filter safely.
Can I clean my Widex charging case?
Yes, you can clean your Widex charging case. Use a dry, soft, lint-free cloth to wipe the outside of the case. You can use a dry cotton swab to gently clean around the charging ports. Never use liquids or sprays on the charging ports. Keep the charging case free of dust and debris.
Conclusion
Cleaning your Widex hearing aids is an easy but critical task. It protects your investment. It also ensures clear sound every day. I have shown you how to perform daily maintenance and deeper cleaning steps. You now know the right tools to use. You also understand how to troubleshoot common issues.
Remember, consistency is key. A few minutes each day makes a big difference. This routine will extend the life of your Widex hearing aids. It helps you enjoy better hearing for many years. If you face problems you cannot fix, contact your audiologist. They are there to help. Take good care of your Widex hearing aids, and they will take good care of your hearing.
- Widex hearing aids
- hearing aid cleaning
- earwax removal
- hearing aid maintenance
- hearing aid care
- hearing health


