· Home Maintenance · 20 min read
How To Clean Window Fan
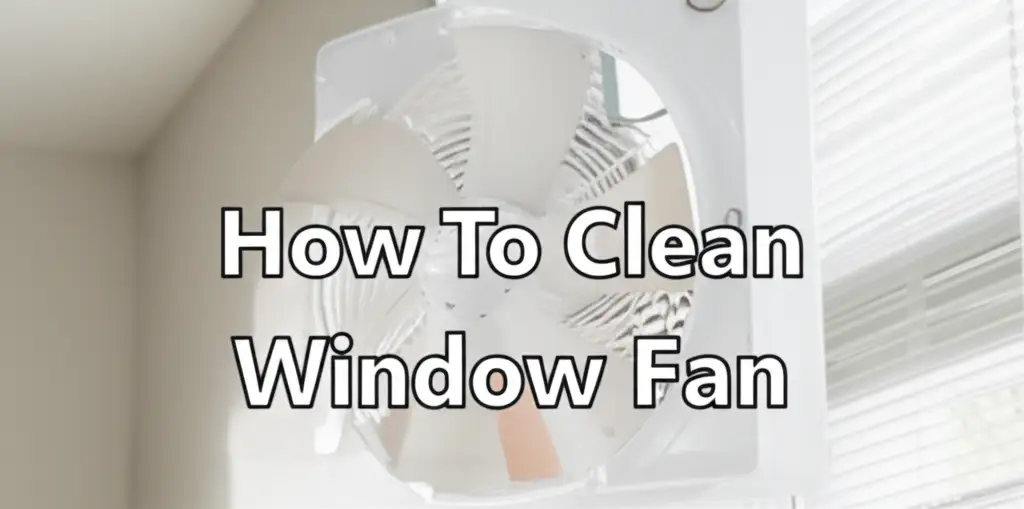
Boost Air Quality: How to Clean Your Window Fan Effectively
Do you enjoy the fresh breeze a window fan brings into your home? Window fans are excellent for air circulation, cooling your space, and expelling stale air. However, these hardworking appliances also become magnets for dust, pollen, and grime from both inside and outside. A dirty window fan does not work well. It can even blow allergens into your home. Cleaning your window fan regularly is important. This practice maintains its efficiency and improves your indoor air quality. I know how important a clean home environment is. This guide will walk you through the simple steps to effectively clean your window fan. We will cover necessary tools, safety tips, and specific methods for different fan types. Get ready to give your window fan the deep cleaning it deserves.
Takeaway
- Always disconnect power before you start cleaning.
- Disassemble your window fan as much as possible for thorough access.
- Use a vacuum and brushes to remove loose dust and debris.
- Wipe down blades, grilles, and housing with a damp, soapy cloth.
- Ensure all parts are completely dry before reassembling and using the fan.
- Clean your window fan regularly to maintain air quality and fan performance.
To clean a window fan, first, unplug it from the power source. If possible, remove the fan from the window opening. Use a vacuum cleaner to suck up large dust accumulations from the grilles and blades. Then, wipe down all surfaces with a cloth dampened with a mild soap solution. Allow the fan parts to dry completely before reassembly and plugging it back in.
Why Regular Window Fan Cleaning Matters for Your Home Air Quality
Your window fan works hard to move air. It draws air from outside or pushes air out. This constant movement means the fan blades and grilles collect a lot of dust. This dust includes common allergens like pollen and pet dander. When the fan runs, it can then spread these particles around your home. This makes your indoor air quality worse.
A buildup of dirt also reduces the fan’s ability to cool effectively. The motor works harder, which uses more energy. This can also shorten the fan’s lifespan. You want your fan to cool your home efficiently. You also want to avoid breathing in old dust. Regular window fan cleaning solves these problems. It ensures fresh, clean air circulates. A clean fan also runs quietly and efficiently. This creates a healthier and more comfortable living space for everyone. It prevents dust and allergens from becoming airborne.
Benefits of a Clean Window Fan
- Improved Air Quality: Removes trapped dust, pollen, and allergens. This makes the air you breathe much cleaner. It helps reduce allergy symptoms for people in your home.
- Increased Efficiency: Clean blades move air more easily. The fan works better and uses less power. This means lower energy bills over time.
- Extended Lifespan: A motor free from dust buildup runs cooler. This helps prevent overheating and extends the fan’s operational life. Regular cleaning prevents premature wear.
- Reduced Noise: Dirt on blades can cause imbalance and extra noise. Cleaning restores smooth operation, making your fan quieter. A clean fan operates as it should.
- Prevents Mold Growth: In humid environments, dirt can trap moisture. This can lead to mold and mildew. Regular cleaning removes these potential hazards. Mold can be a serious health concern.
I have found that a clean fan truly makes a difference. The air feels lighter and fresher. It is a simple step with a big impact on your home environment. Taking a small amount of time to clean your fan really pays off.
Gathering Your Tools: Essential Supplies for Cleaning Your Window Fan
Before you begin cleaning your window fan, prepare all necessary supplies. Having everything ready makes the cleaning process much smoother. You will need a few common household items. Some specialized tools can also make the job easier. Safety is always important. Ensure you have proper protection for yourself.
Start by gathering simple items. A vacuum cleaner with a brush attachment is very helpful. Microfiber cloths are excellent for wiping surfaces. A soft-bristled brush, like an old toothbrush or a small paint brush, helps reach tight spots. You also need a mild dish soap and warm water for washing. A spray bottle can be useful for mixing your cleaning solution.
For deeper cleaning, consider compressed air. This is great for blowing dust from crevices. Safety glasses protect your eyes from dislodged dust. Gloves keep your hands clean and protect them from cleaning solutions. If your fan is particularly greasy, you might need a degreaser. However, for most window fans, soap and water work well.
List of Cleaning Supplies
- Vacuum Cleaner: A handheld vacuum or a standard vacuum with a hose attachment. Use a brush attachment for gentle dust removal. This is the first step for most fan cleaning.
- Microfiber Cloths: Several clean cloths for wiping and drying. They absorb dust and moisture well.
- Soft-Bristled Brush: An old toothbrush, small paint brush, or dedicated cleaning brush. It helps get into grilles and around fan blades.
- Mild Dish Soap: A small amount mixed with warm water creates an effective cleaning solution. Use only a few drops.
- Warm Water: For mixing with soap and rinsing.
- Spray Bottle (Optional): For applying cleaning solution evenly.
- Compressed Air Can (Optional): Good for blowing dust from motor vents and hard-to-reach areas. Be careful not to spray too close.
- Safety Glasses: To protect your eyes from dust and debris.
- Gloves: To protect your hands from dirt and cleaning solutions.
- Screwdriver (If needed for disassembly): Some fans require tools to open covers. Check your fan’s manual first.
Having these items ready will help you effectively clean your window fan. It makes the entire process efficient and thorough. I always lay everything out beforehand. This saves time and keeps me organized during the cleaning task.
Step-by-Step Guide: How to Clean a Removable Window Fan
Cleaning a window fan that you can remove is usually easier. It lets you access all parts for a thorough cleaning. Follow these steps carefully. Make sure the fan is completely unplugged before you start. This ensures your safety throughout the cleaning process.
First, gently lift the fan out of your window. Place it on a protected surface like an old towel or newspaper. This keeps your floors clean. Now you can easily work around the fan without awkward angles. If your fan has extendable side panels, retract them. This makes the fan more compact.
Many window fans have grilles that snap or screw off. Check your fan’s manual for disassembly instructions. Removing the front grille gives you direct access to the fan blades. Some models might let you remove the back grille too. Being able to remove grilles is a big help for cleaning. For other fan types, like a box fan, the process is similar. You can learn more about how to clean a box fan if you have one.
Cleaning Process for Removable Fans
- Unplug and Remove: Always unplug the fan first. Then, carefully take the fan out of the window. Place it on a flat, stable surface.
- Disassemble Grilles: Look for screws or clips holding the front grille. Use a screwdriver if needed. Carefully remove the grille. Some fans have a back grille that also detaches.
- Vacuum Loose Dust: Use your vacuum cleaner with a brush attachment. Go over the fan blades, the grilles, and the interior of the fan housing. Remove as much loose dust as possible. This step prevents wet dust from becoming mud. For general fan dust removal, this method is also excellent. You can find more tips on how to clean dust off a fan.
- Wipe Down Blades and Grilles: Mix a few drops of mild dish soap with warm water in a bucket or spray bottle. Dip a microfiber cloth into the soapy water, wring it out well. Wipe each fan blade, front and back. Clean both sides of the grilles. Use a soft-bristled brush for stubborn dirt in tight grille spaces. If the grilles are very dirty, you might wash them in the sink with warm, soapy water. Rinse them thoroughly.
- Clean the Fan Housing: Wipe the exterior of the fan housing with your damp, soapy cloth. Pay attention to vents and seams. Avoid getting water into the motor area. The housing often collects dust and fingerprints.
- Dry All Parts: This is a crucial step. Use a dry microfiber cloth to wipe down all cleaned parts. Allow them to air dry completely. Place them in a well-ventilated area for several hours, or even overnight. This prevents moisture damage to electrical components.
- Reassemble and Test: Once all parts are fully dry, reattach the grilles. Screw them back on securely. Place the fan back in the window. Plug it in and test it to ensure it works correctly.
Following these steps ensures your removable window fan is truly clean. It will perform better and help keep your home fresh. I make sure everything is bone dry before putting it back together.
Cleaning a Non-Removable Window Fan: Specific Techniques
Some window fans are permanently installed or are too heavy to remove easily. Cleaning these fans requires a different approach. You cannot take them to a sink for washing. The key is to work carefully in place. You still need to disconnect the power first. Safety remains the top priority.
Cleaning a non-removable fan means you work around its fixed position. You still aim to clean the blades and grilles. The process involves more spot cleaning and vacuuming. You must be extra careful not to introduce water into the motor housing. Working slowly and methodically helps you achieve good results.
Start by unplugging the fan. This cannot be stressed enough. Then, assess if you can access the grilles. Some fixed fans have front grilles that can still be unscrewed or unclipped. If so, remove them. This will make cleaning the blades much easier. If the grilles do not come off, you will need to clean through them.
Cleaning Process for Non-Removable Fans
- Disconnect Power: Unplug the fan from the wall outlet. Do not proceed until the power is off.
- Vacuum Loose Dust: Use a vacuum cleaner with a narrow attachment. Go through the grilles and over the fan blades as much as possible. Remove all loose dust and cobwebs. A soft brush attachment works best here. This initial step is critical.
- Use Compressed Air (Optional): If you have a can of compressed air, use short bursts to blow dust from deep within the grilles and around the motor. Hold the can upright. Be careful not to blow dust further into the motor. This helps dislodge stubborn dust.
- Wipe Visible Surfaces: Dampen a microfiber cloth with a very small amount of mild soapy water. Wring it out extremely well. It should feel almost dry to the touch. Carefully wipe the visible parts of the fan blades by reaching through the grilles. Use a soft-bristled brush or an old toothbrush to clean inside the grilles themselves.
- Clean Fan Housing: Wipe down the exterior housing of the fan. Use the damp cloth for this. Pay attention to any vents. Ensure no water drips into internal components.
- Spot Clean Stubborn Areas: For tough spots, use a cotton swab dipped in rubbing alcohol. Rubbing alcohol evaporates quickly. This makes it safer for electronic areas. Use it sparingly on tough stains on the grilles or blades.
- Dry Thoroughly: Use a dry microfiber cloth to wipe down all damp areas. Ensure the fan is completely dry before plugging it back in. You may need to wait several hours. Air circulation in the room helps speed drying.
- Reassemble (if applicable) and Test: If you removed any grilles, reattach them securely. Once completely dry, plug the fan back in and test its operation.
Cleaning a non-removable fan takes more patience. But it is entirely possible to get it clean. Regular vacuuming between deep cleans will also help maintain cleanliness. Consider this similar to cleaning a window AC unit without removing it. The principle of careful, in-place cleaning applies.
Tackling Stubborn Grime and Mold on Your Window Fan
Sometimes, a window fan needs more than just a basic clean. Stubborn grime, grease, or mold can build up. This is especially true if the fan is in a kitchen area or a very humid climate. Tackling these issues requires slightly different products and more focused effort. Remember to always work with the power disconnected.
Grease buildup on fan blades or grilles is common in kitchens. It makes dust stick even more. Mold or mildew can appear in damp conditions. This is a health concern and needs proper removal. Identifying the type of buildup helps you choose the right cleaning solution. Always test any new cleaning solution on an inconspicuous area first. This prevents damage to the fan’s finish.
For greasy buildup, a stronger degreaser might be necessary. For mold, you need a solution that kills spores. White vinegar or a diluted bleach solution are good options for mold. Always use appropriate protective gear when dealing with mold or strong cleaners. Wear gloves and safety glasses.
Addressing Specific Cleaning Challenges
Dealing with Greasy Grime
- Prepare a Stronger Solution: Mix warm water with a generous amount of dish soap. For very tough grease, add a quarter cup of white vinegar to the solution. Vinegar helps cut through grease effectively.
- Soak (if possible): If grilles or blades are removable, soak them in the soapy-vinegar solution for 15-30 minutes. This helps loosen the grease.
- Scrub with a Brush: Use a stiff-bristled brush or a scrubber sponge to scrub the greasy areas. The soaking will make the grease easier to remove.
- Rinse Thoroughly: Rinse the parts under running water until all soap and grease are gone.
- Dry Completely: Ensure all parts are bone dry before reassembling. Residual moisture can lead to rust or electrical issues.
Removing Mold and Mildew
Mold and mildew on your window fan are serious. They can spread spores into your home’s air. Immediate and thorough cleaning is important. If you also have mold on your window sills, you can learn more about how to clean mold off window sills.
- Wear Protection: Put on gloves, safety glasses, and a mask. Mold spores can irritate airways.
- Prepare Mold Solution:
- Option 1 (White Vinegar): Mix equal parts white vinegar and water in a spray bottle. Vinegar kills many types of mold.
- Option 2 (Bleach Solution - Use with Caution): Mix one part bleach with 10 parts water. Only use this in a well-ventilated area. Do not mix bleach with other cleaners, especially ammonia.
- Apply Solution: Spray the moldy areas directly. Let the solution sit for 10-15 minutes. This gives it time to work.
- Scrub and Wipe: Use a stiff brush or old toothbrush to scrub away the mold. Wipe the area with a clean, damp cloth. For particularly stubborn mold, you might need to repeat the process. If you notice mold on other window appliances, like a window AC unit, remember that you can also learn about how to clean mold from window air conditioner.
- Dry Thoroughly: Allow the fan parts to air dry completely. Ensure there is no moisture left. A fan can be quite susceptible to dampness.
When tackling tough spots, always prioritize safety. These methods ensure your window fan is not just clean, but also free from harmful contaminants. I find that catching mold early makes a big difference.
Maintaining Your Window Fan: Tips for Long-Term Cleanliness
Cleaning your window fan deeply is important, but ongoing maintenance keeps it cleaner longer. Regular, quick cleaning prevents heavy buildup. This saves you time and effort in the long run. Good maintenance also ensures your fan runs efficiently all season. It keeps your indoor air quality consistently good.
Think about how often your fan runs. A fan used daily will gather dust faster than one used occasionally. Environmental factors also play a role. Homes with pets, smokers, or high pollen counts will see faster dust accumulation. Adjust your cleaning schedule based on these factors.
A simple wipe-down every few weeks can make a big difference. This prevents dust from caking onto blades and grilles. It also keeps your fan looking good. Remember, a clean fan is a happy fan. It performs better and lasts longer.
Simple Maintenance Practices
- Weekly Dusting: Use a feather duster or a dry microfiber cloth. Go over the fan grilles and blades. This removes surface dust before it settles. This quick step takes only a minute or two.
- Monthly Vacuuming: Use your vacuum cleaner with a brush attachment. Lightly vacuum the grilles and accessible parts of the fan. This gets dust from deeper crevices. It prevents significant buildup.
- Check for Obstructions: Periodically inspect the fan. Ensure no leaves, bugs, or other debris are stuck in the grilles or on the blades. Clear any blockages immediately. Obstructions reduce airflow and strain the motor.
- Clean the Window Sill: When you clean the fan, also clean the window sill it sits on. Dust and dirt from the sill can get pulled into the fan. You can find tips on how to clean window sills if they are dirty. A clean sill contributes to a cleaner fan.
- Store Properly Off-Season: When the weather cools and you no longer need your window fan, clean it thoroughly before storing. Place it in a box or cover it with a sheet. This protects it from dust during storage. Store it in a dry place. This prepares it for next season.
- Monitor Fan Performance: Pay attention to how your fan sounds and performs. Increased noise, reduced airflow, or unusual smells can indicate it needs cleaning. Do not wait for visible dirt to prompt a clean.
By incorporating these simple maintenance tips, you ensure your window fan remains a beneficial addition to your home. Regular care keeps it running optimally. It also keeps your home’s air clean and fresh. I find that a little effort often saves a lot of work later.
Safety First: Important Precautions During Window Fan Cleaning
Safety is the most critical aspect of cleaning any electrical appliance. Your window fan is no exception. Ignoring safety precautions can lead to electric shock, injury, or damage to the fan. Always prioritize your well-being. A careful approach ensures a successful and risk-free cleaning process.
The primary rule is always to disconnect the fan from its power source. This means pulling the plug from the wall socket. Do this before you touch the fan for cleaning. Even if the fan is turned off at the switch, power might still reach internal components. An unplugged fan is a safe fan.
Water and electricity do not mix. Be extremely cautious when using any liquids to clean your fan. Avoid spraying water directly onto the motor or electrical wiring. Use damp, not soaking wet, cloths. Ensure all parts are completely dry before plugging the fan back in. This prevents short circuits and other electrical hazards.
Essential Safety Measures
- Unplug the Fan: This is non-negotiable. Always pull the plug from the wall outlet before you start any cleaning. Make sure the fan is completely disconnected from power.
- Avoid Submerging Electrical Parts: Never put the motor housing or any part with electrical components into water. Clean these areas with a dry or slightly damp cloth.
- Use Proper Ventilation: If using strong cleaning solutions like bleach for mold, ensure the area is well-ventilated. Open windows and doors. This protects you from fumes.
- Wear Protective Gear: Gloves protect your hands from dirt, grime, and cleaning chemicals. Safety glasses shield your eyes from flying dust or cleaning solution splashes. A mask can help if you are sensitive to dust or mold spores.
- Dry Completely: Allow ample time for all cleaned parts to dry. Water inside electrical components can cause severe damage or present a shock hazard. Patience is key here. I often let parts air dry overnight.
- Handle Blades Carefully: Fan blades can be sharp. Handle them gently to avoid cuts. If your fan has metal blades, be extra cautious.
- Inspect Power Cord: Before re-plugging the fan, check the power cord for any frayed wires or damage. Do not use the fan if the cord is damaged. Replace it or have it repaired by a professional.
- Do Not Use Abrasive Cleaners: Abrasive cleaners or harsh chemicals can damage the fan’s surface or plastic parts. Stick to mild soap and water unless dealing with specific issues like mold. Even then, test first.
By following these safety guidelines, you can clean your window fan effectively and without risk. Prioritizing safety makes the entire process a positive experience. Remember these steps for a safe cleaning.
Frequently Asked Questions About Cleaning Window Fans
How often should I clean my window fan?
You should clean your window fan at least once every three months, or more often if you use it daily. If you have pets, allergies, or live in a dusty area, clean it monthly. Regular light cleaning prevents heavy dust buildup. This keeps your air fresh.
Can I put my window fan parts in the dishwasher?
No, do not put window fan parts in the dishwasher. The high heat can warp plastic components, and harsh detergents can damage the fan’s finish or motor. Always hand wash removable parts with mild soap and water, then dry them completely.
What should I do if my window fan smells after cleaning?
If your window fan smells after cleaning, it might not be fully dry, or there could be mold deep inside the motor. Ensure all parts are completely dry. If the smell persists, especially a musty odor, inspect for hidden mold. Consider professional help if you cannot find the source.
Can I clean a window fan without removing it from the window?
Yes, you can clean a window fan without removing it. First, unplug it. Use a vacuum with a brush attachment to remove loose dust. Then, use a slightly damp, well-wrung cloth to wipe visible surfaces. Use compressed air for tight spots. Ensure it dries fully before plugging it back in.
Is it safe to use water to clean a window fan?
Using water is safe for cleaning removable grilles and blades, but never near the motor or electrical parts. Always use a damp cloth, not a soaking wet one, and ensure all parts are completely dry before reassembly. Unplug the fan before any cleaning with water.
What causes a window fan to get so dirty?
Window fans get dirty because they move a lot of air. They pull in dust, pollen, pet dander, and other airborne particles from both inside and outside your home. These particles stick to the fan blades and grilles, building up over time and reducing efficiency.
Conclusion
Cleaning your window fan is a straightforward task. It offers many benefits for your home’s air quality and the fan’s performance. You now know the necessary tools and steps to clean any type of window fan effectively. From basic dusting to tackling stubborn mold, you have the knowledge to handle it. Remember, consistency is important. Regular maintenance prevents heavy buildup and keeps your fan running smoothly.
A clean window fan ensures fresh, healthy air circulates in your living space. It also extends the life of your appliance and improves its efficiency. I find that a little time spent on cleaning saves headaches later. Do not let dust and grime affect your home’s comfort. Take action today. Dedicate some time to clean your window fan. Enjoy the difference it makes. Your home will feel fresher, and you will breathe easier. Visit BeaCleaner.com for more cleaning tips and guides to keep your home spotless.
- fan cleaning
- window fan maintenance
- home air quality