· Home Maintenance · 16 min read
How To Clean Young Living Diffuser
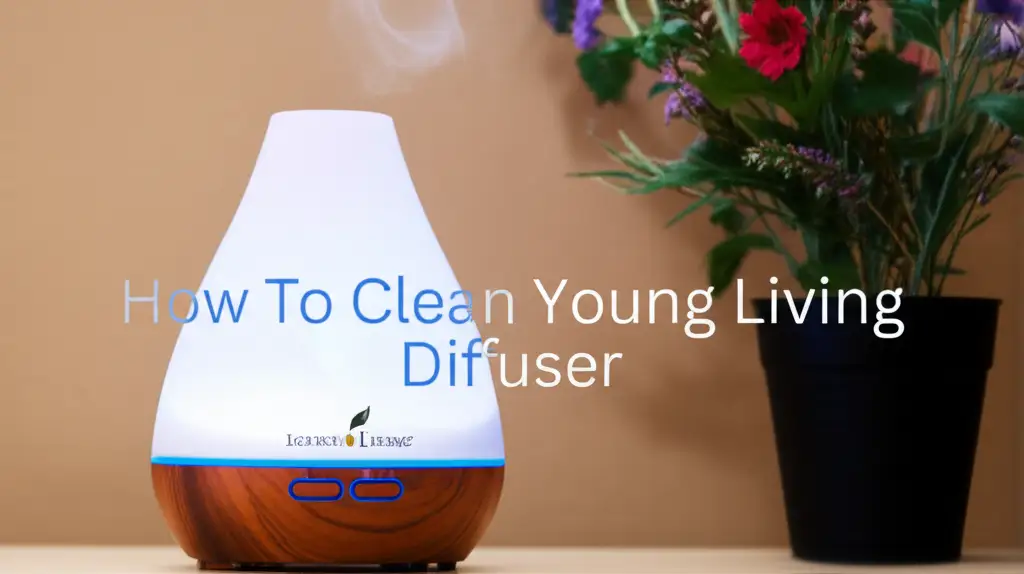
Restore Your Diffuser: How To Clean Young Living Diffuser Effectively
Do you love the aroma of essential oils filling your space? Many people do, and Young Living diffusers are a popular choice. Over time, essential oil residue can build up inside your diffuser. This buildup affects its performance and can even shorten its life. Knowing how to clean Young Living diffuser models properly keeps them running smoothly. Regular cleaning is a simple act that protects your investment. This guide will walk you through easy steps to maintain your diffuser. We cover daily care, deep cleaning, and tips for lasting freshness.
Takeaway
- Regularly clean your Young Living diffuser to prevent oil buildup and ensure optimal performance.
- Use white vinegar and water for most cleaning tasks.
- Perform a quick rinse after each use and a deep clean weekly or bi-weekly.
- Avoid harsh chemicals or abrasive materials that can damage your diffuser.
You can clean a Young Living diffuser using white vinegar and water. First, unplug the unit and empty any remaining water and oil. Then, fill the reservoir halfway with clean water and add 10-15 drops of white vinegar. Run the diffuser for 3-5 minutes, then drain, wipe, and rinse thoroughly.
Why Your Young Living Diffuser Needs Regular Cleaning
Your Young Living diffuser works by dispersing essential oils into the air. This process involves water and tiny oil particles. Over time, these particles can leave behind a sticky residue. This residue collects on the ultrasonic plate and inside the water reservoir.
Ignoring this buildup causes several problems. First, the diffuser’s mist production can decrease. You might notice less scent or a weaker mist. Second, old oil residue can alter the aroma of new oils. This means your new, pure essential oils might not smell as intended. Finally, neglected buildup can damage the internal components. Regular cleaning prevents these issues, ensuring your diffuser works like new. It also extends the lifespan of your device.
Essential Supplies for Cleaning Your Diffuser
Cleaning your Young Living diffuser requires only a few basic items. You likely already have most of these at home. These supplies are gentle yet effective for removing oil residue. Using the right tools protects your diffuser from damage. Avoid harsh chemicals or scrubbing pads.
Here are the supplies you will need:
- White Vinegar: This is your primary cleaning agent. White vinegar is acidic and helps break down essential oil buildup. It also disinfects naturally. I always keep a large bottle of white vinegar handy for various cleaning tasks around my house. It’s truly a versatile cleaner, similar to how I might use it when how to clean with vinegar and baking soda.
- Clean Water: You will use clean tap water or distilled water for rinsing. Distilled water is often preferred to prevent mineral buildup from tap water, especially in hard water areas.
- Cotton Swabs: These are excellent for cleaning small crevices and the ultrasonic plate. Their soft tips prevent scratches.
- Soft Cloth or Microfiber Cloth: A soft cloth is perfect for wiping down the exterior and interior of the diffuser. It absorbs moisture without scratching.
- Small Brush (Optional): Some diffusers come with a small cleaning brush. If yours has one, use it for gentle scrubbing. If not, a soft toothbrush can work in a pinch, but be very gentle.
Gathering these items before you start makes the cleaning process smooth. You will be ready to clean your diffuser thoroughly and efficiently. This simple preparation saves time and effort.
Step-by-Step Guide: Basic Daily Cleaning
Basic daily cleaning is crucial for maintaining your Young Living diffuser. This quick routine prevents significant buildup. It also ensures fresh scents every time you diffuse. I find that a quick rinse after each use makes a big difference. This simple habit keeps your diffuser ready for its next session.
Follow these easy steps:
- Unplug and Disconnect: Always start by unplugging your diffuser from the power source. Safety first! Disconnect any cords from the base of the unit.
- Empty Remaining Water and Oil: Pour out any leftover water and essential oil from the reservoir. Turn the diffuser upside down over a sink. Make sure to empty it completely.
- Wipe Down the Interior: Use a soft, damp cloth to wipe the inside of the water reservoir. Pay attention to the sides and the bottom. Remove any visible oil residue or film.
- Clean the Ultrasonic Plate: The ultrasonic plate is a small disc at the bottom of the reservoir. It is crucial for mist production. Dip a cotton swab in clean water and gently wipe the plate. Do not scrub hard, as this can cause damage. Ensure no oil film remains on the plate.
- Wipe the Exterior: Use a dry or slightly damp soft cloth to wipe the outside of the diffuser. Remove any dust or oil smudges. Keep the exterior clean for a fresh look.
- Air Dry: Leave the diffuser open to air dry completely. This prevents moisture buildup and mold growth. Ensure all parts are dry before storing or refilling for use.
This daily routine takes only a few minutes. It keeps your diffuser performing its best. Consistent daily care minimizes the need for deep cleaning.
Deep Cleaning Your Young Living Diffuser (Weekly/Bi-weekly)
Deep cleaning your Young Living diffuser tackles stubborn residue. It is important to do this weekly or bi-weekly. The frequency depends on how often you use your diffuser and the types of oils you diffuse. Thicker oils, like citrus oils, can leave more residue. A thorough deep clean ensures your diffuser runs efficiently and safely. This step is essential for longevity and pure aroma.
Here is how to deep clean your diffuser:
- Prepare the Diffuser: Unplug the diffuser and empty any water or oil. Wipe down the interior with a soft cloth, removing loose residue.
- Add Vinegar Solution: Fill the water reservoir halfway with clean water. Then, add 10 to 15 drops of pure white vinegar. For larger diffusers, you can use up to a tablespoon of vinegar. Vinegar is excellent for breaking down tough oil buildup.
- Run the Diffuser: Put the cover back on and run the diffuser for about 3 to 5 minutes. This allows the vinegar solution to circulate. It loosens essential oil buildup on the ultrasonic plate and reservoir walls. You will see mist, which means the solution is working.
- Let it Soak (Optional but Recommended): After running it, let the vinegar solution sit in the diffuser for 15 to 20 minutes. This soaking time helps dissolve very stubborn residue. For heavily used diffusers, I sometimes let it soak for an hour or two.
- Drain and Rinse: Carefully pour out the vinegar solution from the reservoir. Be sure to avoid pouring it over the side where air vents or buttons are. Then, rinse the reservoir thoroughly with clean water. Swirl water around and pour it out several times.
- Wipe and Clean Plate: Use a cotton swab dipped in rubbing alcohol or a small amount of white vinegar to gently wipe the ultrasonic plate. This targets any remaining film. Use a soft cloth to wipe down the inside walls and exterior.
- Final Rinse and Dry: Rinse the reservoir one last time with clean water. Leave the diffuser open to air dry completely. Make sure there is no moisture left before storing or reusing.
This deep cleaning process ensures your diffuser is truly clean. It maintains optimal performance and extends its life. I often use similar vinegar and water solutions for other household items, such as when cleaning a shower. Just as how to clean shower with baking soda and vinegar can tackle soap scum, this method targets oil residue.
Tackling Stubborn Residue and Essential Oil Build-Up
Sometimes, even regular deep cleaning is not enough for heavy oil buildup. This can happen with thicker oils, or if you skipped cleanings for a while. Stubborn residue might make your diffuser perform poorly. Do not worry; there are ways to tackle these tougher spots. Patience is key when dealing with persistent grime.
Here are advanced tips for stubborn buildup:
- Increased Vinegar Soak Time: If the standard 15-20 minute soak does not work, increase the time. Let the vinegar solution sit for several hours. For very tough cases, leave it overnight. The longer soak allows the vinegar to break down more residue.
- Gentle Scrubbing with Cotton Swab: After soaking, use a fresh cotton swab dipped in white vinegar or rubbing alcohol. Gently rub the ultrasonic plate and any sticky areas in the reservoir. Be very careful not to scratch the plate. The goal is to loosen the residue, not scrape it off.
- Rubbing Alcohol for Oil Films: If you see an oily film that water and vinegar do not remove, rubbing alcohol can help. Apply a small amount to a cotton swab. Gently wipe the affected areas. Rubbing alcohol is effective at dissolving essential oils. Ensure good ventilation when using alcohol.
- Baking Soda Paste (Use with Caution): For extremely sticky, caked-on residue, you can create a very mild paste. Mix a tiny amount of baking soda with water. Apply it to a soft cloth or cotton swab. Gently rub the affected area, avoiding the ultrasonic plate. Baking soda is a mild abrasive. Rinse thoroughly immediately after. This method should be used sparingly and with extreme care, as harsh abrasives can damage the diffuser’s internal components.
- Repeat the Process: If one round does not clean it entirely, repeat the deep cleaning process. Sometimes, it takes a couple of cycles to fully remove old, hardened oil.
Always finish with a thorough rinse and air dry. This prevents any cleaning agent residue from lingering. Tackling stubborn buildup might take more time, but it saves your diffuser.
Understanding Different Young Living Diffuser Models and Cleaning Nuances
Young Living offers a range of diffusers, each with slightly different designs. While the core cleaning principles remain the same, some models might have specific areas to pay attention to. All Young Living diffusers operate on ultrasonic technology. This means they all have a water reservoir and an ultrasonic plate. However, their shapes, sizes, and access points can vary.
Let’s look at common models:
- Dewdrop Diffuser: This is one of Young Living’s most popular models. It has a single, open reservoir, making it easy to access for cleaning. The ultrasonic plate is clearly visible at the bottom. The main difference here is simply the open design, which allows for direct wiping and rinsing.
- Desert Mist Diffuser: Similar to the Dewdrop, the Desert Mist also features an open, accessible reservoir. It might have a more decorative outer casing. The cleaning process for the internal components is identical to the Dewdrop. Just ensure you wipe down any decorative crevices on the outside.
- Aria Diffuser: The Aria diffuser stands out with its elegant wood and glass design. The glass reservoir lifts out, which can make it easier to clean separately. You can wash the glass reservoir just like a drinking glass, using warm water and vinegar. Pay close attention to the small connection points where the mist exits the glass. Clean the ultrasonic plate on the base unit carefully. The separate components can be beneficial for thorough cleaning.
- Lantern Diffuser: This model combines a diffuser with an ambient light. Its reservoir design is generally straightforward. Access to the ultrasonic plate is easy. Ensure no water gets into the light components during cleaning.
- Sweet Aroma Diffuser: This compact and portable diffuser often has a smaller reservoir. The cleaning steps are identical, but you may need smaller cotton swabs for tight spots. Its compact size means less space for residue to accumulate, but it still requires regular cleaning.
Regardless of the model, always unplug your diffuser before cleaning. Never submerge the entire base unit in water. Focus on the water reservoir and the ultrasonic plate. Always refer to your specific diffuser’s manual for any unique cleaning instructions. My advice is to treat each diffuser with care, just as you would any delicate electronic device.
Troubleshooting Common Diffuser Issues After Cleaning
Sometimes, even after a thorough cleaning, your diffuser might not work perfectly. This can be frustrating, but many post-cleaning issues have simple solutions. Do not immediately assume your diffuser is broken. A systematic approach to troubleshooting can often resolve the problem. I have faced these issues myself and usually found an easy fix.
Here are common issues and their solutions:
- No Mist or Weak Mist:
- Not Enough Water: Check if the water level is below the maximum fill line. The diffuser needs enough water to create mist.
- Too Much Water: Overfilling can also prevent mist production. Ensure the water level is at or below the fill line.
- Dirty Ultrasonic Plate: Even after cleaning, a tiny film might remain. Unplug the diffuser and gently wipe the ultrasonic plate again with a cotton swab dipped in vinegar or rubbing alcohol. This is the most common reason for weak mist.
- Hard Water Buildup: If you use tap water, mineral deposits can accumulate quickly. Try using distilled water for both diffusing and cleaning.
- Diffuser Making Noise but No Mist:
- This often points back to the ultrasonic plate. It might be dirty or damaged. If cleaning does not help, consider contacting Young Living support.
- Odd Smell After Cleaning:
- This usually means there is residual vinegar or essential oil. Rinse the reservoir thoroughly with clean water multiple times. You can also run the diffuser with just clean water for a few minutes. Then, discard the water and air dry. This often removes any lingering odors.
- Diffuser Leaking:
- Overfilling: If you overfill, water can escape. Always respect the maximum fill line.
- Cracked Reservoir: Inspect the reservoir for any hairline cracks. If cracked, it needs replacement.
- Improper Assembly: Ensure the top and any internal components are seated correctly. A loose lid can cause leaks.
- Diffuser Not Turning On:
- Power Connection: Double-check that the power cord is securely plugged into both the diffuser and the wall outlet.
- Reset: Sometimes, simply unplugging the diffuser for a few minutes and plugging it back in can reset it.
- Water in Base: If water accidentally got into the base unit during cleaning, let it dry completely (24-48 hours) before trying to power it on again.
If none of these solutions work, consult your diffuser’s user manual. Young Living’s customer support can also provide further assistance. Remember, proper cleaning prevents most of these issues.
Tips for Maintaining Diffuser Longevity
Keeping your Young Living diffuser in top condition goes beyond just cleaning. Good maintenance habits ensure your diffuser lasts for years. These tips help preserve its performance and appearance. Think of it as preventative care for your diffuser. Small efforts add up to long-term benefits.
Here are some practices for diffuser longevity:
- Use Quality Oils: Young Living essential oils are pure. Using lower quality or synthetic oils can leave more residue. They can also contain chemicals that harm your diffuser’s internal parts. Stick to therapeutic-grade essential oils.
- Use Distilled or Filtered Water: Tap water contains minerals that can cause scale buildup on the ultrasonic plate. This mineral buildup reduces mist output and can damage the diffuser over time. Distilled or filtered water minimizes this issue. It keeps the ultrasonic plate clearer and extends its life.
- Empty After Each Use: Do not leave water and oil sitting in the reservoir. Empty and quickly wipe out the diffuser after each use. This prevents oil from solidifying and becoming stubborn. This is a very simple habit that makes a big difference.
- Avoid Overfilling: Always respect the maximum fill line inside the reservoir. Overfilling can cause water to enter the air vents or internal components. This damages the electronics.
- Place on a Stable, Flat Surface: Ensure your diffuser sits on a flat, stable surface. This prevents accidental spills or tipping. Spills can damage the diffuser itself and the surface it sits on.
- Store Properly: If you will not use your diffuser for an extended period, clean it thoroughly. Then, ensure it is completely dry before storing it in a cool, dry place. Protect it from dust and extreme temperatures.
- Handle with Care: Diffusers are electronic devices. Avoid dropping them or handling them roughly. Treat them gently, especially when moving or cleaning.
- Clean Accessories: If your diffuser has detachable parts, like covers or internal caps, clean them regularly. Oil can accumulate on these surfaces too.
- Consider a Second Diffuser: If you use your diffuser constantly, consider having a second one. You can rotate them. This gives each diffuser a break and allows for thorough drying between uses.
Following these tips helps maintain your Young Living diffuser’s efficiency. It keeps the essential oil aromas pure and strong. Most importantly, it ensures you enjoy the benefits of aromatherapy for a long time.
FAQ Section
How often should I clean my Young Living diffuser? You should perform a quick rinse and wipe after every use. A deeper clean with white vinegar is recommended weekly or bi-weekly. If you use thick oils or diffuse frequently, clean it more often. Consistent cleaning prevents residue buildup and maintains performance.
Can I use soap to clean my diffuser? It is not recommended to use soap. Soap can leave a residue inside the diffuser. This residue can affect the scent of essential oils. It might also cause excessive foaming. Stick to white vinegar and water for the best results.
What if my diffuser is still not working after cleaning? First, recheck the power connections and water levels. Gently wipe the ultrasonic plate again with a cotton swab and rubbing alcohol. If water entered the base, let it dry for 24-48 hours. If issues persist, refer to your diffuser’s manual or contact Young Living customer support.
Is vinegar safe for all Young Living diffusers? Yes, white vinegar is safe for cleaning Young Living diffusers. Its mild acidity effectively breaks down essential oil residue and mineral deposits. Always use plain white vinegar, not apple cider vinegar or other types, and rinse thoroughly afterward to avoid any lingering scent.
How do I prevent oil build-up in my diffuser? To prevent buildup, always empty and rinse your diffuser immediately after each use. Use distilled or filtered water instead of tap water to minimize mineral deposits. Perform regular deep cleans with white vinegar. Avoid letting essential oils sit in the reservoir for extended periods.
Can I put tap water in my diffuser? You can use tap water, but it often contains minerals. These minerals can lead to white scale buildup on the ultrasonic plate over time. This buildup can reduce mist output. Using distilled or filtered water is highly recommended to extend your diffuser’s lifespan and maintain optimal performance.
Conclusion
Learning how to clean Young Living diffuser models is a small effort with big rewards. Regular maintenance ensures your device delivers pure essential oil aromas. It keeps your space fresh and inviting. By following the simple steps outlined, you protect your investment. You also ensure your aromatherapy experience remains enjoyable and effective.
Make cleaning your diffuser a regular part of your wellness routine. A few minutes of care prevents common issues. It helps your diffuser last longer. So, keep your Young Living diffuser sparkling clean. Continue enjoying the wonderful benefits of essential oils in your home. Your clean diffuser will thank you with clear, strong mist every time.
- Young Living diffuser
- diffuser cleaning
- essential oil diffuser care
- clean essential oil diffuser
- diffuser maintenance tips