· Automotive Maintenance · 15 min read
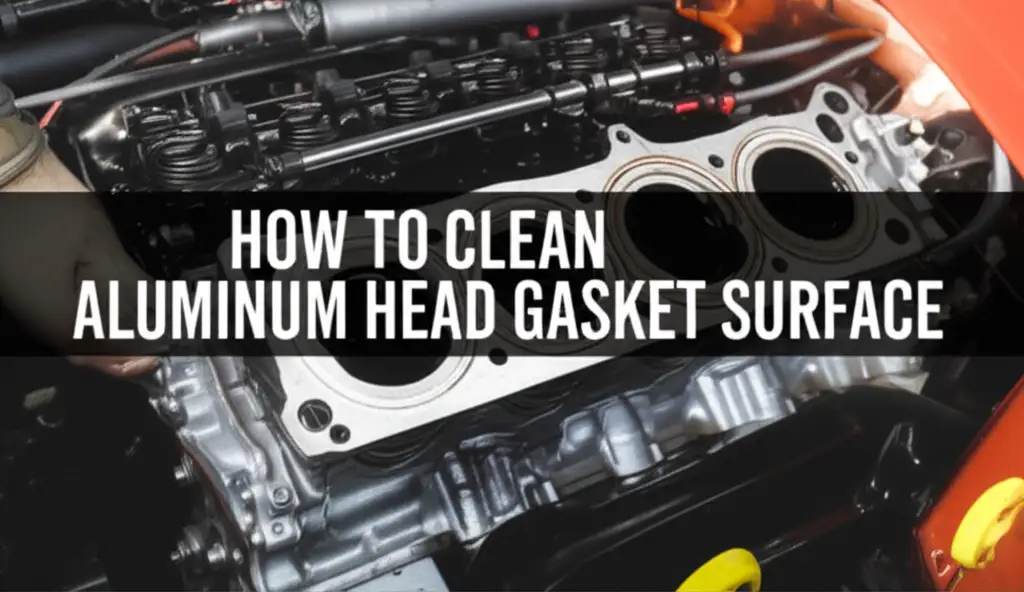
How To Clean Aluminum Head Gasket Surface
Preparing Your Aluminum Head for a Perfect Seal
Cleaning an aluminum head gasket surface requires a careful approach. Engine performance relies on a perfect seal. An improperly cleaned surface often leads to gasket failure. This can cause leaks and other serious engine problems. I will show you how to clean aluminum head gasket surface with proper tools and techniques. We will cover tool selection, step-by-step methods, and important safety tips. You will learn to prepare your engine for a reliable gasket seal.
Takeaway:
- Always use non-abrasive tools designed for aluminum.
- Prioritize safety with eye protection and gloves.
- Remove old gasket material gently to avoid surface damage.
- Achieve a smooth, clean surface free of debris for a perfect seal.
Cleaning an aluminum head gasket surface involves careful removal of old gasket material and sealants without scratching or gouging the delicate aluminum. You will need non-metallic scrapers, specialized abrasive pads for aluminum, and appropriate chemical gasket removers. Follow a precise, gentle process to ensure a perfectly flat and clean surface for the new gasket.
Why a Clean Aluminum Head Gasket Surface Is Critical
A clean surface is essential for engine health. The head gasket forms a seal between the engine block and the cylinder head. This seal contains combustion gases, engine oil, and coolant. If the surface is not clean, the new gasket cannot seal properly. This leads to leaks and engine damage.
Why Proper Cleaning Matters
Proper cleaning ensures the new gasket sits flat. Any remaining old gasket material or debris creates high spots. These high spots prevent an even compression of the new gasket. An uneven seal allows fluids to mix or gases to escape. This can cause overheating, loss of power, and internal engine damage. A smooth surface is the foundation for a durable repair.
Risks of Improper Cleaning
Improper cleaning carries many risks. Using harsh abrasive tools can scratch or gouge the soft aluminum. Even small scratches can create leak paths for fluids. Using the wrong chemicals can corrode the aluminum itself. This weakens the metal and compromises the sealing surface. Damage to the cylinder head or block means expensive repairs or replacement. I always take my time to avoid these costly mistakes. You also need to clean other parts like rims and gutters. You can find useful tips on how to clean aluminum rims with household products and how to clean tiger stripes on aluminum gutters.
The goal is to remove all old material without harming the parent metal. This requires patience and the correct supplies. Skimping on cleaning tools or time will often lead to a re-do of the entire job. It is always better to do it right the first time. I have seen many problems arise from a rushed cleaning job.
Gathering Your Safe Cleaning Tools for Aluminum Heads
Having the right tools makes a big difference. Using improper tools can cause irreversible damage to your aluminum head. I always make sure I have everything ready before I start. This saves time and prevents frustration.
Safety First
Safety is the first step in any engine work. Always wear safety glasses to protect your eyes from debris. Use chemical-resistant gloves when handling cleaners. Engine compartments can have sharp edges, so wearing sturdy work gloves also helps. Good ventilation is vital when using chemical solvents. Work in an open area or use fans.
Recommended Tools
For removing old gasket material, I recommend specialized tools. Plastic or nylon scrapers are perfect for initial removal. They are softer than aluminum, so they will not scratch the surface. A brass scraper is another good option; it is softer than steel but harder than aluminum, offering a balance of effectiveness and safety. Razor blades can be used, but only with extreme care and at a very low angle to prevent gouging.
For detailed cleaning, a rubber abrasive disc or a “cookies” wheel on an air tool is excellent. These discs are designed for gasket removal without damaging aluminum. They have a fine abrasive grit embedded in rubber. Using a variable speed drill or air tool gives you better control. Make sure the speed is low to avoid heat buildup. For general head cleaning, you might find useful tips on how to clean cylinder head without removing valves.
Cleaning Agents
Chemical gasket removers are very effective. They soften old, baked-on gasket material. Always choose a product safe for aluminum. Read the label carefully. Many auto parts stores carry these specific cleaners. Common solvents like brake cleaner or acetone can help with final degreasing. However, never use harsh caustic cleaners that can react with aluminum. I prefer to use a specialized automotive degreaser that is safe for all engine components.
A stiff nylon brush helps remove softened material from crevices. Microfiber towels or lint-free cloths are essential for wiping away residue. Make sure whatever you use does not leave fibers behind. Cleanliness is paramount for a proper gasket seal. I always double-check my tools to ensure they are clean too.
Step-by-Step: Removing Old Gasket Material Safely
Removing old gasket material from an aluminum head requires a systematic approach. You want to be thorough but also very gentle. Hurrying this step can ruin the surface and cost you more time and money later. I always follow a clear sequence to ensure nothing is missed and no damage occurs.
Initial Scraping Techniques
Start by carefully scraping off the bulk of the old gasket. Use a plastic or nylon scraper. Hold the scraper at a very low angle, almost flat against the surface. Push forward to lift and remove the larger pieces of gasket material. Avoid digging into the aluminum. Work slowly and methodically across the entire gasket surface. For really stubborn spots, you might switch to a brass scraper, but maintain that low angle. If you try to use a sharp edge straight on, you risk digging into the soft aluminum. This first pass removes the easy stuff, preparing the surface for finer cleaning.
Chemical Gasket Remover Application
Once the bulk material is gone, apply a chemical gasket remover. Spray or brush the remover directly onto the remaining stubborn bits of gasket and sealant. Allow the chemical to soak for the time specified on the product label. This chemical reaction softens the old material. The softening makes it much easier to scrape off. I usually let it sit for at least 15-20 minutes, or longer for very tough residue. During this time, the chemicals penetrate the hardened gasket.
After soaking, use your plastic or brass scraper again. You will notice the softened material comes off much more easily. Wipe away the loosened material with a clean, lint-free cloth. You may need to repeat the application and scraping process if there are still stubborn areas. Ensure you are working in a well-ventilated area due to the fumes from the chemical remover. This step is crucial for getting rid of the baked-on residue that traditional scraping cannot handle.
Gentle Abrasive Methods
For the final cleaning of any remaining residue, use a gentle abrasive method. A common tool for this is a “cookie” wheel or a Roloc bristle disc designed for aluminum. Attach this disc to a low-speed drill or air tool. These discs have fine, flexible abrasive bristles or rubber compounds. They remove gasket material without cutting into the aluminum. Run the tool at a low speed. Apply very light pressure. Move the disc evenly across the surface. Do not press hard or hold it in one spot. Overuse or too much pressure can create low spots or excessive heat, which can warp the head.
After using the abrasive disc, wipe the surface clean with a dry, lint-free cloth. Inspect the surface closely for any missed spots or lingering debris. This step polishes the surface slightly and removes any minor imperfections, leaving it perfectly smooth and ready for the new gasket. I always take my time here, as this is the final stage of physical removal.
Precision Cleaning for a Smooth Aluminum Finish
Achieving a perfectly smooth finish on your aluminum head gasket surface is the key to a leak-free seal. This stage is about refining the surface after removing the bulk of the old material. Precision is everything here. Even tiny imperfections can compromise the new gasket’s integrity.
Final Cleaning and Inspection
After all scraping and abrasive methods, the surface needs a final, thorough cleaning. Use a high-quality automotive degreaser or brake cleaner. Spray it generously onto the gasket surface. Use a clean, lint-free cloth or paper towels to wipe it dry. Repeat this process until the cloth comes away perfectly clean, with no residue. You want to remove all traces of old gasket material, chemical residue, and oil. Any remaining contaminants can prevent the new gasket from adhering or sealing properly.
Once clean, inspect the surface meticulously. I use a bright light and run my finger over the surface. Feel for any bumps or imperfections. You can also use a straightedge to check for flatness. Place the straightedge across the surface in multiple directions. Look for any light showing underneath, indicating high spots. If you find any, you may need to revisit the gentle abrasive step. A magnifying glass can help spot tiny embedded particles. The goal is a mirror-smooth surface.
Avoiding Damage to the Surface
Protecting the delicate aluminum is paramount during this stage. Never use steel wool, sandpaper, or harsh wire brushes. These materials are too abrasive for aluminum and will scratch or pit the surface. Even small scratches create pathways for leaks under engine pressure. Avoid using power tools with high speeds or excessive pressure. Heat buildup can warp the cylinder head, rendering it unusable.
Always opt for tools specifically designed for aluminum surfaces. Plastic scrapers, brass scrapers, and Roloc bristle discs are your best friends. Remember that gentle, patient work pays off. The integrity of your engine relies on this clean, undamaged surface. If you are cleaning other aluminum items, remember that different methods might apply. For example, cleaning aluminum rims involves different techniques to preserve their finish.
Final Checks and Protecting Your Clean Gasket Surface
Once you have meticulously cleaned your aluminum head gasket surface, the job is almost done. However, two critical steps remain: a final inspection and protecting the newly cleaned surface. These steps ensure your hard work results in a durable, leak-free gasket installation. Neglecting them can undo all your efforts.
Protecting the Cleaned Surface
After achieving that perfectly smooth and clean surface, protect it immediately. Airborne dust and debris can settle on it. Fingerprints can leave oils. I usually cover the cylinder head with a clean, lint-free cloth or plastic sheeting. This cover stays on until the moment of new gasket installation. If you need to store the head for a period, apply a thin layer of light engine oil or a corrosion inhibitor. This prevents oxidation and rust, especially in humid environments. Before installation, thoroughly clean off this protective layer with brake cleaner or degreaser. The surface must be bone dry and spotless just before the new gasket goes on.
Tips for Optimal Gasket Installation
With your surface prepared, follow specific steps for the gasket installation. Always use a new head gasket. Never reuse an old one. Inspect the new gasket for any damage or defects before placing it. Ensure the gasket is oriented correctly, as many are directional. Some gaskets have special coatings; avoid touching these areas excessively with bare hands.
For some applications, applying a thin layer of RTV sealant might be required. Always follow the specific instructions from the gasket manufacturer or your vehicle’s repair manual. Do not over-apply sealant if it is not recommended. Excess sealant can squeeze out and contaminate engine passages. Finally, torque the head bolts down in the specified sequence and to the correct torque values. This ensures even pressure across the gasket surface. This proper tightening sequence is crucial for a perfect seal. I always use a calibrated torque wrench for this critical step.
Common Mistakes to Avoid When Cleaning Aluminum Head Surfaces
Cleaning an aluminum head gasket surface is a detailed task. Making mistakes here can lead to bigger problems down the road. I have seen many people make these errors. Knowing what to avoid is as important as knowing what to do.
One common mistake is using overly aggressive cleaning tools. Steel wire brushes, coarse sandpaper, or Scotch-Brite pads designed for metal can easily scratch aluminum. Aluminum is a soft metal. These scratches create channels for leaks. Always use tools designed for softer metals, like plastic or brass scrapers. Specialized Roloc discs made for aluminum are also safe. Avoid any tool that feels too abrasive.
Another significant error is using the wrong chemicals. Caustic cleaners, strong degreasers not specified as aluminum-safe, or even some brake cleaners can corrode aluminum. This corrosion damages the sealing surface. Always read product labels carefully. Look for phrases like “aluminum safe” or “safe for all metals.” When in doubt, test a small, inconspicuous area first. Water or simple green cleaners are often not strong enough for baked-on gasket material.
Applying too much pressure with rotary tools is a frequent mistake. Tools like die grinders with abrasive discs can generate a lot of heat. Too much heat can warp the cylinder head. This warping creates an uneven surface, making a proper seal impossible. Always use these tools at low speeds and with very light, even pressure. Let the tool do the work; do not force it. Move the tool constantly to avoid heating up one spot.
Failing to clean thoroughly is also a big problem. Many people stop too soon. They leave behind small flakes of old gasket material or sealant residue. Even a tiny piece can cause a leak. You need a perfectly clean, smooth surface. Use bright light and run your finger across the surface to feel for imperfections. Wipe with a clean, white cloth to ensure no dirt or oil remains. What looks clean may not be clean enough.
Finally, not protecting the clean surface before installation is a mistake. Dust, dirt, or even fingerprints can contaminate the surface. Always cover the cleaned head immediately. Use a clean, lint-free cloth or plastic. Only uncover it right before you place the new gasket. This prevents new contaminants from compromising your hard-earned clean surface. Avoiding these common errors ensures a successful gasket replacement.
FAQ Section
What is the safest way to remove old gasket material from aluminum?
The safest way involves using non-abrasive tools. Start with plastic or nylon scrapers. Then, use a chemical gasket remover designed for aluminum. For final cleaning, use rubber abrasive discs (like “cookie” wheels) on a low-speed drill. This combination avoids scratching or gouging the soft aluminum surface.
Can I use a wire brush on an aluminum head gasket surface?
No, never use a steel wire brush on an aluminum head gasket surface. Steel is much harder than aluminum. A wire brush will scratch, pit, and damage the delicate surface. This damage creates pathways for leaks, compromising the new gasket’s seal. Always opt for softer materials like brass or nylon brushes if needed.
What chemicals are safe for cleaning aluminum engine parts?
Chemicals safe for cleaning aluminum engine parts include specialized aluminum-safe gasket removers. Automotive degreasers explicitly labeled “safe for all metals” or “aluminum safe” are also good choices. Acetone or brake cleaner can be used for final degreasing, but always test them first. Avoid caustic cleaners or strong acids.
How do I check if the aluminum surface is flat after cleaning?
To check for flatness, use a precision straightedge. Place the straightedge across the gasket surface in multiple directions (lengthwise, crosswise, and diagonally). Look for any gaps or light shining between the straightedge and the surface. Even small gaps indicate high or low spots that can cause gasket leaks.
What happens if I don’t clean the gasket surface properly?
If you do not clean the gasket surface properly, the new head gasket will not create a perfect seal. This can lead to various problems. Engine oil and coolant can mix, causing severe internal damage. Combustion gases can escape, resulting in power loss or overheating. Improper cleaning always leads to premature gasket failure.
What about using abrasive pads like Scotch-Brite?
Avoid using standard abrasive pads like Scotch-Brite on aluminum head gasket surfaces. While they might seem less aggressive than wire brushes, even the fine grades can still leave microscopic scratches or embed abrasive particles in the soft aluminum. This can compromise the sealing surface. Stick to specialized rubber abrasive discs designed for aluminum.
The Perfect Seal Starts Here
Cleaning an aluminum head gasket surface is a critical step in any engine repair. It demands patience and the right tools. You learned to safely remove old gasket material using plastic scrapers, chemical removers, and gentle abrasive discs. We also covered the importance of final inspection and protecting the freshly cleaned surface. Remember, an unblemished, perfectly flat surface ensures a durable, leak-free seal.
Taking the time to properly clean aluminum head gasket surface prevents costly leaks and engine damage. This precise approach is not just about cleaning; it is about restoring integrity. Your diligence now means a reliable engine for the future. Always prioritize safety and use the correct methods. If you ever have questions, consult your vehicle’s service manual or a professional. Ensure your engine work stands the test of time.
- aluminum head cleaning
- gasket surface preparation
- engine repair
- cylinder head cleaning
- old gasket removal