· Automotive Maintenance · 20 min read
How To Clean Oil Pan
Clean Your Oil Pan: A Guide for Engine Health
Ever wondered what keeps your car’s engine humming smoothly? It is often the simple things, like clean oil. Your engine’s oil pan plays a vital role in this process, holding the oil that lubricates moving parts. Over time, however, sludge and debris can build up, compromising its function. I believe that a clean oil pan is key to a long-lasting engine.
Learning how to clean an oil pan is a skill that can save you trouble and expense. It is a necessary part of deep engine care that many car owners overlook. This comprehensive guide will walk you through everything. We will cover the tools you need, the safety precautions to take, and a step-by-step process. You will learn to properly clean your engine’s oil pan. I will share insights into maintaining this crucial component for optimal vehicle performance.
Takeaway:
- Drain the old oil completely before starting any work.
- Remove the oil pan carefully, avoiding damage to bolts or the seal.
- Thoroughly clean the pan inside and out using degreasers and brushes.
- Inspect for damage and clean the gasket surface meticulously.
- Reinstall the pan with a new gasket, tightening bolts to specifications.
- Refill with fresh oil and check for any leaks.
To clean an oil pan, first drain the old engine oil. Then, remove the pan from the vehicle. Scrape out any sludge and wash the pan with a suitable degreaser. Rinse thoroughly, ensure it is dry, and reinstall with a new gasket before refilling with fresh engine oil.
Understanding Your Oil Pan: Why Cleaning Matters
Your engine’s oil pan sits at the very bottom of the engine. It serves as a reservoir for the engine oil. This oil circulates through the engine, lubricating all the moving parts. After lubrication, gravity pulls the oil back into the pan. This cycle continues every time your engine runs.
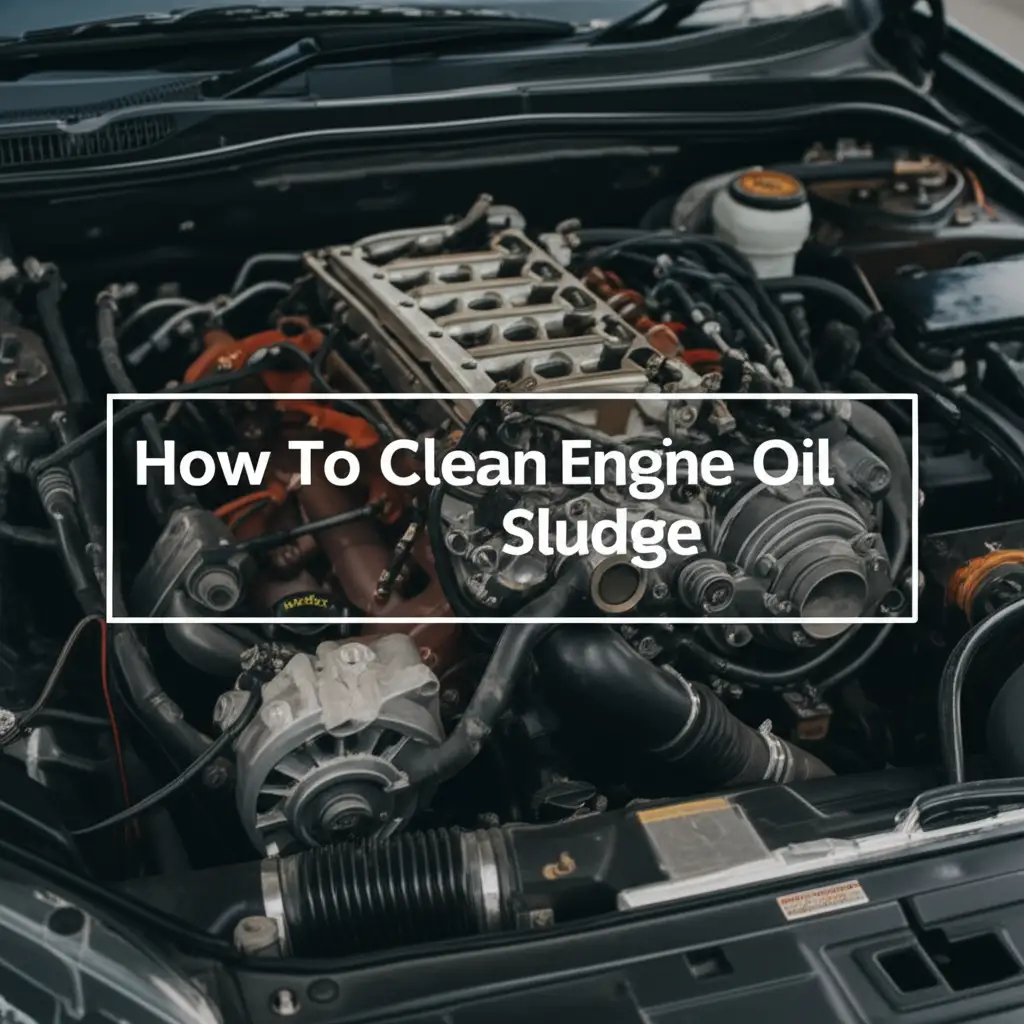
A clean oil pan is essential for engine health. Over time, engine oil breaks down. It collects tiny metal particles from engine wear. It also accumulates carbon deposits and other contaminants. These particles settle at the bottom of the oil pan, forming a thick, tar-like substance called sludge. Sludge is a major problem for your engine.
Sludge can clog the oil pickup screen, which is a filter at the bottom of a tube inside the oil pan. If this screen gets blocked, the oil pump struggles to draw oil. This leads to a lack of lubrication throughout the engine. Insufficient lubrication causes increased friction. This speeds up engine wear, reduces performance, and can lead to costly repairs. A truly clean oil pan ensures that your engine receives a consistent supply of clean oil, protecting its vital components.
Moreover, if you are performing a significant engine repair, cleaning the oil pan becomes even more critical. You want to remove any existing debris before adding fresh oil to a newly repaired engine. This prevents old contaminants from instantly polluting your new oil. I have seen many instances where a thorough oil pan cleaning extended an engine’s life. It is an investment in your vehicle’s future.
Essential Tools and Safety Gear for Oil Pan Cleaning
Before you begin the task of cleaning your engine oil pan, gathering the correct tools and safety gear is paramount. Having everything on hand makes the job smoother. It also helps prevent interruptions. You want to ensure you have exactly what you need for each step. Preparation is half the battle in any automotive work.
Here is a list of essential items I always recommend having ready:
- Vehicle Lifting Equipment: A sturdy floor jack and reliable jack stands are non-negotiable. Safety here is key. Never work under a vehicle supported only by a jack.
- Oil Drain Pan: A large capacity drain pan is crucial for catching all the old engine oil. Choose one that can hold more than your engine’s oil capacity.
- Socket and Ratchet Set: You will need these for the drain plug and the many bolts holding the oil pan in place. Ensure you have a wide range of sizes.
- Torque Wrench: This is vital for proper reinstallation. Overtightening or undertightening oil pan bolts can cause leaks.
- Gasket Scraper or Razor Blade: You will use this to carefully remove old gasket material from the oil pan and engine block surfaces.
- Scrub Brushes and Stiff Bristle Brushes: Various sizes and stiffness will help you tackle sludge inside the pan.
- Degreaser or Parts Cleaner: An automotive-specific degreaser or engine parts cleaner works best for dissolving oil and sludge. I avoid harsh household cleaners.
- Shop Rags or Old Towels: You will need plenty of these for wiping, cleaning, and managing spills.
- New Oil Pan Gasket and Drain Plug Washer: Always replace these components. They are one-time use seals.
- New Engine Oil: Have the correct type and quantity ready for refilling.
- Personal Protective Equipment (PPE):
- Safety Glasses: Eye protection is critical against splashing oil or chemicals.
- Nitrile or Chemical-Resistant Gloves: Protect your hands from oil, grease, and cleaning agents.
- Old Clothes or Coveralls: Engine work can be messy. Protect your skin and clothes.
Remember, safety always comes first. Work in a well-ventilated area. If any oil spills onto your garage floor, it is important to clean it up promptly to prevent slips and maintain a safe workspace. Learn how to clean engine oil off concrete or how to clean oil off garage floor if a spill occurs. Having these items on hand will make the cleaning process much more efficient and safe.
Draining Oil and Removing the Engine Oil Pan Safely
Now that you have all your tools and safety gear ready, it is time to get your hands dirty. The process of draining the oil and removing the oil pan requires careful steps. Always prioritize safety during this entire procedure. Rushing can lead to injury or damage to your vehicle.
Here is how I approach this critical stage:
Step 1: Prepare Your Vehicle
First, drive your car for about 5-10 minutes. This warms up the engine oil. Warm oil drains more easily and carries more contaminants with it. Once warmed, park your car on a flat, level surface. Engage the parking brake.
Next, raise the front of your vehicle using a reliable floor jack. Place sturdy jack stands securely under the vehicle’s frame or designated jack points. Never rely solely on the jack. Give the car a gentle shake to ensure it is stable on the stands.
Step 2: Drain the Engine Oil
Position your large oil drain pan directly under the oil drain plug. The drain plug is usually located at the lowest point of the oil pan. Using the correct size socket, carefully loosen and remove the drain plug. Be prepared for the oil to come out quickly. It can be quite hot, so avoid direct contact.
Let the oil drain completely. This can take anywhere from 15 to 30 minutes. While it drains, inspect the old oil. Look for any metallic flakes or unusual coloration, which could indicate engine problems. Once the flow reduces to a slow drip, replace the drain plug. Remember to use a new drain plug washer if your vehicle requires one.
Step 3: Remove the Oil Pan Bolts
With the oil drained, you can now focus on the oil pan bolts. These bolts typically surround the entire perimeter of the oil pan. Use the correct size socket and ratchet to carefully loosen each bolt. I usually start at one end and work my way around, loosening them evenly.
Some bolts might be harder to reach, especially on certain vehicle models. Take your time. Once all bolts are loose, remove them completely. Keep track of the bolts; some might be different lengths depending on their location. A magnetic tray can be very useful for this.
Step 4: Detach the Oil Pan
The oil pan is usually sealed to the engine block with a gasket or RTV (Room Temperature Vulcanizing) sealant. It will not just fall off. You will need to carefully pry it loose. Use a gasket scraper or a wide, flat-bladed tool. Gently insert it between the oil pan and the engine block. Avoid using excessive force. You do not want to bend the pan or scratch the engine block’s sealing surface.
Work your way around the pan, gently separating the seal. Once the seal breaks, carefully lower the oil pan. Be ready for any residual oil that might still be inside. It is wise to have your drain pan positioned underneath. This step requires patience. I find it is best to wiggle the pan gently until it comes free. If you get oil on other engine components during removal, you can easily learn how to clean oil off engine.
Effective Cleaning Techniques for a Grimy Oil Pan
Once the oil pan is off the engine, you will likely see years of accumulated sludge, carbon, and metal particles. This is where the real cleaning work begins. Our goal is to make the pan spotless, inside and out. A clean pan ensures your fresh oil stays clean for longer. It also prevents contamination from old debris.
Here are the techniques I use to get an oil pan sparkling clean:
1. Initial Sludge Removal
First, grab your plastic scraper or an old putty knife. Start scraping out the thickest layers of sludge. This gunk often accumulates in the bottom corners and around the oil pickup tube area (if the pickup is still attached to the pan). Remove as much of this solid material as you can manually. You can scoop it into a separate container for disposal. This step reduces the amount of chemical cleaner you will need.
Do not be afraid to get thorough here. The more physical gunk you remove now, the easier the chemical cleaning will be. I always make sure to get into every crevice.
2. Degreasing the Interior
After scraping, it is time for chemical action. Apply a generous amount of automotive degreaser or engine parts cleaner to the inside of the oil pan. Many good products are available that are specifically designed to cut through thick oil and carbon deposits. Read the product instructions carefully regarding dwell time.
Let the degreaser sit for a few minutes. This allows it to break down the remaining oil and sludge. Use a stiff bristled brush to scrub the entire interior surface. Pay special attention to the corners and any areas where sludge tends to stick. You might need to reapply degreaser and scrub multiple times. I usually use an old toothbrush for tight spots.
For truly stubborn, baked-on residue, sometimes soaking the pan overnight in a degreasing solution can help. Make sure the pan is fully submerged.
3. Cleaning the Gasket Surface
This is a critical step for preventing future oil leaks. The old gasket material or RTV sealant will be stuck to the mating surface of the oil pan. You must remove every trace of it. Use your gasket scraper or a sharp razor blade held at a low angle. Carefully scrape away all the old material.
Be extremely gentle and avoid gouging or scratching the metal surface of the pan. Even a tiny scratch can create a leak path for new oil. After scraping, wipe the surface clean with a rag soaked in a little degreaser or brake cleaner. The surface needs to be perfectly smooth and clean for the new gasket to seal properly. I often run my finger along the edge to feel for any remaining bumps.
4. Rinsing and Drying
Once you are satisfied with the cleaning, rinse the oil pan thoroughly. If you used water-based degreasers, use plenty of water to wash away all chemical residue and loosened contaminants. If you used a solvent-based parts cleaner, you might just need to wipe it clean.
After rinsing, ensure the pan is completely dry before reinstallation. Moisture can cause rust. You can air dry it, use compressed air, or wipe it down with clean, lint-free towels. I often leave it in the sun for a while or use a heat gun on a low setting. The pan must be bone dry before you put it back on. This helps ensure proper adhesion for any RTV sealant you might use with the new gasket.
Inspecting and Preparing the Oil Pan for Reinstallation
With your oil pan gleaming clean, the next crucial step is a thorough inspection. This stage is just as important as the cleaning itself. Reinstalling a damaged or improperly prepared pan will lead to leaks or even further engine issues. I always take my time here, as prevention is better than a messy repair.
Here is what you need to check and prepare:
1. Visual Inspection for Damage
Carefully examine the entire oil pan for any signs of damage. Look for:
- Cracks: Even hairline cracks can cause significant oil leaks under pressure. Pay close attention to corners and around bolt holes.
- Dents or Deformations: A dented oil pan can reduce oil capacity. More importantly, it can warp the mounting flange. A warped flange will prevent a proper seal, leading to leaks.
- Rust or Corrosion: While internal rust is less common due to oil coating, external rust can weaken the metal. Address any rust spots if they seem significant.
- Stripped Bolt Holes: Inspect the threads in each bolt hole on the pan. If any are stripped, you will need to repair them (e.g., with a thread repair kit) or consider replacing the pan. A loose bolt cannot provide proper clamping force.
If you find significant damage, especially cracks or severe warping, replacing the oil pan might be the safest and most cost-effective option in the long run. A new pan ensures a reliable seal.
2. Final Cleanliness Check
Even after thorough washing and drying, give the oil pan one last wipe-down. Use a clean, lint-free rag. This ensures there are no dust particles, fibers, or leftover residue. The sealing surface, in particular, must be pristine. Any foreign matter on the gasket surface can compromise the seal.
I often use a quick spray of brake cleaner on the gasket surface. Then I immediately wipe it off with a clean rag. This ensures absolute cleanliness and removes any oily film that could prevent proper gasket adhesion. Make sure the brake cleaner evaporates completely before proceeding.
3. Preparing the New Gasket or Sealant
You will need a new oil pan gasket. Never reuse an old one. They compress and lose their sealing ability. There are two main types:
- Cork or Rubber Gaskets: These are typically installed dry onto the oil pan or engine block. Some applications might recommend a thin coat of RTV sealant on one side to help hold it in place.
- Form-in-Place Gaskets (RTV Sealant): Some vehicles do not use a pre-formed gasket. Instead, they use a bead of RTV (Room Temperature Vulcanizing) silicone sealant. If your vehicle uses RTV, apply an even, continuous bead of the specified RTV type (e.g., “ultra black” or “oil resistant”) along the entire sealing surface of the oil pan. Make sure the bead is consistent in thickness, usually about 2-3mm. Do not apply too much, as excess can squeeze into the oil pan and contaminate the oil.
Always consult your vehicle’s service manual for the exact type of gasket or sealant. Follow the manufacturer’s instructions for RTV application, including any “skin over” or “cure” times before installation. This ensures a proper seal.
Reinstalling the Oil Pan and Refilling Engine Oil
With your oil pan meticulously cleaned and prepared, it is time for reinstallation. This stage is crucial for preventing leaks. Proper technique and attention to detail will ensure a secure and reliable seal. I always double-check every step here.
Here is how to properly reinstall the oil pan and refill your engine with fresh oil:
1. Position the New Gasket (if applicable)
If your oil pan uses a pre-formed gasket, carefully place it onto the oil pan’s sealing flange. Some gaskets have small nubs that align with holes in the pan to hold them in place. A few small dabs of RTV sealant can also help hold the gasket in position. This prevents it from shifting as you lift the pan. If you are using only RTV, apply the bead as described in the previous section.
2. Lift and Align the Oil Pan
Carefully lift the oil pan. Align the bolt holes on the pan with the bolt holes on the engine block. This can be tricky, especially if the pan is heavy or the space is tight. Take your time. I sometimes use a couple of guide pins (bolts with their heads cut off) in opposing holes to help with alignment. This allows the pan to slide easily into place.
Once aligned, gently press the pan against the engine block. Ensure the gasket or RTV bead compresses evenly. Avoid sliding the pan too much, as this can smear the RTV or dislodge the gasket.
3. Install and Hand-Tighten Bolts
Start by threading a few bolts by hand in strategic locations (e.g., corners or opposing sides) to hold the pan in place. This ensures the pan is properly seated before you begin tightening. Do not tighten any bolts fully yet. Just get them finger-tight.
Once all bolts are hand-tight, double-check that the pan is flush against the engine block all around its perimeter. A gap anywhere indicates a misalignment or an issue with the gasket.
4. Torque the Bolts to Specification
This is perhaps the most critical step for leak prevention. Using your torque wrench, tighten the oil pan bolts to the manufacturer’s specified torque settings. These specifications are found in your vehicle’s service manual. Do not guess the torque. Undertightening leads to leaks. Overtightening can strip threads or warp the pan, also leading to leaks.
Tighten the bolts in a specific sequence. Most manufacturers recommend a crisscross or spiral pattern, working from the center outwards. This ensures even clamping pressure across the gasket. Go around the pan in two or three passes. The first pass lightly snugs all bolts. The second pass brings them to half torque. The final pass brings them to full torque. This incremental tightening is vital for a good seal.
5. Reinstall Drain Plug and Lower Vehicle
Once all oil pan bolts are torqued, reinstall the oil drain plug. Use a new drain plug washer if your vehicle uses one. Torque the drain plug to its specification as well. Then, carefully lower your vehicle from the jack stands.
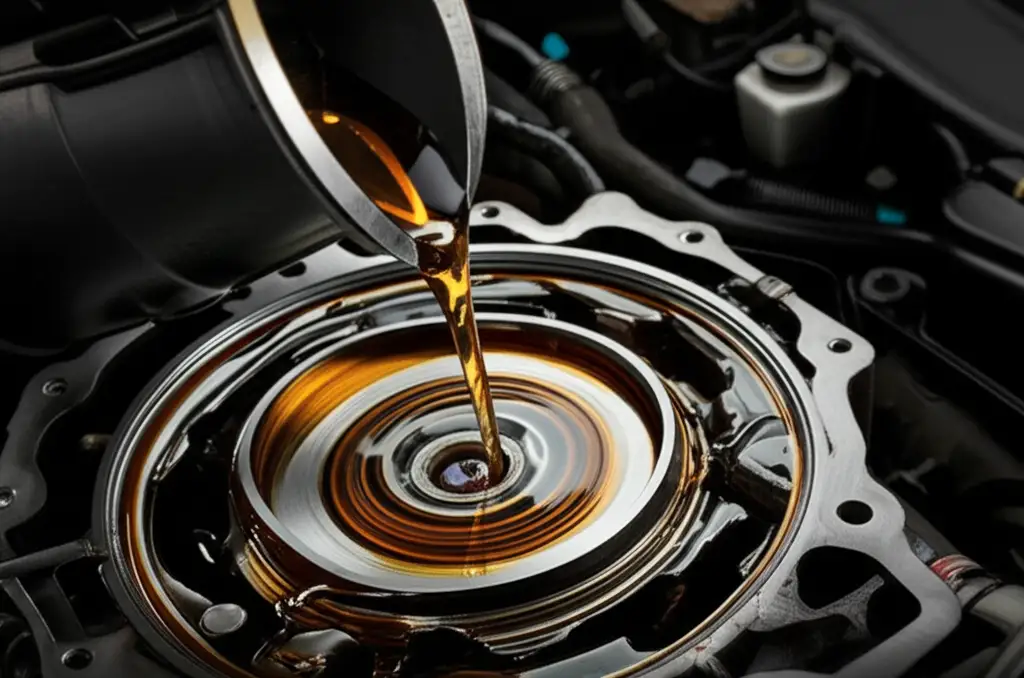
6. Refill Engine Oil and Check for Leaks
With the vehicle back on the ground, use a funnel to pour the specified amount and type of new engine oil into the engine. Consult your owner’s manual for the correct oil type and capacity. After refilling, start the engine and let it run for a few minutes.
Turn off the engine and wait for a few minutes for the oil to settle back into the pan. Check the oil level using the dipstick. Adjust as needed. Finally, and most importantly, inspect the entire perimeter of the oil pan for any signs of leaks. Look carefully, as even a small drip can indicate a problem. If you notice leaks, re-check torque specifications and the gasket installation. Clean any oil residue on the engine or garage floor. Learning how to clean oil from concrete is helpful if spills occur.
Maintaining Your Oil Pan for Long-Term Engine Health
Cleaning your oil pan is a significant step in engine maintenance. However, it is not a standalone event. Proper ongoing maintenance is vital to keep your oil pan—and, by extension, your entire engine—in top condition. Following these tips can help prevent sludge buildup and ensure your engine runs smoothly for years. I find that regular care beats reactive repairs every time.
Here are key maintenance practices I follow:
1. Stick to Regular Oil Change Intervals
This is perhaps the most important preventative measure. Engine oil degrades over time and accumulates contaminants. Changing your oil and oil filter at the manufacturer’s recommended intervals is crucial. This frequency helps to remove suspended particles and prevents them from settling as sludge in the oil pan. Using good quality oil and filters contributes significantly to this. I always mark my calendar for the next oil change.
2. Use the Correct Type and Grade of Engine Oil
Always use the oil type and viscosity grade specified in your vehicle’s owner’s manual. Using the wrong oil can lead to premature oil breakdown, increased sludge formation, and reduced lubrication effectiveness. Synthetic oils often offer superior protection against sludge and varnish buildup compared to conventional oils. They can also extend oil change intervals, but always follow your car manufacturer’s guidelines.
3. Address Oil Leaks Promptly
Even small oil leaks can indicate a problem. They can also contribute to external grime buildup on the oil pan and other engine components. If you notice oil spots under your car, investigate the source and fix it immediately. A persistent leak means your engine is losing oil. It also means you might be running on a low oil level, which is detrimental to engine health. Prompt repair prevents larger issues and keeps your engine bay cleaner.
4. Monitor Your Oil Level Regularly
Check your engine oil level at least once a month, or before long trips. Running your engine with low oil can cause severe damage. It can also lead to increased wear and accelerated sludge formation. Always ensure your oil level is within the recommended range on the dipstick. Topping off when needed is a simple habit that makes a big difference.
5. Drive Smartly
Frequent short trips, especially in cold weather, do not allow engine oil to reach optimal operating temperature. This prevents moisture and unburnt fuel byproducts from evaporating, contributing to sludge. Try to take longer drives periodically to ensure the engine warms up fully. Avoid excessive idling, as it can also accelerate oil degradation.
6. Consider a Quality Engine Flush (Cautiously)
Some professionals recommend an engine flush before an oil change to remove stubborn sludge. These products contain detergents that help dissolve deposits. However, I use them with caution. If your engine has very heavy sludge, a flush can sometimes dislodge large chunks. These chunks could then clog the oil pickup screen. If you choose to use one, follow product directions carefully and change the oil immediately after. This is not a substitute for regular oil changes.
By adhering to these maintenance tips, you significantly reduce the chances of severe sludge buildup. This helps your engine oil pan stay clean, ensuring your engine runs efficiently and reliably for many miles to come.
Frequently Asked Questions About Cleaning Your Oil Pan
Cleaning an oil pan can bring up several questions. Here are some common queries and their answers to help you with your automotive maintenance journey.
Q1: How often should I clean my engine oil pan?
You typically do not need to clean your oil pan regularly as part of routine maintenance. Most drivers will only need to clean it if they observe signs of heavy sludge. This might be during major engine work or when troubleshooting persistent oil pressure issues. Regular oil changes prevent most sludge buildup.
Q2: What happens if I don’t clean my oil pan when it’s sludgy?
If you do not clean a sludgy oil pan, the buildup can clog the oil pickup screen. This restricts oil flow to your engine’s vital parts. It leads to oil starvation, increased friction, and premature engine wear. Severe cases can cause catastrophic engine failure due to a lack of lubrication.
Q3: Can I clean the oil pan without removing it from the engine?
Cleaning an oil pan without removing it is very difficult and largely ineffective for heavy sludge. While some engine flush products claim to clean internal engine components, they cannot physically scrape out solid deposits. For a truly clean oil pan, removal is necessary to access and manually clean the interior.
Q4: What kind of cleaner should I use for an engine oil pan?
Use automotive-specific degreasers or parts cleaner solvents. These products are formulated to dissolve oil, grease, and carbon deposits safely. Avoid harsh household cleaners or anything that could leave residue or corrode metal. Always ensure good ventilation when using
- engine oil pan
- car maintenance
- oil change
- engine cleaning
- automotive repair
- sludge removal
- vehicle care