· Automotive Maintenance · 14 min read
How To Clean Oil Off Engine

Cleaning Engine Oil: A Step-by-Step Guide
Has your engine bay seen better days? A greasy, oil-stained engine can be more than just an eyesore; it can hide potential issues and even pose safety risks. Many car owners wonder how to clean oil off engine parts effectively and safely. You might feel overwhelmed by the task, but a clean engine helps your vehicle run better and makes maintenance checks easier.
I understand the desire for a clean engine compartment. It feels good to open the hood and see a well-maintained machine. This comprehensive guide will walk you through the entire process of cleaning oil off your engine. We will cover why it matters, what tools you need, safety precautions, and step-by-step cleaning methods. You will also learn about tackling tough stains and preventing future oil buildup. Let’s get your engine looking spotless and running smoothly.
Takeaway
- Prioritize Safety: Always wear protective gear and disconnect the battery before starting.
- Prepare Thoroughly: Cool the engine, cover sensitive electrical components.
- Choose the Right Degreaser: Select an automotive-specific, non-corrosive degreaser.
- Agitate and Rinse Carefully: Use brushes to loosen grime, then rinse gently with low-pressure water.
- Dry Completely: Allow the engine to dry fully before reconnecting the battery or starting.
To clean oil off your engine, first ensure the engine is cool. Disconnect the battery and cover sensitive electrical parts with plastic. Apply an automotive degreaser, let it soak, then scrub with brushes to remove grime. Finally, rinse thoroughly with low-pressure water and allow the engine to dry completely before use.
Why You Need to Clean Oil Off Your Engine
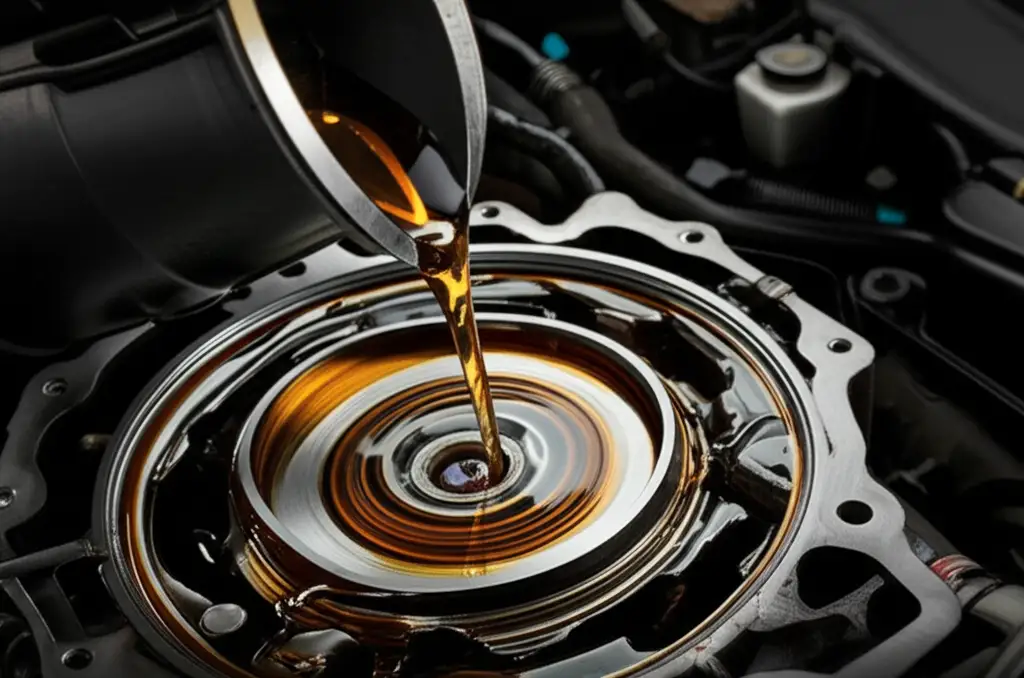
A clean engine is more than just about aesthetics; it offers several practical benefits. Oil buildup on your engine can create problems over time. This includes hiding potential oil leaks, which can lead to serious engine damage if not found early. A dirty engine also runs hotter, as thick grime acts as an insulator, trapping heat.
Furthermore, oil can attract dirt and debris, forming a gritty sludge. This abrasive mixture can accelerate wear on moving parts and seals. A very dirty engine can even present a fire hazard. Oil is flammable, and if it drips onto hot exhaust components, it can ignite. Regular cleaning helps reduce this risk significantly.
Cleaning your engine also boosts its overall value. When you sell a car, a clean engine bay shows proper care and maintenance. It suggests the vehicle has been well-kept throughout its life. This can increase buyer confidence and command a better resale price. I always feel more confident buying a car with a clean engine.
A clean engine also makes diagnosing problems easier. If you spot a new oil leak, it stands out clearly against a clean surface. On a dirty engine, new leaks blend in with old grime, making them hard to spot. This simple cleaning step can save you money on costly repairs down the line. It promotes better engine performance and longevity.
Essential Tools and Safety Gear for Engine Oil Cleaning
Before you start cleaning oil off engine components, gathering the right tools is important. Proper safety gear is equally critical. You are working with chemicals and near electrical parts. Always put safety first to prevent injuries or damage.
First, you will need an automotive-specific engine degreaser. Do not use harsh household cleaners; they can damage engine components. Look for a degreaser designed for car engines. Next, gather a variety of brushes. Stiff bristle brushes work well for heavy grime. Detail brushes or old toothbrushes can reach tight spots.
You will also need a garden hose with a spray nozzle or a low-pressure pressure washer. High-pressure washers can force water into sensitive areas. A bucket of warm water helps with rinsing or diluting cleaner. Microfiber towels or old rags are useful for wiping and drying.
For your safety, wear chemical-resistant gloves. These protect your hands from degreasers and hot engine parts. Safety glasses are a must to shield your eyes from splashes and debris. A face mask might be helpful if the degreaser has strong fumes. I always wear gloves and glasses for any engine work.
Finally, have some plastic bags and tape ready. These items will cover sensitive electrical components before you start spraying water. Cardboard or old newspapers can protect your garage floor from drips and runoff. Being prepared ensures a smooth and safe cleaning process.
Preparing Your Engine for a Thorough Clean
Proper preparation makes a big difference when you clean oil off engine surfaces. Skipping these initial steps can lead to damage or an ineffective clean. I learned this the hard way once, and it taught me the value of preparation. Taking your time here saves you trouble later.
First, ensure your engine is cool to the touch. Cleaning a hot engine can cause degreasers to evaporate too quickly, leaving residue. Hot surfaces can also cause water to flash-evaporate, potentially warping components or creating steam. Let your car sit for at least an hour or two after driving. If you just drove, wait longer.
Next, disconnect the car’s battery. This step is crucial for safety. It prevents electrical shorts and protects sensitive electronics from water damage. Remove both the negative and positive terminals, starting with the negative. Tuck the cables away from the battery terminals to prevent accidental contact.
Now, cover all sensitive electrical components with plastic bags and secure them with tape. This includes the alternator, distributor, ignition coils, spark plug wires, air intake, and any exposed sensors or fuse boxes. Use durable plastic, like grocery bags or painter’s plastic sheeting. Make sure the covers are snug to prevent water from entering. You want to protect anything that looks like it could be damaged by water.
Additionally, remove any loose debris from the engine bay. Use a shop vac or compressed air to blow away leaves, dirt, or loose grime. This makes the degreaser more effective on the oil and grease. A clean surface helps the cleaner work better. You now have a protected and ready engine, primed for a deep clean.
Step-by-Step Guide to Cleaning Engine Oil
Now it is time for the main event: actually cleaning oil off engine parts. Follow these steps carefully for a safe and effective result. This process will remove most of the grime and bring back your engine’s shine. I find this part very satisfying, watching the dirt wash away.
First, apply the engine degreaser generously to all oily and greasy areas. Focus on the valve covers, oil pan, engine block, and any areas with visible oil residue. Avoid spraying directly onto uncovered electrical components or painted surfaces that might be sensitive. Let the degreaser sit for the time recommended on its label. This usually ranges from 10 to 15 minutes. It needs time to break down the oil and grease.
While the degreaser is working, use your various brushes to agitate the grime. Scrub all the dirty surfaces thoroughly. Use a stiff brush for large, heavily soiled areas. Switch to smaller detail brushes or an old toothbrush for tight crevices and hard-to-reach spots. Work the degreaser into the oil and carbon buildup. This helps loosen the stubborn crud. You might be surprised at how much dirt comes off with a good scrub.
After scrubbing, it is time to rinse. Use a garden hose with a gentle spray setting. Start rinsing from the top of the engine and work your way down. This helps carry the loosened grime downwards and away. Avoid using high-pressure water, as it can force water into electrical connections or bearings. Rinse until all the degreaser and loosened oil are gone. Be careful not to drench any areas you covered earlier. Any spilled oil on your garage floor should also be addressed. For tips on cleaning those areas, you can refer to how to clean up spilled oil or how to clean oil off garage floor.
Once you finish rinsing, remove all the plastic coverings from the electrical components. Use microfiber towels or compressed air to dry the engine as much as possible. Pay special attention to drying electrical connectors. The engine must be completely dry before you reconnect the battery or start the car. This prevents electrical issues.
Tackling Stubborn Engine Oil Stains and Grime
Sometimes, a single application of degreaser is not enough. Old, baked-on oil and sludge can be very stubborn. Cleaning oil off engine parts that have years of buildup requires extra effort. Do not get discouraged if some spots remain after the first pass. Persistent grime needs a targeted approach.
For extremely tough spots, you might need to repeat the degreasing and scrubbing process. Apply a fresh layer of degreaser specifically to the problem areas. Let it soak longer this time, maybe 20-30 minutes, if the product allows. Use even more vigorous scrubbing with your stiffest brushes. A brass brush can work wonders on metallic surfaces if you are careful not to scratch anything delicate. Remember to rinse thoroughly after each application.
Sometimes, a specialized product designed for engine sludge or carbon buildup is useful. These products penetrate deeper into the baked-on grime. They can help break down the toughest deposits. If your engine suffers from internal sludge, there are specific methods to address that as well. You can learn more about this by reading how to clean engine oil sludge and how to clean sludge from engine. These types of resources offer detailed steps for those particular challenges.
For very localized, thick spots, you might try a small amount of concentrated degreaser directly on a brush. Work it into the stain by hand. Automotive detailing brushes can get into the tightest spots. Patience is key when dealing with these challenging stains. Do not rush the process; allow the chemicals time to work.
After multiple attempts, if a stain still persists, it might be permanent. Some very old oil stains can dye porous surfaces or become baked into the metal itself. Do not use overly abrasive materials or extremely harsh chemicals in an attempt to remove them. This could cause damage to your engine parts. Focus on getting the majority of the oil off, which is the most important part for performance and safety.
Post-Cleaning Care and Preventing Future Oil Buildup
After you successfully clean oil off engine surfaces, the job is not quite done. Proper post-cleaning care ensures your engine remains in good condition. Also, taking steps to prevent future oil buildup helps maintain its cleanliness. I always finish with these steps to protect my hard work.
First, ensure your engine is completely dry. Use compressed air to blow out any remaining water from crevices, electrical connectors, and bolt heads. You can also let the car sit in the sun for a few hours. If you are in a hurry, drive the car briefly to warm up the engine. The heat helps evaporate any lingering moisture. Make sure you reconnect your battery only after everything is dry. This prevents starting issues or electrical damage.
Next, inspect your engine for any new or existing oil leaks. A clean engine bay makes leaks much easier to spot. Look for fresh drips, wet spots, or residue around seals, gaskets, and hoses. If you find a leak, it is important to address it promptly. Even small leaks can worsen over time. This can lead to significant oil loss and further engine bay contamination.
To prevent future oil buildup, address any identified leaks right away. Replacing worn gaskets or seals is a proactive step. Regular maintenance also plays a big role. Check your oil level frequently and tighten the oil cap and drain plug properly after oil changes. Ensure your oil filter is installed correctly and tightened.
Consider applying an engine dressing or protectant spray. These products create a protective layer on plastic and rubber components. They give the engine bay a finished look. They also help repel dirt and make future cleaning easier. These protectants are not for metal parts but for hoses, plastic covers, and wires. A little bit of prevention goes a long way in keeping your engine spotless.
Common Mistakes to Avoid When Cleaning Engine Oil
Cleaning oil off engine parts can be simple, but certain mistakes can lead to damage or an ineffective clean. Knowing what to avoid saves you time, money, and potential headaches. I have seen many people make these errors, and the results are often costly.
One major mistake is using a high-pressure washer too aggressively. While effective for dirt, high pressure can force water into sensitive electrical connections. It can also damage sensors, break plastic clips, or strip paint. Use a wide fan spray or a garden hose with a nozzle on a gentle setting. Keep the nozzle a safe distance from components.
Another common error is neglecting to cover sensitive electrical components. Failing to do this can lead to short circuits, sensor malfunctions, or even permanent electrical damage. Always disconnect the battery and cover the alternator, fuse boxes, and exposed wiring. These parts are very vulnerable to water.
Using the wrong type of cleaner is also a mistake. Household cleaners, like dish soap or strong detergents, are often corrosive. They can dry out rubber hoses, corrode aluminum parts, or leave behind damaging residues. Always use an automotive-specific engine degreaser. These products are formulated to be safe for engine materials.
Rushing the drying process is another error. Starting your engine or reconnecting the battery too soon can cause electrical problems if moisture remains. Give the engine ample time to air dry. Use compressed air if you have it. Patience is essential to ensure all water has evaporated.
Finally, ignoring safety precautions is a serious mistake. Working with chemicals and near hot or electrical components demands vigilance. Always wear safety glasses and chemical-resistant gloves. Ensure you are working in a well-ventilated area. These simple steps protect your health and safety.
FAQ Section
How often should I clean oil off my engine?
You should clean oil off your engine as needed. If you spot fresh oil leaks or significant grime buildup, it is time for a clean. For preventative maintenance, a thorough cleaning every 1-2 years is often sufficient. This keeps your engine looking good and helps you spot new leaks early.
Can I use household cleaners to clean engine oil?
No, avoid using household cleaners like dish soap or strong detergents. These products are often too harsh for automotive components. They can corrode metal, dry out rubber hoses, or leave damaging residues. Always use an automotive-specific engine degreaser for the best and safest results.
Is it safe to pressure wash my engine?
You can use a pressure washer, but with extreme caution. Use a wide fan spray nozzle and keep the pressure low. Never spray directly into electrical components, open air intakes, or sensitive sensors. A garden hose with a strong nozzle is often safer and just as effective for cleaning oil off engine parts.
What causes oil to build up on an engine?
Oil buildup usually comes from leaks. Common sources include worn valve cover gaskets, oil pan leaks, faulty oil seals, or loose oil filters and drain plugs. Sometimes, it is just residue from spilled oil during maintenance. Regular inspection helps identify the source of the oil.
How do I prevent oil leaks on my engine?
Preventing oil leaks involves routine maintenance. Check your oil levels regularly and ensure your oil cap is tight. Replace gaskets and seals as soon as they show signs of wear or leakage. Use the correct type and amount of engine oil. Regular service helps keep all engine components in good working order.
Conclusion
Cleaning oil off your engine is a valuable maintenance task that goes beyond just appearance. A clean engine helps you identify potential problems, reduces fire hazards, and can even extend your vehicle’s lifespan. We covered everything from gathering the right tools and ensuring safety to preparing your engine and executing a thorough clean. You now understand how to tackle stubborn stains and what steps to take for post-cleaning care.
Remember to always prioritize safety by disconnecting the battery and covering sensitive electrical parts. Use an automotive-specific degreaser and gentle rinsing methods. A clean engine bay is a sign of a well-maintained vehicle. It benefits both its performance and its resale value. I encourage you to make engine cleaning a part of your regular car care routine. Start cleaning oil off your engine today and enjoy a pristine, healthy vehicle.
- engine cleaning
- oil removal
- car care
- auto detailing
- engine degreasing
- DIY auto repair
- vehicle maintenance