· Home Care · 16 min read
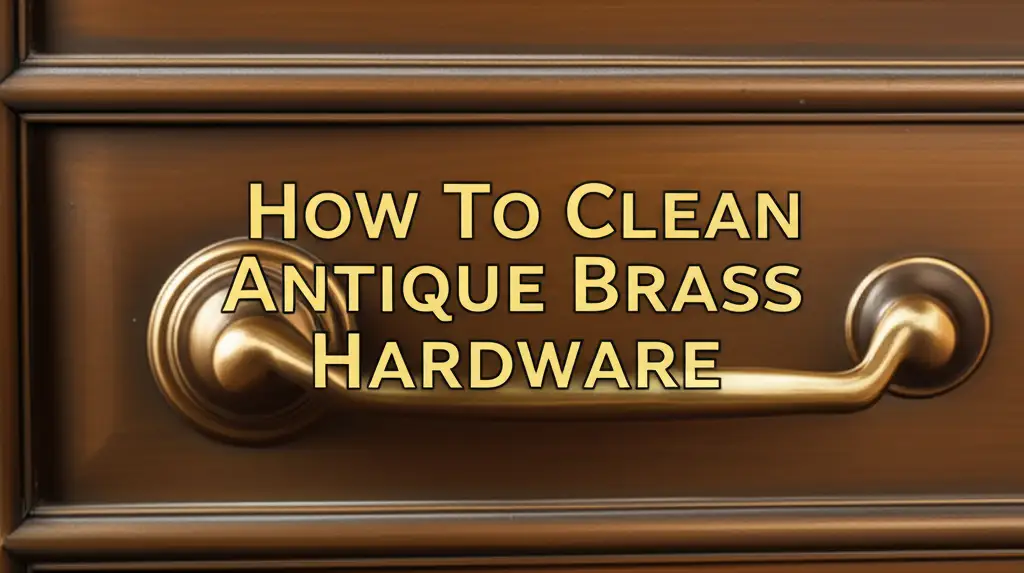
How To Clean Antique Brass Hardware
Restore Your Antique Brass Hardware with Gentle Care
Antique brass hardware holds a special charm. It connects us to history, adding warmth and character to furniture and homes. But over time, tarnish builds up. This tarnish can hide the true beauty of your pieces. Knowing how to clean antique brass hardware safely is important. Improper cleaning methods can damage your valuable items. They can strip away the original finish or precious patina.
I will guide you through the best practices for cleaning antique brass hardware. You will learn gentle, effective methods. We will cover identifying real brass, using natural cleaners, and polishing for shine. This article provides steps to bring back the shine. It also helps you protect your antique brass for years. Let’s make your antique brass hardware look its best again.
Takeaway:
- Always test antique brass to confirm it is solid, not plated.
- Start with the mildest cleaning methods first to avoid damage.
- Natural cleaners like lemon, salt, and vinegar are often effective.
- Preserve original patina if it adds to the piece’s value.
- Regular gentle maintenance helps keep antique brass clean.
Cleaning antique brass hardware involves gentle techniques to remove tarnish while preserving its historical integrity. Identify solid brass first. Then, use mild solutions like warm soapy water or a paste of lemon juice and salt. Rub gently with a soft cloth. Rinse well and dry completely to prevent new tarnish.
Understanding Antique Brass and Patina
Antique brass hardware tells a story through its appearance. Many people love the look of aged brass. This aged look often includes a dark, dull layer called patina. Patina forms naturally as brass reacts with air and moisture. It protects the metal underneath. Some antique collectors prefer to keep this patina. It adds character and value to a piece. Removing it can sometimes decrease an item’s worth.
However, sometimes the brass is very dirty or covered in heavy tarnish. This tarnish might look black and hide the beauty of the brass. This deep discoloration is different from a natural, desirable patina. My goal is to help you clean antique brass hardware without harming the good patina. We will focus on removing only the harmful tarnish. This way, your antique pieces can shine while keeping their historical appeal.
Identifying True Antique Brass
Before you clean any piece, you must know if it is solid brass or plated. Many older items used brass plating over steel or other metals. Cleaning plated items with strong cleaners can remove the thin brass layer. This exposes the metal underneath. You do not want to damage a valuable antique by accident. I always test a piece first to know what I am working with.
Here is a simple test you can do:
- Magnet Test: Get a small magnet. Hold it near the hardware.
- If the magnet sticks, the item is likely brass-plated steel or iron. You need to be very gentle with these pieces.
- If the magnet does not stick, the item is probably solid brass. Solid brass is not magnetic. This means you have more options for cleaning.
- Scratch Test (Use with caution): Find a hidden spot on the hardware. Use a sharp tool to gently scratch a tiny, unseen area.
- If you see a different colored metal underneath the scratch, it is plated.
- If the scratch reveals the same yellow-gold color as the surface, it is solid brass. This test is risky. Only use it as a last resort if the magnet test is unclear.
Once you know your hardware is solid brass, you can proceed with cleaning. If it is plated, use extremely mild methods only. Gentle cleaning protects the thin brass layer. Knowing the material helps you choose the right cleaning approach.
Gentle Cleaning Methods for Antique Brass
When you clean antique brass hardware, always start with the gentlest methods. This approach helps you avoid damage. Strong cleaners can be too harsh for old, delicate brass. My first step is always to try simple, natural solutions. These methods often work wonders on light tarnish. They are also safer for the brass and for you.
Warm Soapy Water Soak
This is the simplest method. It works well for dust, grime, and very light tarnish. I often use this first.
- Prepare: Fill a basin with warm water. Add a few drops of mild dish soap. Do not use strong detergents.
- Soak: Place the brass hardware into the soapy water. Let it soak for 15-30 minutes. For very dirty items, you can let them soak longer.
- Clean: Use a soft cloth or a soft-bristled toothbrush to gently scrub the brass. Pay attention to crevices.
- Rinse: Rinse the hardware thoroughly under clean running water. Make sure no soap residue remains.
- Dry: Dry the brass immediately and completely with a clean, soft cloth. Any moisture left behind can cause new tarnish.
Lemon and Salt Paste
Lemon and salt make a natural, slightly abrasive cleaner. This mixture works well on light to medium tarnish. I find it very effective for bringing out a natural shine. For more ideas on using natural cleaning agents, consider how to clean with vinegar and baking soda.
- Mix: Squeeze fresh lemon juice into a small bowl. Add enough table salt to create a thick paste. The paste should not be runny.
- Apply: Take a soft cloth or cotton swab. Apply the paste to a small, inconspicuous area first. This is a spot test.
- Rub: Gently rub the paste onto the brass surface. Use light, circular motions. Do not scrub hard. The salt acts as a mild abrasive. The acid in the lemon helps dissolve tarnish.
- Rinse: Rinse the hardware thoroughly with clean water.
- Dry: Dry immediately and completely with a soft cloth. Buff gently for shine.
Remember, the goal is to clean antique brass hardware, not to strip it. Always choose the least aggressive method that gets the job done. If you want to keep the original dark look, learn more about how to clean brass without removing patina. This helps preserve historical value.
Tackling Stubborn Tarnish and Blackened Brass
Sometimes, gentle methods are not enough. Antique brass can develop heavy tarnish or turn black. This often happens over many years of neglect. When I encounter brass that has turned black, I know it needs a stronger approach. However, I still choose methods that are safe for antiques. Remember, you want to clean antique brass hardware, not damage it.
Vinegar and Flour Paste
This paste is a bit stronger than lemon and salt. The vinegar provides more acidity. Flour gives the paste body, allowing it to cling to the surface. For deeper cleaning insights, you can explore methods for how to clean brass that has turned black.
- Mix: In a non-metal bowl, combine 1/2 cup white vinegar, a tablespoon of salt, and enough flour to form a thick paste. The flour helps the mixture stick.
- Apply: Spread the paste generously over the tarnished areas of the brass.
- Wait: Let the paste sit on the brass for at least 10 minutes. For very heavy tarnish, you can leave it on for up to an hour. Do not let it dry out completely.
- Rub: With a soft cloth, gently rub the paste into the brass. Use small, circular motions. You should see the tarnish starting to lift.
- Rinse: Rinse the hardware thoroughly with warm, clean water. Remove all paste residue.
- Dry: Dry the brass completely and immediately with a soft, clean towel. Buff for shine.
Commercial Brass Cleaners (Use with Caution)
Sometimes, despite my best efforts, natural methods fall short. In such cases, a commercial brass cleaner might be needed. I approach these with extreme caution. Many commercial cleaners are very strong. They can remove desirable patina along with tarnish. They might also contain harsh chemicals.
- Choose Wisely: Select a cleaner specifically designed for antique brass or fine metals. Read reviews. Look for non-abrasive formulas.
- Test First: Always, always test the cleaner on an inconspicuous spot first. This step is critical. Apply a tiny amount. See how the brass reacts.
- Follow Instructions: Read the product instructions carefully. Follow them exactly. Do not leave the cleaner on longer than recommended.
- Apply Gently: Use a soft cloth. Apply the cleaner sparingly. Rub gently to remove tarnish. Do not scrub.
- Rinse and Dry: Rinse the brass thoroughly with clean water. Dry it immediately and completely.
I prefer natural methods. But if you must use a commercial cleaner, prioritize safety and gentleness. Your goal is to clean antique brass hardware effectively, without causing irreversible harm.
Polishing and Protecting Your Antique Brass
Once you have removed the tarnish, the brass will reveal its true beauty. The next step is to polish it. Polishing enhances the shine. It also prepares the surface for protection. I like to bring out a soft luster in antique brass. This is different from a mirror-like shine often seen on new brass. You want to clean antique brass hardware to look its best, not just new.
Gentle Polishing Techniques
- Buffing with a Soft Cloth: For a subtle shine, simply buff the clean, dry brass with a clean, soft cloth. Microfiber cloths work very well. This action helps to bring out a gentle sheen. It also removes any remaining dullness.
- Olive Oil Polish (Optional): Some people like to use a tiny amount of olive oil for a deeper luster. Apply a very small drop to a soft cloth. Rub it into the brass. Then, buff off any excess immediately with another clean cloth. This method adds a protective layer and a beautiful glow. Use this sparingly, as too much oil can attract dust.
Applying a Protective Coating
After cleaning and polishing, brass will start to tarnish again. This is natural. A protective coating can slow this process. I often recommend this step, especially for hardware used daily.
- Renaissance Wax: This is a popular choice for antiques. It is a micro-crystalline wax polish. It creates a clear, durable barrier. Apply a thin layer with a soft cloth. Let it dry for a few minutes. Then, buff it to a soft sheen. This wax protects the brass without changing its appearance.
- Lacquer (Professional Application): For a very durable, long-lasting protective layer, lacquer is an option. However, this is best left to professionals. Lacquer needs to be applied evenly. It also needs to be removed carefully if the brass needs re-cleaning later. Incorrect application can trap moisture and cause damage. I do not recommend applying lacquer yourself unless you have experience.
Choosing whether to apply a protective coating depends on the hardware’s use. If it is purely decorative, a simple buffing might be enough. If it is frequently touched, protection makes sense. Your goal is to clean antique brass hardware and then keep it beautiful longer.
Removing Hardware and Safety Tips
Before you start to clean antique brass hardware, consider if you can remove it. Cleaning hardware off its base is always easier. This prevents damage to surrounding materials, like wood. It also lets you clean all sides of the brass piece.
Safely Removing Hardware
- Document: Take photos before you remove any hardware. This helps you remember where each piece goes. It also shows its original position.
- Tools: Use the correct size screwdriver. An ill-fitting screwdriver can strip screw heads. This makes reassembly hard.
- Store Screws: Place all screws and small parts in a labeled container. A small plastic bag or jar works well. Losing antique screws is easy and frustrating.
- Gentle Removal: Pry stuck hardware carefully. Use a flat, thin tool wrapped in cloth to protect the surrounding surface. Do not force anything.
General Safety Precautions
When I clean antique brass hardware, safety is always first. Even natural cleaners can irritate skin.
- Gloves: Wear protective gloves. This protects your hands from cleaners and dirt. It also keeps your skin oils off the cleaned brass.
- Ventilation: Work in a well-ventilated area. This is especially important if you use commercial cleaners. Fumes can be strong.
- Eye Protection: Consider wearing safety glasses. This protects your eyes from splashes, especially when scrubbing.
- Test Small Areas: Always test any cleaner on a small, hidden spot first. This helps prevent damage to the entire piece.
- No Abrasives: Avoid steel wool, harsh scrubbers, or abrasive powders. These can scratch antique brass. They can also permanently damage the finish.
- Rinse Thoroughly: Always rinse the brass completely after cleaning. Any leftover cleaner can continue to react with the metal. This causes new tarnish or damage over time.
By following these safety tips, you ensure a smooth and safe cleaning process. You protect yourself and your valuable antique brass hardware.
Long-Term Care and Maintenance
Once you have learned how to clean antique brass hardware, regular maintenance is simple. Preventing heavy tarnish is easier than removing it. I believe in consistent, gentle care. This keeps your antique pieces looking beautiful for many years. You will avoid the need for deep cleaning often.
Regular Dusting and Wiping
- Soft Cloth Dusting: Dust your antique brass hardware regularly. Use a soft, dry cloth. This prevents dust and grime from building up. Dust can hold moisture and contribute to tarnish.
- Fingerprint Removal: Oils from your hands can speed up tarnishing. Wipe down hardware that is touched often. Use a soft, clean cloth. This removes fingerprints and smudges.
Minor Tarnish Removal
- Spot Cleaning: If you see small areas of tarnish forming, address them quickly. Use the mildest method possible. A damp cloth with a tiny bit of mild soap often works.
- Buffing: Gently buff the brass with a dry, soft cloth once a week. This maintains the shine. It also helps to distribute any protective wax you may have applied.
Environmental Considerations
The environment plays a role in how quickly brass tarnishes.
- Humidity Control: High humidity speeds up tarnishing. If you live in a humid climate, consider using a dehumidifier. This helps protect antique metals.
- Avoid Direct Sunlight: Direct sunlight can cause brass to tarnish faster. It can also dry out surrounding wood. Position furniture with antique brass hardware away from direct sun.
- Gloves for Handling: Whenever possible, wear cotton gloves when handling freshly cleaned or polished brass. This prevents skin oils from reacting with the metal.
By making these simple maintenance steps a part of your routine, you extend the life and beauty of your antique brass hardware. You protect your investment. You also preserve the character these pieces add to your home.
What to Avoid When Cleaning Antique Brass
Knowing what not to do is just as important as knowing what to do. When you clean antique brass hardware, certain actions can cause permanent damage. I want to help you avoid common mistakes. These mistakes can reduce the value and beauty of your antiques.
Harsh Abrasives
- Steel Wool and Scouring Pads: Never use steel wool, abrasive scouring pads, or stiff brushes. These materials will scratch the brass surface. Scratches are very hard, sometimes impossible, to remove. They will also dull the finish.
- Abrasive Cleaners: Avoid powdered cleansers or pastes with large abrasive particles. Even some “gentle” kitchen scrubs can be too harsh. Stick to soft cloths and fine-grained natural abrasives like salt or baking soda if needed.
Strong Chemicals
- Ammonia and Bleach: Do not use cleaners containing ammonia or bleach. These chemicals can react badly with brass. They can cause discoloration. They can also corrode the metal over time.
- Strong Acid Cleaners: While vinegar and lemon juice are mild acids, industrial-strength acid cleaners are too harsh. They can strip patina too aggressively. They can also etch the brass surface.
- Dishwashers: Never put antique brass hardware in a dishwasher. Dishwasher detergents are very strong. The high heat and harsh chemicals will almost certainly damage the brass. They can also cause irreversible discoloration.
Removing All Patina
- Over-Cleaning: Resist the urge to make antique brass look brand new. Over-cleaning can remove the natural patina. This patina adds character and value to the antique. It also protects the brass.
- Value Reduction: For true antiques, a well-preserved patina is often a sign of age and authenticity. Removing it completely can reduce the item’s historical integrity and monetary value. If you are unsure, consult an antique restorer.
By avoiding these pitfalls, you ensure the longevity and beauty of your antique brass hardware. You respect its history. You preserve its value. Your goal is always to clean antique brass hardware safely and effectively, without causing harm.
FAQ Section
How often should I clean antique brass hardware?
Clean antique brass hardware only when needed. For light dust, wipe it weekly. If tarnish builds, clean it every few months. Over-cleaning can remove valuable patina. I always suggest a gentle approach. This preserves the piece’s historical look.
Can I clean antique brass with vinegar?
Yes, you can clean antique brass using vinegar. Mix white vinegar with salt and flour to form a paste. Apply it gently. Vinegar helps remove tarnish effectively. Always rinse thoroughly and dry completely afterward. This method is generally safe for solid brass. For more uses, explore how to clean mold with vinegar.
Will cleaning antique brass remove its patina?
Gentle cleaning methods like warm soapy water may not remove much patina. Stronger cleaners or harsh scrubbing can remove patina. Patina is the desirable aged look. If you want to keep the patina, use very mild methods. For specifics, see how to clean brass without removing patina.
What is the best way to clean brass hardware attached to wood furniture?
To clean brass hardware on wood, remove it if possible. This protects the wood. If you cannot remove it, mask off the surrounding wood. Use painter’s tape. Apply cleaners sparingly. Clean a small area at a time. Rinse quickly and dry immediately. Be careful not to get liquids on the wood.
Can I use store-bought brass polish on antique brass?
You can use store-bought brass polish, but with caution. Many polishes are abrasive. They can remove patina and scratch the surface. Choose non-abrasive options. Always test a small, hidden area first. I often prefer natural methods for antiques.
How do I know if my brass is antique or just old?
True antique brass typically shows signs of age. This includes variations in surface texture, natural patina, and original construction methods. A magnet test can tell you if it’s solid brass. If a magnet sticks, it’s plated. Consult an antique expert for definitive identification.
Conclusion
Learning how to clean antique brass hardware is a valuable skill. It allows you to restore the beauty of historical pieces. You can keep their value intact. We have explored the gentle methods for cleaning. We also covered ways to tackle stubborn tarnish. We talked about how to protect your cherished items. Remember to always test a small area first. Use the gentlest cleaning method possible. You should avoid harsh chemicals and abrasive tools.
Your antique brass hardware deserves careful treatment. By following these steps, you will enjoy its renewed luster for years. Regular, gentle maintenance will keep these pieces looking their best. These steps also help preserve their unique character. Start cleaning your antique brass hardware today. Bring out the hidden beauty in your home. Visit our website for more cleaning tips and tricks.
- antique brass
- brass cleaning
- hardware restoration
- home cleaning
- vintage decor