· Appliance Maintenance · 17 min read
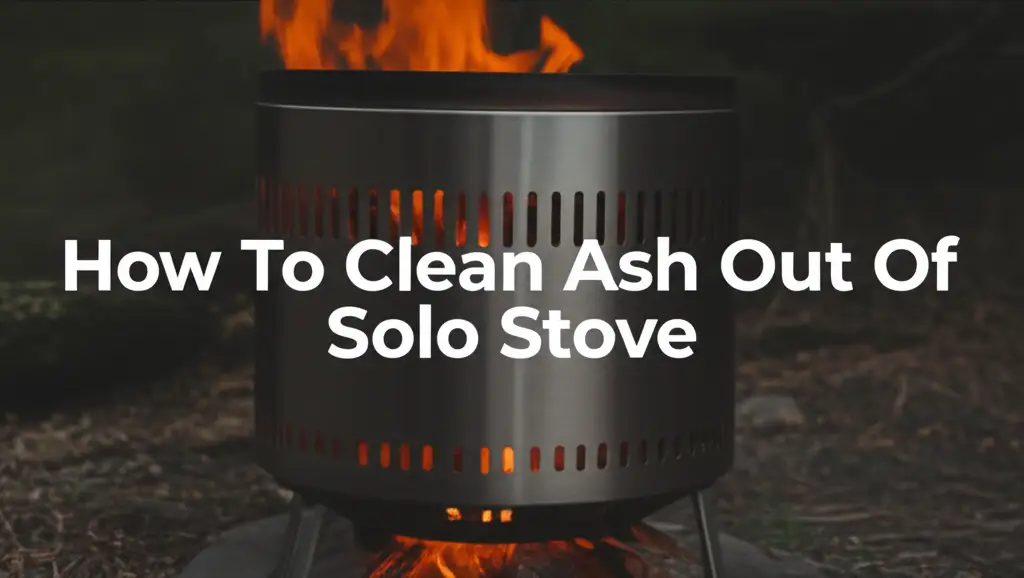
How To Clean Ash Out Of Solo Stove
Mastering Solo Stove Ash Cleaning for Optimal Performance
A Solo Stove brings warmth and joy to any outdoor gathering. Its efficient design creates beautiful, low-smoke fires. However, like any wood-burning appliance, regular ash removal is key to maintaining its performance. Knowing how to clean ash out of Solo Stove properly ensures your unit burns efficiently for years. This guide will walk you through every step. We cover the tools you need, the best cleaning techniques, and how to dispose of ash safely.
Takeaway
Keeping your Solo Stove clean of ash is simple and important.
- Allow the stove to cool completely.
- Gather the right tools: ash vacuum, scoop, gloves, mask.
- Remove ash carefully, starting with the removable base plate.
- Dispose of ash safely in a metal container.
- Regular cleaning improves airflow and burning efficiency.
Clear Answer to Main Query
To clean ash out of a Solo Stove, first ensure it is completely cool. Then, carefully remove the ash pan or tilt the stove to empty the ash into a metal container. Use a small ash shovel or an ash vacuum to clear remaining debris. This process ensures proper airflow and extends the stove’s life.
Why Regular Ash Removal Matters for Your Solo Stove
Maintaining your Solo Stove involves consistent ash removal. Ash buildup can significantly affect how well your stove works. My own Solo Stove has taught me this lesson many times. A clean stove burns hotter and produces less smoke.
Ash acts as an insulator at the bottom of the stove. It blocks the crucial airflow from the primary intake vents. These vents bring oxygen into the combustion chamber. Without enough oxygen, wood does not burn completely. This leads to a smoky fire and wasted fuel. Cleaning your Solo Stove regularly prevents these issues.
Beyond performance, ash removal impacts the life of your stove. Prolonged ash contact, especially with moisture, can cause corrosion. This damages the stainless steel over time. Regular cleaning keeps the metal dry and free of corrosive agents. It protects your investment. A well-maintained stove also looks better and is always ready for your next fire.
Benefits of a Clean Solo Stove
There are clear advantages to keeping your Solo Stove free of ash.
- Improved Airflow: The double-wall design of a Solo Stove relies on proper airflow. Fresh air enters through bottom vents, heats up between the walls, and then feeds the top vents. Ash blocks this critical primary airflow. When clear, the stove gets more oxygen. This creates a hotter, more efficient burn.
- Reduced Smoke: Incomplete combustion creates more smoke. When the Solo Stove has enough oxygen, wood burns completely. This leads to a secondary burn of particles that would normally escape as smoke. Less smoke means a more pleasant experience for everyone around the fire.
- Extended Lifespan: Ash contains corrosive compounds. If left inside the stove, especially with moisture, these compounds can slowly eat away at the stainless steel. Removing ash regularly prevents this chemical damage. It helps keep the metal strong and shiny for years. Proper care helps your stove last longer.
- Optimal Performance: A clean Solo Stove performs as it was designed. It starts easier, heats up faster, and maintains a consistent flame. This means you use less wood for the same amount of warmth and enjoyment. I always notice the difference when my stove is sparkling clean.
Essential Tools for Efficient Solo Stove Ash Cleaning
Having the right tools makes cleaning ash from your Solo Stove much easier. You do not need many specialized items. Most are common household or outdoor cleaning tools. I have tried various methods over time. The right tools make the job quick and mess-free.
First, ensure your Solo Stove is completely cool. Never attempt to clean a warm or hot stove. Even warm ash can retain heat and cause burns. Safety always comes first. Allow several hours, or even overnight, for the stove to cool down after a fire. This step is critical before you gather any tools.
Many Solo Stove models, especially the larger ones, now feature a removable ash pan. This pan makes ash removal incredibly simple. It slides out, allowing you to dump the ash directly. For models without this feature, or for deeper cleaning, you will need other tools. These tools help manage the fine, dusty nature of wood ash. Using the right equipment prevents dust from spreading everywhere.
Recommended Equipment List
Here is a list of tools I recommend for cleaning your Solo Stove.
- Heat-Resistant Gloves: These protect your hands from residual heat and sharp debris. They also keep your hands clean from the ash. I always wear mine, even when the stove feels cool.
- Dust Mask or Respirator: Ash is very fine and can irritate your lungs. A mask prevents you from inhaling airborne particles. This is a crucial safety item.
- Small Ash Scoop or Shovel: A sturdy metal scoop is perfect for scraping and collecting ash. Look for one with a flat edge to get into corners. This tool helps you scoop out the bulk of the ash easily.
- Metal Bucket or Ash Can with Lid: Never use plastic containers for ash. Even cool ash can contain embers that reignite. A metal can with a tight-fitting lid is essential for safe storage and disposal.
- Ash Vacuum (Optional but Recommended): An ash vacuum is a game-changer. It has a special filter and a metal hose designed for fine ash. It picks up fine dust that scoops might miss. This tool makes the clean-up process much faster and cleaner. Its specialized design prevents damage to your regular household vacuum. The principles of ash removal, whether from a Solo Stove or a pellet stove, often involve similar tools for safe and efficient cleanup. For more details on ash vacuuming, you can explore methods for cleaning ash out of a pellet stove.
- Stiff Bristle Brush or Wire Brush: This helps dislodge stubborn ash or creosote buildup from the internal walls. Use it gently to avoid scratching.
- Cleaning Cloths/Paper Towels: Useful for wiping down the exterior or any remaining dust.
- Water Hose (for exterior rinse, if applicable): For a deeper exterior clean, a hose can remove soot and grime. Ensure the interior remains dry.
Step-by-Step Guide to Cleaning Solo Stove Ash
Cleaning the ash from your Solo Stove is a straightforward process. Following these steps ensures a thorough and safe clean. I have refined this routine over many uses. It helps keep my Solo Stove in top condition. This detailed guide makes the task simple for anyone.
Preparing Your Solo Stove for Cleaning
Before you start, proper preparation is key. This prevents mess and ensures safety.
- Ensure Complete Cooling: This is the most important step. Wait several hours after a fire. For large fires, let it cool overnight. Touch the stove with your hand; if it feels warm at all, wait longer. Hot ash or embers can cause severe burns or start fires.
- Move to a Designated Cleaning Area: If possible, move your Solo Stove to an area away from your house or flammable materials. A concrete patio or gravel driveway is ideal. This makes sweeping up any spilled ash easier. It also minimizes dust indoors.
- Gather Your Tools: Have your heat-resistant gloves, dust mask, ash scoop, metal bucket, and ash vacuum ready. Lay them out so they are easily accessible. Being organized saves time.
Methods for Ash Removal
The method for removing ash depends on your Solo Stove model. Newer models feature a removable ash pan. Older ones require tilting or scooping from the top.
For Models with a Removable Ash Pan (e.g., Solo Stove Bonfire 2.0, Yukon 2.0):
- Remove the Base Plate/Ash Pan: Carefully lift the flame ring and remove the internal base plate. The ash pan sits directly underneath.
- Slide Out the Ash Pan: Gently slide the ash pan out from the bottom. It will contain most of the ash.
- Empty the Ash Pan: Dump the ash from the pan directly into your metal ash can. Use a small brush or scoop to get any remaining dust out of the pan.
- Clean the Interior: With the ash pan removed, you can now access the bottom of the main chamber. Use your ash scoop to gather any ash that fell outside the pan. An ash vacuum is excellent for this. It quickly sucks up fine particles and dust. This method is similar to how one might handle ash in other types of stoves. For insights into general ash cleanup, consider checking guides on how to clean ash out of a pellet stove.
- Reassemble: Once clean, slide the ash pan back in. Replace the base plate and flame ring.
For Models Without a Removable Ash Pan (e.g., older Solo Stove Bonfire, Ranger, Yukon):
- Remove Flame Ring and Grate: Lift the flame ring off the top. Then, remove the interior grate that holds the wood. This gives you full access to the stove’s interior.
- Scoop Out Bulk Ash: Use your ash scoop or shovel to carefully remove the bulk of the ash. Place it directly into your metal ash can. Be gentle to avoid damaging the interior walls.
- Tilt and Empty: For fine ash and remaining debris, you can carefully tilt the entire Solo Stove over your metal ash can. This allows gravity to do most of the work. Ensure a firm grip.
- Use an Ash Vacuum: After tilting, use an ash vacuum to clean the remaining fine dust. Reach into the crevices and around the air holes. This ensures all ash is gone. The effectiveness of an ash vacuum makes it a valuable tool, similar to its use when you need to clean ash out of a pellet stove.
- Brush Interior Walls: If you see any soot or creosote buildup, use a stiff brush to loosen it. Then, vacuum up the loosened particles.
Cleaning the Ash Pan and Interior
Once the bulk of the ash is gone, focus on the details.
- Wipe Down the Ash Pan (if applicable): If your model has one, wipe the ash pan with a dry cloth. Make sure it is completely dry before reinserting it.
- Clean External Vents: Use a small brush or a dry cloth to clear any ash or debris from the exterior air vents at the bottom. These vents are crucial for proper airflow.
- Wipe Exterior (Optional): For a polished look, wipe the exterior stainless steel with a dry microfiber cloth. Avoid abrasive cleaners.
Safe Ash Disposal Practices
Proper ash disposal is as important as the cleaning itself. Ash, even when it appears cold, can harbor embers for days. Ignoring this can lead to serious fire hazards. I have always emphasized safety when dealing with fire by-products. This section provides clear guidelines to ensure your property remains safe.
The fine texture of ash also means it can easily become airborne. When you dispose of it, you want to minimize dust spreading. This protects your lungs and keeps your surroundings clean. Always handle ash with care and use the correct containers. A plastic bin is never suitable for ash, even if you think it is cold.
Ash also contains various minerals from the burned wood. While some people use ash in gardens, it is important to know which plants benefit. Too much ash can change soil pH significantly. For general disposal, safety is the primary concern. Always assume embers are present.
Understanding Ash Hazards
It is vital to understand why ash is dangerous.
- Hidden Embers: Ash is an excellent insulator. It can trap heat for long periods. A small ember can smolder for days under a blanket of ash. This small ember can reignite when exposed to oxygen.
- Fire Risk: Placing ash in flammable containers like plastic bags, cardboard boxes, or even directly on wooden decks causes many fires each year. These fires often start hours or even days after you think the ash is cool.
- Respiratory Irritation: Ash is a very fine powder. When disturbed, it easily becomes airborne. Inhaling ash particles can irritate your respiratory system. Always wear a dust mask.
Proper Containment and Storage
Follow these steps for safe ash disposal.
- Use a Metal Container with a Lid: Only use a dedicated metal ash can or a galvanized steel bucket. This type of container will not burn. The lid prevents oxygen from reaching potential embers. It also keeps ash from blowing around.
- Keep Away from Combustibles: Place the sealed metal container on a non-combustible surface. This means concrete, dirt, or gravel. Keep it several feet away from any buildings, wooden decks, or other flammable materials. Do not store it in your garage or near wood piles.
- Cool Ash Completely: Leave the ash in the sealed metal container for several days. I recommend at least 72 hours. This allows any hidden embers to cool and die out completely. You can also add a small amount of water to the ash. This ensures any embers are extinguished. Be careful not to make the ash too wet, as this creates a heavy, muddy mess.
- Final Disposal: After the ash has been completely cold for several days, it is safe to dispose of it. You can often bag it in heavy-duty trash bags and put it out with your regular household waste. Check your local waste disposal rules. Some areas have specific guidelines for ash. Never dump hot ash directly into nature or a trash can.
Deep Cleaning and Maintenance Tips for Your Solo Stove
Beyond regular ash removal, deep cleaning and periodic maintenance ensure your Solo Stove remains in top condition. This extends its life and keeps it looking great. I find that a little extra effort now saves bigger problems later. This level of care goes beyond simple ash removal.
Over time, despite its efficient design, a Solo Stove can accumulate soot, creosote, and general grime. This buildup affects both appearance and performance. Soot is a black, powdery residue from incomplete combustion. Creosote is a tar-like substance that forms when wood smoke condenses. While less common in Solo Stoves due to their secondary burn, it can still accumulate, especially with improper wood or burning habits.
A deep clean addresses these buildups. It also provides a chance to inspect your stove for any wear or damage. This proactive approach ensures your Solo Stove is always ready for your next outdoor adventure. Taking care of it helps you enjoy many more smokeless fires.
Addressing Soot and Creosote Buildup
Soot and creosote primarily affect the interior and upper sections of the stove.
- Scrape and Brush: After removing all ash, use a stiff bristled brush or a plastic scraper. Gently scrape away any visible soot or creosote from the interior walls. Pay attention to the holes near the top, where secondary combustion occurs. These can get blocked.
- Vacuum Remaining Debris: Use your ash vacuum to suck up all loosened particles. This prevents them from falling back into the ash pan or spreading.
- Exterior Soot Removal: For external soot marks, especially around the flame ring, use a non-abrasive stainless steel cleaner. Apply it with a soft cloth. Wipe in the direction of the grain to avoid scratches. Never use steel wool or harsh chemicals, as they can damage the finish. For general tough stains on various surfaces, even basic cleaning solutions can work. Sometimes, a mixture of vinegar and baking soda can be surprisingly effective for tough grime, as seen in methods like how to clean with vinegar and baking soda. However, for stainless steel, stick to specialized cleaners.
- Polish (Optional): If you want your Solo Stove to shine, use a stainless steel polish after cleaning. This protects the surface and resists fingerprints.
Seasonal Maintenance Checklist
Perform these checks and cleaning tasks at least once per season, or more often if you use your Solo Stove frequently.
- Thorough Ash Removal: Always start with a complete ash removal, as detailed earlier. Ensure the stove is bone dry before storing.
- Inspect Airflow Vents: Check all primary and secondary airflow holes. Ensure they are free of debris. Use a small wire or pipe cleaner if needed to clear blockages. Good airflow is critical for the Solo Stove’s smokeless efficiency.
- Examine Stainless Steel: Look for any signs of rust, corrosion, or pitting. Early detection allows for immediate action. Minor blemishes can sometimes be buffed out with a stainless steel cleaner.
- Check Welds and Connections: Inspect all welded seams and connections for any cracks or weaknesses. Solo Stoves are very durable, but extreme heat can cause stress over time.
- Store Properly: When not in use for extended periods, store your Solo Stove in a dry, covered area. Use a Solo Stove cover or a waterproof tarp. This protects it from rain, snow, and extreme temperatures. Storing it indoors, like in a garage or shed, is ideal. Moisture is the biggest enemy of stainless steel.
- Prep for Next Use: Before your next fire, give your stove a quick visual inspection. Ensure it is clean and dry. This simple check guarantees optimal performance for your next burn.
Troubleshooting Common Solo Stove Cleaning Issues
Even with the best intentions, you might encounter a few common issues when cleaning your Solo Stove. Knowing how to handle them makes the process smoother. I have faced these challenges myself and learned quick solutions. These tips help you overcome minor hurdles.
Sometimes, ash seems stubborn. Other times, dust gets everywhere. These small problems can be frustrating. However, with the right approach, you can fix them. This section addresses frequent concerns. It provides simple, actionable advice.
Maintaining your Solo Stove does not have to be difficult. These troubleshooting tips ensure your cleaning efforts are effective. They help you keep your stove performing at its best. You will be ready for many more enjoyable fires.
Stuck Ash or Debris
Fine ash and small debris can sometimes get stuck in crevices or clog the lower airflow holes.
- Use a Stiff Brush: A simple stiff bristle brush or a bottle brush can dislodge stubborn ash. Work it into corners and around the bottom grate. Gently brush towards the center where you can scoop or vacuum it.
- Air Compressor or Blower: For truly stubborn clogs in the smaller air holes, a blast of compressed air can be effective. Use a low-pressure setting to avoid damaging the stove. Direct the air into the holes to push out the ash. Wear safety glasses and a mask, as ash will blow out forcefully.
- Rethink Your Fuel: Sometimes, certain types of wood produce more fine ash or char. Dry, well-seasoned hardwood generally creates less residue. Wet wood or softwoods can lead to more problematic ash and creosote buildup. Switching to better fuel can reduce future issues.
Managing Mess and Dust
Ash is notoriously dusty. Preventing it from spreading is a common challenge.
- Work Outdoors: Always clean your Solo Stove outdoors. This allows the fine dust to dissipate into the open air. Cleaning indoors will create a significant mess.
- Use an Ash Vacuum: As mentioned earlier, an ash vacuum is designed specifically for fine dust. It traps particles much better than a regular shop vac or household vacuum. If you frequently clean ash, investing in one is worthwhile. It greatly reduces airborne dust. It is a fantastic tool for managing dust from ash, just as it would be for cleaning fine particles when you clean ash out of a pellet stove.
- Dampen Surrounding Area (Slightly): Before you begin cleaning, lightly mist the ground around your Solo Stove with water. This can help to settle any ash that might escape your container or vacuum. Do not spray water into the stove.
- Clean on a Calm Day: Wind can easily carry ash particles. Choose a day with little to no wind for your cleaning session. This makes the job much cleaner.
- Wear Appropriate Gear: Always wear a dust mask or respirator. This protects your lungs from inhaling ash. Gloves also keep your hands clean.
Optimizing Your Solo Stove for Less Ash
While ash removal is necessary, you can take steps to minimize the amount of ash your Solo Stove produces. This means less cleaning effort for you. I have found that a few simple adjustments can make a big difference. These tips focus on burning smarter, not harder.
The Solo Stove’s design promotes efficient combustion. It uses a secondary burn to consume smoke particles. However, the type of fuel you use and how you manage your fire greatly impact the remaining ash. Understanding these factors helps you achieve a cleaner, more efficient burn.
By following these optimization strategies, you will not only reduce ash but also enhance your overall fire experience. You will get hotter fires, less smoke, and longer burn times. It is a win-win situation for any Solo Stove owner.
- Solo Stove
- ash cleaning
- fire pit maintenance