· Appliance Maintenance · 18 min read
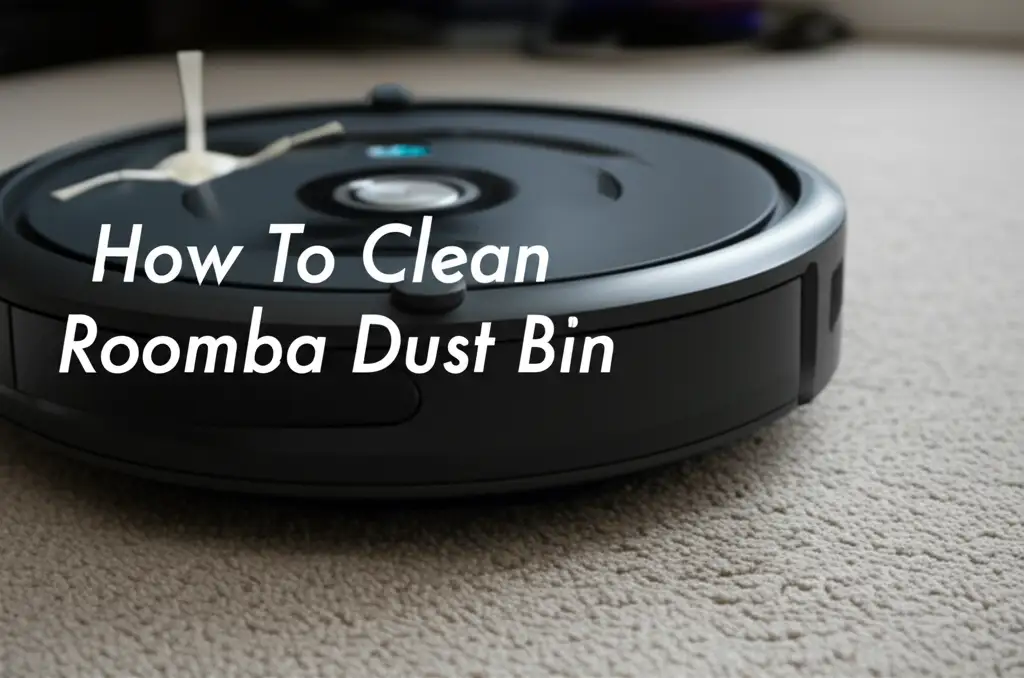
How To Clean Roomba Dust Bin

How to Clean Your Roomba Dust Bin for Peak Performance
Your Roomba robot vacuum works hard every day. It picks up dirt, dust, and pet hair from your floors. All this debris goes into its dust bin. A full or dirty dust bin can stop your Roomba from working well. It might leave dirt behind or lose suction power. I learned that keeping this part clean is very important.
Many people wonder about proper robot vacuum care. Cleaning the dust bin is a simple yet crucial task. It helps your Roomba collect more dirt effectively. This guide helps you understand how to clean Roomba dust bin. We cover everything from daily emptying to deep cleaning methods. You will learn about filter care and what tools to use. Proper maintenance makes your Roomba last longer and clean better.
Takeaway
- Empty the Roomba dust bin after every use to prevent overflow and maintain suction.
- Clean the filter regularly by tapping out debris or using compressed air.
- Wash the dust bin with water only if your specific Roomba model allows it.
- Perform deep cleaning of the bin and filter at least once a week.
- Replace the filter every 2-3 months to ensure peak performance.
To clean your Roomba dust bin, first remove it from the robot. Empty all collected debris into a trash can. Remove the filter and tap it to dislodge dust. For some models, you can rinse the bin with water and let it air dry completely before reinserting the filter and bin.
Why Regular Roomba Dust Bin Cleaning Matters
Maintaining your Roomba includes cleaning its dust bin. A clean dust bin directly impacts your robot’s cleaning ability. When the bin is full, dirt has no place to go. This means your Roomba pushes dirt around instead of collecting it. I noticed this difference right away when I started cleaning my bin more often.
A clogged dust bin also puts stress on the vacuum’s motor. The motor works harder to pull air through the bin. This uses more power and can shorten the motor’s life. Regular cleaning prevents this strain. It helps your Roomba maintain strong suction. Think of it like keeping your car’s engine oil clean.
Dust and debris can also build up around the bin’s sensors. These sensors tell the Roomba how full the bin is. If they get dirty, your Roomba might give false alerts. It might tell you the bin is full when it is not. This leads to interruptions in cleaning cycles. Cleaning helps these sensors work correctly.
A dirty filter is another common issue. The filter prevents fine dust from blowing back into your air. If the filter is clogged, air cannot flow freely. This reduces the vacuum’s suction. Clean filters capture more allergens and fine particles. This improves air quality in your home.
Proper dust bin care prevents bad smells too. Pet hair and food crumbs can sit in the bin. Over time, these items can start to smell. Emptying and cleaning the bin regularly stops odors. This keeps your home smelling fresh. It also keeps your Roomba hygienic.
Understanding Your Roomba Dust Bin: Components Explained
The Roomba dust bin is a simple unit, but it has key parts. Knowing these parts helps you clean it correctly. Each component plays a role in collecting debris. I found that understanding this system made cleaning easier for me.
First, there is the main bin compartment. This is the large area that holds all the dirt and dust. It is usually a plastic container. This part detaches from the main Roomba body. You remove this part to empty the collected debris.
Next, you have the filter. The filter sits within the dust bin. It is a crucial part of the vacuum system. This filter traps small particles like dust, pollen, and pet dander. Roomba uses different types of filters. Some have a standard filter, while others use a High-Efficiency Filter. High-Efficiency Filters capture even smaller particles.
Many Roomba bins also have a small pre-filter screen. This screen stops larger debris from reaching the main filter. It helps protect the main filter from large clogs. You might see this screen just inside the bin opening. This screen needs occasional cleaning too.
Some advanced Roomba models have a washable dust bin. This means you can rinse the entire plastic bin with water. However, not all models are washable. It is important to check your Roomba’s manual first. Washing a non-washable bin can cause damage. Water can get into electronic parts.
The bin also has a release latch or button. This lets you easily remove the bin from the Roomba. It clicks into place when you put the bin back. Ensure the bin is fully seated for proper operation. A loose bin can affect suction.
Understanding these parts helps with cleaning. You know what to empty, what to clean, and what to keep dry. Knowing your Roomba’s specific model is key. This lets you follow the right cleaning steps. Always consult your Roomba’s manual for specific instructions for your model.
Step-by-Step Guide to Cleaning Your Roomba Dust Bin
Cleaning your Roomba dust bin is a simple process. Doing it regularly improves your Roomba’s performance. Follow these steps for a thorough clean. I do these steps after every few cleaning cycles.
1. Remove the Dust Bin:
- Press the bin release tab or button on your Roomba. This is usually located at the back of the robot.
- Gently slide the dust bin out. It should come out easily.
- Place your Roomba aside in a safe spot.
2. Empty the Bin:
- Hold the bin over a trash can.
- Open the dust bin door or flap. This is where the dirt empties out.
- Shake the bin gently to remove all dirt and debris. You might need to tap it against the trash can’s edge.
3. Clean the Filter:
- Locate the filter in the dust bin. It is usually a rectangular piece.
- Pull the filter out from its slot. Be careful not to tear it.
- Tap the filter firmly against the inside of the trash can. This dislodges fine dust.
- You can also use a small brush or a can of compressed air to remove more dust. Aim the air away from your face. A clogged filter affects suction. For more on dust removal, you might find tips on how to clean dust off a fan helpful.
4. Clean the Bin Interior (Dry Method):
- For non-washable bins, use a dry cloth or paper towel.
- Wipe down the inside of the bin. Remove any lingering dust or debris.
- Pay attention to corners and edges. Dirt can accumulate in these spots.
- You can also use a small vacuum cleaner hose attachment. This helps pick up fine dust.
5. Clean the Bin Interior (Washable Method - if applicable):
- First, confirm your Roomba model has a washable bin. Check your manual.
- Remove the filter before washing the bin. Never wash the filter unless specified by iRobot.
- Rinse the plastic dust bin under warm tap water. Do not use very hot water.
- Use a gentle dish soap if needed. Scrub with a soft brush to remove grime.
- Rinse thoroughly to remove all soap residue.
- Let the bin air dry completely. This is crucial. It needs to be bone dry. I usually let it sit for 24 hours. Placing it in direct sunlight can speed drying. Do not use a towel or paper towel to dry the inside. Lint can stick to it.
6. Reassemble and Reinsert:
- Once the bin is dry (if washed) and the filter is clean, put the filter back.
- Ensure the filter is seated correctly in its slot.
- Close the dust bin door or flap.
- Slide the cleaned dust bin back into your Roomba.
- You should hear a click when it is properly locked in place.
Follow these steps for regular upkeep. This keeps your Roomba working at its best. Consistent cleaning prevents many common issues.
Deep Cleaning Your Roomba Dust Bin and Filter
Regular emptying is good, but deep cleaning gives your Roomba a fresh start. This process tackles hidden grime and microscopic dust. I deep clean my Roomba dust bin at least once a week. This maintains peak performance.
Why Deep Clean? Over time, fine dust can build up in small crevices. It can coat internal surfaces. This affects airflow and sensors. Deep cleaning removes this hidden dirt. It ensures your Roomba breathes freely. This is similar to how we might need to deep clean other electronics to prevent dust buildup, such as learning how to clean dust from a PS5 to maintain its efficiency.
Deep Cleaning the Dust Bin:
- Disassemble: First, follow the steps above to remove and empty the bin. Remove the filter.
- Inspect for Clogs: Look closely inside the bin. Check the air intake path for any stuck debris. Sometimes pet hair can clump up inside.
- Brush Away Dust: Use a small, soft brush. A clean paintbrush or an old toothbrush works well. Brush away dust from all internal surfaces. Pay attention to corners, seams, and the area around the filter slot.
- Wipe Down: Use a slightly damp microfiber cloth to wipe the inside and outside of the plastic bin. Avoid getting electronics wet if your bin is not washable. For washable bins, you can rinse them thoroughly. Ensure the cloth is only damp, not wet.
- Air Dry (if washed): If you rinsed your bin, allow it to air dry completely. Do not rush this step. Moisture can damage your Roomba. I leave mine for a full 24 hours in a well-ventilated area.
Deep Cleaning the Filter: The filter is the workhorse for trapping fine particles. Deep cleaning it is vital.
- Remove and Tap: Take out the filter. Tap it vigorously against a hard surface, like the inside of a trash can. Do this several times until less dust comes out.
- Use Compressed Air: Hold the filter away from your face. Spray compressed air through the filter from the dirty side. This forces trapped dust out. Be careful not to get too close or use too much pressure, as it can damage the filter material.
- Vacuum the Filter: Use a handheld vacuum or your regular vacuum’s hose attachment. Gently vacuum over the filter surface. This pulls out stubborn dust particles.
- Inspect for Damage: Check the filter for tears or visible holes. A damaged filter cannot trap dust effectively. If you see damage, it is time for a replacement.
Important Note on Washing Filters: Most Roomba filters, especially High-Efficiency Filters, are not washable. Water can damage the delicate filter material. It can reduce its ability to trap fine particles. Always check your Roomba’s user manual before attempting to wash any filter. If your manual says “do not wash,” then stick to tapping and compressed air.
Deep cleaning ensures optimal airflow. This directly translates to stronger suction and cleaner floors. It also prolongs the life of your filter. This is a simple task that yields big results.
How Often Should You Clean Your Roomba Dust Bin?
The frequency of cleaning your Roomba dust bin depends on several factors. These include how often you use your Roomba, the size of your home, and the amount of dirt and pet hair it collects. I find a consistent schedule works best for my Roomba.
After Every Cleaning Cycle: This is the most important rule: Empty the dust bin after every single use. Your Roomba’s bin size is limited. It can fill up quickly, especially in homes with pets or high foot traffic. An empty bin means your Roomba starts each cleaning job with maximum capacity. It prevents overflow during cleaning. I always empty my bin immediately after my Roomba docks.
Filter Cleaning Schedule: The filter needs more than just emptying.
- Weekly: Tap out the filter at least once a week. If you have pets or allergies, do this 2-3 times a week. This removes visible dust and keeps airflow strong.
- Monthly (or Bi-Weekly for heavy use): Use compressed air or a small vacuum to deep clean the filter. This gets rid of embedded fine dust.
Dust Bin Deep Cleaning Schedule:
- Weekly (Washable Bins): If your Roomba has a washable dust bin, rinse it with water weekly. Remember to let it dry completely.
- Bi-Weekly/Monthly (Non-Washable Bins): For non-washable bins, wipe down the interior with a dry or slightly damp cloth every two to four weeks. Remove any build-up that tapping alone cannot get.
Filter Replacement Schedule: Filters do not last forever. Even with regular cleaning, their effectiveness decreases.
- Every 2-3 Months: Roomba recommends replacing the filter every 2-3 months. This ensures your robot captures fine dust efficiently. If you have severe allergies or multiple pets, consider replacing it more often. I keep spare filters on hand.
Factors Affecting Cleaning Frequency:
- Pets: Homes with pets accumulate more hair and dander. You will need to empty and clean more often.
- Carpet vs. Hard Floors: Carpets tend to hold more dirt. Roomba might pick up more debris from carpeted areas, filling the bin faster.
- Allergies: If anyone in your home has allergies, frequent filter cleaning and replacement are crucial. This keeps the air cleaner.
- Usage: A Roomba running daily will need more frequent bin and filter attention than one used once a week.
Observing your Roomba helps too. If you notice a drop in suction, the bin might be full or the filter clogged. If your Roomba gives “bin full” alerts often, it needs attention. Following these guidelines helps your Roomba clean efficiently. It keeps your home cleaner too.
Troubleshooting Common Roomba Dust Bin Issues
Even with regular cleaning, you might face some dust bin issues. Knowing how to troubleshoot helps fix them quickly. I have encountered a few problems myself and found these solutions helpful.
1. “Bin Full” Indicator Stays On After Emptying:
- Dirty Sensors: The most common reason is dirty bin full sensors. These are small infrared sensors located on the Roomba itself and on the dust bin.
- Solution: Take out the dust bin. Use a clean, dry microfiber cloth to wipe the clear plastic window on the dust bin. Also, wipe the corresponding sensor on the Roomba’s body. Make sure no dust or debris covers these sensors. Sometimes, hair can wrap around them.
- Clogged Air Path: The air path leading to the sensors might be clogged with fine dust.
- Solution: Deep clean the entire dust bin. Ensure all channels are clear. Use a small brush or compressed air to clear any blockages.
2. Roomba Leaves Debris Behind or Loses Suction:
- Full Bin: Check if the bin is actually full. Empty it completely.
- Clogged Filter: A heavily clogged filter severely reduces suction.
- Solution: Remove and vigorously tap out the filter. Use compressed air if possible. If the filter looks very dirty or is torn, replace it with a new one.
- Air Path Obstruction: Something might be blocking the air intake in the bin.
- Solution: Visually inspect the bin’s intake opening. Remove any large debris, pet hair clumps, or paper stuck inside.
- Brush Issues: Sometimes, the problem is not the bin but the brushes. Tangled brushes prevent dirt from reaching the bin. For comprehensive Roomba maintenance, it’s also helpful to know how to clean Roomba charging contacts to ensure proper power delivery.
3. Dust Leaks from the Dust Bin:
- Improperly Seated Bin: The bin might not be fully clicked into place.
- Solution: Remove the bin and reinsert it. Push it firmly until you hear a click.
- Damaged Filter Seal: The rubber seal around the filter might be worn or damaged.
- Solution: Inspect the filter’s seal. If it looks flattened, cracked, or missing, replace the filter.
- Cracked Bin: A crack in the plastic bin can cause leaks.
- Solution: Inspect the bin for any cracks. If cracked, you will need to replace the entire dust bin.
- Overfilled Bin: If the bin is too full, dust can spill out.
- Solution: Empty the bin more frequently.
4. Difficulty Removing/Inserting the Dust Bin:
- Debris Around Edges: Dirt or debris might be stuck around the bin’s edges or the Roomba’s opening.
- Solution: Wipe down the area around the bin opening on the Roomba. Clean the edges of the dust bin itself.
- Misalignment: The bin might not be lined up correctly.
- Solution: Ensure you are pushing the bin straight in. Do not force it. It should slide in smoothly.
Addressing these issues promptly keeps your Roomba working efficiently. Regular visual checks can prevent many problems before they start. Always refer to your Roomba’s specific user manual for detailed troubleshooting.
Essential Roomba Maintenance Tips Beyond the Dust Bin
Cleaning the dust bin is vital, but your Roomba needs other care too. Regular comprehensive maintenance keeps your robot running smoothly. I follow these steps to extend my Roomba’s life and ensure it cleans effectively. It is like taking care of any complex device, similar to how we might consider how to clean black dust around air vents in our homes for better air quality.
1. Clean the Main Brushes (Extractors):
- Frequency: At least once a week, more often with pets.
- Process:
- Open the brush frame on the bottom of your Roomba.
- Remove the two main brushes (they often twist out).
- Use the cleaning tool (often included with Roomba) to cut and pull away hair and debris tangled around the brush ends and bristles.
- Clean the yellow or green brush caps. They can accumulate hair.
- Clean the square and hex pegs on the brushes.
- Wipe the yellow brush bearings where the brushes sit.
- Reinsert the brushes, ensuring they click into place.
2. Clean the Side Brush:
- Frequency: Every 2-4 weeks, or when it looks dirty.
- Process:
- Unscrew the side brush (usually a single screw).
- Remove hair and debris wrapped around the base of the brush and the post it sits on.
- Wipe the side brush itself.
- Reattach the brush. If bristles are bent, try running it under warm water and letting it dry straight. Replace if it is too worn.
3. Clean the Front Caster Wheel:
- Frequency: Every 2-4 weeks.
- Process:
- Pull the front wheel module firmly to remove it from the robot.
- Pull the wheel itself out of its housing.
- Remove any hair, thread, or debris wrapped around the axle.
- Clean inside the wheel housing.
- Reassemble and push the module back into the Roomba. A dirty wheel makes Roomba move erratically.
4. Clean the Charging Contacts:
- Frequency: Monthly, or if your Roomba has trouble charging.
- Process:
- Locate the two metal charging contacts on the bottom of your Roomba.
- Locate the matching contacts on the Home Base.
- Wipe both sets of contacts with a clean, dry cloth. A melamine foam eraser (Magic Eraser) can work wonders on stubborn grime.
- Keeping these clean ensures proper charging. For more details, you can refer to how to clean Roomba charging contacts.
5. Clean the Cliff Sensors:
- Frequency: Monthly.
- Process:
- Turn your Roomba over.
- Locate the several small circular sensors around the bottom edge. These prevent Roomba from falling down stairs.
- Wipe them clean with a dry microfiber cloth. Dust and dirt can block these sensors.
6. Clean the Optical Tracking Sensor:
- Frequency: Monthly.
- Process:
- Locate the small, clear square or circle on the bottom of your Roomba, usually near the center. This helps Roomba navigate.
- Wipe it clean with a dry microfiber cloth.
Consistent cleaning of these parts prevents breakdowns and keeps your Roomba working at peak efficiency. Neglecting these areas can lead to error messages and poor cleaning. Make a routine for full Roomba care. This investment in time pays off with cleaner floors and a longer-lasting robot.
FAQ Section
Q: How often should I empty my Roomba dust bin? A: You should empty your Roomba dust bin after every single cleaning cycle. This ensures the bin has maximum capacity for the next run. It prevents debris overflow. Regular emptying also helps maintain your Roomba’s suction power. It keeps your robot ready for efficient cleaning.
Q: Can I wash the Roomba dust bin with water? A: It depends on your specific Roomba model. Some Roomba dust bins are washable and can be rinsed with water. Others are not. Always check your Roomba’s user manual before washing the bin. If washable, remove the filter first. Let the bin air dry completely before reinserting it.
Q: What if my Roomba dust bin is still dirty after cleaning? A: If the dust bin looks dirty after basic cleaning, perform a deep clean. Use a small brush to get into crevices. For washable bins, rinse it thoroughly with warm water and mild soap. For non-washable bins, wipe with a slightly damp cloth. Ensure you address any specific areas of buildup.
Q: How do I remove fine dust from the Roomba filter? A: To remove fine dust from the filter, first tap it firmly against a trash can. Then, use compressed air to blow dust out from the dirty side. You can also gently vacuum the filter surface with a brush attachment. Never wash the filter unless your manual explicitly states it is washable.
Q: Do I need to replace the Roomba filter when cleaning the bin? A: No, you do not need to replace the filter every time you clean the bin. You should remove the filter and clean it regularly by tapping or using compressed air. Roomba recommends replacing the filter every 2-3 months for optimal performance. This maintains high dust capture efficiency.
Q: My Roomba says “bin full” but it is empty. What should I do? A: This usually means the bin full sensors are dirty. Remove the dust bin. Locate the clear plastic windows on the bin and the corresponding sensors on the Roomba’s body. Wipe these sensors clean with a dry microfiber cloth. Ensure no dust or debris covers them. This should clear the message.
Conclusion
Cleaning your Roomba dust bin is a simple yet essential maintenance task. It directly affects how well your robot vacuum cleans your home. By regularly emptying the bin, cleaning the filter, and performing deep cleans, you ensure your Roomba maintains powerful suction. This prevents dirt from being left behind. I always feel better knowing my Roomba is running at its best.
Consistent care of your Roomba’s dust bin extends its lifespan. It helps avoid common issues like reduced suction or “bin full” errors. Remember to check your specific Roomba model’s instructions for washing the bin and filter. Make cleaning a routine part of your robot vacuum ownership.
- Roomba cleaning
- Roomba maintenance
- robot vacuum care
- dust bin cleaning
- Roomba filter


