· Home Cleaning · 18 min read
How To Clean Bathroom Exhaust Fan Without Removing

Easy Way To Clean Bathroom Exhaust Fan Without Removing
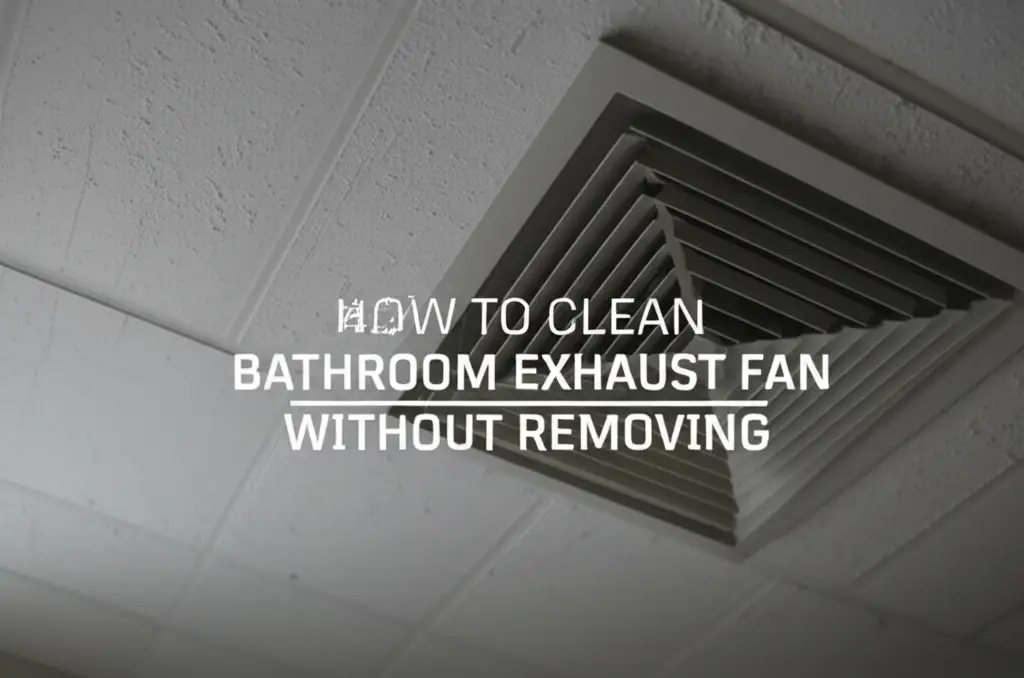
Have you ever looked up at your bathroom exhaust fan and noticed a thick layer of dust? It is common for these fans to collect dirt. Many people avoid cleaning them because they think it requires complex disassembly. However, you can effectively clean your bathroom exhaust fan without removing it from the ceiling. This simple guide will show you how to do it. We will cover the tools you need, safety steps, and a clear method to get your fan running better.
Takeaway
- Prioritize Safety First: Always turn off power to the fan at the circuit breaker before you start cleaning.
- Gather Essential Tools: Use a vacuum with attachments, a brush, cleaning cloths, and a mild cleaner for effective cleaning.
- Clean in Layers: Start by cleaning the fan cover, then move to the accessible internal components like blades.
- Use Compressed Air: A can of compressed air helps remove dust from hard-to-reach areas.
- Maintain Regularly: Schedule routine light cleanings to prevent heavy dust buildup and ensure fan efficiency.
To clean a bathroom exhaust fan without removing it, first turn off the power at the circuit breaker. Then, remove the fan cover and thoroughly vacuum visible dust and debris from the grille, blades, and housing. Use a damp cloth with mild cleaner to wipe down accessible surfaces, and compressed air to dislodge trapped dirt from internal components.
Why Cleaning Your Bathroom Exhaust Fan Matters
A bathroom exhaust fan works hard. It pulls moisture, odors, and airborne particles out of your bathroom. This prevents mold and mildew growth. It also keeps your bathroom air fresh. Over time, dust, lint, and grime build up on the fan blades and inside the housing.
This buildup makes the fan less efficient. A dirty fan cannot move air properly. It uses more energy to do less work. A very dirty fan can also become noisy. It might even spread dust particles back into your bathroom air. Regularly cleaning your fan is important. It helps maintain good air quality. It also extends the life of your fan.
Cleaning the fan helps you avoid bigger problems later. A fan choked with dust struggles to operate. This strain can lead to motor failure. A clean fan operates quietly and effectively. This keeps your bathroom feeling fresh and healthy. You protect your family from mold and mildew.
Essential Tools and Supplies for No-Removal Cleaning
You do not need many special tools to clean your bathroom exhaust fan without removing it. Most items you likely already have at home. Gathering everything before you start saves time. It makes the cleaning process smooth. Make sure you have all these items ready.
First, you will need a sturdy stepladder. Your fan is usually on the ceiling, so you must reach it safely. Do not use unstable chairs or stools. Next, grab a vacuum cleaner. A hose attachment is very useful. A brush attachment is even better. It helps loosen stuck-on dust.
You will also need a microfiber cloth or an old rag. These are good for wiping surfaces clean. A small, soft-bristled brush, like an old paintbrush or toothbrush, helps with tight spots. For cleaning solutions, a spray bottle with water and a few drops of dish soap works well. You can also use an all-purpose cleaner.
Consider getting a can of compressed air. This is excellent for blowing dust out of tiny crevices. Safety glasses are a good idea. Dust and debris might fall when you are cleaning. Gloves protect your hands from dirt and cleaning solutions. Having a trash bag or newspaper nearby helps catch falling debris.
- Sturdy Stepladder: For safe access to the ceiling fan.
- Vacuum Cleaner with Hose and Brush Attachments: To remove loose dust and debris.
- Microfiber Cloths or Rags: For wiping down surfaces.
- Small, Soft-Bristled Brush: An old paintbrush or toothbrush for intricate cleaning.
- Spray Bottle with Mild Cleaner: Water mixed with dish soap or an all-purpose cleaner.
- Can of Compressed Air: For blowing dust from hard-to-reach areas.
- Safety Glasses: To protect your eyes from falling dust.
- Gloves: To keep your hands clean.
- Drop Cloth or Newspaper: To protect the floor below the fan.
Safety First: Preparing for the Clean
Safety is the most important step before you start cleaning your bathroom exhaust fan. Working with electricity and on a ladder requires careful attention. Ignoring safety steps can lead to injuries or damage. Always follow these guidelines to ensure a safe cleaning process.
First, turn off the power to the bathroom exhaust fan. Go to your home’s main electrical panel. Find the circuit breaker labeled for your bathroom or the specific fan. Flip the switch to the “off” position. If your breakers are not labeled, you might need to turn off the main breaker for a moment. Test the fan switch in the bathroom. The fan should not turn on. This step prevents accidental electrocution or fan operation during cleaning.
Next, place your sturdy stepladder directly under the fan. Make sure the ladder is stable. Check that all four feet are on a level surface. Ask someone to hold the ladder if you feel unsteady. Do not overreach while on the ladder. Move the ladder instead.
Wear your safety glasses. This protects your eyes from any dust, dirt, or debris that might fall. Dust can irritate your eyes. Wear gloves to protect your hands. Place a drop cloth or old newspaper on the floor directly below the fan. This catches any dust or grime that drops. It makes cleanup much easier. Taking these precautions ensures a smooth and safe cleaning experience. You prepare your workspace properly. This step prevents potential hazards. Cleanliness extends beyond just the fan. For broader ceiling cleaning tips, you can refer to how to clean a ceiling.
Step-by-Step Guide: Cleaning the Fan Cover/Grille
The fan cover or grille is the most visible part of your bathroom exhaust fan. It also collects the most dust. Cleaning this part is the first step in restoring your fan’s look and function. You can often clean it without taking the entire fan apart. Follow these simple steps.
First, gently pull down the fan cover. Most bathroom exhaust fan covers are held in place by spring clips. You can pull them straight down about an inch or two. Then, squeeze the clips together. This releases them from the fan housing. The cover should come off easily. Some covers might have small screws. If so, use a screwdriver to remove them. Keep the screws in a safe place.
Once the cover is off, take it to a sink or bathtub. Use a vacuum cleaner with a brush attachment. Carefully vacuum both sides of the cover. This removes most of the loose dust and lint. Focus on the grates and crevices. Dust loves to cling to these areas.
If the cover is greasy or very dirty, wash it. Fill a sink with warm water. Add a few drops of dish soap. Soak the cover for a few minutes. Then, scrub it gently with a sponge or brush. Pay attention to the areas where dust has built up. Rinse the cover thoroughly with clean water. Make sure all soap residue is gone.
Dry the cover completely before putting it back. You can air dry it or use a clean cloth. Moisture can cause problems if reinstalled too soon. Once dry, reattach the cover. Align the spring clips or screw holes. Push the cover back into place until it clicks. Your fan cover now looks brand new.
Deep Cleaning the Fan Housing and Blades (Without Disassembly)
After cleaning the fan cover, the next step is to tackle the internal components. This includes the fan housing and the blades themselves. You can deep clean these parts effectively without needing to remove the entire fan unit. This method keeps the process simple. It still delivers excellent results.
Vacuuming Dust and Debris
With the cover removed, you will see a lot of dust inside the fan housing. This is normal. Use your vacuum cleaner with the hose and brush attachments. Reach inside the fan housing as far as you can. Carefully vacuum all visible dust, lint, and debris. Pay close attention to the fan blades. They collect a lot of buildup.
Move the vacuum attachment slowly. Try to get into all crevices. The brush attachment helps loosen stubborn dust. You might need to rotate the fan blades gently by hand to reach all sides. Do not force them. Just move them enough to get the vacuum brush around them. This initial vacuuming removes the bulk of the dirt.
Wiping Down Accessible Surfaces
Once you have vacuumed, some fine dust or grime might remain. Prepare your cleaning solution. Mix a small amount of mild dish soap with water in a spray bottle. Lightly spray a clean microfiber cloth with this solution. Do not spray directly into the fan housing. You want to avoid getting too much moisture near electrical components.
Carefully wipe down all accessible surfaces inside the fan housing. This includes the motor housing and any exposed wires. Use your small brush, like an old toothbrush, to reach tight corners. Gently wipe the fan blades with the damp cloth. Be careful not to bend the blades. They can be delicate. This step removes sticky grime and remaining dust.
Using Compressed Air for Hard-to-Reach Areas
Some dust will always be out of reach. This is where compressed air comes in handy. A can of compressed air allows you to blow dust out of tiny gaps. Aim the nozzle into the fan’s motor area. Use short bursts of air. This dislodges dust from deep within the fan.
Be ready for dust to fly out. It is why you wore safety glasses and put down a drop cloth. Work in short bursts. Point the air nozzle to direct the dust out of the fan opening. This is especially effective for cleaning vents and grilles that are hard to reach by hand. Compressed air reaches where brushes cannot.
Dealing with Mold and Mildew
If your bathroom fan is very dirty, you might see mold or mildew. This indicates a humidity problem in your bathroom. For light mold, a solution of white vinegar and water works well. Mix equal parts white vinegar and water in a spray bottle. Spray it onto a clean cloth. Wipe down the affected areas.
For stubborn mold, you might need a stronger solution. A commercial mold cleaner can be used. Always follow product instructions. Never mix bleach and ammonia. Ensure the area is well-ventilated when dealing with mold. Wear protective gear. Addressing mold is important. It improves air quality. It also stops the spread of spores. Regular cleaning helps prevent mold from returning. A clean fan helps control humidity, which reduces mold growth. You can also learn about cleaning hard water stains on shower glass, which are common in humid bathroom environments.
Addressing Odors and Improving Airflow
A clean fan should smell fresh. If odors persist, the source might be mold or mildew. Ensure you have cleaned all visible mold. Sometimes, odors come from accumulated organic matter. This gets trapped in the fan. After cleaning, your fan should operate more quietly. It should also move air more effectively.
To further improve airflow, make sure there are no blockages. Check the outside vent cover. Birds or insects sometimes build nests there. Remove any obstructions you find. A clear exhaust path is crucial for fan efficiency. A clogged vent reduces airflow greatly.
You can also use an odor-neutralizing spray in the bathroom after cleaning. Do not spray it directly into the fan. Spray it into the air. This helps remove lingering smells. Regular cleaning prevents odors from returning. It also keeps your fan working at its best. A well-maintained fan improves the overall comfort of your bathroom. It reduces humidity. This helps to prevent many bathroom cleaning issues, including hair clogs in the sink drain, which you can learn about in how to clean hair out of bathroom sink drain.
Preventative Measures for a Cleaner Fan
Cleaning your bathroom exhaust fan is important. Preventing heavy buildup is even better. Regular maintenance reduces the need for deep cleaning. It keeps your fan running efficiently all the time. Small actions can make a big difference.
First, make a habit of dusting your fan cover regularly. Use a duster or a vacuum with a brush attachment. Do this every month or two. This removes loose dust before it becomes a sticky mess. It takes only a few minutes. This simple step prevents major accumulation.
Second, manage humidity in your bathroom. Turn on the fan before you start showering. Let it run for at least 15-20 minutes after you finish. This clears out most of the moisture. Open a window slightly while showering if possible. Less humidity means less condensation. This reduces mold growth on the fan.
Ensure proper ventilation. Do not block the fan with towels or decor. The fan needs a clear path to draw air. If your bathroom has no windows, running the fan is even more critical. Proper ventilation is key to a healthy bathroom environment.
Consider installing a humidity sensor switch. This type of switch turns the fan on automatically when humidity levels rise. It also turns off when the air is dry. This ensures the fan runs exactly when needed. It saves energy. It also keeps your fan cleaner. These preventative steps extend the time between deep cleans. They keep your bathroom fresh. They maintain your fan’s efficiency.
Troubleshooting Common Exhaust Fan Issues (Post-Clean)
You have cleaned your bathroom exhaust fan. What if it is still not working perfectly? Sometimes, a deep clean solves most problems. Other times, an issue might persist. Knowing what to check can save you time and money. Here are some common problems and their simple solutions.
If the fan is still noisy, check the fan cover. Make sure it is installed correctly. Sometimes, loose clips or screws cause rattling. Ensure nothing inside the housing is touching the blades. A piece of insulation or debris can cause a persistent rattle. If the noise is a grinding sound, the motor bearings might be worn. This usually means the fan needs professional attention or replacement.
If the airflow seems weak, double-check the outside vent. A bird’s nest or accumulated debris can severely restrict airflow. Clear any blockages. Also, ensure the fan size is appropriate for your bathroom. A small fan in a large bathroom will struggle. Sometimes, the ductwork itself might be clogged. This requires inspection by a professional.
If the fan does not turn on at all, first recheck the circuit breaker. Make sure it is flipped to the “on” position. Test the bathroom light to confirm power is restored. If the light works but the fan does not, the fan motor might be faulty. Or, the switch could be bad. Replacing a switch is a simple DIY task. Replacing a motor is more complex.
Odors can persist even after cleaning the fan. This suggests the source of the odor is elsewhere. Check for mold behind walls or under flooring. Look for gunk in sink drains. A dirty drain can release foul smells into the bathroom. Learn how to clean gunk out of bathroom sink drain if you suspect this problem. Ensuring your fan works well is part of a healthy home. It contributes to overall cleanliness.
When Professional Help or Full Removal is Needed
While cleaning your bathroom exhaust fan without removing it is effective for most maintenance, there are times when you might need professional help or a full unit removal. Recognizing these situations saves you time and prevents further damage. Do not hesitate to call an expert if needed.
If the fan motor makes grinding or whining noises even after cleaning, it could be a sign of a failing motor bearing. This usually means the fan is reaching the end of its life. A professional electrician can assess the motor. They can determine if it needs replacement. Sometimes, replacing the whole unit is more cost-effective.
If the fan still does not move air efficiently after a thorough cleaning and checking for external blockages, the problem might be with the ductwork. Ducts can become clogged deep inside. They can also get disconnected. These issues are complex. They require specialized tools and expertise to fix. An HVAC technician can inspect and clean your ductwork.
Persistent strong odors, especially a burning smell, indicate a serious electrical issue. Turn off the power immediately at the breaker. Do not use the fan. Call an electrician right away. This is a fire hazard. Visible water leaks from the fan also need immediate professional attention. This could mean a roof leak or damaged plumbing above.
Finally, if your fan is very old and has never been maintained, or if you simply want to upgrade to a quieter or more powerful model, a full removal and replacement is often the best option. A licensed electrician can safely remove the old fan. They can install a new one. This ensures proper wiring and ventilation. Knowing when to call a pro keeps your home safe. It also ensures your bathroom ventilation system works properly.
Benefits of Regular Bathroom Exhaust Fan Maintenance
Regular maintenance of your bathroom exhaust fan, even without full removal, offers many benefits. It is a small effort with large returns. You invest in your home’s health and comfort. These benefits go beyond just a clean fan.
First, regular cleaning greatly improves air quality. A clean fan removes moisture and odors effectively. This prevents the growth of mold and mildew. Mold spores can cause respiratory problems. They also trigger allergies. A clean fan keeps the air you breathe fresh and healthy.
Second, maintaining your fan extends its lifespan. Dust and grime cause the motor to work harder. This leads to premature wear and tear. A clean fan operates with less strain. It lasts much longer. This saves you money on replacements and repairs. It is like giving your fan a tune-up.
Third, a clean fan is an efficient fan. It uses less energy to move the same amount of air. This can lead to lower electricity bills. Your home stays drier. This protects bathroom fixtures from moisture damage. For example, it helps prevent issues like hard water stains on shower glass.
Fourth, regular cleaning reduces noise. A fan choked with dust can become loud and disruptive. Cleaning removes the debris that causes rattles and hums. Your bathroom becomes a quieter, more peaceful space.
Finally, a well-maintained fan adds to the overall cleanliness of your bathroom. It removes airborne particles. It keeps surfaces drier. This means less scrubbing for you. Regular fan cleaning is a smart part of your home maintenance routine. It supports a healthy living environment.
Frequently Asked Questions
How often should I clean my bathroom exhaust fan without removing it?
You should clean your bathroom exhaust fan cover and accessible internal parts every 3 to 6 months. For bathrooms with heavy use, or if you notice significant dust buildup, aim for a quarterly cleaning. Regular light maintenance prevents deep grime from accumulating. This keeps your fan working efficiently.
What causes bathroom exhaust fans to get so dirty?
Bathroom exhaust fans get dirty because they pull air, moisture, and airborne particles, like dust, lint, and skin flakes, out of the room. The sticky humidity in bathrooms makes these particles cling to fan blades and housing. Over time, this buildup forms a thick layer of grime.
Can a dirty bathroom exhaust fan be a fire hazard?
Yes, a very dirty bathroom exhaust fan can be a fire hazard. Accumulated lint and dust are flammable. If the fan motor overheats due to working too hard or having faulty wiring, it could ignite the debris. Regular cleaning reduces this risk significantly. Always turn off power before cleaning.
Can I use a vacuum cleaner to clean the fan without taking it apart?
Absolutely. A vacuum cleaner with a hose and brush attachment is one of the most effective tools for cleaning a bathroom exhaust fan without removing it. It efficiently sucks up loose dust and debris from the fan cover, blades, and housing. This avoids spreading dust around the bathroom.
What if my fan is still noisy after cleaning?
If your fan remains noisy after cleaning, check the fan cover to ensure it is securely reinstalled. Listen for rattling; some parts might be loose. A grinding noise often indicates a failing motor bearing, which cleaning cannot fix. In this case, professional inspection or fan replacement is usually necessary.
Is it safe to spray water directly into the fan housing?
No, it is not safe to spray water or cleaning solutions directly into the fan housing. Water and electricity do not mix. This can damage the motor, create an electrical hazard, or cause rust. Instead, apply cleaning solutions to a cloth and wipe down accessible surfaces carefully.
Conclusion
Cleaning your bathroom exhaust fan without removing it is a straightforward task. It significantly improves your home’s air quality. It also extends the life of your fan. By following the simple steps outlined, you can tackle dust and grime effectively. You do not need complex tools or professional help for routine maintenance.
Remember to prioritize safety by turning off the power. Gather your basic cleaning supplies. Then, systematically clean the cover, blades, and housing. Regular, easy maintenance prevents major buildup. This keeps your bathroom fresh and healthy. Do not let a dirty fan reduce your air quality. Take action today. A clean fan means a cleaner, healthier bathroom for you.
- bathroom fan cleaning
- exhaust fan maintenance
- vent fan dust
- no-removal cleaning
- DIY home cleaning
- indoor air quality


