· Kitchen Cleaning · 14 min read
How To Clean Burner Caps
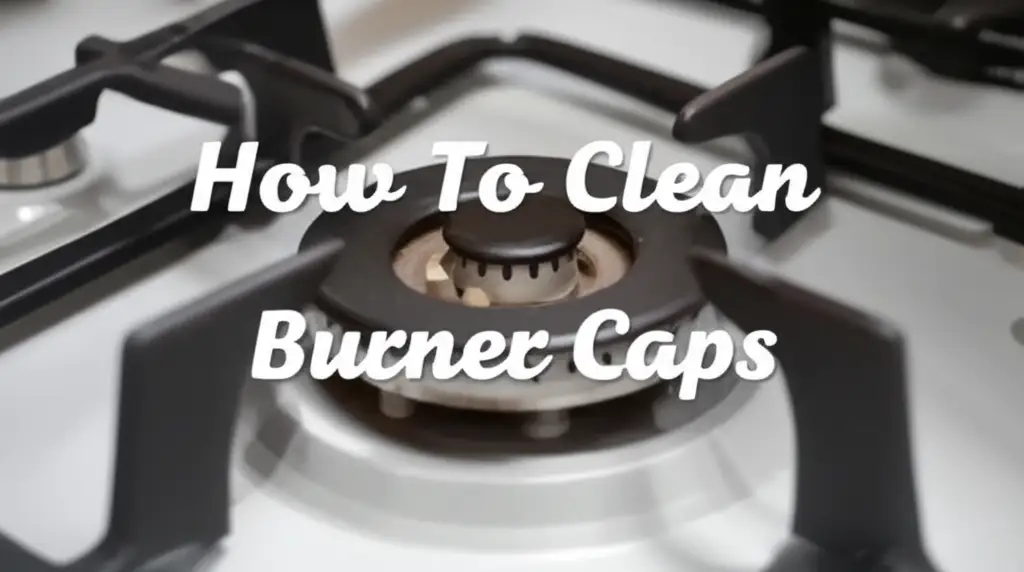
Sparkling Stove: How To Clean Burner Caps
Your kitchen stove works hard. Burner caps are essential parts of gas and electric stoves. They spread the flame or heat evenly. Over time, these caps collect grease, food spills, and burnt-on residue. This build-up makes them look dirty. It also impacts their performance. Knowing how to properly clean burner caps keeps your stove working well. It also makes your kitchen look tidy. This article shares effective methods. We will guide you through simple steps. You will learn to clean gas burner caps and electric stove burner caps. We cover different materials. We aim to help you bring back the shine. Get ready to transform your stovetop from grimy to gleaming.
Takeaway
- Remove and Soak: Always remove burner caps before cleaning. Soak them in warm, soapy water to loosen initial grime.
- Choose Your Cleaner: Use dish soap, baking soda paste, or vinegar for general cleaning. Consider specialized degreasers for tough stains.
- Scrub Gently: Use non-abrasive tools. A soft brush or sponge works best to avoid scratches.
- Rinse Thoroughly: Rinse all caps completely to remove cleaner residue. Leftover soap can cause discoloration.
- Dry Fully: Ensure burner caps are completely dry before placing them back on the stove. This prevents rust and ensures proper function.
To effectively clean burner caps, first remove them from the stove. Soak them in hot, soapy water to loosen cooked-on food and grease. Then, scrub with a non-abrasive brush or sponge using baking soda paste or a vinegar solution. Rinse thoroughly and dry completely to prevent water spots and rust.
Why Clean Burner Caps? Understanding the Grime
Burner caps get dirty fast. Every time you cook, grease splatters. Food boils over. These spills land directly on the caps. Over time, these layers of grime bake onto the surface. This happens due to the heat from the burners. The dirt becomes hard and sticky. I have seen many stoves with black, crusty caps. It is a common problem in any busy kitchen.
Dirty caps are not just an eyesore. They can also affect how your stove works. For gas stoves, blocked holes can change the flame pattern. The flame might not spread evenly. This makes cooking less efficient. For electric stove burner caps, heavy build-up can trap heat. This might lead to uneven heating for your pots and pans. Regular cleaning solves these problems. It ensures your stove always performs at its best. It also maintains a clean kitchen environment.
Grease and food particles can harbor bacteria. This creates an unsanitary cooking surface. A clean burner cap makes your kitchen safer. It also extends the life of your appliance. A well-maintained stove lasts longer. Cleaning burner caps is a simple task. It offers big rewards for your home. It keeps your stove looking good. It also keeps it working properly.
Gathering Your Tools: Essential Supplies for Cleaning Burner Caps
Before you start, gather everything you need. This makes the cleaning process smooth. You likely have most of these items already in your home. Having the right tools saves time. It also helps you achieve better results. I always make sure to have all my supplies ready before I begin. This helps me avoid interruptions during cleaning.
You will need warm water and liquid dish soap. These are basic but effective for grease. A soft sponge or cloth is good for gentle scrubbing. For tougher spots, a non-abrasive scrub brush helps. An old toothbrush is excellent for small crevices. You also need a towel for drying the caps.
For natural cleaning solutions, get baking soda and white vinegar. These are powerful degreasers. They are also safe for most surfaces. If you have very stubborn, burnt-on residue, consider a specialized oven cleaner or degreaser. Make sure it is safe for your burner cap material. Always check the product label. Gloves protect your hands from harsh cleaners and grime. A bowl or basin for soaking is also useful. You can also clean other parts of your stove, like the burner rings, at the same time. How to Clean Stove Burner Rings is a helpful guide for this task.
Pre-Cleaning Steps: Preparing Your Stove Burner Caps
Preparation is key for effective cleaning. It makes the actual scrubbing much easier. First, ensure your stove is completely off. If it is a gas stove, turn off the gas supply. Safety always comes first when working with appliances. This prevents any accidental burns or gas leaks.
Allow the stove to cool down completely. Never try to clean hot burner caps. You risk serious burns. Once cool, carefully remove each burner cap. Gas burner caps usually lift right off. Electric stove burner caps might be fixed. If so, you will clean them in place or follow your stove’s manual for removal. Some caps are made of cast iron, some are enamel, and others are stainless steel. Identify your cap material for the best cleaning approach.
Brush off any loose crumbs or food particles into the trash. Use a dry cloth or a soft brush for this. This step prevents large debris from clogging your sink. It also makes the soaking process more effective. Place the removed caps into a large basin or your sink. You are now ready for the deep cleaning process. This preparation saves you effort in the long run.
Deep Cleaning Burner Caps: Effective Methods for Different Materials
Cleaning burner caps requires specific methods. The best approach depends on the material of your caps. Most caps are cast iron, porcelain enamel, or stainless steel. Each material responds differently to cleaners. I will share methods that work well. You can tackle even the toughest stains.
Method 1: Soaking with Dish Soap and Hot Water
This method is simple and effective for general grease and light spills. It is my go-to for regular maintenance. Fill a basin with very hot water. Add a generous amount of liquid dish soap. Dish soap breaks down grease.
Place the burner caps into the soapy water. Make sure they are fully submerged. Let them soak for at least 30 minutes. For heavily soiled caps, soak them for several hours. You can even leave them overnight. The hot water and soap soften the burnt-on food. After soaking, use a sponge or non-abrasive brush. Gently scrub away the loosened grime. You might find that much of the dirt comes off easily. This method is safe for all types of burner cap materials. It is a gentle start to serious cleaning.
Method 2: Baking Soda Paste for Stubborn Stains
Baking soda is a powerful natural abrasive. It works wonders on stubborn stains and burnt-on food. This method is great when soaking alone is not enough. Mix baking soda with a small amount of water. Create a thick paste. The paste should be spreadable but not runny.
Apply this paste directly onto the stained areas of the burner caps. Make sure to cover all the dirty spots. Let the paste sit for 15-30 minutes. The baking soda works to lift and loosen the grime. After waiting, use a non-abrasive scrub brush or an old toothbrush. Scrub the paste into the cap. You will see the grime start to come off. Baking soda is safe for porcelain enamel and stainless steel. It can also be used on cast iron, but ensure you dry thoroughly afterward. It provides a deeper clean than just soap and water. You might find it useful for other kitchen items too. For example, it can help clean the bottom of your pans if they have burnt-on food. How to Clean Bottom of Pan offers more tips.
Method 3: Vinegar Solutions for Shine and Degreasing
White vinegar is an excellent degreaser and helps restore shine. It also disinfects naturally. This method is perfect for removing greasy films and water spots. It leaves your caps sparkling. Vinegar is acidic. It can dissolve mineral deposits and grease.
Mix equal parts white vinegar and water in a spray bottle or a bowl. You can also add a few drops of dish soap for extra degreasing power. Spray the solution onto the burner caps. Let it sit for 10-15 minutes. Alternatively, you can soak the caps in the vinegar solution. After soaking or spraying, scrub with a sponge or cloth. The grime should come off easily. Rinse the caps well with clean water. Vinegar is safe for most cap materials, but always rinse thoroughly. It can leave a residue if not fully washed off. Vinegar is also a fantastic cleaner for many other surfaces. You can even use it to clean glass. How to Clean Glass with Vinegar provides more ideas for its use.
Method 4: Specialized Cleaners for Tough Jobs
Sometimes, the grime on burner caps is extremely tough. Burnt-on grease that has accumulated for years might need stronger action. For these situations, consider using specialized oven cleaners or heavy-duty degreasers. These products contain stronger chemicals. They are designed to break down baked-on food and grease. I use them sparingly for the most challenging cleaning tasks.
Always read the product instructions carefully. Ensure the cleaner is safe for your specific burner cap material. Some harsh chemicals can damage certain finishes. Always wear rubber gloves and ensure good ventilation when using these products. Apply the cleaner as directed, usually by spraying or wiping it onto the caps. Allow it to sit for the recommended time. Then, scrub with a brush. Rinse the caps thoroughly multiple times to remove all chemical residue. This method provides the most aggressive cleaning. It should be used only when other, milder methods fail. Remember to follow safety precautions strictly. Similar strong cleaners might be needed if you are wondering How to Clean Bottom of Oven or after a self-clean cycle. How to Clean Oven After Self Clean can give you more insights into robust cleaning methods.
Restoring Shine: Polishing and Drying Your Burner Caps
After cleaning, the next step is to restore their shine. Proper drying is crucial. It prevents water spots and rust. Water can cause corrosion, especially on cast iron caps. A well-dried cap also functions better. It looks brand new. This step completes the transformation.
First, rinse each burner cap thoroughly under clean, running water. Make sure no cleaning solution remains. Any leftover soap or residue can cause discoloration. It can also affect the flame on gas stoves. Rinse until the water runs clear and there are no suds. This is a vital step.
Next, dry the caps completely. Use a clean, dry towel. Microfiber cloths work well for this. They absorb water efficiently. They also help buff the surface to a shine. For cast iron caps, I often place them in a low-temperature oven. Set the oven to about 200°F (93°C) for 15-20 minutes. This ensures every bit of moisture evaporates. It prevents rust. For porcelain enamel and stainless steel caps, towel drying is usually sufficient. You can also air dry them on a rack for a few hours. Just make sure they are bone dry. Once dry, your burner caps will look fantastic. They will be ready to go back on the stove.
Preventative Maintenance: Keeping Burner Caps Clean Longer
Cleaning burner caps can be a big job. You can reduce how often you need to deep clean them. A little preventative maintenance goes a long way. Consistent care keeps your caps looking good. It also ensures your stove works efficiently. I find that small, regular actions save me from big, tough cleaning tasks later.
Wipe down your burner caps after each use. A quick wipe with a damp cloth removes fresh spills and splatters. This prevents food from baking onto the surface. It stops grease from building up. This simple habit makes a huge difference. Use a mild dish soap solution for daily wiping. This helps break down any greasy film.
Check your burner caps regularly for any signs of build-up. If you see a small stain, tackle it immediately. Do not let it sit and harden. A small scrub with baking soda paste on a spot can prevent a larger problem. For gas stoves, periodically check the igniter holes. Use a toothpick or small needle to clear any blockages. This ensures your flame spreads properly. You should also consider cleaning the burner rings. Regular care keeps them in top shape. How to Clean Stove Burner Rings has more tips for that area. These small, consistent efforts mean you will spend less time on major clean-ups. They will keep your burner caps spotless.
Common Burner Cap Cleaning Mistakes to Avoid
Cleaning burner caps is simple, but mistakes can happen. Avoiding these errors saves you time and protects your stove. I have learned these lessons over time. Knowing what not to do is as important as knowing what to do. Your caps will last longer with proper care.
One common mistake is using abrasive scrubbers. Steel wool or harsh scouring pads can scratch the surface of your caps. This damages the finish. It can even remove protective coatings. Always use soft sponges, cloths, or non-abrasive brushes. This keeps your caps looking new. Another error is not drying the caps completely. Lingering moisture leads to rust, especially on cast iron caps. It can also leave water spots on other materials. Always ensure the caps are bone dry before putting them back. An oven on low heat or extended air drying helps.
Using cleaners that are too harsh is also a mistake. Some industrial cleaners contain strong acids or alkalis. These can discolor or corrode certain cap materials. Always check if a cleaner is safe for your specific caps. Test a small, hidden area first if you are unsure. Never put hot caps into cold water. This can cause thermal shock. It can warp or crack the caps. Always let your stove and caps cool down completely. These simple precautions make your cleaning efforts safe and effective. They also keep your caps in good condition.
FAQ Section
How often should I clean burner caps?
You should wipe down burner caps after each use to remove fresh spills. A deep clean is recommended every 1-3 months. This depends on how often you cook. Heavy cooking may require more frequent deep cleaning. Regular maintenance reduces the need for intense scrubbing.
Can I put burner caps in the dishwasher?
Most manufacturer guidelines advise against putting burner caps in the dishwasher. The harsh detergents and high heat can damage the finish. Dishwashers may also cause discoloration or corrosion. Handwashing with dish soap and water is safer and more effective.
What causes burner caps to turn black or discolored?
Burner caps turn black or discolor due to baked-on grease, food spills, and high heat. The heat from cooking causes food residues to carbonize. This leaves stubborn black marks. Regular cleaning prevents this build-up. It keeps the original finish intact.
How do I clean rust off cast iron burner caps?
For light rust, make a paste with baking soda and water. Apply it to the rusted areas. Let it sit for an hour. Scrub with a non-abrasive brush. Rinse and dry thoroughly. For heavier rust, a mild acid like vinegar can help. Always re-season cast iron caps with oil after cleaning to prevent future rust.
Can I use oven cleaner on burner caps?
You can use oven cleaner on some burner caps. Always check the cap material first. Read the oven cleaner’s instructions. Some oven cleaners are too harsh for certain finishes. Test a small, hidden area. Wear gloves and ensure good ventilation. Rinse caps thoroughly after using oven cleaner.
Are there natural alternatives to harsh chemical cleaners?
Yes, many effective natural alternatives exist. Baking soda paste works well for stubborn stains. White vinegar is great for degreasing and shine. A mixture of dish soap and hot water is excellent for general cleaning. These options are safer for you and your home.
Conclusion
Cleaning burner caps might seem like a small task. It makes a big difference in your kitchen. A clean stove looks better. It also works more efficiently. We explored various methods. You learned to clean burner caps using simple tools. From soaking in hot, soapy water to using baking soda or vinegar, you have many options. Remember to prepare properly and dry completely. Preventative care helps maintain your hard work. Regular wiping down prevents future stubborn stains.
Keeping your stove in top shape extends its life. It also creates a healthier cooking environment. You now have the knowledge to tackle any grime on your burner caps. I hope these tips make your cleaning routine easier. Get ready to enjoy a sparkling clean stovetop. Make cleaning a regular part of your kitchen routine. Your clean burner caps will thank you.
- stove cleaning
- kitchen maintenance
- degreasing burner caps