· Kitchen Cleaning · 16 min read
How To Clean Greasy Stove
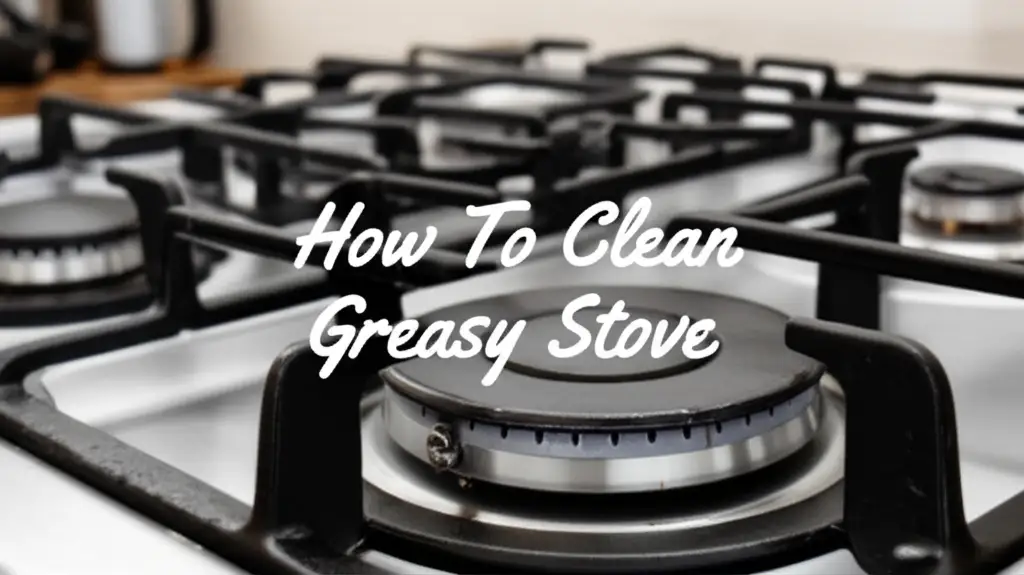
Clean Greasy Stove: A Simple Guide to a Sparkling Kitchen
A greasy stove is a common sight in many kitchens. Cooking splashes grease and food particles everywhere. This buildup makes your kitchen look dirty. It can also pose a fire hazard if ignored. I know the struggle of keeping the stove clean. It feels like a never-ending battle sometimes. However, a clean stove makes cooking more enjoyable. It also shows pride in your home. This article gives you clear steps. We will cover tools, methods, and tips. You can effectively clean greasy stove surfaces. We will discuss natural remedies and strong cleaners. You will learn how to maintain your stove’s shine. Let us begin this cleaning journey together. Your stove will thank you.
Takeaway
- Gather essential tools like gloves, sponges, and degreasers.
- Pre-treat stubborn grease with baking soda paste or commercial cleaners.
- Clean different stove types (gas, electric, glass) with specific methods.
- Address greasy stove racks, grates, and burners separately.
- Implement daily wiping and regular deep cleans to prevent grease buildup.
A greasy stove needs proper cleaning. First, remove loose debris. Then, apply a degreaser or a baking soda paste. Let it sit for 15-30 minutes. Scrub the surface thoroughly with a non-abrasive sponge or cloth. Wipe away the grime. Rinse with clean water. Finally, dry the stove completely for a sparkling finish.
Why Your Stove Gets Greasy and Why It Matters
Stoves get greasy from daily cooking activities. Grease and oil splatter from pans. Food particles can also stick to the surface. Heat from cooking bakes these messes onto the stove. Over time, layers of grime form. This buildup is not just unsightly. It affects how your stove looks and performs. It also poses risks to your health and safety.
Understanding Grease Buildup
Cooking involves fats and oils. When these ingredients heat up, they turn into tiny droplets. These droplets float in the air. They then settle on nearby surfaces. Your stove top is the closest surface. It collects most of these splatters. Over time, these splatters layer up. They form a sticky, hard-to-remove residue. This residue attracts dust and other kitchen debris. It creates a stubborn greasy film. This film can be difficult to remove. This is especially true if you do not clean it regularly.
The Importance of Regular Cleaning
Cleaning your stove regularly offers many benefits. First, it keeps your kitchen hygienic. Grease and food bits can harbor germs. A clean stove reduces these risks. Second, it prevents fire hazards. Thick grease layers are flammable. They can catch fire during cooking. Regular cleaning removes this danger. Third, it extends your stove’s life. Grease can corrode stove components. This can lead to costly repairs. A clean stove performs better. It also looks much more appealing. I find that a clean kitchen makes me feel better. It is a more pleasant place to cook meals.
Essential Tools and Supplies for Greasy Stove Cleaning
Before you start cleaning, gather your supplies. Having everything ready makes the process smoother. You do not want to stop midway to search for a sponge. The right tools help you clean effectively. They also protect your hands and surfaces. We will look at what you need. This includes both cleaning agents and protective gear. Preparing well sets you up for success.
Common Cleaning Agents
You have many options for cleaning agents. Some are strong chemical degreasers. Others are natural household items. Both can be effective against grease. Your choice depends on the grease level. It also depends on your preference.
- Dish Soap: This is a gentle degreaser. It works well for light, fresh grease. Mix it with warm water. It helps break down oil.
- Baking Soda: This is an abrasive cleaner. It also neutralizes odors. Mix it with water to form a paste. This paste lifts tough grime.
- White Vinegar: This is an acidic cleaner. It cuts through grease and dissolves mineral deposits. Mix it with water in a spray bottle. It also disinfects surfaces.
- Commercial Degreasers: Products like Goo Gone, Easy-Off, or Simple Green are strong. They are made for heavy grease. Always read instructions and safety warnings.
- Ammonia: This is very strong. Use it for extremely burnt-on grease. Always use it in a well-ventilated area. Never mix it with bleach.
Protective Gear and Scrubbing Tools
Protecting yourself is important. You will use strong cleaners and elbow grease. The right tools prevent scratches. They also make scrubbing easier.
- Rubber Gloves: These protect your hands from chemicals. They also protect them from hot water. I always wear gloves for deep cleaning.
- Non-Abrasive Sponges/Cloths: Microfiber cloths are gentle. They absorb grease well. Soft sponges work for most surfaces.
- Scrub Brushes: Stiffer brushes help with textured surfaces. They get into crevices. Choose ones with nylon bristles.
- Plastic Scrapers: These remove burnt-on bits. They will not scratch delicate surfaces. Keep a plastic putty knife handy.
- Spray Bottles: These are great for applying homemade cleaners. They ensure even coverage.
- Old Towels/Paper Towels: Use these for wiping away residue. They are also good for drying surfaces.
Having these items ready saves time. It makes your stove cleaning job simpler.
Step-by-Step Guide to Clean Greasy Stove Surfaces
Cleaning a greasy stove involves several steps. Each step builds on the previous one. This ensures a thorough and effective clean. We will break down the process. We will cover different parts of your stove. Remember to always work safely. Disconnect power to electric stoves. For gas stoves, ensure knobs are off.
Prepping Your Stove for Cleaning
Preparation is key for any cleaning task. It makes the actual cleaning much easier. It also protects your stove from damage. Do not skip these initial steps.
- Safety First: Turn off your stove. Unplug electric stoves from the wall outlet. For gas stoves, ensure all burners are off. This prevents accidental burns or electric shocks. Safety is my top priority.
- Remove Loose Debris: Use a dry cloth or paper towel. Wipe away any crumbs or loose food bits. This stops them from turning into muddy messes. This makes the degreasing step more effective.
- Remove Removable Parts: Take off burner grates, caps, and knobs. These parts often have heavy grease. Cleaning them separately is best. Place them in a sink or a bucket.
Tackling the Stove Top
The stove top is where most grease accumulates. Different stove types need different approaches. I will guide you through common types.
Gas Stove Specific Steps
Gas stoves have grates and burner caps. These parts get very greasy. Focus on them first.
- Soak Grates and Caps: Put grates and burner caps in hot, soapy water. For heavy grease, add a squirt of commercial degreaser. Let them soak for at least 30 minutes. An overnight soak is even better for very tough grime.
- Clean Burner Openings: Use a small brush or a paperclip. Carefully clean out any clogged holes. This improves burner efficiency. Make sure gas holes are clear.
- Wipe Down the Surface: Spray the main stove top with a degreasing solution. Use a mix of equal parts white vinegar and water. You can also use a commercial kitchen degreaser. Let it sit for 10-15 minutes. This breaks down the grease.
- Scrub and Rinse: Use a non-abrasive sponge or cloth. Scrub the surface in small circles. Pay attention to baked-on spots. Wipe with a clean, damp cloth. Repeat until all residue is gone. For gas stove parts, check out our guide on how to clean stove grills and how to clean burners on gas stove.
Electric Coil Stove Specific Steps
Electric coil stoves have removable drip pans. These catch spills and grease.
- Remove Drip Pans and Coils: Lift out the heating coils. Then, remove the drip pans underneath. These pans are usually heavily greased.
- Clean Drip Pans: Soak the drip pans in hot, soapy water. Add baking soda or degreaser for stubborn grease. Scrub them with a stiff brush. Rinse and dry completely.
- Wipe the Surface: Wipe the area under the coils. Use a damp cloth with dish soap or an all-purpose cleaner. Avoid getting water into the coil connections.
- Clean Coils (Carefully): Do not submerge coils in water. Wipe them with a damp cloth if needed. They are mostly self-cleaning when heated.
- Reassemble: Once everything is dry, put the coils and drip pans back.
Glass/Smooth Top Specific Steps
Glass and smooth tops are elegant but need gentle care. Avoid abrasive scrubbers.
- Apply Cleaner: Sprinkle baking soda generously over the greasy areas. Spray white vinegar over the baking soda. It will foam up. This reaction helps lift grime.
- Let It Sit: Cover the area with a damp, warm towel for 15-30 minutes. This keeps the mixture moist. It also allows it to penetrate the grease.
- Gently Scrape and Wipe: Use a plastic scraper or razor blade (at a low angle). Gently scrape off burnt-on food. Then, use a non-abrasive sponge to scrub. Wipe with a clean, damp cloth. For detailed instructions on how to clean glass stove top with vinegar, how to clean smooth top stove, or for specific colors like how to clean white stove top and how to clean black enamel stove top, refer to our specialized guides.
- Polish: For a streak-free shine, wipe with a dry microfiber cloth. A glass cleaner can also help.
Cleaning Knobs and Controls
Stove knobs gather grease and food residue. They are easy to overlook.
- Remove Knobs: Most stove knobs pull straight off. Check your stove manual if yours are different.
- Soak and Scrub: Soak the removed knobs in hot, soapy water. Use an old toothbrush or a small brush. Scrub away the grease and grime.
- Clean Control Panel: Wipe the area around the control panel. Use a damp cloth with an all-purpose cleaner. Be careful not to get water into electronic parts.
- Dry and Reattach: Ensure knobs are completely dry before putting them back. Wet knobs can cause electrical issues.
Following these steps will help you achieve a truly clean stove top.
Deep Cleaning Greasy Stove Racks and Burner Grates
Stove racks and burner grates endure heavy grease buildup. They often get caked with burnt food too. Simply wiping them down is not enough. They need a deep cleaning approach. This section focuses on effective methods for these stubborn items. These parts benefit greatly from soaking.
Soaking Methods for Heavily Greased Parts
Soaking loosens baked-on grease. It makes scrubbing much easier. Choose a method based on how dirty your parts are.
Dish Soap and Hot Water:
- Place racks and grates in a large sink or tub.
- Fill with very hot water. Add a generous amount of dish soap.
- Let them soak for several hours. Overnight is even better for very tough grease. The hot water and soap work to break down the oil.
- After soaking, most grease will wipe away easily. You can also refer to our guide on how to clean stove racks for more details.
Baking Soda and Vinegar:
- Lay grates in a large, sturdy trash bag or a tub.
- Sprinkle a thick layer of baking soda over them.
- Pour white vinegar slowly over the baking soda. It will foam up. This reaction helps lift stubborn grime.
- Seal the bag or cover the tub. Let them sit for at least 4-6 hours. For seriously greasy items, leave them overnight. This method works well for heavily greased wire racks inside ovens too. Check out our advice on how to clean greasy wire racks.
Ammonia (for Extreme Cases):
- This method is powerful. Use it with extreme caution and in a well-ventilated area.
- Place racks in a heavy-duty trash bag.
- Pour about 1/2 cup of ammonia into the bag. Do not mix with any other cleaners.
- Seal the bag tightly. Place it outdoors or in a garage. Ammonia fumes are strong.
- Let it sit overnight. The fumes will break down the grease without scrubbing.
- Next day, open the bag outdoors. Remove the parts. Rinse them thoroughly under running water.
Scrubbing and Rinsing Techniques
After soaking, the hard work is mostly done. Now, you need to remove the loosened grime.
- Scrubbing: Use a stiff scrub brush or a heavy-duty sponge. The grime should come off easily now. For stubborn spots, use a nylon brush. Avoid steel wool on coated grates. It can scratch the finish.
- Detailing: Use an old toothbrush or a small bottle brush. Clean any crevices or tight spots. Get into all the nooks and crannies.
- Rinsing: Rinse each piece thoroughly under hot running water. Ensure all soap or cleaning solution is gone. Residual cleaner can cause smoking when the stove is next used.
- Drying: Dry all parts completely. You can air dry them. Alternatively, dry them with a clean towel. Reassemble once everything is dry. This deep cleaning process makes your stove look much cleaner. It also ensures proper function.
Natural vs. Commercial Cleaners: Which is Best for Grease?
When you clean greasy stove surfaces, you have a choice. You can use natural ingredients. Or you can pick commercial products. Both options have benefits and drawbacks. Knowing which to use helps you clean effectively. It also helps you stay safe. I use both, depending on the job.
DIY Cleaning Solutions
Natural cleaners are often found in your pantry. They are safer for pets and children. They are also gentle on surfaces.
- Baking Soda and Water Paste: This is my go-to for many tasks. Mix baking soda with a little water. Form a thick paste. Apply it directly to greasy spots. Let it sit for 15-30 minutes. The baking soda acts as a mild abrasive. It gently scrubs away grime. Then, wipe and rinse. This method is safe for most stove types.
- White Vinegar Spray: Vinegar is acidic. It cuts through grease and grime. Mix equal parts white vinegar and water in a spray bottle. Spray it on the greasy area. Let it sit for 10 minutes. Wipe with a damp cloth. Vinegar also helps sanitize surfaces. It leaves a fresh, clean scent. You can learn more about how to clean glass stove top with vinegar.
- Lemon Juice: Lemon juice is another natural acid. It works similarly to vinegar. Squeeze fresh lemon juice onto greasy areas. Let it sit for a few minutes. Then scrub and wipe. It leaves a pleasant citrus scent. It also helps dissolve grease.
- Dish Soap and Hot Water: For light, fresh grease, plain dish soap is effective. Its degreasing properties work well. Mix it with hot water. Apply with a sponge. It breaks down the oils quickly.
Pros of DIY Solutions:
- Non-toxic and eco-friendly.
- Cost-effective.
- Safe for most surfaces.
- No harsh chemical fumes.
Cons of DIY Solutions:
- May require more scrubbing.
- Less effective on heavily baked-on grease.
- Can take longer to work.
Heavy-Duty Commercial Degreasers
Commercial degreasers are formulated for tough jobs. They contain strong chemicals. These chemicals dissolve grease quickly.
- Kitchen Degreasing Sprays: Brands like Simple Green, Goo Gone Kitchen, or Fantastik are popular. They come in spray bottles. Spray directly onto the greasy surface. Let it sit for a few minutes (as per product instructions). Then wipe away. They are very effective.
- Oven Cleaners: Some heavy-duty oven cleaners can tackle stove top grease. Products like Easy-Off are extremely powerful. They are designed for baked-on grime. Always follow instructions carefully. Wear gloves and ensure good ventilation. These are especially useful for old, thick grease layers.
- Specialized Stove Top Cleaners: Many brands make cleaners specifically for glass or ceramic stove tops. These often come with a scrubbing pad. They are designed not to scratch delicate surfaces.
Pros of Commercial Degreasers:
- Very effective on tough, baked-on grease.
- Faster cleaning time.
- Requires less scrubbing effort.
Cons of Commercial Degreasers:
- Can contain harsh chemicals.
- May produce strong fumes.
- Require good ventilation and protective gear.
- Can be more expensive.
- May not be suitable for all stove materials. Always check compatibility.
Choosing between natural and commercial cleaners depends on your situation. For light, regular cleaning, natural options are great. For serious, long-standing grease, a commercial product might be necessary. I often start with natural options. If they do not work, I move to stronger commercial products.
Advanced Tips for Stubborn Grease and Burnt-On Stains
Sometimes, grease is not just greasy. It is burnt-on. It has turned into a hard, black crust. These stains need extra effort. Regular cleaning methods might not work. Here are some advanced techniques. They help you tackle the toughest stove messes. Always use caution with these methods.
Using Ammonia for Tough Spots
Ammonia is a powerful degreaser. It works wonders on carbonized grease. It essentially dissolves the burnt-on layers. Remember, ammonia has strong fumes. It should always be used with care. I use this method only for the worst stains.
- Safety First: Ensure your kitchen is very well-ventilated. Open windows and turn on the range hood. Wear rubber gloves and eye protection. Never mix ammonia with bleach. This creates dangerous gas.
- Application: Soak a small cloth or paper towel in ammonia. Place the soaked cloth directly over the burnt-on spot. Do not pour ammonia directly onto the stove.
- Cover and Wait: Cover the ammonia-soaked spot with plastic wrap. This traps the fumes. The fumes do the work. Let it sit for several hours. Overnight is ideal for very tough spots.
- Scrape and Clean: Remove the plastic wrap and the cloth. The burnt grease should be soft. Use a plastic scraper or a razor blade (at a very low angle). Carefully scrape away the loosened grime. Wipe the area clean with a damp cloth. Rinse thoroughly with clean water. Dry the surface completely.
Scrapers and Abrasives (Carefully)
For glass or ceramic stove tops, burnt-on residues can be extremely stubborn. Sometimes, a degreaser alone is not enough. You might need a physical tool.
- Razor Blade Scrapers: These are effective for glass stove tops. Hold the scraper at a very shallow angle (about 15-20 degrees). Gently push the blade under the burnt-on mess. This lifts it off the surface. Do not use a sharp angle. This can scratch the glass. Always use new, clean blades. Use these only on cooled surfaces. For advice on dealing with specific burnt stains, see our articles on how to clean burnt water off glass stove top and how to clean burnt milk from stove.
- Non-Scratch Scouring Pads: For metal or enamel stove tops, non-scratch scouring pads can help. Use them with your chosen degreaser. Apply gentle pressure. Avoid harsh steel wool. Steel wool can leave scratches. It can also leave tiny metal fragments. These can rust on your stove.
- Melamine Sponges (Magic Erasers): These sponges are surprisingly effective. They work like very fine sandpaper. Wet the sponge. Gently rub the stubborn stain. They can remove scuffs and grime without chemicals. Test them on an inconspicuous area first. Ensure they do not affect your stove’s finish.
Always prioritize safety. Test any new cleaner or tool in a hidden spot. This prevents damage to your stove. With patience and the right method, even the worst grease spots can disappear.
Maintaining a Clean Stove: Prevention is Key
Cleaning a greasy stove is hard work. The best way to deal with grease is to prevent it. Regular maintenance saves you time and effort. It also keeps your kitchen looking good. I have learned that consistent small actions prevent big problems. Incorporate these habits into your daily routine.
- stove cleaning
- grease removal
- kitchen maintenance

