· RV Maintenance · 16 min read
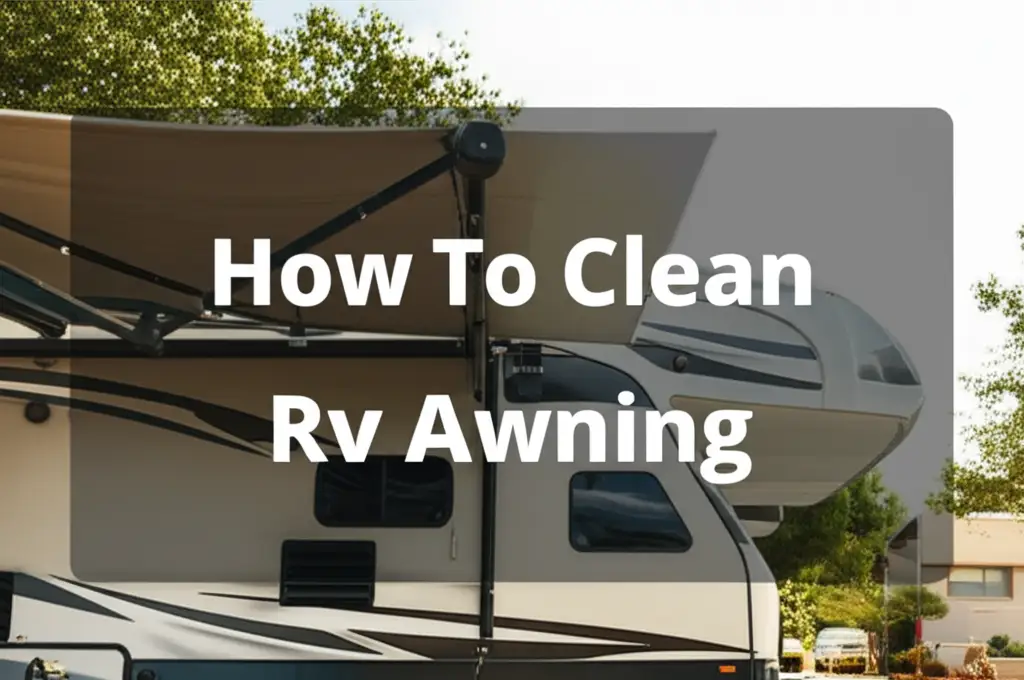
How To Clean Camper Awning

Sparkling Clean: Your Guide to Camper Awning Care
Imagine pulling up to your favorite campsite. You extend your camper awning, ready to relax. Then you see it: unsightly dirt, green mold, or dark mildew spots. A dirty awning reduces your enjoyment and can shorten the awning’s life. Keeping your RV awning clean is a simple yet vital task.
I understand the desire for a pristine outdoor space, even on the road. A well-maintained awning offers comfortable shade and enhances your RV’s appearance. This comprehensive guide helps you achieve a spotless camper awning. We cover everything from gathering supplies to tackling tough stains. You will learn the best methods for different awning materials. Let’s make your outdoor living space sparkle again.
Takeaway:
- Gather Supplies: Always collect all necessary tools and cleaners before starting.
- Identify Material: Know if your awning is fabric or vinyl to use the correct cleaning method.
- Pre-Clean: Remove loose dirt and debris before applying cleaning solutions.
- Clean in Sections: Work on small areas to ensure thorough cleaning and rinsing.
- Rinse Completely: Remove all cleaning solution residue to prevent damage.
- Dry Fully: Allow the awning to dry completely before retracting to prevent mold and mildew.
- Protect: Apply a protectant to extend the life and cleanliness of your awning.
Cleaning your camper awning involves extending it fully, sweeping away loose debris, applying a specialized or homemade cleaning solution appropriate for your awning material (fabric or vinyl), gently scrubbing to remove grime and stains, thoroughly rinsing the entire surface, and then allowing it to air dry completely before retracting to prevent mold and mildew growth.
Why Keeping Your Camper Awning Clean Matters
Keeping your camper awning clean might seem like a small detail, but it brings many benefits. A clean awning looks inviting and extends its lifespan. Over time, dirt, dust, and environmental grime build up. This accumulation can degrade the awning material. Mold and mildew are common culprits that harm the fabric.
Uncleaned awnings become a breeding ground for mold and mildew. These fungi are not just unsightly; they can cause permanent stains. They also weaken the fabric fibers. A weakened awning is more prone to tears and damage. This means you might need to replace it sooner than expected. Regular cleaning prevents this early wear. It protects your investment in your RV.
A dirty awning can also affect your health. Mold and mildew spores become airborne. These can trigger allergies or respiratory issues for sensitive individuals. Ensuring a clean awning creates a healthier outdoor environment for everyone. It makes your camping experience more enjoyable. No one wants to relax under a moldy canopy.
Furthermore, a clean awning helps maintain your RV’s overall value. Just like the rest of your camper, the awning contributes to its aesthetic appeal. If you ever decide to sell your RV, a well-maintained awning is a selling point. It shows you care about your vehicle. I always feel better about my RV when everything looks its best.
Essential Tools and Supplies for Awning Cleaning
Before you begin the cleaning process, gather all your tools and supplies. Having everything ready saves time and makes the job easier. The right equipment ensures an effective and safe cleaning experience. You need specific items for different types of dirt and awning materials.
First, you will need a reliable water source. A garden hose with a spray nozzle is perfect for rinsing. Make sure the water pressure is good. Next, you need a ladder or a sturdy step stool. This helps you reach the top of your awning safely. Safety is always important when working at heights.
For scrubbing, choose a soft-bristle brush. A long-handled brush is often helpful for reaching high spots without constant ladder repositioning. Avoid stiff brushes or abrasive scrubbers, as these can damage the awning material. Always protect the fabric. I prefer a soft brush because it cleans without causing harm.
Cleaning solutions are crucial. You can use specialized RV awning cleaners available at camping supply stores. Many people also use common household cleaners. A mixture of dish soap and warm water works well for light dirt. For tougher stains, you might need stronger solutions. These include diluted bleach for mold or vinegar for general grime. Remember to check the awning manufacturer’s recommendations.
Finally, gather a few buckets for mixing solutions and rinsing rags. Old towels or microfiber cloths are good for wiping. Safety glasses and gloves are also wise additions. They protect your eyes and hands from cleaning chemicals. Having these items ready ensures a smooth and efficient cleaning session.
Preparing Your Camper Awning for Cleaning
Proper preparation is key to an effective and safe awning cleaning. Before you apply any cleaning solutions, you must get your awning ready. This initial stage removes loose debris and sets the foundation for a deeper clean. Skipping these steps can make the entire process less efficient.
First, fully extend your camper awning. Ensure it is taut and stable. This allows you to access all parts of the fabric. Make sure there are no wrinkles or folds where dirt can hide. If your awning has a support arm, extend it to its full length. This ensures the awning is flat.
Next, remove any large, loose debris from the awning surface. Use a soft broom or a handheld brush to gently sweep off leaves, twigs, dust, and spiderwebs. You can also use a leaf blower on a low setting for this step. Getting rid of these loose particles prevents them from turning into mud when wet. It also keeps them from scratching the awning during scrubbing. I always do this first.
After sweeping, give the awning a preliminary rinse with your garden hose. Use a spray nozzle to wet the entire surface. This helps loosen any caked-on dirt. It also prepares the fabric for the cleaning solution. Rinsing also reveals any areas with stubborn stains. You can then focus your efforts on those spots.
Finally, protect your RV’s side walls and anything below the awning. If you are using strong cleaners, cover nearby windows or painted surfaces. Drop cloths work well for this. This precaution prevents accidental damage or streaks from cleaning runoff. I cover my RV’s side to be extra careful. Proper preparation saves you time and effort in the long run.
Step-by-Step Guide to Cleaning a Fabric Camper Awning
Cleaning a fabric camper awning requires a gentle but thorough approach. Fabric awnings, often made of acrylic, are popular for their breathability. They can also absorb dirt and mildew more readily than vinyl. Following these steps ensures a deep clean without damaging the material.
Start by mixing your cleaning solution. For most fabric awnings, a mild soap solution is effective. I mix about a quarter cup of dish soap in a gallon of warm water. For tougher stains, a specialized fabric awning cleaner might be necessary. Always test any cleaner on a small, hidden spot first. This checks for colorfastness.
Apply the cleaning solution to the fabric. You can use a spray bottle for even coverage. Alternatively, dip your soft-bristle brush into the solution. Work in small sections, starting from one end of the awning. Allow the solution to soak into the fabric for a few minutes. This helps loosen dirt and grime. Do not let it dry on the fabric.
Gently scrub the surface with your soft-bristle brush. Use circular motions. Pay close attention to areas with visible dirt, mold, or mildew. Avoid scrubbing too hard, as this can damage the fabric fibers. The goal is to lift the dirt, not to force it into the material. I always take my time with this step.
After scrubbing a section, rinse it thoroughly with your garden hose. Ensure all soap residue washes away. Soap left on the fabric can attract new dirt faster. It can also lead to streaks. Continue this process section by section until the entire awning is clean. Rinse the entire awning one last time to ensure complete removal of cleaning agents. For more detailed insights on fabric care, you might find information on how to clean canvas awning helpful, as many principles apply.
Step-by-Step Guide to Cleaning a Vinyl Camper Awning
Cleaning a vinyl camper awning differs slightly from fabric. Vinyl is non-porous and generally easier to clean. It resists mold and mildew better, but it can still accumulate dirt, grim, and stubborn stains. Follow these steps for an effective clean that maintains your vinyl awning’s integrity and appearance.
Begin by preparing your cleaning solution. For vinyl awnings, a mixture of warm water and mild dish soap often works well. I often use about half a cup of laundry detergent per gallon of water for a stronger clean. For persistent mold or mildew, a solution of one part bleach to four parts water is usually safe for vinyl. Always wear gloves and eye protection when using bleach.
Apply the cleaning solution to the vinyl surface. You can use a spray bottle to ensure even coverage. Alternatively, apply it with a sponge or soft cloth. Let the solution sit for a few minutes. This allows it to break down dirt and loosen any stuck-on debris. Do not let the solution dry on the awning.
Gently scrub the vinyl with a soft-bristle brush or sponge. Vinyl is durable but can scratch with abrasive tools. Focus on dirty areas and stains. The non-porous nature of vinyl means dirt tends to sit on the surface, making it easier to lift. Work in manageable sections to ensure thorough cleaning.
After scrubbing, rinse the section immediately with your garden hose. Ensure all the cleaning solution is completely washed off. Any residue can leave streaks or attract dirt more quickly. Continue this process until the entire vinyl awning is clean. Finish with a final rinse over the entire awning to ensure no cleaning agent remains. This method helps your vinyl awning stay vibrant and clean for many seasons. For other awning types, general cleaning principles for durability can be found in a guide on how to clean Sunsetter awning.
Tackling Stubborn Stains: Mold, Mildew, and Tree Sap
Stubborn stains like mold, mildew, and tree sap can be frustrating on your camper awning. These require specific treatments beyond general cleaning. Addressing them promptly prevents permanent damage. I have found these methods highly effective.
Mold and Mildew: These are common problems, especially if you retract your awning wet. For fabric awnings, a solution of one part oxygen bleach (e.g., OxiClean) to four parts water works well. Apply it to the affected area and let it soak for 15-30 minutes. Scrub gently and rinse thoroughly. For vinyl awnings, a solution of one part regular bleach to four parts water is very effective. Apply, let sit for 5-10 minutes, then scrub and rinse. Always test in an inconspicuous area first. Remember, prompt action prevents deeper penetration and potential damage to the awning. If you are looking for general mold solutions, there is also information on how to clean mold with vinegar, which can sometimes apply to milder cases or as a preventative measure. Another useful resource to avoid mold growth can be found here: how to clean mold in shower.
Tree Sap: Tree sap is sticky and tough to remove. Do not try to scrape it off dry, as this can damage the fabric or vinyl. Instead, use a solvent. Mineral spirits or rubbing alcohol can dissolve tree sap. Apply a small amount to a clean cloth. Gently dab the sap spot. Work from the outside of the stain inwards. This prevents spreading the sap. Once the sap softens, gently lift it away. Follow up with a mild soap and water wash on that spot. Rinse well to remove any residue from the solvent.
Bird Droppings and Other Organic Stains: For fresh bird droppings or bug splatters, simply use warm water and a mild soap solution. Scrub gently with a soft brush. For dried stains, pre-soak the area with water for a few minutes. This softens the stain, making it easier to remove. I find that immediate action is best for these stains. The longer they sit, the harder they become to remove. Always rinse thoroughly after treating any stain to remove all cleaning agents.
Drying and Protecting Your Camper Awning
Drying and protecting your camper awning are crucial steps. They prevent future problems like mold and mildew and extend the life of your awning. Never retract your awning while it is wet. This creates a perfect environment for fungi to grow. I always make sure mine is completely dry.
After cleaning and rinsing, leave your awning fully extended. Allow it to air dry completely in the sun. Sunlight helps evaporate moisture. It also acts as a natural sanitizer. This drying process can take several hours, depending on weather conditions. Ensure there are no damp spots. Check the underside and any hidden folds. Patience is key at this stage.
Once the awning is bone dry, consider applying a UV protectant. Many products are available specifically for RV awnings. These protectants shield the fabric or vinyl from harmful UV rays. UV rays can cause fading and material breakdown over time. A protectant also helps repel water and dirt. This makes future cleanings easier.
Applying a protectant is usually simple. Spray it evenly over the clean, dry surface. Follow the product’s instructions carefully. Some require a second coat or specific drying times. This layer of protection acts as a barrier against environmental elements. It helps maintain the awning’s original color and strength.
Regular protection prolongs the life of your awning significantly. It is a small effort that yields big rewards. I apply protectant after every major cleaning. This keeps my awning looking new for longer. A well-protected awning means more relaxing time under the shade.
Regular Maintenance Tips for Awning Longevity
Beyond deep cleaning, regular maintenance keeps your camper awning in top shape. Small, consistent efforts prevent major issues. These habits extend your awning’s life and ensure it is always ready for your next adventure. I incorporate these simple steps into my routine.
First, wipe down your awning regularly. After each trip, or at least once a month if your RV is parked, extend the awning. Use a damp cloth or a soft brush to remove dust, pollen, and light dirt. This prevents grime from building up and becoming stubborn stains. This quick wipe-down is much easier than a full deep clean.
Second, always retract your awning during strong winds or heavy rain. High winds can tear the fabric or damage the support arms. Heavy rain can cause pooling water, which puts stress on the frame. It can also lead to tears. Retracting it protects your investment from severe weather damage. I check the weather forecast before extending my awning.
Third, inspect your awning regularly for signs of wear or damage. Look for small tears, loose stitching, or bent support arms. Address these issues promptly. Small tears can become large ones quickly. Early repairs prevent costly replacements. Check the tension arms and springs. Ensure they operate smoothly. Lubricate moving parts if needed, using a silicone-based spray.
Finally, keep trees and plants clear of your awning. Overhanging branches can drop sap, leaves, or even small twigs onto the fabric. These can cause stains or punctures. Parking your RV in a clear spot helps reduce the amount of debris on your awning. A clean awning is a happy awning, ready for your next journey.
FAQ Section
How often should I clean my camper awning?
You should clean your camper awning at least once or twice a year for a deep clean. If you camp frequently or in treed areas, a quick wipe-down after each trip is beneficial. This prevents dirt, mold, and mildew from becoming deeply embedded. Regular, light cleaning reduces the need for intense scrubbing.
Can I use a pressure washer on my camper awning?
No, I do not recommend using a pressure washer on your camper awning. The high pressure can damage the fabric fibers or vinyl coating. It can also force water into seams, causing delamination or leaks. A garden hose with a spray nozzle provides enough pressure for effective rinsing without causing harm.
What is the best cleaner for mold on a camper awning?
For mold on fabric awnings, a solution of oxygen bleach (like OxiClean) and water is effective. For vinyl awnings, a diluted bleach solution (1 part bleach to 4 parts water) works well. Always test any cleaner on a small, hidden area first. Rinse thoroughly after cleaning to remove all chemical residue.
How do I prevent mold and mildew on my awning?
To prevent mold and mildew, always ensure your awning is completely dry before retracting it. If you must retract it wet, extend it again as soon as possible to dry. Regularly clean off dirt and debris. Applying a UV protectant with mold inhibitors can also help. Store your RV in a dry, well-ventilated area.
Can I use household cleaners like dish soap or vinegar?
Yes, mild dish soap mixed with warm water is excellent for general dirt and grime on both fabric and vinyl awnings. Vinegar (diluted with water) can also be used for mild mold or as a general cleaner, especially for fabric awnings. Always rinse thoroughly to remove all soap or vinegar residue.
What should I do if my awning has a strong odor after cleaning?
If your awning has a strong odor after cleaning, it might be due to trapped moisture or residual mold. Ensure the awning is completely dry. You can re-clean with a mold-specific cleaner or a vinegar solution. Allow it to air out for several hours in direct sunlight. Baking soda sprinkled on the dry awning can also absorb odors.
Conclusion
Keeping your camper awning clean is a simple yet impactful aspect of RV maintenance. I have learned that a little effort goes a long way. A clean awning not only enhances your RV’s appearance but also extends its lifespan. We covered everything from preparing your awning to tackling tough stains. You now have the knowledge to keep your outdoor living space spotless.
Remember the importance of proper cleaning techniques for both fabric and vinyl materials. Always use the right tools and solutions for the job. Do not forget the critical steps of thorough rinsing and complete drying. These steps are vital to prevent mold and mildew. Regular maintenance and protection will ensure your awning stays vibrant for years.
Now, you can confidently clean camper awning and enjoy your travels even more. A well-maintained awning offers a perfect shaded retreat. It makes your camping experiences more comfortable and enjoyable. So, grab your cleaning supplies and get ready to restore your awning’s shine. Your RV adventures await under a sparkling clean canopy!
- camper awning cleaning
- RV maintenance tips
- mildew removal
- awning care
- outdoor cleaning