· RV Maintenance · 16 min read
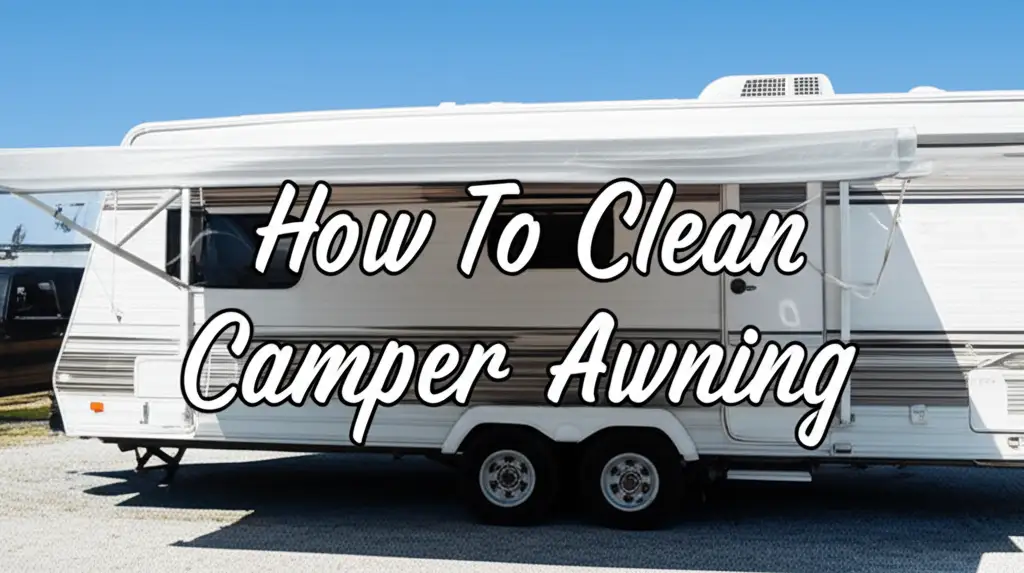
How To Clean Rv Awning
Extend the Life of Your RV Awning with Simple Cleaning
An RV awning provides vital shade and shelter. It makes your outdoor space comfortable. Over time, dirt, grime, and even mold can build up on it. Cleaning your RV awning properly keeps it looking good. It also helps it last for many trips.
Ignoring awning cleaning shortens its lifespan. Stains become permanent. Mold can grow deep into the fabric. A well-maintained awning improves your RV’s appearance. It protects your investment. This guide shares simple steps to make your RV awning shine again. We cover tools, methods, and common issues. You will learn to clean your RV awning effectively and safely.
Takeaway:
- Know your awning material (vinyl or fabric) to choose the right cleaner.
- Use gentle tools like soft brushes and specific cleaning solutions.
- Always rinse thoroughly and let the awning dry completely before rolling it up.
- Regular cleaning prevents stubborn stains and prolongs awning life.
- Avoid harsh chemicals and pressure washers that can damage the material.
Cleaning an RV awning involves understanding its material, using appropriate gentle cleaners, and applying the right techniques to remove dirt, mold, and mildew. Regular cleaning protects the awning fabric and extends its lifespan, ensuring it remains a functional and attractive part of your RV.
Why RV Awning Cleaning Is Essential
Your RV awning faces many elements. Sun, rain, wind, and tree sap affect it daily. This constant exposure causes dirt and grime to stick. Mold and mildew can grow quickly in damp conditions. These things do not just make your awning look bad. They also cause damage.
Mold can eat away at the fabric or vinyl. This weakens the material over time. Dirt and debris can scratch the surface when the awning retracts. Regular cleaning stops this damage from happening. It also protects your investment. A clean awning means a longer-lasting awning.
Benefits of a Clean RV Awning
A clean RV awning offers many advantages. First, it makes your RV look new. A dirty awning detracts from your vehicle’s overall appearance. Second, cleaning prevents costly repairs. Replacing an awning is expensive. Regular care avoids early wear and tear.
Third, a clean awning creates a healthier environment. Mold and mildew can cause respiratory issues. Removing them improves air quality around your campsite. Finally, cleaning helps maintain the awning’s functionality. Dirt can jam mechanisms. Keep your awning clean for smooth operation every time you use it.
Understanding RV Awning Materials
Before you start cleaning, identify your RV awning’s material. Most RV awnings are either vinyl or acrylic fabric. Each material needs a different cleaning approach. Using the wrong cleaner can cause damage. Knowing your material ensures a safe and effective clean.
Vinyl Awnings
Vinyl awnings are very common. They have a smooth, plastic-like surface. This surface is waterproof and easy to wipe down. Vinyl resists stains well but can develop mildew. Mold tends to grow on the surface layer. This makes it easier to clean off.
You can use a variety of mild cleaners on vinyl. Avoid harsh solvents or abrasive brushes. These can strip the protective coating. Always test cleaners on a small, hidden spot first. This simple step prevents unwanted damage.
Acrylic Fabric Awnings
Acrylic fabric awnings look and feel more like traditional canvas. They breathe well, which helps reduce heat buildup. Water beads up and rolls off acrylic. Mold and mildew can grow into the weave of the fabric. This makes them tougher to remove.
Acrylic fabrics need specific cleaners. Do not use bleach on acrylic awnings. Bleach can damage the fabric fibers and color. Mild soap and water are often the best choices. For tougher stains, look for cleaners designed for outdoor fabrics. You can find more information on how to clean canvas awning materials by visiting our specific guide on the topic.
Essential Tools and Supplies for Awning Cleaning
Having the right tools makes the cleaning process easier. You do not need many specialized items. Most supplies are common household goods. Gather everything before you begin. This saves time and effort.
Basic Cleaning Kit
You will need a few key items for cleaning your RV awning. A soft-bristle brush is essential. Avoid stiff brushes, especially on fabric. Buckets are useful for mixing solutions. A garden hose with good water pressure is important for rinsing.
- Soft-bristle brush: For scrubbing without damage.
- Two buckets: One for cleaning solution, one for rinse water.
- Garden hose with spray nozzle: For effective rinsing.
- Ladder: To reach the entire awning safely.
- Safety glasses and gloves: Protect your eyes and skin.
- Old towels or drop cloths: To protect your RV sides from runoff.
Cleaning Solutions
The best cleaning solution depends on your awning material and the type of stain. For general dirt, mild soap works well. Dish soap or gentle laundry detergent are good options. For stubborn mold and mildew, you may need stronger solutions.
- Mild dish soap: Good for general dirt and grime on both vinyl and fabric.
- Specialized RV awning cleaner: Formulated for specific awning materials and stains. Many products are available on the market designed for this purpose.
- White vinegar solution: Mix equal parts vinegar and water for mildew on vinyl. It is a natural option for many cleaning tasks. You might find similar advice on how to clean mold in shower areas.
- Bleach solution (for vinyl only): Mix 1/4 cup bleach with 1 gallon of water for tough mildew on vinyl. Always use with caution and rinse thoroughly.
Always follow the product instructions for any commercial cleaner. Test any new solution on a small, unseen area first. This prevents potential damage or discoloration.
Step-by-Step Guide: Cleaning a Vinyl RV Awning
Cleaning a vinyl RV awning is usually straightforward. The smooth surface helps. Follow these steps for a gleaming result. This method is effective for general dirt and light mildew.
1. Prepare the Awning and Area
First, extend your awning fully. Make sure it is taut. This gives you a flat surface to work on. Remove any furniture or items under the awning. You do not want them to get wet or stained.
Lay old towels or drop cloths along the side of your RV. This protects your RV’s finish from cleaning solutions and dirty runoff. It saves you from having to clean your RV’s side later. You can learn more about general RV cleaning, such as how to clean your RV roof, to keep your vehicle spotless.
2. Rinse the Awning
Use your garden hose to thoroughly rinse the top and bottom of the awning. This removes loose dirt and debris. It also pre-wets the surface. Pre-wetting helps the cleaning solution work better. Start from the highest point and work your way down.
Make sure to get all corners and edges. A good initial rinse makes the scrubbing step easier. It also helps prevent scratching the surface with abrasive dirt particles during scrubbing.
3. Apply Cleaning Solution
Mix your chosen cleaning solution in a bucket. For general cleaning, mild dish soap and water works. For mildew, use a specialized RV awning cleaner or a vinegar solution. Apply the solution to the entire awning. You can use a soft brush or a spray bottle for application.
Work in sections if your awning is very large. This prevents the solution from drying before you can scrub it. Ensure the solution covers all dirty areas. Pay extra attention to any visible stains.
4. Scrub the Awning
Use your soft-bristle brush to gently scrub the awning. Work in small sections. Apply light pressure. Scrub both the top and bottom surfaces. Pay close attention to areas with mildew or stubborn dirt.
For tough spots, let the solution sit for a few minutes. Do not let it dry completely. Reapply solution if needed. The goal is to lift the dirt and mildew, not to scrub them harder into the material.
5. Rinse Thoroughly
This is a critical step. Rinse the awning completely with your garden hose. Start from the top and work down. Ensure all soap and cleaning solution are gone. Any residue can attract new dirt or even damage the vinyl over time.
Rinse several times if necessary. Check both sides of the awning. Look for suds or film. A clean rinse helps prevent streaks and keeps your awning looking fresh.
6. Let the Awning Dry Completely
After rinsing, leave the awning fully extended to air dry. Do not roll it up while it is wet or damp. Rolling up a wet awning is a common mistake. It can cause mold and mildew to grow rapidly. It can also trap moisture, which leads to unpleasant odors.
Ensure the awning is bone dry before retracting it. This might take several hours, especially on a humid day. A fully dry awning stays cleaner longer.
Step-by-Step Guide: Cleaning an Acrylic Fabric RV Awning
Cleaning an acrylic fabric awning requires more care than vinyl. The fabric weave can trap dirt. Certain cleaners can harm the material. Follow these steps carefully for the best results. You might find some of these methods similar to how to clean a camper awning or even how to clean a Sunsetter awning.
1. Prepare and Rinse
Extend your acrylic awning fully. Make sure it is pulled tight. Remove items from underneath. Place drop cloths to protect your RV. Then, thoroughly rinse both the top and bottom of the awning with a garden hose. This removes loose dirt and prepares the fabric for cleaning.
2. Apply Fabric-Specific Cleaner
Mix a mild soap solution. Or use a cleaner specifically designed for outdoor fabrics. Do not use household detergents that contain harsh chemicals or bleach. Apply the solution evenly across the fabric. Use a soft brush or sponge.
Let the solution soak for a few minutes. Check the product instructions for the recommended dwell time. This allows the cleaner to penetrate the fabric fibers and loosen embedded dirt.
3. Gently Scrub the Fabric
Using your soft-bristle brush, gently scrub the fabric. Work in small sections. Scrubbing with too much force can damage the fabric or distort its shape. Focus on areas with visible stains or mildew.
For stubborn spots, you might need to reapply the cleaner. Allow it to sit again. Remember, gentle scrubbing is key for acrylic fabrics.
4. Rinse and Repeat if Needed
Rinse the awning thoroughly with your garden hose. Ensure all soap and cleaning solution are removed from the fabric. Any leftover residue can attract dirt or encourage mildew growth.
If stains remain, you might need to repeat the cleaning process. Sometimes, deep-set stains need a second application. Be patient and repeat the steps as necessary.
5. Dry Completely
Just like vinyl awnings, acrylic fabric awnings must dry completely. Leave the awning fully extended in the sun. Air circulation helps. Rolling up a damp fabric awning leads to mildew and odors.
Ensure every part of the fabric is dry to the touch. This can take several hours, depending on weather conditions. Patience ensures your awning stays fresh and clean.
Tackling Stubborn Stains: Mold, Mildew, and Tree Sap
Sometimes, regular cleaning is not enough. Stubborn stains like mold, mildew, or tree sap need targeted treatment. Each type of stain requires a specific approach. Using the wrong method can cause more harm than good.
Removing Mold and Mildew
Mold and mildew are common on RV awnings. They thrive in damp, shady conditions. Removing them protects your awning and your health. The method depends on your awning material.
- For Vinyl Awnings:
- Bleach Solution: Mix 1/4 cup of bleach with 1 gallon of water. Apply this solution to the mildewed areas. Let it sit for 5-10 minutes. Do not let it dry. Scrub gently with a soft brush. Rinse thoroughly afterwards. Always wear gloves and eye protection.
- Vinegar Solution: Mix equal parts white vinegar and water. This is a milder alternative to bleach. Spray on the mildew. Let it sit for 15-30 minutes. Scrub and rinse well. This is effective for light mildew and acts as a deterrent.
- For Acrylic Fabric Awnings:
- Oxygen Bleach (Non-Chlorine): Mix oxygen bleach (like OxiClean) according to package directions with water. Apply to the mildewed areas. Let it soak for 15-30 minutes. Gently scrub. Rinse thoroughly. This is safer for colored fabrics than chlorine bleach.
- Specialized Fabric Cleaners: Many products are designed specifically for outdoor fabric mildew removal. Follow their instructions carefully. These are often the safest and most effective options. For general mold cleanup, you may also find useful tips on how to clean mold in shower areas, as the principles of removal are similar.
Always test any strong cleaner on a small, hidden spot first. This helps prevent discoloration or damage.
Removing Tree Sap
Tree sap can be very sticky and tough to remove. It hardens over time. Prompt action helps.
- Ice Cube Method: For fresh sap, rub an ice cube over the sap. This hardens the sap, making it brittle. You might be able to pick it off gently.
- Mineral Spirits (for Vinyl): Apply a small amount of mineral spirits to a clean cloth. Gently dab the sap spot. Avoid rubbing vigorously. Rinse the area with mild soap and water immediately afterward. Mineral spirits can be strong, so use sparingly and rinse quickly.
- Rubbing Alcohol (for both): Dampen a cloth with rubbing alcohol. Gently blot and rub the sap. This can dissolve the stickiness. Rinse thoroughly with water and mild soap afterward. Test on an inconspicuous area first.
Never scrape tree sap with sharp objects. This can tear or puncture your awning material. Patience and gentle methods are best.
Preventative Maintenance and Awning Care Tips
Cleaning your RV awning is important. But preventing dirt and damage is even better. Regular preventative care keeps your awning in top condition. These simple habits extend its life significantly.
Regular Rinsing
Rinse your awning often, especially after trips. This removes loose dirt, pollen, and light debris. It stops grime from building up and becoming ingrained. A quick rinse after each use can save you from deeper cleaning later. This is particularly helpful if you park under trees.
Dry Before Storing
Always ensure your RV awning is completely dry before rolling it up. Rolling up a wet awning is a primary cause of mold and mildew growth. Even a slightly damp awning can develop issues. If it gets wet unexpectedly, extend it as soon as possible to dry. This is a critical step for long-term health of the awning material.
Use a Protective Treatment
After cleaning and drying, consider applying a UV protectant or fabric guard. These products create a barrier on the awning surface. They repel water, dirt, and prevent UV damage. This makes future cleaning easier. It also protects the material from sun fading.
Reapply these treatments periodically. Check product instructions for frequency. Many are designed to last for several months.
Avoid Parking Under Trees
Parking directly under trees can cause issues. Tree sap, bird droppings, and falling leaves dirty your awning quickly. Sap is particularly difficult to remove. If you must park under trees, clean your awning immediately after. This prevents stains from setting.
Regular Inspections
Periodically inspect your awning for small tears or damage. Address any issues quickly. Small tears can become big problems if ignored. Check seams and hardware for wear. Early detection saves you from costly repairs down the road. This proactive approach helps extend the life of your entire RV, much like performing regular maintenance on your RV AC unit.
Common Mistakes to Avoid When Cleaning Your RV Awning
Cleaning your RV awning can be easy. However, some common mistakes can damage it. Knowing what to avoid saves you time, money, and frustration. Avoid these pitfalls for the best results.
Using Harsh Chemicals
Avoid cleaners that contain bleach (on fabric), ammonia, or other harsh chemicals. These can strip protective coatings, fade colors, or weaken the material. Always choose mild, pH-neutral cleaners first. If stronger cleaners are needed, ensure they are safe for your specific awning material. Read labels carefully.
Using a Pressure Washer
A pressure washer might seem like a quick solution. However, its high force can severely damage your RV awning. It can tear the fabric, rip seams, or blast off protective layers. It can also force water into the retraction mechanism. Stick to a standard garden hose with a spray nozzle. Gentle pressure is key.
Not Rinsing Thoroughly
Leaving soap residue on your awning is a common mistake. Any leftover cleaner can attract more dirt. It can also become sticky. This residue can even degrade the material over time. Always rinse the awning completely until no suds or film remain. Rinse from top to bottom.
Rolling Up a Wet Awning
This is one of the biggest mistakes. Rolling up a wet or even damp awning is an open invitation for mold and mildew. These organisms thrive in dark, moist environments. Always ensure your awning is bone dry before retracting it. If you need to roll it up wet in an emergency, extend it again at your earliest opportunity to dry.
Ignoring Small Stains
Small stains can become big problems if ignored. Tree sap, bird droppings, and insect remains can set into the material. The longer they sit, the harder they are to remove. Address small spots promptly. A quick spot clean is much easier than a full awning overhaul. This proactive cleaning applies to other parts of your RV too, such as when you need to clean your RV toilet.
Frequently Asked Questions About RV Awning Cleaning
How often should I clean my RV awning?
Clean your RV awning at least once or twice a year. More frequent cleaning is needed if you camp under trees or in humid areas. Regular rinsing after each trip helps prevent dirt buildup between deep cleans.
Can I use household bleach on my RV awning?
You can use a diluted bleach solution (1/4 cup bleach per gallon of water) on vinyl awnings for tough mildew. Never use bleach on acrylic fabric awnings, as it can damage the fabric and cause discoloration. Always test in an inconspicuous area first.
What is the best cleaner for RV awning mold and mildew?
For vinyl, a diluted bleach solution or a specialized vinyl awning cleaner works best. For acrylic fabric, use oxygen bleach (non-chlorine) or a cleaner specifically designed for outdoor fabrics. Always follow product instructions and test first.
Is it safe to power wash my RV awning?
No, it is not safe to power wash your RV awning. High-pressure water can damage the fabric, seams, and protective coatings. It can also force water into the retraction mechanism. Use a standard garden hose with a spray nozzle for rinsing.
How do I prevent mold from growing on my RV awning?
Always dry your awning completely before rolling it up. Avoid parking under trees where moisture and debris accumulate. Apply a protective UV spray or fabric guard after cleaning. Regular rinsing helps remove mold spores before they can grow.
Can I clean my RV awning while it’s retracted?
No, always fully extend your RV awning for cleaning. This allows you to access both the top and bottom surfaces. It also ensures proper drying. Cleaning a retracted awning is ineffective and can leave dirty spots.
Conclusion
A clean RV awning makes your camping trips more enjoyable. It also protects your investment. You now know how to clean RV awning surfaces effectively. You understand the differences between vinyl and acrylic. You have the tools and steps to tackle dirt, mold, and even stubborn stains.
Remember to identify your awning material first. Use gentle cleaning solutions and soft brushes. Rinse everything thoroughly. Most importantly, always let your awning dry completely before rolling it up. By following these simple steps, you can keep your RV awning looking great for many years to come. Make regular awning cleaning a part of your RV maintenance routine. Your awning will thank you. Get ready for spotless adventures ahead!
- RV awning cleaning
- mildew removal
- awning care
- outdoor fabric cleaning

