· Kitchen Maintenance · 16 min read
How To Clean Deep Fry Oil
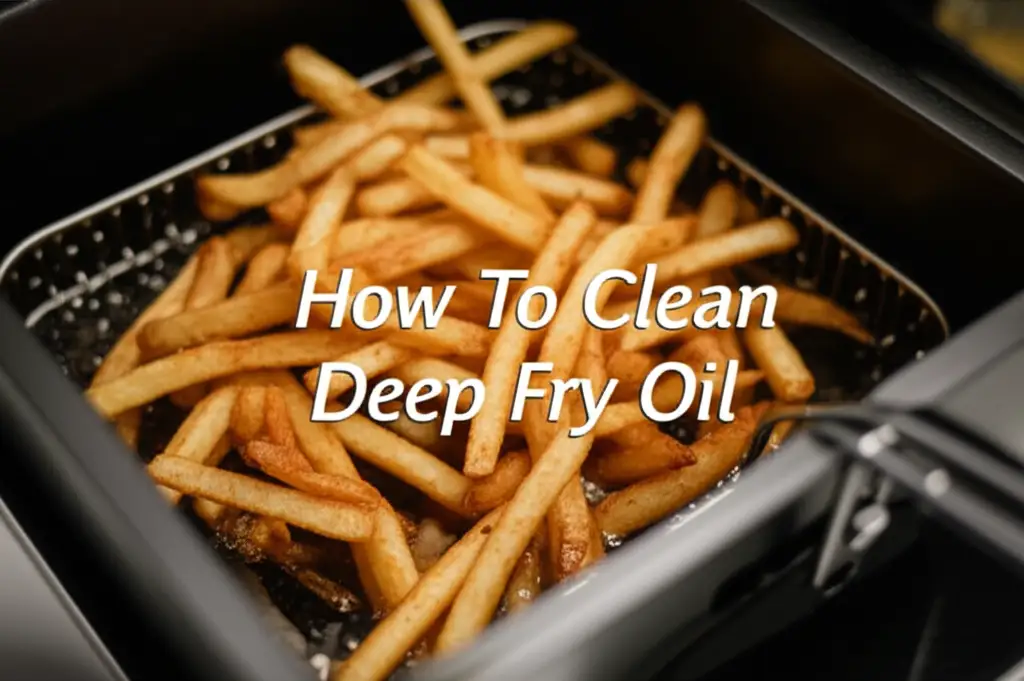
Master the Art: How to Clean Deep Fry Oil for Reuse
Deep frying at home brings delicious meals. However, using fresh oil for every batch can be wasteful and expensive. This is why learning how to clean deep fry oil becomes a smart choice. You can extend the life of your cooking oil significantly. Cleaning your deep fry oil improves the taste of your food and saves you money.
This guide helps you understand oil degradation and gives you clear steps to clean deep fry oil. We cover essential tools and effective filtration methods. You will learn about advanced techniques for oil clarification. We also discuss how to maintain your deep fryer and when to finally discard the oil. Get ready to make your deep frying more efficient and economical.
Takeaway
- Cool Oil Completely: Always allow oil to cool before handling.
- Strain Thoroughly: Use fine-mesh strainers or cheesecloth to remove food particles.
- Store Properly: Keep filtered oil in airtight containers in a cool, dark place.
- Monitor Oil Quality: Watch for dark color, strong odor, or excessive foaming.
- Clean Fryer Regularly: A clean fryer extends oil life.
Cleaning deep fry oil involves straining it through a fine filter after it cools. This removes food particles and sediment. Proper storage in an airtight container in a cool, dark place then helps maintain its quality. This process allows for multiple uses, improving efficiency and reducing waste.
Why Deep Fry Oil Needs Cleaning: Understanding Degradation
Deep fry oil degrades with each use. Food particles, moisture, and heat cause this breakdown. These factors lead to a decline in oil quality. Understanding why oil needs cleaning helps you clean deep fry oil effectively.
When you fry food, small bits break off into the oil. These particles burn and carbonize, turning the oil dark. They also give off unpleasant flavors. This affects the taste of your next fried item. The oil can also foam excessively or produce more smoke.
Heat exposure also breaks down oil molecules. This creates free fatty acids and other compounds. These compounds reduce the oil’s smoke point. A lower smoke point means the oil starts smoking at a lower temperature. This can burn your food and create harmful substances. Moisture from food also accelerates oil degradation. It causes hydrolysis, a chemical reaction that spoils the oil faster.
Regular cleaning removes these harmful elements. It stops the chain reaction of oil breakdown. You will enjoy better-tasting food. You will also use less oil over time, saving money. Knowing the signs of degraded oil helps you know when it is time to clean it. Watch for a darker color, a strong unpleasant smell, or very thick oil.
Essential Tools for Effective Oil Cleaning
Having the right tools makes cleaning deep fry oil simple and safe. You do not need many specialized items. Most are common kitchen tools. Gathering them before you start saves time and effort.
First, you need a safe container for the hot oil. A heat-proof bowl or a large pot works well. Ensure it is clean and dry. Moisture can cause hot oil to splatter. Next, you will need a filtering system. A fine-mesh strainer is a basic requirement. This will catch larger food debris. For finer particles, cheesecloth or coffee filters are essential. You can line your strainer with these materials for better filtration.
Funnels are also very helpful. They allow you to pour filtered oil into storage containers without spills. Always choose a wide-mouthed funnel if possible. This makes pouring easier and safer. Lastly, you need airtight storage containers. Glass jars or sturdy plastic containers with tight-fitting lids are ideal. These protect the oil from air and light. Light and air can cause oil to spoil faster.
Having these tools ready makes the process smooth. It helps you keep your kitchen clean too. Sometimes, cleaning up spilled oil can be a task. Always work carefully to prevent messes. Using proper tools ensures you clean your deep fry oil effectively and safely.
- Heat-Proof Container: A large metal bowl or pot to hold cooled oil.
- Fine-Mesh Strainer: For initial straining of large debris.
- Filter Material:
- Cheesecloth: Multiple layers for good filtration.
- Coffee Filters: Excellent for very fine particles, but slow.
- Paper Towels: Use sturdy, unbleached types for quick straining.
- Funnel: To pour filtered oil into storage containers.
- Airtight Storage Containers: Glass jars or plastic bottles for storing clean oil.
Step-by-Step Guide to Cleaning Deep Fry Oil
Cleaning deep fry oil is a straightforward process. Following these steps ensures you remove impurities effectively. This extends the life of your cooking oil significantly. Always prioritize safety, especially when dealing with oil.
Step 1: Allow the Oil to Cool Completely
This step is critical for safety. Never attempt to clean hot oil. Hot oil causes severe burns. Let the oil cool down to room temperature. This can take several hours, even overnight. Pouring warm oil through a filter can be dangerous and inefficient. Warm oil flows too quickly and can break the filter. Ensure the oil is entirely cool before proceeding. This step alone prevents many kitchen accidents.
Step 2: Prepare Your Filtration Setup
Once the oil is cool, set up your filtration system. Place a clean, heat-proof container on a flat surface. Position your fine-mesh strainer over this container. If using cheesecloth, line the strainer with two to three layers. For coffee filters, place one inside the strainer. Ensure the filter material covers the entire straining area. This setup collects all impurities. A clean setup prevents introducing new contaminants.
Step 3: Carefully Pour the Oil
Slowly pour the cooled oil from your deep fryer or pot into the prepared filter. Do not rush this step. Pouring too quickly can overwhelm the filter. This might cause a mess or allow particles to pass through. Allow the oil to drip through naturally. It may take some time, especially with coffee filters. Be patient. The slower the pour, the better the filtration. As you pour, watch for sediment at the bottom of the original container. Try to leave the heaviest sludge behind.
Step 4: Strain the Oil Multiple Times (Optional but Recommended)
For crystal-clear oil, repeat the straining process. You can use fresh filter material for each pass. This removes even the tiniest particles. The more times you strain, the cleaner your oil becomes. This step is especially useful if you fried heavily breaded foods. Repeated straining also helps if the oil has a lot of burnt bits. This method ensures maximum purity before storage.
Step 5: Store the Cleaned Oil Properly
After straining, transfer the cleaned oil into airtight containers. Glass jars or plastic bottles work well. Use a funnel to prevent spills. Label the container with the date of cleaning. This helps you track its freshness. Store the oil in a cool, dark place. A pantry or cupboard is ideal. Avoid direct sunlight or heat, as these shorten oil’s shelf life. Proper storage is crucial for maintaining oil quality.
Following these steps allows you to clean deep fry oil effectively. This practice saves money and enhances your cooking. Remember, a clean cooking environment supports food safety. Also, keep your cooking tools clean. You might find our guide on how to clean burnt oil from stainless steel pan useful for related cleanup. Also, for general kitchen upkeep, knowing how to clean bottom of pan can be helpful.
Advanced Techniques for Oil Clarification
Sometimes, simple straining is not enough. Oil can still look cloudy or retain subtle odors. Advanced techniques help clarify the oil further. These methods remove microscopic particles and neutralize odors. They bring your oil closer to its original state.
One popular method uses cornstarch. This technique is called flocculation. You mix a small amount of cornstarch with cold water to form a slurry. Then, you whisk this slurry into cooled deep fry oil. Heat the oil gently over low heat, stirring constantly. The cornstarch particles act like magnets. They attract and clump together tiny food particles and impurities. As the oil heats, the cornstarch mixture solidifies. This forms a gelatinous mass. This mass traps all the fine debris.
Once the cornstarch mixture solidifies and sinks, remove the oil from heat. Let it cool completely. Then, simply scoop out the solid cornstarch clump. You will notice the oil looks much clearer. This method is surprisingly effective for removing cloudiness. It also helps reduce unwanted odors. It works because cornstarch has a high surface area. This allows it to absorb impurities.
Another method involves using egg whites. Similar to cornstarch, egg whites coagulate when heated. They trap impurities as they cook. Whisk one egg white per gallon of cooled oil. Add it to the oil and heat gently. The egg white will clump up and float to the surface. Scoop out the cooked egg white and discard it. This also clarifies the oil and helps with odors. These advanced methods can significantly improve your oil’s quality. They make your clean deep fry oil truly sparkle.
Maintaining Your Deep Fryer for Oil Longevity
A clean deep fryer contributes directly to the longevity of your cooking oil. If your fryer is dirty, it will contaminate fresh or cleaned oil quickly. Regular maintenance prevents this. It also ensures safe and efficient operation of your appliance. Keeping your deep fryer clean is as important as cleaning the oil itself.
After each use, and once the oil is removed, wipe down the inside of the fryer. Remove any leftover crumbs or oil residue. These bits will burn and degrade the next batch of oil. Use paper towels or a soft cloth. For stubborn grease buildup, use a degreaser or hot soapy water. Always ensure the fryer is completely cool before cleaning. Never immerse electrical components in water.
A common issue is burnt-on oil residue on the heating elements or inside surfaces. These residues can be tough to remove. They contribute to off-flavors in your food. For these, a non-abrasive scrubber and a good kitchen degreaser work well. If you have a removable heating element, clean it separately. Ensure it is dry before reassembly. For persistent burnt oil, a mixture of baking soda and water can form a paste. Apply it and let it sit before scrubbing. This helps break down the burnt layer. You might find tips on how to clean oil out of oven useful for similar grease problems.
Remember to clean the fryer basket too. Food particles often stick to the mesh. Soak it in hot, soapy water to loosen debris. Scrub it with a brush. Rinse thoroughly and dry completely before storing. A clean fryer means your cleaned oil stays cleaner for longer. This extends its life and ensures better-tasting food.
When to Discard Deep Fry Oil and Safe Disposal
Even with meticulous cleaning, deep fry oil will eventually need to be discarded. Oil has a limited lifespan. Reusing oil too many times can affect food taste and quality. It can also pose health risks. Knowing when to discard oil is as important as knowing how to clean deep fry oil.
Several signs indicate oil is no longer fit for use. First, check the color. If the oil is very dark, almost black, it is time to discard it. It means too many burnt particles and degraded compounds are present. Second, pay attention to the smell. Fresh oil has a neutral or pleasant aroma. If your oil smells rancid, burnt, or like old fish, it is spoiled. Third, observe its consistency. If the oil becomes thick or gummy, it has broken down too much. Fourth, watch for excessive foaming or smoking at normal frying temperatures. This indicates a reduced smoke point. If the oil smokes heavily before food is even added, it is bad. Finally, if food fried in it comes out soggy, greasy, or tastes off, the oil is probably past its prime.
Do not pour used cooking oil down the drain. This causes severe plumbing issues. The oil solidifies and clogs pipes. It can also harm sewage systems and the environment. Instead, always dispose of oil safely. Allow the oil to cool completely. Pour it into a non-recyclable container with a lid. Empty milk cartons, old plastic bottles, or coffee cans work well. Seal the container tightly.
Once sealed, place the container in your regular trash. Some communities offer recycling programs for cooking oil. Check with your local waste management facility. They might have designated drop-off points. Proper disposal protects your plumbing and the environment. Learning how to clean up spilled oil can also be useful if accidents happen during disposal. You can also review how to clean up spilled oil for broader cleanup needs.
Maximizing Deep Fry Oil Life: Best Practices
Beyond cleaning, several practices help extend your deep fry oil’s useful life. These habits ensure you get the most out of your investment. Adopting them means less waste and better frying results. It is all about preserving the oil’s integrity.
First, avoid overheating your oil. Heating oil beyond its smoke point rapidly degrades it. Use a thermometer to monitor oil temperature. Adjust heat as needed to stay within the recommended range for your oil type. Different oils have different smoke points. Overheating creates harmful compounds and burnt flavors. This practice alone greatly improves oil longevity.
Second, avoid salting food directly over the fryer. Salt speeds up oil breakdown. It reacts with the oil and causes it to degrade faster. Salt also collects at the bottom of the fryer. This creates a crust that can be hard to clean. Salt your food after it comes out of the fryer. This simple change can make a big difference.
Third, filter your oil after every use. Even if you plan to use it again soon, filter it. Small food particles left in the oil will continue to cook and burn. This contaminates the entire batch. Immediate filtration prevents this ongoing degradation. It keeps your oil fresh for the next frying session. Consistent filtration is key to maximizing oil life.
Fourth, keep your oil covered when not in use. Exposure to air causes oxidation. Oxidation makes oil go rancid faster. Use an airtight lid on your fryer or storage container. Store the oil in a cool, dark place. Light also accelerates degradation. A pantry or cupboard is ideal. Do not store oil near the stove or in direct sunlight. Following these best practices helps you keep your deep fry oil in top condition. You will enjoy better frying and save money.
Troubleshooting Common Deep Fry Oil Issues
Even with proper cleaning and maintenance, you might encounter issues with your deep fry oil. Knowing how to troubleshoot these problems helps you decide the best course of action. It can save you from premature oil disposal.
Cloudy Oil After Filtering: If your oil still looks cloudy, it means very fine particles remain. Your current filter might not be fine enough. Try using multiple layers of cheesecloth. Alternatively, use a coffee filter or a paper towel as a second filter. These materials have smaller pores. They can trap the microscopic debris causing the cloudiness. You can also try an advanced clarification method like the cornstarch technique.
Oil Foams Excessively: Excessive foaming often indicates oil degradation. It happens when water content or free fatty acids build up. If the foaming is mild, try frying a few slices of bread. The bread can absorb some impurities. If foaming persists or becomes severe, it is a strong sign the oil needs to be discarded. New oil should not foam much.
Unpleasant Odor: A strong, unpleasant odor, like fishy, burnt, or rancid, means the oil is spoiled. Filtration may remove some smell from burnt food particles. However, if the oil itself smells bad, its chemical structure has changed. This oil is no longer safe or pleasant for cooking. It is time to discard it. No amount of cleaning will fix a truly rancid oil.
Food Tastes Off: If your fried food absorbs bad flavors, the oil is the culprit. Even if the oil looks okay, it might have absorbed flavors from previous foods. Overused oil also makes food greasy or soggy. This is because degraded oil does not cook food evenly. If your food quality suffers, discard the oil. It has lost its frying integrity.
By understanding these common issues, you can make informed decisions. Learning to clean deep fry oil helps, but knowing when to let it go is also vital. This ensures you always cook with quality oil.
FAQ Section
How many times can I reuse deep fry oil?
You can generally reuse deep fry oil 3 to 6 times. The number depends on what you fry and how well you clean the oil. Frying battered foods or fish degrades oil faster. Proper filtration and storage maximize reuse. Always check for color, smell, and consistency before each use.
Can I mix old and new deep fry oil?
It is not ideal to mix old and new deep fry oil. The degraded compounds in old oil will quickly break down the fresh oil. This shortens the lifespan of the new oil. It is best to keep old and new oil separate. Use the older, cleaned oil first.
How long can cleaned deep fry oil be stored?
Cleaned deep fry oil can be stored for 1 to 3 months. Proper storage in an airtight container in a cool, dark place is crucial. Humidity and exposure to air or light speed up degradation. Always check the oil’s quality before reusing it, even if stored correctly.
What is the best way to filter deep fry oil?
The best way to filter deep fry oil is to use a fine-mesh strainer lined with multiple layers of cheesecloth or a coffee filter. This combination removes most food particles. Allowing the oil to cool completely before filtering ensures safety and effectiveness. Repeat filtering for clearer oil.
Can oil be cleaned without special tools?
You can clean deep fry oil without special tools. Use a regular kitchen strainer and a few layers of clean paper towels or a clean old T-shirt. A large bowl can collect the filtered oil. This basic setup removes most larger food particles. It offers a simple, effective cleaning solution.
Conclusion
Learning how to clean deep fry oil is a smart practice for any home cook. It extends the life of your cooking oil, saving you money and reducing waste. We have covered everything from understanding oil degradation to proper storage. You now know the essential tools and step-by-step cleaning methods. Advanced techniques like cornstarch clarification can give you crystal-clear results.
Remember, maintaining your deep fryer is also key to oil longevity. A clean fryer prevents contamination. Knowing when to discard oil is as important as cleaning it. Watch for signs of spoilage like dark color, unpleasant smell, or excessive foaming. Always dispose of used oil safely.
By following these guidelines, you ensure better-tasting fried foods. You also contribute to a more sustainable kitchen. Take control of your deep frying experience. Start cleaning your deep fry oil today. Enjoy crispier, healthier results with every batch.
- deep fry oil cleaning
- filter frying oil
- reuse cooking oil
- deep fryer cleaning
- oil maintenance