· Automotive Maintenance · 20 min read
How To Clean Engine Air Filter
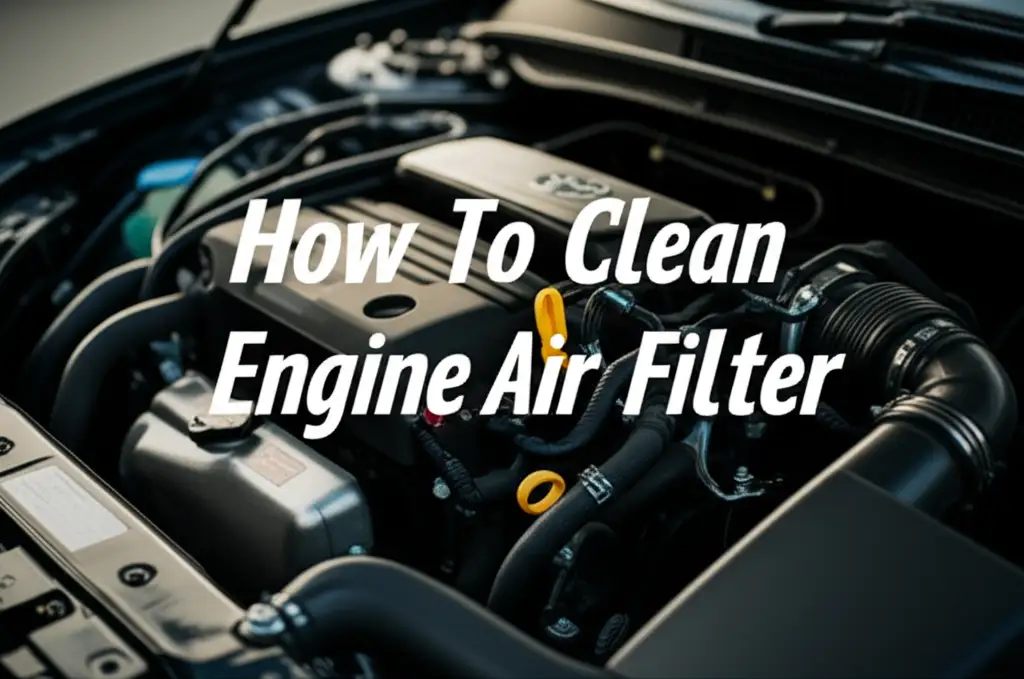
Clean Your Engine Air Filter for Peak Performance
A clean engine air filter is vital for any vehicle. It helps your engine breathe properly. When dirt or debris clogs the filter, engine performance drops. Your car might use more fuel or struggle to accelerate. Learning how to clean engine air filter saves money and improves your car’s life.
Many people overlook this simple task. Yet, it offers big benefits. A clean filter ensures optimal airflow to the engine. This leads to better fuel economy and consistent power. Regular cleaning extends the life of your filter. It also prevents costly engine problems later. In this guide, I will share easy steps. We will cover different filter types. You can keep your engine running smoothly.
Takeaway
- Regularly clean washable engine air filters to boost performance and fuel economy.
- Identify your filter type (oiled cotton, foam) before cleaning to use correct methods.
- Always let filters dry completely before reinstalling them to prevent engine damage.
How do you clean an engine air filter?
To clean an engine air filter, remove it from its housing. For oiled cotton filters, apply a special cleaning solution, rinse with low-pressure water, and let it air dry. For foam filters, use warm soapy water, rinse thoroughly, and allow it to dry completely before re-oiling (if applicable) and reinstalling. Dry paper filters are generally not cleaned but replaced.
Boost Performance: Why Clean Your Engine Air Filter?
Cleaning your engine air filter plays a big role in car health. This small part has a huge impact on how your engine runs. A clean filter allows air to flow freely. This airflow is essential for the combustion process inside your engine.
When the air filter gets dirty, it restricts this vital airflow. Imagine trying to run a marathon while breathing through a tiny straw. Your engine feels the same way. Restricted airflow means your engine works harder to pull in enough air. This extra effort burns more fuel. You will notice lower fuel efficiency. Your gas mileage drops.
A dirty filter also affects engine power. You might feel your car hesitating. It may accelerate slower. The overall performance feels sluggish. This happens because the fuel-to-air mixture becomes unbalanced. The engine does not get enough oxygen. Cleaning the filter restores this balance. It brings back lost horsepower. Your car feels more responsive again.
Furthermore, a clean filter protects your engine from harmful particles. Dust, dirt, and debris are everywhere on the road. The filter traps these tiny invaders. If the filter is clogged, some particles might sneak through. These particles can damage sensitive engine components. They can scratch cylinder walls. This leads to premature wear and tear. Regular cleaning keeps these harmful elements out. It extends your engine’s lifespan significantly.
Think of it as preventive medicine for your car. It is a simple, inexpensive maintenance task. It avoids more expensive repairs down the line. A clean engine air filter means a healthier engine. It means better fuel economy. It means a more enjoyable driving experience for you.
Know Your Filter: Types of Engine Air Filters Explained
Before you start cleaning, you need to know your air filter type. Not all engine air filters are the same. Each type requires a different cleaning approach. Using the wrong method can damage the filter. It can even harm your engine.
The most common type is the dry paper filter. These filters are often white or off-white. They have many pleats. These pleats increase the surface area for trapping particles. Paper filters are designed for one-time use. You usually cannot clean them effectively. Water or compressed air can damage the paper fibers. This creates holes. These holes allow dirt to pass through. If you have a dry paper filter, you should replace it when it gets dirty.
Another popular type is the oiled cotton gauze filter. Brands like K&N, AEM, and Spectre make these. These filters use layers of cotton gauze. They are treated with a special oil. The oil helps trap very fine dust particles. These filters are often red, blue, or gray. They are designed to be reusable. You can wash and re-oil them. Cleaning these filters saves money over time. It also reduces waste. Cleaning specific filters like a Spectre air filter or an AEM air filter requires specific kits.
Foam air filters are also common. You find them in motorcycles, ATVs, and lawn mowers. These filters use a porous foam material. The foam captures dirt and dust. Some foam filters are pre-oiled. Others are used dry. They are very durable. You can wash and reuse them many times. Knowing how to clean a foam air filter is a valuable skill for small engine owners.
Lastly, some performance vehicles might use synthetic filters. These filters are made from synthetic fibers. They offer excellent filtration and airflow. Some synthetic filters are washable. Others are not. Always check the manufacturer’s recommendations for your specific filter. Identifying your filter type is the first crucial step. It ensures you use the correct cleaning method. This prevents damage and keeps your engine protected.
Pre-Cleaning Checklist: Tools and Safety for Air Filters
Before you begin cleaning your engine air filter, gather all necessary tools. Proper preparation makes the job easier and safer. You want to have everything ready before you start disassembling anything. This prevents delays and ensures you do the job right.
First, consider safety. Always wear safety glasses or goggles. Air filters can hold a lot of dust and debris. This can fly into your eyes during removal or cleaning. Gloves are also a good idea. They protect your hands from dirt, oil, and cleaning solutions. If you are working on a hot engine, allow it to cool down completely. Touching hot engine parts can cause burns.
Next, gather your tools and supplies. The specific items depend on your filter type.
For oiled cotton gauze filters, you will need:
- Air filter cleaning kit: These kits usually contain a cleaning solution and a re-oiling spray or bottle. Brands like K&N sell specific kits.
- Soft brush: For gently loosening stubborn dirt.
- Low-pressure water source: A garden hose with a sprayer works well. Avoid high-pressure washers.
- Clean rags or paper towels: For wiping down surfaces.
- Protective tarp or cardboard: To protect your work area from drips.
For foam air filters, you will need:
- Warm, soapy water: A mild detergent or dish soap works fine.
- Two buckets: One for washing, one for rinsing.
- Clean rags: For drying and wiping.
- Foam filter oil (if applicable): Some foam filters require re-oiling.
- Safety glasses and gloves: Always essential.
For dry paper filters, remember you usually replace them. You will just need a new filter. A screwdriver or wrench might be needed to open the airbox. Having a vacuum cleaner nearby can help clean the airbox itself.
Always check your car’s owner’s manual. It provides specific instructions for your vehicle’s air filter. It also lists recommended cleaning products or replacement intervals. Having the right tools and knowing the proper safety steps makes the cleaning process simple. It ensures you clean your filter effectively.
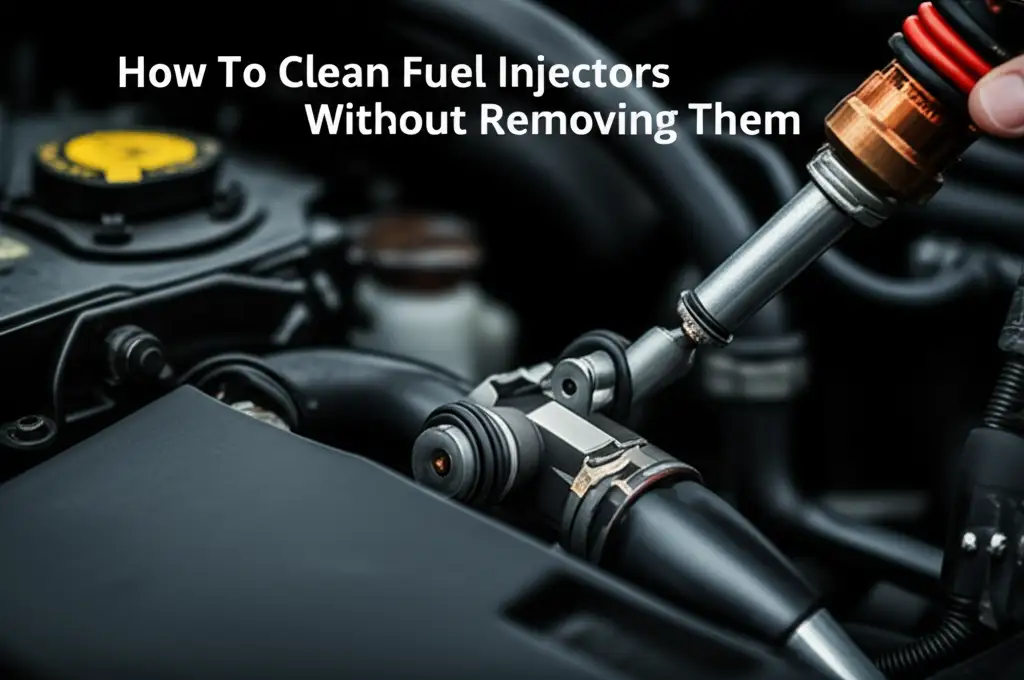
Cleaning Oiled Cotton Gauze Filters: A Step-by-Step Method
Oiled cotton gauze filters are popular for their reusability and performance. Brands like K&N, AEM, and Spectre make these. Cleaning them properly is important. It ensures they continue to filter air effectively. You need a specific cleaning kit for these filters.
Step 1: Remove the Air Filter
First, locate your engine air filter housing. It is usually a large black box connected to the engine by a hose. Use a screwdriver or wrench to unclamp the housing. Carefully remove the dirty air filter. Be gentle not to dislodge excess dirt into the intake. Some dust will fall.
Step 2: Apply Cleaning Solution
Lay the filter on a protected surface. Spray the special air filter cleaner generously onto both sides of the filter. Make sure to saturate all the pleats. The cleaner will loosen dirt and break down the old oil. Let the cleaner soak for about 10-15 minutes. Do not let it dry on the filter.
Step 3: Rinse the Filter
After soaking, rinse the filter with cool, low-pressure water. Start rinsing from the clean side (the inside) of the filter. This pushes the dirt out of the pleats, not further in. Continue rinsing until the water runs clear. Use low pressure to avoid damaging the delicate cotton gauze. Avoid high-pressure nozzles. You can clean filters like a Harley air filter or a motorcycle air filter using this method too.
Step 4: Dry the Filter
This step is critical. Shake off excess water from the filter. Place the filter in a clean, dry area. Allow it to air dry completely. This can take several hours, or even a full day. Do not use compressed air or heat guns. These can damage the cotton fibers. The filter must be bone dry before you apply oil. Reinstalling a wet filter can damage your engine’s mass airflow sensor.
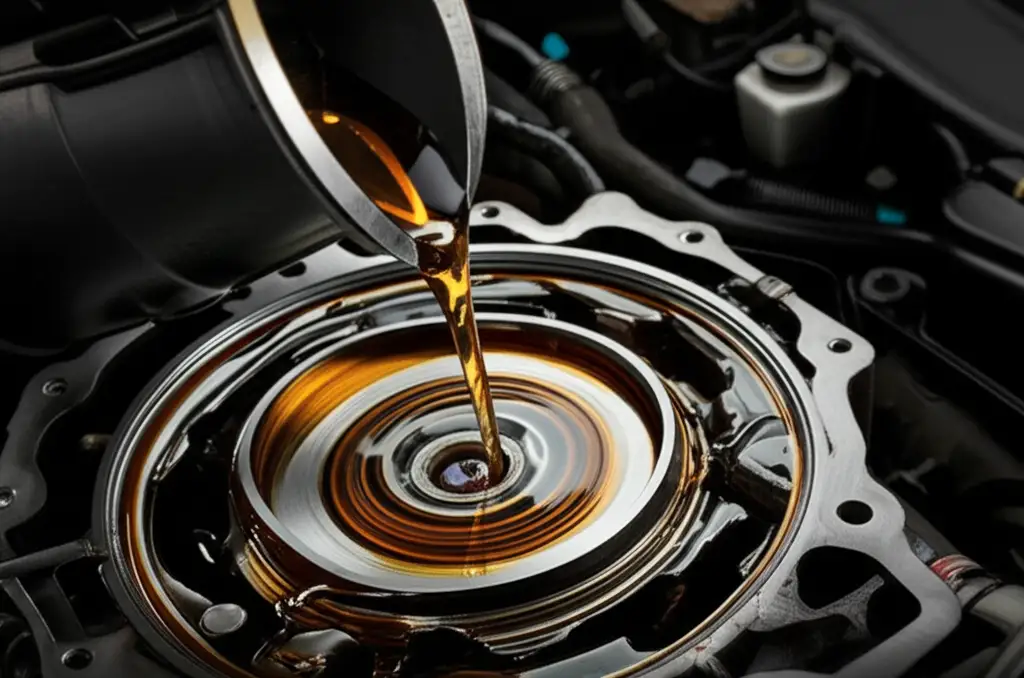
Step 5: Re-oil the Filter
Once the filter is completely dry, it needs re-oiling. Use the specific air filter oil from your cleaning kit. Apply the oil evenly along the pleats. Do this from the clean side. The oil will wick into the cotton. Do not over-oil the filter. Excess oil can restrict airflow. It can also contaminate your mass airflow sensor. A light, even coating is enough. The oil provides the necessary stickiness to trap fine dust.
Step 6: Reinstall the Filter
After oiling, allow the oil to absorb for about 20 minutes. Check for any dry spots and apply a little more oil if needed. Once ready, carefully reinstall the clean, oiled filter into your airbox. Make sure it seats properly. Close the housing and secure all clamps or screws. You have now successfully cleaned your oiled cotton gauze filter.
Rejuvenate Foam Air Filters: Simple Cleaning Steps
Foam air filters are common in off-road vehicles and small engines. You find them in ATVs, motorcycles, and lawn mowers. These filters are very durable and reusable. Cleaning them is a straightforward process. It helps maintain engine health.
Step 1: Remove the Foam Filter
Locate the air filter housing on your engine. This might be under the seat on a motorcycle or ATV. On a lawn mower, it is usually a small box near the carburetor. Unclamp or unscrew the housing cover. Carefully pull out the foam filter. Be ready for some loose dirt to fall.
Step 2: Pre-Clean the Filter
Shake off any large pieces of dirt or debris. You can gently tap the filter against a hard surface. This removes the bulk of the loose contaminants. This step makes the washing process easier.
Step 3: Wash the Filter
Fill one bucket with warm water and a mild detergent. Dish soap works well. Submerge the foam filter in the soapy water. Gently knead and squeeze the filter. This pushes the dirt out of the foam pores. Continue washing until the water becomes very dirty. Replace the dirty water with fresh soapy water if needed. You can use this method to clean an ATV air filter or a chainsaw air filter.
Step 4: Rinse the Filter
Fill a second bucket with clean, cool water. Transfer the foam filter to this bucket. Rinse the filter thoroughly by kneading and squeezing it in the clean water. Continue rinsing until all soap residue is gone and the water runs clear. Make sure no soap suds remain.
Step 5: Dry the Filter
Squeeze out as much excess water as possible from the foam filter. Do not wring it forcefully, as this can tear the foam. Place the filter on a clean towel. Allow it to air dry completely. This might take several hours. Avoid direct sunlight or heat sources. They can degrade the foam material. Do not use compressed air. Ensure the filter is bone dry before proceeding.
Step 6: Re-oil the Filter (If Applicable)
Many foam filters require oiling to trap fine dust. If your filter was oiled before cleaning, you need to re-oil it. Apply a specialized foam filter oil. Pour a small amount of oil into a clean plastic bag. Put the dry foam filter into the bag. Knead the bag gently. This distributes the oil evenly throughout the foam. The filter should be lightly saturated but not dripping. Too much oil can restrict airflow.
Step 7: Reinstall the Filter
Once the filter is properly oiled and ready, carefully reinstall it into its housing. Ensure it fits snugly. Close the airbox cover. Secure all clamps or screws. Your foam air filter is now clean and ready to protect your engine. This ensures your small engine runs efficiently, whether it’s a lawn mower air filter or another piece of equipment.
Small Engine Air Filters: Cleaning for Mowers, ATVs, and More
Small engines power many of our tools and vehicles. Lawn mowers, ATVs, chainsaws, and generators all use small engines. Just like car engines, these also need clean air filters. Regular cleaning ensures these engines run well. It extends their lifespan.
Small engine air filters often come in foam or paper types. Foam filters are common. They are durable. You can wash and reuse them. Paper filters, on the other hand, are usually disposable. They should be replaced when dirty. Always check your equipment’s manual. It will tell you the specific filter type.
For foam filters in small engines, the cleaning process is similar to what we discussed. First, remove the filter from its housing. Shake off loose dirt. Then, wash it in warm, soapy water. Use a mild detergent. Knead the filter gently to work out the grime. Rinse it thoroughly under clean water. Squeeze out excess water. Let it air dry completely. If the filter was previously oiled, re-oil it with specific foam filter oil. Then, reinstall it. This routine helps your ATV air filter or chainsaw air filter perform its best.
Paper filters for small engines cannot be washed. Water damages the paper pleats. Using compressed air can also be harmful. High-pressure air can blow holes in the filter material. These holes let dirt pass straight into the engine. If your small engine has a paper filter, simply replace it with a new one. This is the most effective way to keep your engine protected.
Maintaining the air filter in your small engine is simple. It makes a big difference. A clean filter helps your equipment start easily. It runs smoother. It lasts longer. Do not forget this simple maintenance task for your outdoor power equipment. It pays off in reliable performance.
When to Clean vs. Replace: Making the Right Engine Filter Choice
Deciding whether to clean or replace your engine air filter is crucial. It depends primarily on the type of filter you have. Misunderstanding this can lead to poor engine performance or damage. I want to help you make the right choice every time.
Most factory-installed air filters in modern cars are made of pleated paper. These dry paper filters are designed for a single use. They are very good at trapping dirt. However, they are not meant to be cleaned. Trying to wash a paper filter damages its delicate structure. The paper fibers break down. This creates holes that allow unfiltered air and dirt to enter your engine. Using compressed air on them can also cause tiny tears. If you have a dry paper filter, always replace it when it gets dirty. The replacement interval is usually every 15,000 to 30,000 miles, or annually. Check your vehicle’s owner’s manual for precise recommendations.
Reusable air filters, such as oiled cotton gauze filters (like K&N or AEM) or foam filters, are made to be cleaned. These filters are an investment. They cost more upfront. But their ability to be cleaned and reused saves money in the long run. They also offer excellent airflow, which can slightly boost engine performance in some cases. If you own one of these filters, cleaning it is the recommended maintenance. Follow the specific cleaning instructions for your filter type.
So, how do you decide? Inspect your filter. If it is a white or yellowish pleated paper filter, and it looks dark with accumulated dirt, it needs replacing. If it is a red, blue, or gray oiled cotton filter, or a colored foam filter, and it looks dirty, it is time for a thorough cleaning.
Knowing the difference prevents engine harm. It saves you money. It ensures your engine always has a supply of clean air. This keeps it running efficiently and powerfully. Make the right choice for your filter type.
Avoid These Mistakes When Cleaning Engine Air Filters
Cleaning your engine air filter can save you money. However, making mistakes during the process can do more harm than good. I want to highlight common pitfalls. Avoiding them ensures your filter lasts longer and your engine stays safe.
One common mistake is using the wrong cleaning solution. For oiled cotton filters, you must use a specific air filter cleaner. Do not use harsh detergents, gasoline, or degreasers. These can strip the oil from the cotton. They can also damage the filter material. For foam filters, a mild soap is usually fine. Always check the manufacturer’s recommendations.
Another major error is using high-pressure water or compressed air. This is especially true for delicate cotton gauze or foam filters. High pressure can tear the filter media. It can blow holes in the pleats. These holes create pathways for dirt to bypass the filter. Your engine will then ingest unfiltered air. This causes premature engine wear. Always use low-pressure water for rinsing. Allow filters to air dry naturally.
Not letting the filter dry completely before re-oiling or reinstalling is another significant mistake. If an oiled filter is still damp, the new oil will not adhere properly. It will not spread evenly. More importantly, moisture entering your engine’s intake system can cause issues. It can corrode components. It can also foul your mass airflow sensor. This leads to poor engine performance and error codes. Always ensure the filter is bone dry. This means hours, sometimes even a full day, of air drying. Patience is key here.
Over-oiling an oiled cotton filter is also a common error. Applying too much oil can restrict airflow. This defeats the purpose of a high-flow filter. Excess oil can also get pulled into the intake system. It can coat and contaminate the mass airflow (MAF) sensor. A dirty MAF sensor can cause rough idling, poor fuel economy, and a check engine light. Apply oil sparingly and evenly. Allow it to wick into the filter media.
Finally, failing to properly reinstall the filter is dangerous. The filter must seat snugly in its housing. All clamps and screws need to be secure. If the housing is not sealed correctly, unfiltered air can bypass the filter. This directly exposes your engine to dirt and debris. Always double-check your work before closing the hood. Avoid these common mistakes. Your engine will thank you.
Signs of a Dirty Filter: Is Your Engine Air Filter Clogged?
Your engine air filter works hard. It cleans thousands of gallons of air every minute your car runs. Over time, it collects a lot of dirt, dust, and debris. When it gets too clogged, your car will show signs. Knowing these signs helps you know when to clean or replace your filter.
One of the most common signs is reduced fuel efficiency. Your engine needs a precise mix of air and fuel to run efficiently. A dirty air filter restricts airflow. This throws off the air-fuel ratio. The engine compensates by burning more fuel to make power. You will notice yourself filling up at the gas station more often. Your miles per gallon will drop significantly.
Another clear sign is decreased engine performance. Your car might feel sluggish. It may accelerate slowly. You might struggle to maintain speed on hills. This happens because the engine is starved of air. It cannot produce its full power output. You might also notice a rough idle. The engine idles unevenly. It might even stall.
Unusual engine sounds can also point to a dirty filter. If your engine makes a strange sucking or wheezing noise, it might be trying to pull air through a clogged filter. You might also hear unusual vibrations. These sounds indicate the engine is working harder than it should.
A visible inspection is often the easiest way to tell. Remove your air filter. Hold it up to a light source. If you cannot see light passing through the filter material, it is likely too dirty. A clean paper filter allows light through. An oiled or foam filter will be dark, but you should still see consistent color. Check for excessive dirt, grime, or tears.
Finally, a “Check Engine” light might illuminate. While this light can indicate many issues, an extremely dirty air filter can sometimes trigger it. This happens if the lack of airflow affects critical sensors, like the mass airflow sensor. If you notice any of these signs, it is time to check your engine air filter. Taking action quickly will prevent further issues.
Maintaining Your Clean Filter & Knowing When to Replace It
Cleaning your engine air filter is a great start. But proper maintenance extends its life. It also ensures your engine stays healthy. It is not just about cleaning. It is about understanding filter longevity.
After cleaning, always store any leftover cleaning solutions or oil properly. Keep them in a cool, dry place. This ensures they are ready for your next cleaning session. If you use a reusable filter, schedule regular inspections. Check your filter every 5,000 to 10,000 miles. This interval depends on your driving conditions. Dusty environments require more frequent checks. Off-roading, for example, will dirty your filter much faster than highway driving.
Even reusable filters do not last forever. Over time, the filter media can degrade. The cotton gauze might fray. Foam filters can become brittle. The pleats on an oiled filter can start to collapse. Eventually, cleaning will no longer restore its full performance. At this point, it is time to replace the filter entirely.
How do you know when to replace a reusable filter? Look for physical damage. Check for tears in the cotton or foam. Inspect for holes. See if the rubber or plastic sealing gasket is cracked or deformed. If the pleats are permanently matted down, or the filter just feels flimsy, it is likely past its prime. Even if you clean it, a damaged filter will not protect your engine properly.
For disposable paper filters, replacement is the only option. Always follow your car’s manufacturer guidelines. These are in your owner’s manual. Typically, paper filters need replacement every 15,000 to 30,000 miles. However, I often recommend checking it annually. If you live in a dusty area, replace it more frequently.
Maintaining your filter means consistency. Regular checks, proper cleaning techniques, and knowing when to replace it are key. This simple routine protects your engine. It ensures you get the best performance and fuel economy from your vehicle for years to come.
FAQ Section
How often should I clean my engine air filter?
The frequency depends on your filter type and driving conditions. For reusable oiled cotton or foam filters, check every 5,000 to 10,000 miles. Clean them when they appear visibly dirty. If you drive on dusty roads often, you may need to clean it more frequently. Always inspect it visually during routine maintenance.
Can I use dish soap to clean my engine air filter?
You can generally use mild dish soap for foam air filters. For oiled cotton gauze filters (like K&N or AEM), you must use a specialized cleaning solution. Dish soap can strip the oil improperly or damage the cotton fibers. Always refer to the filter manufacturer’s cleaning instructions.
- engine maintenance
- car care
- air filter cleaning
- DIY auto
- vehicle performance
- fuel efficiency
- automotive repair