· Skincare & Beauty · 19 min read
How To Clean Face Brush
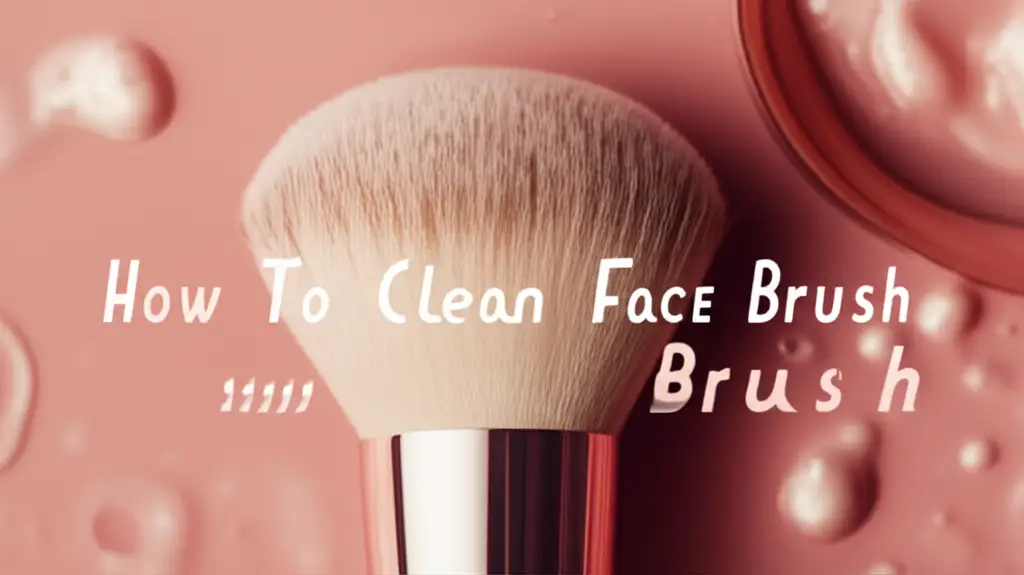
How To Clean Face Brush: Essential Steps for Clear Skin
Do you ever think about the tools you use for your face? Your face brush is a key part of your beauty routine. It helps apply foundation, powder, blush, or even cleanses your skin. However, a dirty brush can do more harm than good.
Cleaning your face brush is essential for healthy skin. A dirty brush holds old makeup, oil, dead skin cells, and bacteria. Using it can lead to breakouts and dull skin. I will show you how to clean face brushes effectively. This guide will cover why cleaning matters, how often to clean, what supplies you need, step-by-step methods, and proper drying and storage. Get ready for a healthier skincare routine.
Takeaway
- Frequency: Clean daily for cleansing brushes, weekly for makeup brushes.
- Supplies: Use gentle cleansers like baby shampoo or specific brush cleaner.
- Method: Lather bristles, rinse thoroughly until water runs clear.
- Drying: Reshape bristles, lay flat or hang upside down.
- Benefits: Prevents breakouts, extends brush life, improves makeup application.
To clean a face brush, wet its bristles with lukewarm water. Apply a small amount of gentle cleanser, like baby shampoo, onto the bristles. Gently massage the brush on a cleaning mat or your palm to create a lather. Rinse the bristles thoroughly under running water until the water runs clear. Squeeze out excess water and reshape the brush head. Lay the brush flat on a clean towel to air dry completely.
Why A Clean Face Brush Matters for Your Skin
Using a clean face brush is more important than you might think. Many people overlook this simple step. However, it directly impacts your skin’s health and the effectiveness of your makeup or skincare products. I want to explain why this practice is so vital.
A dirty face brush collects a lot of unwanted things. Imagine all the leftover makeup, oils from your skin, dead skin cells, and even dust from the air. These things build up in the bristles over time. When you use a dirty brush, you are putting all that debris back onto your clean face. This can clog your pores.
Clogged pores often lead to skin issues. Breakouts, blackheads, and whiteheads can appear. This happens because bacteria from the brush transfer to your skin. If you have sensitive skin, dirty brushes can cause irritation or redness. Cleaning your face brush helps prevent these problems. It keeps your skin clear and healthy.
Beyond skin health, a clean brush performs better. Old product residue can make your foundation look streaky. It can make your blush look patchy. Clean bristles apply products smoothly and evenly. This gives you a flawless finish every time. A clean brush also feels softer on your skin. It makes your makeup application a more pleasant experience.
Finally, regular cleaning extends your brush’s life. Dirt and product buildup can break down the bristles. This damages your brush over time. Proper cleaning keeps the bristles soft and intact. It ensures your favorite brushes last longer. This saves you money in the long run. Caring for your tools cares for your skin. It also helps preserve your investment in good brushes.
How Often to Clean Your Face Brush: A Schedule
Deciding how often to clean your face brush depends on its type and how often you use it. There is no single rule for all brushes. However, following a good schedule helps keep your skin clear and your brushes in top condition. I will guide you through common recommendations.
For brushes you use daily, like a foundation brush or a damp beauty blender, more frequent cleaning is best. These brushes come into direct contact with wet products and your skin’s oils. They can grow bacteria quickly. I suggest cleaning these tools after every use, or at least every few days. A quick daily clean prevents major buildup. This keeps them hygienic for your skin.
Brushes used for powder products, such as blush brushes or setting powder brushes, need less frequent cleaning. They do not get as saturated with oils and wet products. I recommend cleaning these brushes deeply once a week. This weekly routine removes any accumulated powder, skin cells, and oils. It ensures a fresh application each time.
For cleansing brushes, like electric facial brushes, cleaning is a daily task. These brushes remove dirt, oil, and makeup from your face. They collect a lot of impurities during each wash. After every use, rinse the brush head thoroughly. Remove any visible residue. Then, perform a deeper clean once or twice a week. This keeps the bristles effective and bacteria-free. Remember, if you use a specific cleansing brush, check its manufacturer’s instructions for the best cleaning practice.
If you have multiple brushes and rotate them, you might adjust your schedule. The key is to avoid visible buildup. You should also watch for changes in performance. If your brush feels stiff or applies product poorly, it needs a wash. Regular cleaning maintains hygiene. It also keeps your skin looking its best. Consistency in cleaning makes a big difference.
Gathering Your Supplies to Clean Face Brushes
Before you start cleaning your face brushes, you need to gather the right supplies. Using the correct products helps clean your brushes effectively. It also protects the delicate bristles. You likely have most of these items at home already. I will list what you need to get started.
First, you need a gentle cleaning solution. Many options work well. You can use a dedicated brush cleanser. These products are formulated specifically for brush bristles. They remove makeup and oils without causing damage. Alternatively, baby shampoo is an excellent, affordable choice. It is mild and free of harsh chemicals. This makes it safe for both synthetic and natural brush hairs. Some people use gentle dish soap, but be careful. Ensure it is very mild and designed for sensitive items. You can also use a mild bar soap. I personally find baby shampoo to be a reliable choice.
Next, you need water. Lukewarm, running water is ideal for rinsing. Make sure you have access to a sink with a faucet. The water helps wash away the cleanser and loosened dirt. It also prepares the brush for cleaning.
A cleaning mat or textured surface is very helpful. These silicone mats have different textures. They help agitate the bristles. This dislodges makeup and dirt more effectively. If you do not have a specific brush cleaning mat, your clean palm works just fine. The friction helps create a lather and deep clean the bristles. Remember to keep your palm clean during the process.
You will also need a clean towel. A soft, absorbent towel is perfect for drying your brushes. It helps wick away excess water. This speeds up the drying process. It also prevents mildew. Do not use a rough towel. It can damage delicate bristles.
Finally, consider a brush drying rack if you have many brushes. These racks hold brushes upside down. This helps water drain away from the ferrule. The ferrule is the metal part connecting the bristles to the handle. Water sitting there can loosen the glue. It can also cause mold. A rack prevents this. However, laying them flat on a towel works well too. Having these supplies ready makes the cleaning process simple and efficient.
Step-by-Step: The Best Way to Clean Your Face Brush
Cleaning your face brush correctly makes a big difference. It keeps your skin clear and your tools working well. This section breaks down the process into easy steps. I will cover both daily gentle cleaning and a more thorough weekly deep clean.
Daily Gentle Cleaning Routine
This routine is perfect for brushes you use every day, especially those for liquid or cream products. It keeps them fresh between deep washes.
- Wet the Bristles: Hold the brush head under lukewarm running water. Only wet the bristles. Keep the handle and ferrule dry. Water entering the ferrule can weaken the glue.
- Apply Cleanser: Put a small drop of your gentle cleanser (like baby shampoo) onto your palm. You can also use a dedicated brush cleaning spray for a quick clean.
- Lather and Swirl: Gently swirl the wet bristles in the cleanser on your palm. Create a lather. You will see makeup residues start to release. If you have a silicone cleaning mat, swirl the brush on its textured surface. This helps remove stubborn dirt.
- Rinse Thoroughly: Rinse the bristles under lukewarm running water. Continue rinsing until the water runs completely clear. Make sure no soap or makeup remains.
- Squeeze and Reshape: Gently squeeze excess water from the bristles. Use a clean towel for this. Reshape the brush head to its original form. This helps it dry properly.
- Air Dry: Lay the brush flat on a clean, dry towel. Allow it to air dry completely before storing. Never dry them upright in a cup. This lets water seep into the ferrule.
Weekly Deep Cleaning Method
A deep clean is essential for all your face brushes. This removes embedded dirt and ensures true sanitation. This method helps tackle stubborn makeup or general grime that accumulates over time. If you notice your brush still has stains after cleaning, you might need a more focused approach. Sometimes, particular products can leave resilient marks. For instance, removing tough paint stains from a brush can be similar to dealing with heavy makeup buildup, which often requires specific techniques beyond just soap and water. You can find more detailed advice on tackling such persistent issues by looking into how to clean stain off a brush. This deeper look ensures your brushes are not just clean, but truly spotless.
- Prepare a Basin: Fill a small basin or cup with lukewarm water. Add a capful of brush cleanser or a generous amount of baby shampoo. Mix it gently.
- Soak (Optional, for very dirty brushes): For very dirty brushes, you can briefly dip only the bristles into the cleaning solution. Do not submerge the ferrule. A soak of a few minutes helps loosen stubborn makeup.
- Lather and Clean: Take one brush at a time. Wet its bristles in the solution. Then, swirl the brush on a cleaning mat or your palm. Work up a good lather. Continue until the lather looks clean. If you are dealing with particularly stubborn grime or heavy product buildup, this step might take a bit longer. For example, some makeup products can create a dense residue that acts much like the challenging buildup seen on hair brushes. If you have ever wondered how to clean buildup on a hair brush, similar principles apply here: gentle but persistent agitation is key. Focus on working the cleanser deeply into the bristles without damaging them.
- Rinse Each Brush: Rinse each brush under lukewarm running water. Keep the brush pointing downwards. This prevents water from entering the ferrule. Rinse until all soap and makeup are gone. The water should be clear. If you find that the brush still retains color or appears stained after this wash, you might be dealing with a persistent dye or pigment. In such cases, specific methods may be needed to completely remove the lingering tint. For comprehensive solutions, consider looking into how to clean brush after staining for more advanced techniques.
- Final Squeeze and Reshape: Gently squeeze excess water out of the bristles. Use a clean, dry towel. Reshape the brush head to its original form. This ensures proper drying and maintains the brush’s shape.
- Proper Drying: Lay the brushes flat on a clean towel. Ensure air can circulate around them. You can also hang them upside down if you have a brush drying rack. This is crucial for preventing mold and preserving the brush’s integrity. Never stand them upright to dry.
By following these steps, your face brushes will remain clean, hygienic, and ready for use. This care routine benefits both your brushes and your skin.
Proper Drying Techniques for Face Brushes
Drying your face brushes correctly is just as important as cleaning them. Improper drying can lead to several problems. It can damage your brushes, promote mold growth, or even loosen the ferrule. I will explain the best ways to dry your brushes to keep them in excellent condition.
After cleaning your face brush, the first step is to remove as much excess water as possible. Gently squeeze the bristles. Use a clean, absorbent towel. Do this carefully. You want to avoid pulling or bending the bristles harshly. The goal is to get rid of drips. Reshape the brush head to its original form. This helps maintain its shape as it dries. A misshapen brush may not apply products evenly.
Now, choose your drying method. The best method is to lay your brushes flat on a clean towel. Ensure the towel is dry and provides a stable surface. You can angle the brush slightly so the bristles are lower than the handle. This helps any remaining water drain away from the ferrule. Air circulation is key. Do not put them in a confined space. A well-ventilated room is perfect. Placing them near an open window can speed up the process.
Another effective method is using a brush drying rack. These racks typically hold brushes upside down. This position allows gravity to pull water away from the ferrule and handle. This is the safest way to prevent water damage to the glue. It also stops mold from forming inside the brush head. If you frequently clean many brushes, a drying rack is a worthwhile investment. It helps maintain the integrity of your brushes for a longer time.
Never stand your brushes upright in a cup or container to dry. This is a common mistake. Water will seep into the ferrule. It will loosen the glue that holds the bristles. This can cause bristles to shed. It can also lead to mold or mildew growth within the brush head. This makes your brush unusable and unhygienic.
Avoid using direct heat sources for drying. Do not use a hairdryer, radiator, or direct sunlight. High heat can melt synthetic bristles. It can also dry out and damage natural bristles. Heat can also break down the glue in the ferrule. Air drying at room temperature is the safest and most effective method. Be patient. It can take several hours, or even overnight, for brushes to dry completely. Always ensure they are completely dry before you store them. This prevents any moisture-related issues. Proper drying ensures your brushes are ready for their next use.
Storing Your Clean Face Brushes for Longevity
Proper storage of your clean face brushes is essential for their longevity. It also ensures they stay hygienic between uses. After you take the time to clean and dry your brushes, you do not want to undo all that good work with poor storage. I will share the best ways to keep your brushes safe and clean.
First, ensure your brushes are completely dry before storing them. Even a little moisture can lead to mildew or mold growth. This can damage the bristles and make the brush unsafe to use. If you are unsure, let them air dry for a few more hours. This small wait prevents big problems.
Store your brushes in a clean, dry place. Avoid humid environments like bathrooms immediately after a shower. High humidity can encourage bacteria and mold. A bedroom vanity or a dedicated makeup drawer is often a better choice. The area should be free from dust and direct sunlight. Direct sunlight can cause bristles to fade or dry out over time.
One common storage method is to use brush cups or holders. If you choose this, store brushes bristles-up. This keeps the bristles from getting squashed or bent. It also allows for good air circulation around the brush head. Make sure the cup is clean. Wipe it down regularly to prevent dust accumulation. For a more organized approach, consider a brush holder with individual slots. This keeps brushes from touching each other. It helps maintain their shape.
For brushes you travel with or want extra protection, a brush roll or case is ideal. These cases often have individual compartments. This keeps each brush separate and clean. It also protects the bristles from getting damaged when you are on the go. Look for cases made of breathable material. This prevents moisture from getting trapped inside.
If you have very delicate or expensive brushes, consider storing them individually. Some brush brands sell brush guards or nets. These mesh covers fit over the brush head. They protect the bristles from bending or fraying. They also help maintain the brush’s shape during storage. This is especially useful for fluffy powder brushes or precise eyeliner brushes.
Finally, avoid tossing your brushes loosely into a drawer or bag. This can bend bristles. It can also expose them to dust and dirt. Proper storage is a simple step. It protects your investment. It also ensures your brushes are always ready for clear, healthy skin.
Advanced Tips and Troubleshooting for Face Brush Cleaning
Even after regular cleaning, you might encounter specific issues with your face brushes. Sometimes, stains persist. Other times, brushes do not feel as clean as you expect. I want to give you some advanced tips and help you troubleshoot common problems. This will ensure your brushes are always in top condition.
One common issue is stubborn stains. Some makeup products, like heavily pigmented foundations or cream blushes, can leave a tint on your brush bristles. Even after a deep clean, the color might remain. For these stains, a targeted approach helps. Try using a small amount of rubbing alcohol on a paper towel. Gently blot the stained area of the bristles. Do not soak the brush in alcohol. Then, wash the brush as usual with your gentle cleanser. The alcohol can help dissolve the pigment. Be cautious with natural hair brushes. Alcohol can dry them out.
Another problem can be brushes that feel greasy or stiff after washing. This often means there is still product buildup. It also means you did not rinse them enough. Try an extra rinse cycle. Use more cleanser and massage the bristles for longer. Ensure the water runs completely clear. Sometimes, the type of cleanser matters. A slightly stronger, dedicated brush cleanser might be needed for very stubborn makeup. If your brush still feels greasy, consider using a tiny drop of olive oil during the wash. It can help break down oil-based makeup. Then, follow with thorough rinsing with soap.
Bristle damage is another concern. This often happens from improper drying or harsh cleaning. If bristles are splayed, try reshaping them while wet. Use your fingers to gently guide them back into place. You can also use a brush guard while drying to help maintain the shape. If bristles are shedding excessively, it might mean the glue in the ferrule is compromised. This can happen from water getting into the ferrule. Try to dry them upside down to prevent this issue. Sadly, severe shedding often means it is time for a new brush.
For very sensitive skin, you might want an extra level of sanitization. After cleaning, you can lightly mist your brushes with a brush sanitizing spray. These sprays often contain alcohol or other antibacterial agents. Let the spray dry completely before using the brush. This adds an extra layer of protection against bacteria. However, this is usually not necessary with proper washing and drying.
Some cleaning methods you might have heard of are not good for brushes. For example, using harsh soaps like dish soap for tough grease might seem effective. However, using strong chemicals or very hot water can damage bristles. For example, methods used to clean a toilet brush are far too aggressive for delicate face brushes. You must prioritize gentleness with your beauty tools. Always stick to mild cleansers and lukewarm water. Your face brushes are an investment for your skin. Treating them well ensures they perform their best for a long time.
Frequently Asked Questions
How often should I clean my face brush?
You should clean face brushes used daily, like foundation or cleansing brushes, after every use or every few days. Brushes for powder products, such as blush or setting powder brushes, need a deep clean weekly. This regular cleaning prevents product buildup and bacterial growth.
What can I use to clean my face brush if I don’t have special cleaner?
You can use gentle household items if you do not have a dedicated brush cleaner. Baby shampoo is an excellent choice due to its mildness. Mild dish soap or even a gentle bar soap can also work. Always ensure the product is free from harsh chemicals that might damage the bristles.
Can I use dish soap to clean my face brush?
Yes, you can use mild dish soap, but choose carefully. Some dish soaps contain strong degreasing agents that can dry out or damage brush bristles, especially natural ones. Opt for a gentle, fragrance-free dish soap. Always follow with a thorough rinse to remove all soap residue.
How do I dry my face brush properly?
After cleaning, gently squeeze excess water from the bristles and reshape the brush head. Lay the brush flat on a clean, dry towel. You can also hang it upside down using a brush drying rack. Never dry brushes upright in a cup, as this can cause water to seep into the ferrule and damage the glue.
Why does my face brush still look dirty after cleaning?
If your face brush still looks dirty, it might have stubborn stains from heavily pigmented makeup. Try a second wash with more vigorous swirling on a cleaning mat. For persistent stains, a small amount of rubbing alcohol on a paper towel, followed by a regular wash, can help. Ensure you rinse thoroughly after this.
Can dirty brushes cause acne?
Yes, dirty face brushes can cause acne. They collect old makeup, oil, dead skin cells, and bacteria from your face and the environment. When you use a dirty brush, you transfer these impurities back onto your skin. This can clog pores, leading to breakouts, blackheads, and skin irritation.
Conclusion
Cleaning your face brush is a simple yet crucial step for healthy skin. It is an act of care for your tools and for yourself. We have covered the importance of hygiene, how often to clean, and the best methods for different brush types. Remember, a clean brush prevents breakouts and helps your makeup look its best.
By following the simple steps outlined in this guide on how to clean face brush, you ensure your skin stays clear and radiant. You also extend the life of your valuable beauty tools. Make brush cleaning a regular part of your skincare routine. Your skin will thank you. Start today for a cleaner, healthier beauty practice.
- face brush cleaning
- skincare routine
- makeup brush care
- deep clean brushes
- hygienic beauty
- prevent breakouts
- brush maintenance