· Vacuum Maintenance · 21 min read
How To Clean Filters On Dyson Ball
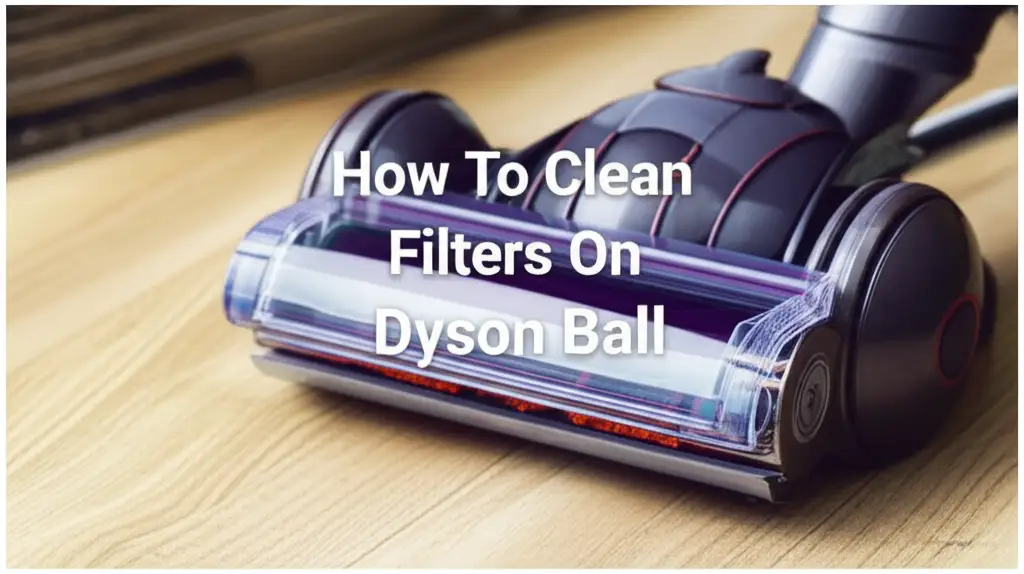
How To Clean Filters On Dyson Ball Vacuum
Have you noticed your trusty Dyson Ball vacuum losing its powerful suction? Perhaps it does not pick up dirt as well as it used to. This common problem often has a simple solution. Your vacuum’s filters likely need cleaning. Dirt and debris build up in these filters over time. This blockage stops air from flowing freely. A clogged filter makes your Dyson work harder and less effectively.
Cleaning the filters on your Dyson Ball vacuum is a simple maintenance task. It restores suction power. It also helps keep your home’s air cleaner. Dirty filters can release dust back into your room. Proper filter care extends the life of your vacuum. It also keeps your living space fresh. This article gives you a complete guide. You will learn how to find, clean, and maintain your Dyson Ball filters. We cover both the washable pre-motor filter and the post-motor HEPA filter. Follow these steps to bring back your Dyson’s best performance.
Takeaway:
- Regularly clean your Dyson Ball vacuum filters to maintain strong suction.
- Locate both the washable pre-motor and often non-washable post-motor (HEPA) filters.
- Wash pre-motor filters with cold water and air dry completely for at least 24 hours.
- Tap out dust from post-motor filters; do not wash unless specified by Dyson.
- Replace filters when cleaning no longer restores performance or if they show damage.
Cleaning the filters on your Dyson Ball vacuum involves locating the pre-motor and post-motor filters, rinsing the washable pre-motor filter with cold water until clean, air-drying it completely for at least 24 hours, and often tapping out dust from the post-motor filter before reassembling. This process restores suction power and maintains air quality.
Why Filter Cleaning Matters for Your Dyson Ball Vacuum’s Performance
Your Dyson Ball vacuum cleaner is a powerful machine. It uses strong suction to pick up dust and dirt. Filters are a vital part of this system. They trap small particles. This stops dust from going back into the air. When filters get dirty, they cannot do their job well. This leads to several problems. Ignoring filter maintenance hurts your vacuum’s function. It also affects the cleanliness of your home.
One major impact of dirty filters is reduced suction power. Imagine trying to breathe through a thick cloth. It is hard to get enough air. Your vacuum motor experiences a similar problem. Dust and debris clog the filter’s pores. This restricts airflow. The motor then struggles to pull air through. This results in weaker suction. You will notice your vacuum leaves more dirt behind. It may take longer to clean floors. Regular cleaning prevents this suction loss. It keeps your Dyson working at its best.
Dirty filters also affect your indoor air quality. Dyson vacuums are known for trapping allergens. They often have HEPA filters. These filters capture tiny particles like pollen, pet dander, and dust mites. A clogged filter cannot trap these particles effectively. It might even release trapped dust back into the air. This is bad for people with allergies or asthma. Cleaning your filters helps keep your home’s air cleaner. It removes allergens and irritants from the airflow. This makes your living space healthier.
Proper filter care also extends your Dyson Ball vacuum’s life. When filters are clogged, the motor works harder. This extra strain can cause the motor to overheat. Overheating shortens the motor’s lifespan. It can lead to costly repairs or even a broken vacuum. Regular cleaning reduces stress on the motor. It ensures your vacuum runs efficiently. Think of it as preventative maintenance for your machine. Just as you maintain other parts of your home, like preventing how to clean mold from washing machine, routine filter care is crucial. It keeps your Dyson in good working order for many years.
Finally, dirty filters can cause unpleasant odors. Trapped dust, pet hair, and food particles can start to smell. These odors spread through your home when you vacuum. Cleaning the filters removes these smelly particles. It helps your vacuum smell fresh. This makes cleaning a more pleasant task. It also prevents your vacuum from becoming a source of bad smells in your home. Maintaining clean filters supports a healthier, fresher environment.
Identifying Filters on Your Dyson Ball Vacuum Model
Before you clean your Dyson Ball filters, you need to know where they are. Dyson vacuums are well-designed. They place filters in easily accessible spots. However, the exact location can vary slightly between different Dyson Ball models. Most Dyson Ball vacuums have two main filters. These are the pre-motor filter and the post-motor filter. Knowing which filter is which helps you clean them correctly. Each filter type has a specific cleaning method.
The pre-motor filter is usually washable. It sits closest to the motor. This filter captures larger dust and dirt particles. It protects the motor from damage. On many Dyson Ball models, you find this filter inside the ball itself. You might need to press a button or release a latch to access it. Sometimes, it is located near the top of the cyclone assembly. Consult your Dyson manual for your specific model. The manual shows precise filter locations. For example, some Dyson Ball models have a twist-release mechanism. Others use a simple pull-out design. This filter often looks like a cone or cylinder. It might be blue or purple in color.
The post-motor filter is often a HEPA filter. HEPA stands for High-Efficiency Particulate Air. This filter is usually at the very end of the airflow path. It captures the smallest particles. These include allergens like pollen, pet dander, and dust mites. This filter ensures that only clean air leaves the vacuum. The post-motor filter is often located near the main wheel or at the back of the ball. On some models, you twist off a cap to reveal it. On others, it might be behind a small door. Check your specific Dyson Ball model’s manual for its exact spot. Not all post-motor filters are washable. Many are designed for tapping clean or for replacement only.
To locate your filters, first, unplug your Dyson Ball vacuum from the wall outlet. Safety comes first. Next, look for markings or diagrams on your vacuum. Dyson often labels filter access points. If you cannot find them, open your Dyson manual. It provides clear instructions and diagrams for filter removal. Keep your model number handy when looking up information. This ensures you find the correct instructions. Once you locate both filters, you are ready to begin the cleaning process. Knowing where each filter is helps you maintain your vacuum properly. It ensures you address both types of filtration. This prepares your Dyson for optimal performance.
Step-by-Step Guide to Cleaning Your Pre-Motor Filter
Cleaning your Dyson Ball vacuum’s pre-motor filter is essential. This filter is typically washable. It removes the bulk of dust and debris. This keeps the smaller post-motor filter from clogging too quickly. Follow these steps carefully to ensure a thorough and safe cleaning. A clean pre-motor filter greatly improves your vacuum’s suction.
Unplug and Remove the Filter: First, always unplug your Dyson Ball vacuum from the power outlet. Safety is important before any maintenance. Next, locate the pre-motor filter. As discussed, this filter is often found within the ball or near the top of the cyclone. Gently twist or pull the filter to remove it from its housing. Some models have a release button. This filter typically looks like a cone or cylinder.
Rinse with Cold Water: Take the filter to a sink. Use only cold tap water. Do not use any detergents or cleaning agents. These can damage the filter material. Hold the filter under the running water. The water should flow through the open end. Rinse the outside of the filter first. Then, flip it over and rinse the inside. Continue rinsing until the water runs clear. You will see dirty water turning clean.
Squeeze and Tap to Clean: As you rinse, gently squeeze the filter. If it is a foam or mesh type, squeezing helps dislodge trapped dirt. You can also gently tap the filter against the sink. This helps remove stubborn dust. Do not twist or wring the filter forcefully. This can damage its structure. Repeat the rinsing and squeezing/tapping until no more dirt comes out. The water running from the filter must be completely clear.
Remove Excess Water: After rinsing, shake the filter firmly. This removes most of the excess water. Place the filter on a clean towel. Gently press it to absorb more moisture. You want to get as much water out as possible before air drying. This shortens the drying time. It also helps prevent mold growth. Make sure it is not dripping wet.
Allow for Complete Air Drying: This is the most crucial step. Your pre-motor filter must be completely dry before you put it back into the vacuum. Place the filter in a warm, dry area with good airflow. Do not use a tumble dryer, microwave, or direct heat source. These can melt or damage the filter. A window sill, a warm airing cupboard, or near a fan works well. The drying process takes at least 24 hours. For best results, let it dry for 48 hours. If the filter is even slightly damp, it can damage the vacuum’s motor. It can also cause a bad smell or mold. For instance, mold can be a serious issue in many areas of the home, similar to problems that might require you to how to clean black mold off wood. Do not rush this step.
Once your pre-motor filter is completely dry, you can reinsert it. Ensure it clicks firmly into place. This prepares your Dyson Ball for improved suction. You will notice a difference immediately. Regular cleaning of this filter is key to maintaining your vacuum’s efficiency.
Cleaning the Post-Motor (HEPA) Filter on Your Dyson Ball
The post-motor filter, often a HEPA filter, plays a critical role. It captures tiny particles that the pre-motor filter might miss. This ensures very clean air leaves your Dyson Ball vacuum. The cleaning process for this filter is different from the pre-motor filter. Many HEPA filters are not washable. It is very important to check your Dyson manual for specific instructions. Washing a non-washable HEPA filter will destroy it.
Locate and Remove the Post-Motor Filter: First, unplug your Dyson Ball vacuum. Find the post-motor filter. This filter is typically at the back of the ball, near the main wheel, or under a small cover. On some models, you twist a cap to access it. Carefully remove the filter. It often looks like a pleated, cylinder-shaped filter.
Check Your Dyson Manual for Washability: Before doing anything else, consult your specific Dyson Ball model’s user manual. Some Dyson HEPA filters are washable, but many are not.
- If your manual says it is washable: Follow the same steps as for the pre-motor filter (rinse with cold water, squeeze gently, allow for complete air drying for 24-48 hours). Do not use soap. Ensure it is bone dry before putting it back.
- If your manual says it is NOT washable: This is often the case. Do NOT rinse or wash this filter with water. Water will damage the filtration material and render it useless.
Cleaning a Non-Washable HEPA Filter: If your HEPA filter is not washable, you clean it by tapping.
- Take the filter outside or over a trash can.
- Gently tap the filter against a hard surface. You will see dust and debris fall out.
- Rotate the filter as you tap. This helps dislodge particles from all sides of the pleats.
- Continue tapping until no more dust comes out.
- You can also use a soft brush or a vacuum cleaner hose (from another vacuum) on a low setting to gently suction dust from the pleats. Be very careful not to damage the delicate filter material.
Inspect for Damage and Reinsert: After cleaning, inspect the post-motor filter. Look for tears, holes, or signs of wear. If the filter is damaged, it will not filter effectively. Also, if it has a persistent bad odor that cleaning does not remove, or if it looks discolored and stained, it is time for a replacement. Even non-washable filters have a lifespan. They should be replaced roughly every 12 months, or sooner if heavy use. Once clean and inspected, carefully reinsert the filter into your Dyson Ball vacuum. Ensure it fits snugly and any covers are replaced securely.
Regular maintenance of both filters keeps your Dyson Ball vacuum working efficiently. It ensures clean air for your home. Remember, always follow your specific Dyson model’s instructions for filter care.
The Drying Process: Patience is Key for Dyson Filters
The drying process for your Dyson Ball vacuum filters is perhaps the most critical step. If you do not dry the filters completely, you risk serious problems. An even slightly damp filter can damage your vacuum’s motor. It can also lead to mold growth and foul odors. Patience during this stage saves you from costly repairs or having to replace filters prematurely.
First, understand why complete dryness is vital. Dyson vacuum motors operate at high speeds. They pull air through the filters. If water is present, this moisture can be drawn into the motor. This leads to electrical shorts or corrosion. Such damage often voids your warranty. It also harms the motor, making it less efficient or causing it to fail completely. Imagine a tiny water droplet getting into a fast-spinning engine. That is the risk. Dyson is very clear on this point: filters must be bone dry before reassembly.
The recommended drying time for washable Dyson filters is a minimum of 24 hours. For best results, especially in humid conditions or cooler environments, allow up to 48 hours. Do not rush this process. There are several ways to help your filters dry safely and effectively:
- Choose a Warm, Dry Location: Place your cleaned filters in an area with good airflow. A window sill on a sunny day works well. An airing cupboard is also a good spot. You want a place where air can circulate around the filter. This helps evaporate the water.
- Avoid Direct Heat: Never use a tumble dryer, microwave, oven, or direct heat sources like a hairdryer. These can melt or deform the filter material. The filter is made of delicate fibers and plastics. High heat will damage them beyond repair. Always use natural air drying.
- Utilize Airflow: If you have a fan, you can place the filters in front of it. The constant movement of air speeds up drying. Ensure the fan is not blowing dust onto the clean filter. A well-ventilated room is perfect.
- Check for Dampness: Before putting the filter back in, feel it thoroughly. Press it with your fingers. It should feel completely dry to the touch. If you feel any coolness or dampness, let it dry longer. You can even leave it for an extra day just to be safe. It is better to wait than to risk damaging your vacuum.
Mold growth is another serious concern with damp filters. If a filter remains wet, mold and mildew can develop. This causes a very unpleasant musty odor when you use your vacuum. It also releases mold spores into your home’s air. If you see black spots or smell mildew on your filter, it has likely grown mold. In such cases, the filter should be replaced, not reused, as mold can be persistent. This is similar to why you might need to address issues like how to clean black mold off wood in other areas of your home. Proper drying prevents this problem entirely. By following these drying guidelines, you protect your Dyson Ball vacuum. You also ensure it provides clean, fresh air for your home.
When to Clean and When to Replace Dyson Ball Filters
Knowing when to clean your Dyson Ball filters is as important as knowing how. However, filters do not last forever. There comes a time when cleaning is no longer enough. You must replace them for your vacuum to perform its best. Understanding the signs for both cleaning and replacement helps maintain your Dyson efficiently.
When to Clean Your Dyson Ball Filters:
Dyson recommends cleaning your washable pre-motor filter at least once a month. This is a good general guideline for average household use. If you use your vacuum frequently, or if you have pets, you might need to clean it more often. You should also clean it if you notice any of these signs:
- Reduced Suction Power: This is the most common sign. If your Dyson is not picking up dirt like it used to, a clogged filter is often the reason.
- Vacuum Smells Musty or Dirty: Trapped dust, pet dander, and other debris can create unpleasant odors. Cleaning the filters removes these odor-causing particles.
- Visual Dirt Accumulation: Simply look at your filter. If it is visibly coated in dust and dirt, it is time for a wash.
- Filter Warning Light: Some Dyson Ball models have an indicator light. This light turns on when the filter needs attention. Consult your manual to see if your model has this feature.
Cleaning regularly prevents deep clogs. It also extends the life of your filters. It keeps your vacuum running efficiently between replacements.
When to Replace Your Dyson Ball Filters:
Even with regular cleaning, filters have a finite lifespan. Dyson recommends replacing your post-motor HEPA filter every 12 months. This is especially true for non-washable filters. Washable filters might last longer. Still, they will eventually need replacement. Here are the signs that indicate a filter needs replacement:
- Permanent Loss of Suction: If you have cleaned your filters thoroughly, dried them completely, and your vacuum still has weak suction, the filters might be worn out. Their material may no longer effectively trap particles.
- Persistent Odors After Cleaning: If your vacuum still smells bad even after a complete and proper filter wash, the odors might be embedded in the filter material. This could be due to mold or deeply trapped organic matter that cleaning cannot remove.
- Visible Damage: Inspect the filter for any tears, holes, or frayed edges. A damaged filter cannot filter air properly. It will allow dirt and allergens to pass through.
- Discoloration or Degradation: Over time, filters can become discolored or show signs of material breakdown. This means the filter media is no longer effective.
- Mold Growth: If you see any signs of mold on your filter, replace it immediately. Mold spores can spread through your home. It is not safe to continue using a moldy filter. This is similar to managing other household filters, like when you might need to replace an how to clean under sink water filter once it is old and worn out.
Using genuine Dyson replacement filters is important. They ensure your vacuum maintains its performance and warranty. Do not use generic filters that might not fit or filter as effectively. Replacing filters at the right time ensures your Dyson Ball continues to provide powerful cleaning and clean air for your home.
Troubleshooting Common Filter-Related Dyson Ball Issues
Even after cleaning your Dyson Ball filters, you might encounter some issues. These problems often relate to incomplete drying or improper reassembly. Knowing how to troubleshoot these common filter-related problems saves you time and frustration. It helps you get your Dyson Ball back to full working order quickly.
1. Loss of Suction After Cleaning: This is the most frequent issue. You cleaned the filters, but the vacuum still does not pick up dirt well.
- Cause: The filter is still damp. This is the primary reason for reduced suction immediately after cleaning. A damp filter restricts airflow, just like a dirty one.
- Solution: Remove the filters immediately. Place them in a warm, dry area with good airflow for another 24-48 hours. Ensure they are bone dry before reinserting them. Do not use your vacuum with a damp filter.
- Cause: Incorrect reassembly. Filters might not be seated properly. This creates air gaps. Air escapes instead of passing through the filter.
- Solution: Remove and reinsert all filters. Ensure they click into place firmly. Check that the cyclone bin is also correctly attached.
- Cause: Blockage elsewhere in the vacuum. Sometimes, the problem is not the filter. There might be a clog in the wand, hose, or brush bar.
- Solution: Check the entire vacuum for blockages. Disassemble the hose and wand. Look for anything obstructing airflow. Clear any debris you find.
2. Bad Odor Coming from the Vacuum: You cleaned the filters, but a strange smell persists.
- Cause: Incomplete drying leading to mold or mildew. If the filter was not completely dry, mold can grow. This creates a musty, unpleasant smell when you vacuum.
- Solution: If you suspect mold, unfortunately, you must replace the filter. Mold spores can be harmful. Trying to re-clean a moldy filter often does not work. You should not use a filter that has visible mold.
- Cause: Trapped organic matter. Sometimes, pet hair or food particles get deeply embedded in the brush bar or cyclone bin. They can rot and cause odors.
- Solution: Thoroughly clean the dust bin, brush bar, and other accessible parts of the vacuum. Clean the brush bar by removing hair tangled around it. You can also clean the interior of the dust bin with a damp cloth and mild soap, then let it dry fully. Ensure no debris remains.
3. Filter Warning Light Still On: Your Dyson has a filter light, and it stays lit even after cleaning.
- Cause: The filter is still damp or improperly seated. The vacuum’s sensors detect restricted airflow.
- Solution: Re-check the drying status of your filters. Make sure they are fully dry. Remove and reinsert them carefully, ensuring a secure fit.
- Cause: The filter needs replacement. Sometimes, the filter light means the filter has reached the end of its effective life. Cleaning no longer restores its performance.
- Solution: Replace the filter. This is common for older HEPA filters that are not designed for washing or have been used extensively.
4. Filter Does Not Fit Back In Properly: You cleaned the filter, but it seems swollen or does not slide back into its spot.
- Cause: Incomplete drying. A damp filter can swell slightly. This makes it hard to fit into its housing.
- Solution: Allow more drying time. The filter will shrink back to its normal size once completely dry.
- Cause: Damage during cleaning. Forceful squeezing or using hot water can deform the filter.
- Solution: If the filter is physically damaged or warped, you must replace it. It will not function correctly.
Troubleshooting these issues often comes down to ensuring the filters are bone dry and correctly installed. Always refer to your Dyson Ball’s specific user manual for the most accurate and detailed troubleshooting steps for your model. Consistent and correct filter care ensures your vacuum continues to clean your home effectively. For general Dyson care tips, you might find useful information on maintaining other Dyson products, such as those found in articles like how to clean Dyson Hot and Cool devices.
Frequently Asked Questions
How often should I clean my Dyson Ball filters? You should clean the washable pre-motor filter at least once a month. If you vacuum often, have pets, or notice reduced suction, clean it more frequently. The post-motor HEPA filter, if washable, follows the same rule. If it is non-washable, tap out dust monthly and replace it annually.
Can I wash my Dyson Ball HEPA filter? It depends on your specific Dyson Ball model. Some Dyson HEPA (post-motor) filters are washable, while many are not. Always check your Dyson owner’s manual before washing any HEPA filter. If your manual says it is not washable, only tap out the dust. Washing a non-washable HEPA filter will destroy it.
What happens if I don’t dry my Dyson filters completely? If you put a damp filter back into your Dyson, it can cause severe problems. The moisture can get into the motor, leading to electrical damage, corrosion, or motor failure. Damp filters also promote mold and mildew growth. This causes bad odors and can release harmful spores into your home’s air.
Why does my Dyson Ball still have low suction after cleaning the filters? Low suction after cleaning often means the filters are not completely dry. Even slight dampness restricts airflow. Remove them and let them air dry for at least 24-48 hours. Ensure they are bone dry. Also, check for clogs in the hose, wand, or brush bar, as these can also reduce suction.
Where are the filters located on my Dyson Ball? Most Dyson Ball vacuums have two main filters. The washable pre-motor filter is often near the top of the cyclone assembly or within the ball. The post-motor HEPA filter is typically at the back of the ball, near the main wheel, or under a small cover. Consult your specific model’s manual for exact locations.
- Dyson Ball filter cleaning
- Dyson vacuum maintenance
- HEPA filter care
- washable vacuum filter