· Kitchen Maintenance · 17 min read
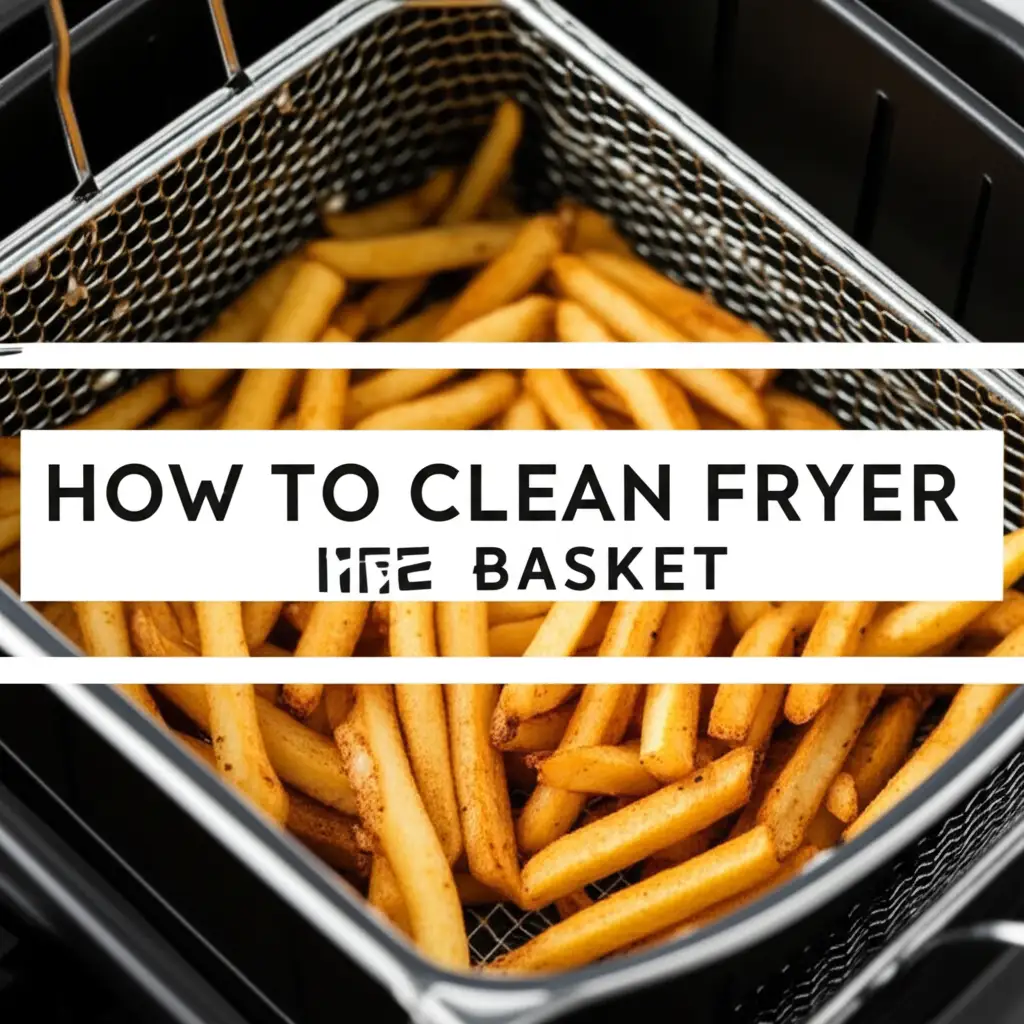
How To Clean Fryer Basket

Deep Clean Your Fryer Basket for Optimal Results
A clean fryer basket makes all the difference in your kitchen. It helps your food taste better. It also makes your deep fryer last longer. Old grease and food bits stick to baskets. This creates a mess and affects cooking quality.
Cleaning your fryer basket is not a hard job. It requires the right approach and supplies. This guide gives you simple steps. You will learn how to clean fryer basket effectively. We cover tools, methods, and tips. Get ready to restore your basket. Make it sparkle like new. This ensures fresh, tasty fried foods every time.
Takeaway:
- Regular cleaning prevents buildup and improves food taste.
- Soaking is often the first step for tough grease.
- Use gentle scrubbers to avoid damage.
- Baking soda and vinegar are powerful, natural cleaners.
- Always dry the basket completely to stop rust.
To clean a fryer basket, first remove loose food debris. Then, soak the basket in hot, soapy water with a degreasing agent. Scrub away loosened grease and residue using a non-abrasive brush or sponge. Rinse thoroughly with hot water and dry completely to prevent rust.
Why Cleaning Your Fryer Basket Matters
A clean fryer basket is important for several reasons. It affects the taste of your food. It also impacts the life of your appliance. Ignoring the basket leads to problems. You get old oil buildup and burnt food particles. These affect health and performance.
Grease buildup smells bad. It transfers old flavors to new food. This makes fresh fries taste stale. A dirty basket can also slow down cooking. It impacts the heat distribution. Regular cleaning avoids these issues. It keeps your fryer working well.
Health and Hygiene Benefits
Food safety begins with clean equipment. A dirty fryer basket harbors bacteria. Old grease breaks down over time. It becomes a breeding ground for germs. These germs can contaminate your food. Eating contaminated food can cause illness.
Cleaning removes these harmful elements. It ensures your food is safe to eat. A sparkling basket means fewer risks. It protects your family’s health. Cleanliness supports good kitchen hygiene.
Proper cleaning stops cross-contamination. It keeps your food pure. You prevent unwanted flavors. You also stop harmful bacteria growth. Always prioritize hygiene in the kitchen.
Extending Fryer Lifespan
Grease and food residue are corrosive. They can damage your fryer basket over time. This damage leads to rust. It causes parts to weaken. A damaged basket can break during use. This can be unsafe.
Regular cleaning removes these corrosive elements. It protects the metal. This extends the life of your basket. It also keeps your entire fryer in good shape. Replacing parts costs money. Preventative cleaning saves you money in the long run.
A well-maintained basket helps the fryer work efficiently. It avoids strain on the heating elements. This makes the whole unit last longer. Proper care keeps your investment safe. It ensures many years of use.
Essential Tools and Supplies for Fryer Basket Cleaning
Cleaning a fryer basket requires the right tools. You need supplies that cut through grease. You also need items that protect your hands. Gather everything before you start. This makes the job easier. It also makes it more efficient.
You do not need many items. Basic kitchen cleaners often work well. Specialized degreasers help with tough jobs. Always pick non-abrasive tools. These tools protect the basket’s finish. A gentle approach works best.
Basic Cleaning Arsenal
Start with common household items. You will need hot water. Dish soap is also important. Choose a dish soap with degreasing power. You also need a sturdy brush. A stiff nylon brush works well. Avoid wire brushes. They can scratch the basket. A sponge or cloth helps with lighter cleaning.
Baking soda is a great natural abrasive. White vinegar helps cut grease and odors. These two items are very versatile. They can tackle many cleaning jobs. You might also want paper towels. They help wipe away loose grease. Having these items ready speeds up the process.
For extra tough grease, consider a commercial degreaser. These cleaners are strong. They dissolve hardened oil quickly. Always check the product label. Ensure it is safe for your basket material. Some degreasers need specific use instructions. Cleaning grease from an air fryer also often involves similar degreasing agents.
Safety Gear
Cleaning grease can be messy. It can also involve harsh cleaners. Always protect yourself. Wear rubber gloves. These gloves keep your hands clean. They also protect your skin from chemicals. Hot water can also irritate skin. Gloves provide a barrier.
Consider eye protection if using strong degreasers. Splashes can happen. Safety glasses protect your eyes. Work in a well-ventilated area. Fumes from some cleaners can be strong. Good air flow keeps you safe. Your safety is always first.
Have old towels ready. These protect your countertops. They also help clean up spills. A clean work area helps too. It makes the job less stressful. Safety gear is simple but important.
Step-by-Step Method: The Hot Water Soak
The hot water soak is a primary method. It softens grease and stuck-on food. This makes scrubbing much easier. Most cleaning jobs start here. This method works for regular maintenance. It also helps with moderate buildup.
You need a large basin or sink. Fill it with very hot water. Add a generous amount of dish soap. Make sure the water is as hot as you can stand. The heat helps break down the grease. Let the basket sit for a while.
Patience is key with this step. Do not rush the soaking process. The longer it soaks, the easier it cleans. This step alone can remove much of the grime. It sets you up for success.
Initial Preparation
Before soaking, remove loose food. Scrape off any large pieces. Use a rubber spatula or paper towel. This prevents clogging your drain. It also keeps the soaking water cleaner. Do this over a trash can.
Wipe excess oil from the basket. Use paper towels. This reduces the amount of grease entering your sink. It makes the water stay cleaner longer. It also lessens the overall cleaning effort. A quick pre-wipe saves time later.
Check the basket for any detachable parts. Some baskets have removable handles. Clean these parts separately if needed. Most fryer baskets are one piece. Ensure you access all areas.
Soaking Process
Place the fryer basket into the hot, soapy water. Ensure it is fully submerged. Add more hot water if needed. Let the basket soak for at least 30 minutes. For heavy grease, soak for several hours. You can even soak it overnight.
The hot water and soap work together. They dissolve the oil. They loosen the food particles. You will see the water change color. This means the grease is lifting. This is a good sign.
You can add a cup of white vinegar to the soak. Vinegar helps cut through grease. It also acts as a deodorizer. This is an extra boost for tough messes. Cleaning with vinegar is a versatile option for many tasks.
Scrubbing and Rinsing
After soaking, remove the basket. The grease should be soft. Use a nylon scrub brush. Gently scrub all surfaces. Pay attention to corners and mesh. These areas collect a lot of buildup. A good scrub removes the loosened grime.
For stubborn spots, use a bit of baking soda. Sprinkle it directly on the area. Scrub with the brush. The baking soda acts as a mild abrasive. It helps lift stuck-on bits. Be gentle to avoid scratches.
Rinse the basket thoroughly under hot running water. Ensure all soap residue is gone. Check for any remaining grease. Repeat scrubbing if needed. A clean rinse means no soap taste on your food. Finally, dry the basket completely. You can air dry or use a towel. Drying stops rust. Cleaning the bottom of a pan also often involves a similar soak-and-scrub approach for burnt-on residues.
Advanced Cleaning Techniques for Tough Fryer Basket Buildup
Sometimes, a simple soak is not enough. Fryer baskets can develop stubborn buildup. This happens from frequent use. Old, caked-on grease needs stronger methods. These advanced techniques help you tackle the toughest grime. They bring your basket back to life.
Be careful with these methods. Some involve strong chemicals. Always read product instructions. Protect yourself with safety gear. Work in a well-ventilated space. These steps ensure a clean basket. They also keep you safe.
Using Baking Soda and Vinegar
Baking soda and vinegar create a powerful cleaning reaction. This mixture bubbles. It helps lift heavy grease and carbon. You can use this after an initial soak. Or, use it for direct application. This method is natural and effective.
First, drain the soak water. Sprinkle a generous layer of baking soda over the wet basket. Make sure it covers all greasy areas. Then, pour white vinegar over the baking soda. Watch it fizz and foam. This reaction breaks down the grease.
Let the mixture sit for 15-30 minutes. This gives it time to work. Then, scrub with your nylon brush. The reaction helps lift the grime. Rinse well with hot water. Repeat if necessary for very thick buildup. Cleaning glass with vinegar shows its power in breaking down tough residues.
The Dishwasher Method
Some fryer baskets are dishwasher safe. Check your fryer’s manual first. Putting a non-dishwasher-safe basket in can cause damage. It can ruin the finish. It can also cause rust. If your basket is safe, this method is very easy.
Scrape off large food particles first. Place the basket in the dishwasher. Use a strong detergent. Choose a hot water cycle. The high heat and strong detergent often clean well. This works for light to moderate buildup.
The dishwasher may not clean extremely tough grease. You might need pre-soaking for heavy grime. It is a good option for regular cleaning. It saves you manual scrubbing time. Always ensure the basket is fully dry after the cycle.
Commercial Degreasers
Commercial degreasers are powerful. They are designed for heavy grease. These products work quickly. They are good for deep cleaning sessions. Read the instructions carefully. Some need dilution. Others are ready to use.
Spray or apply the degreaser to the basket. Let it sit for the recommended time. This time is usually short. It can be 5-10 minutes. The degreaser breaks down the oil. It turns it into a liquid. Then, scrub and rinse thoroughly.
Always wear gloves and eye protection. Use these products in a well-ventilated area. Fumes can be strong. Ensure all degreaser is rinsed off. Residue can affect food taste. It can also be unsafe. These products are effective for very dirty baskets. Cleaning oven after self-clean or the bottom of an oven also often involves strong degreasers.
Specific Challenges: Rust and Burnt-On Residue
Fryer baskets face specific problems. Rust is common. Burnt-on residue is also a frequent issue. These problems need special attention. Standard cleaning might not remove them. Addressing these challenges keeps your basket in good condition.
Rust weakens the metal. It can also transfer to food. Burnt-on residue affects cooking. It can also cause uneven heating. Learn how to tackle these tough spots. Restore your basket’s look and function.
Prevention is always best. Regular cleaning stops these issues from forming. But if they appear, there are solutions.
Tackling Rust Spots
Rust forms when metal is wet for too long. Or, if the protective coating wears off. Small rust spots can spread. Address them quickly. You can use natural methods or mild chemicals. Do not use harsh abrasives.
For light rust, use baking soda paste. Mix baking soda with a little water. Form a thick paste. Apply it to the rust spot. Let it sit for an hour. Then, scrub with a nylon brush. The mild abrasive action helps remove rust. Rinse well and dry completely.
Another option is white vinegar. Soak the rusted part in white vinegar. Let it sit for several hours. The acid helps dissolve rust. Then, scrub with a brush. Rinse and dry thoroughly. For deeper rust, consider a rust remover product. Follow product directions carefully. Always re-season cast iron baskets after rust removal if applicable.
Removing Carbonized Buildup
Burnt-on carbon is very tough. It sticks to the basket like cement. It forms from food burning onto the metal. A hot water soak might not be enough. You need stronger action.
Try the baking soda and vinegar method first. This often helps lift carbon. For very stubborn carbon, you might need a scraper. Use a plastic or wooden scraper. Avoid metal ones. Metal can scratch the basket. Gently scrape at the carbonized areas.
You can also try boiling the basket. Fill a large pot with water. Add a few tablespoons of dish soap. Place the basket in the pot. Boil for 15-30 minutes. This softens the carbon. Then, scrub with a stiff brush. This method works well for very sticky, burnt residue. This is similar to cleaning an air fryer basket that has tough grease.
Maintaining Fryer Basket Cleanliness for Daily Use
Cleaning your fryer basket after every use is best. This prevents buildup. It makes deep cleaning less frequent. A quick daily routine keeps your basket ready. It saves you time and effort later.
Consistent care stops problems before they start. It keeps your fryer basket in prime condition. This means better-tasting food every time you fry. It also extends the life of your equipment. A little effort goes a long way.
Think of it as part of your cooking process. Just like washing dishes, cleaning the basket is essential. It keeps your kitchen hygienic and functional.
Post-Use Routine
As soon as the oil cools, act quickly. Do not let oil sit and harden. Remove the basket from the fryer. Scrape off any loose food particles. Use a rubber spatula or paper towel. This prevents clogging drains.
Wipe down the basket with a paper towel. Get rid of excess oil. Then, immediately wash the basket. Use hot water and dish soap. Scrub with a non-abrasive sponge or brush. Focus on areas where food sticks.
Rinse the basket thoroughly. Ensure all soap is gone. Dry the basket completely. Water left on metal can cause rust. Use a clean towel or air dry. Store the basket in a dry place. This simple routine makes a big difference.
Storage Tips
Proper storage helps maintain cleanliness. It also prevents rust. Do not store a wet basket. Always dry it completely before putting it away. Excess moisture causes corrosion. This damages the metal over time.
Store the basket inside your fryer if it fits. This keeps it protected. It also keeps it dust-free. If storing separately, find a dry cabinet. Avoid humid areas. A kitchen cabinet is usually fine.
You can place a paper towel in the basket before storage. This helps absorb any residual moisture. It offers an extra layer of protection. These simple steps keep your fryer basket ready for its next use. They ensure it lasts for years. Cleaning air fryer racks also benefits from immediate cleaning and proper drying.
Common Mistakes to Avoid When Cleaning Fryer Baskets
Cleaning a fryer basket seems straightforward. However, some common mistakes can damage it. These errors can also make the cleaning process harder. Knowing what to avoid saves you time. It also protects your investment.
Pay attention to the tools you use. Be mindful of the cleaners. Proper technique is key. Avoid shortcuts that promise quick fixes. They often lead to bigger problems. Learn these pitfalls to clean your basket safely and effectively.
A clean basket ensures good food. It also means a longer-lasting appliance. Avoid these common errors for best results.
Skipping Pre-Cleaning Steps
Many people skip the initial wipe-down. They put a greasy basket directly into water. This is a mistake. It contaminates your cleaning water quickly. The water gets filled with oil. It then becomes less effective at cleaning.
Removing loose food and excess oil first helps. It makes the soaking water cleaner. It allows the soap to work better. It also makes the final scrub much easier. A few seconds of pre-cleaning saves minutes later. Do not underestimate this simple step.
Pre-cleaning reduces drain clogs. It keeps your sink cleaner. It is a vital first action. Always wipe down before you soak.
Using Abrasive Tools
Metal scouring pads or wire brushes seem strong. They remove tough grime quickly. But they can scratch your fryer basket. Many baskets have a non-stick coating. Or they have a protective finish. Abrasive tools can remove these.
Scratches damage the basket. They make it prone to rust. Food also sticks more easily to scratched surfaces. This makes future cleaning harder. Always use non-abrasive tools. Nylon brushes, plastic scrapers, or soft sponges are best.
Be gentle when scrubbing. Let the cleaners do the hard work. Elbow grease is fine, but avoid harsh materials. Protect your basket’s surface. It will thank you with longer life.
Neglecting Safety Precautions
Cleaning products can be strong. Hot water can scald skin. Ignoring safety is a big mistake. It can lead to injuries. Always put your safety first.
Wear rubber gloves. These protect your hands from hot water and chemicals. Use eye protection when needed. Especially with strong degreasers. Good ventilation is also important. Open windows or use a fan. This prevents inhaling strong fumes.
Read all product labels carefully. Follow their safety instructions. Do not mix cleaners unless specified. Some combinations are dangerous. A safe cleaning process protects you. It also protects your home.
FAQ Section
How often should I clean my fryer basket?
You should clean your fryer basket after every use. This prevents grease and food buildup. A quick wash helps maintain hygiene. It keeps your basket in good condition. For deep cleaning, once a month is usually sufficient. This depends on how often you use your fryer. Regular light cleaning avoids major scrubbing sessions.
Can I put a fryer basket in the dishwasher?
Some fryer baskets are dishwasher safe, but not all. Always check your fryer’s instruction manual first. Placing a non-dishwasher-safe basket in the dishwasher can cause damage. It can remove protective coatings or cause rust. If it is safe, the dishwasher is good for light cleaning. For heavy grease, a pre-soak is often still necessary.
What’s the best way to remove sticky, old grease?
For sticky, old grease, a prolonged hot water soak is crucial. Fill a large sink with very hot water and a strong dish soap. Add a cup of white vinegar for an extra boost. Let the basket soak for several hours, or even overnight. After soaking, scrub with a stiff nylon brush. For extreme cases, a commercial degreaser can be effective.
How do I prevent rust on my fryer basket?
To prevent rust, always dry your fryer basket completely after washing. Use a towel or allow it to air dry fully before storing. Store the basket in a dry area. Avoid leaving it wet for extended periods. If your basket has a protective coating, avoid using abrasive tools that can scratch it off. Scratches expose bare metal, making it prone to rust.
Can I use harsh chemicals on my fryer basket?
It depends on the basket material and the chemical. Avoid harsh, abrasive cleaners if your basket has a non-stick or coated finish. These can strip the coating. For stainless steel, stronger degreasers might be acceptable. Always read the product label. Check for warnings or specific instructions for kitchen use. Prioritize natural solutions like baking soda and vinegar when possible.
What if my basket has non-stick coating?
If your fryer basket has a non-stick coating, be extra careful. Do not use abrasive scrubbers like steel wool or metal brushes. These will scratch and ruin the coating. Stick to soft sponges, nylon brushes, or cloths. Avoid harsh chemical degreasers that may strip the non-stick surface. Gentle dish soap and hot water are best. For stubborn areas, a baking soda paste and soft scrubbing work well.
Conclusion
Cleaning your fryer basket is simple. It brings many benefits. You get better-tasting food. Your appliance lasts longer. You also ensure a healthier kitchen environment. We covered essential steps. We discussed tools and methods. These help you tackle any level of grime.
Remember to act quickly after each use. A small effort prevents big problems. Hot water and dish soap are your friends. For tough buildup, baking soda and vinegar help. Always prioritize safety. Protect your hands and eyes. Your fryer basket will shine. This leads to delicious meals every time.
Now you know how to clean fryer basket effectively. Take these tips. Put them into action. Enjoy your sparkling clean fryer. It is ready for your next culinary adventure. Start cleaning today for a better frying experience.
- fryer cleaning
- deep fryer care
- kitchen hygiene


