· Kitchen Maintenance · 20 min read
How To Clean Sticky Range Hood
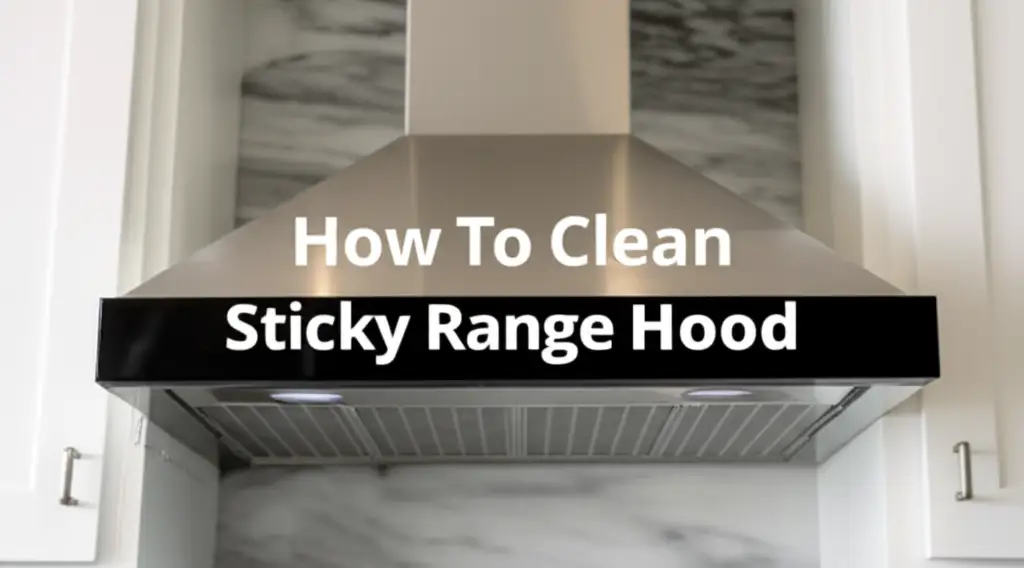
Clean Your Sticky Range Hood with Ease
Is your kitchen range hood feeling a bit sticky? You are not alone. Grease and grime build up quickly on this hardworking appliance. This stickiness traps dust and makes your kitchen look dirty. Learning how to clean sticky range hood surfaces makes a big difference. I know how frustrating it is when grease coats everything. This guide provides clear steps to bring back the shine. You will find simple methods and practical tips. I will help you tackle even the toughest grease. Get ready to enjoy a cleaner kitchen.
Takeaway
Cleaning a sticky range hood involves a few key steps:
- Always prioritize safety by unplugging the unit.
- Use warm water and a good degreaser, like dish soap or vinegar solutions.
- Remove and soak filters for best results.
- Wipe down exterior and interior surfaces carefully.
- Regular cleaning prevents heavy build-up.
A sticky range hood needs a degreasing agent and physical scrubbing. First, unplug the appliance for safety. Then, remove and soak the filters in hot, soapy water. For the exterior, mix a degreaser with warm water and wipe surfaces. Rinse with a clean, damp cloth.
Understanding Why Range Hoods Get Sticky
Range hoods become sticky due to grease and cooking fumes. Each time you cook, tiny grease particles float into the air. These particles rise and stick to surfaces, especially the range hood. Over time, these layers of grease collect dust. This creates a thick, sticky film. Regular cooking causes this build-up. It happens quickly, even if you clean your kitchen often.
The sticky residue on your range hood is mostly polymerized cooking oil. This means the oil has reacted with oxygen and heat. It forms a gummy, hard-to-remove layer. This layer acts like a magnet for dust and dirt. It makes the surface look dull and feel unpleasant. This build-up also affects the hood’s performance. It can clog filters and reduce airflow. A clean hood works better and keeps your kitchen air fresh.
High heat from cooking makes grease stick faster. Steam from boiling water also carries grease particles. These tiny particles travel far. They attach to anything in their path. The hood is directly above the cooking area. This makes it the primary target for grease. Understanding this helps you see why regular cleaning is important. It is not just about looks. It is about keeping your kitchen healthy.
The type of cooking you do impacts the stickiness. Frying and stir-frying create more airborne grease. Boiling and steaming create less. However, all cooking adds to the problem. Ventilation helps, but some grease always escapes. This is why the hood gets so dirty. The stickiness is a sign it is working. It captures grease that would otherwise settle on your walls and cabinets.
Essential Tools and Cleaning Solutions
Gathering your tools before you start makes cleaning easier. You will need a few basic items. These items help you tackle grease effectively. Having everything ready saves time. It also makes the cleaning process smoother. I always make sure I have all my supplies at hand. This avoids interruptions during cleaning.
First, you need protective gear. Gloves protect your hands from harsh cleaners and grease. Old towels or newspapers protect your countertop. A few sturdy sponges or microfiber cloths are also important. These tools help you scrub and wipe surfaces without scratching them. I prefer microfiber cloths for their absorbency and gentle nature.
For cleaning solutions, you have several options. Dish soap is a great degreaser for light to moderate stickiness. Mix it with hot water. Baking soda creates a paste that tackles tougher grime. White vinegar diluted with water works well for mild grease and shines surfaces. For very stubborn, old grease, a commercial degreaser might be necessary. Always read the instructions on commercial products. You can also make a powerful solution with ammonia and hot water, but use this in a well-ventilated area.
Having a spray bottle is useful for applying liquid solutions. A soft brush, like an old toothbrush, helps clean tight spots. A bucket or basin is good for soaking filters. Make sure your bucket is large enough. These simple items help you achieve a truly clean range hood. I find that the right tools make a big difference in cleaning efficiency.
- Protective Gloves: Essential for hand safety.
- Microfiber Cloths/Sponges: For wiping and scrubbing.
- Old Towels/Newspapers: To protect surfaces.
- Spray Bottle: For applying liquid cleaners.
- Bucket/Basin: For soaking parts.
- Old Toothbrush/Soft Brush: For crevices.
- Cleaning Solutions:
- Dish soap (liquid)
- Baking soda
- White vinegar
- Commercial degreaser (optional, for heavy grease)
- Ammonia (optional, use with extreme caution and ventilation)
Step-by-Step Guide to Cleaning the Range Hood Filters
Cleaning the filters is a critical step. Filters trap most of the grease and dirt. If they get clogged, the hood cannot work well. Dirty filters make your hood less efficient. They also cause fire hazards. I clean my filters regularly. It makes a big difference in how my hood performs.
Safety First: Unplugging Your Range Hood
Before you start, safety comes first. Always unplug the range hood from its power source. This prevents electric shock. You do not want any power running while you handle water and cleaners. I make sure the power is off before I touch anything. This simple step keeps you safe.
Removing and Soaking the Filters
Most range hoods have metal mesh filters. These slide out or unclip easily. Check your hood’s manual if you are unsure. Once removed, place the filters in a large basin or sink. Fill the basin with very hot water. Add a generous amount of liquid dish soap. Let the filters soak for at least 30 minutes to an hour. For really greasy filters, a few drops of a commercial degreaser or a cup of white vinegar to the hot water can help loosen the grime. Some people add baking soda. This creates a fizzing reaction that helps break down grease. You can also try soaking them in a solution of very hot water and ammonia (ensure good ventilation and do not mix ammonia with bleach).
Scrubbing and Rinsing the Filters
After soaking, use a stiff brush or an old toothbrush to scrub the filters. The hot water and soap should have softened the grease. You will see grease lifting away. Focus on the mesh openings. Make sure to get all the sticky residue off. Rinse the filters thoroughly under hot running water. Check for any remaining grease. If needed, repeat the soaking and scrubbing. Ensure they are completely clean.
Drying and Reinstalling the Filters
Shake off excess water from the filters. Let them air dry completely. You can also use a clean cloth to pat them dry. Do not put wet filters back into the hood. This can cause problems. Once dry, slide or clip the clean filters back into place. You will notice an immediate improvement in your hood’s appearance. A clean filter helps your hood pull air more effectively. For more details on cleaning filters, you can refer to resources on how to clean range hood filter.
Deep Cleaning the Range Hood Exterior and Interior
Once the filters are clean, it is time to tackle the rest of the hood. The exterior and interior surfaces also collect grease and dust. These areas are visible and need careful attention. A clean exterior improves your kitchen’s look. A clean interior ensures maximum performance.
Preparing the Exterior Surface
Start by laying old newspapers or towels on your countertop. This protects surfaces from drips and spills. Mix your cleaning solution in a spray bottle or a bowl. For light grease, dish soap and warm water work well. For tougher grime, a solution of equal parts white vinegar and hot water is effective. You can also make a paste with baking soda and a little water. This paste is excellent for sticky, dried-on spots. I often use the baking soda paste for extra stubborn areas.
Cleaning the Exterior
Spray your cleaning solution directly onto the sticky areas of the hood’s exterior. Let it sit for 5-10 minutes. This gives the solution time to break down the grease. Then, use a clean microfiber cloth or a soft sponge to wipe the surface. Work in small sections. Apply gentle pressure. You will see the grease lifting off. For any stubborn spots, apply a bit of baking soda paste. Let it sit for a few minutes. Then, scrub gently with a non-abrasive scrubber. Rinse your cloth frequently in clean water. Wipe down the entire exterior. Make sure to get into corners and edges. Pay attention to the controls and buttons. Ensure they are free of stickiness. If your hood has glass elements, use a separate cloth and a glass cleaner to avoid streaks.
Cleaning the Interior
The interior of the hood also collects grease. This area is less visible but equally important to clean. Use the same cleaning solution as for the exterior. Spray or wipe the solution onto the interior surfaces. Be careful around wires and electrical components. Do not spray directly into light fixtures or fan openings. Use a damp cloth to wipe these areas. A small brush can help reach tight spots. Pay attention to the fan blades if they are accessible. Grease on the blades can reduce efficiency.
Final Wipe Down and Polishing
After cleaning, wipe all surfaces with a clean, damp cloth to remove any cleaner residue. Then, use a dry microfiber cloth to dry and polish the hood. This prevents water spots and leaves a streak-free shine. For stainless steel hoods, a specialized stainless steel cleaner can add extra shine. This final step makes your hood look new. I always make sure to dry completely. It prevents new dust from sticking to damp spots.
Tackling Stubborn Grease and Baked-On Residue
Sometimes, grease builds up for a long time. It can become hard and baked on. Regular methods might not be enough. This needs a more aggressive approach. But do not worry, there are powerful solutions available. I have found these methods very effective for old, tough grease.
Using Commercial Degreasers
For very stubborn grease, a commercial degreaser is your best friend. These products are formulated to cut through heavy oil and grease. Read the product instructions carefully. Always use them in a well-ventilated area. Spray the degreaser onto the sticky spots. Let it sit for the recommended time. This allows the chemicals to break down the grease. Then, wipe away with a clean cloth. You might need to repeat this process. Some strong degreasers can damage certain finishes. Always test on an inconspicuous area first. This prevents accidental damage.
The Power of Baking Soda Paste
Baking soda is a natural abrasive and an excellent degreaser. Mix baking soda with a little water to form a thick paste. Apply this paste directly onto the baked-on grease. Spread a thick layer. Let the paste sit for several hours, or even overnight. The longer it sits, the more it works. The baking soda will absorb and loosen the grease. Then, scrub with a non-abrasive pad. The paste acts as a gentle scrubber. It removes the grime without scratching. Rinse thoroughly with a damp cloth. This method is safe and very effective. It is also gentle on surfaces compared to harsh chemicals. You can use a similar approach for cleaning sticky kitchen cabinets too.
Steam Cleaning for Heavy Buildup
A handheld steam cleaner is another powerful tool. Steam uses heat and moisture to break down grease. It is also chemical-free. Fill the steam cleaner with distilled water. Direct the steam nozzle onto the sticky areas. The hot steam will melt the grease. Wipe away the melted grease with a cloth. Use a brush attachment for tougher spots. Be careful not to direct steam into electrical components. Steam cleaning is effective and avoids harsh chemicals. It leaves surfaces clean and sanitized. This method is great for heavy, widespread grease.
Ammonia Fumes Method (Use with Extreme Caution)
This method is for the toughest, most caked-on grease. It involves placing a bowl of ammonia inside the hood. Never mix ammonia with bleach or any other cleaner. This creates dangerous fumes. Place a bowl of household ammonia inside the hood. Close the hood door or cover it. Leave it overnight. The ammonia fumes will break down the grease. The next day, open windows and remove the bowl. The grease will be softer and easier to wipe off. Wear gloves and eye protection. Ensure the area is extremely well-ventilated. This is a last resort method. It requires serious safety precautions. I rarely use this method. Only consider it for the most extreme cases.
Specific Considerations for Different Hood Materials
Range hoods come in various materials. Each material needs specific care. Using the wrong cleaner can damage the finish. Knowing your hood’s material helps you choose the right method. This protects your investment. I always check the material before applying any cleaner.
Stainless Steel Hoods
Stainless steel is common but prone to fingerprints and streaks. For cleaning sticky grease, use warm water with dish soap. A microfiber cloth works best. Wipe with the grain of the steel to avoid streaks. After cleaning, dry thoroughly. Use a dedicated stainless steel cleaner and polish. This adds shine and repels future fingerprints. Avoid abrasive scrubbers or steel wool. These can scratch the surface. Harsh chemicals like bleach can discolor stainless steel. Always stick to gentle, non-abrasive cleaners.
Painted or Enameled Hoods
Painted or enameled hoods are durable but can chip. Use mild cleaning solutions like dish soap and warm water. A soft sponge or cloth is essential. Avoid abrasive cleaners or scrubbers. These can remove the paint or enamel. For stubborn spots, a baking soda paste can work. Test it in a small, hidden area first. Rinse thoroughly and dry immediately. Chipping paint allows rust to form. Be gentle with these surfaces.
Copper or Brass Hoods
Copper and brass hoods add a unique look to kitchens. They also require special care. These metals can tarnish. For light stickiness, use warm soapy water and a soft cloth. For tougher grease, specific copper or brass cleaners might be needed. These products clean and polish the metal. Avoid anything acidic, like vinegar. Vinegar can cause discoloration on these metals. Always follow the product instructions for specialty metal cleaners. Regular polishing helps maintain their luster.
Glass Hood Elements
Many modern hoods have glass elements or touch screens. Cleaning these needs a streak-free approach. Use a glass cleaner or a solution of vinegar and water. Spray onto a microfiber cloth first, not directly onto the glass. Wipe gently. Avoid harsh chemicals near electronic screens. For screens, use a damp cloth and then dry immediately. Do not oversaturate the cloth. You want to avoid moisture getting into the electronics. Refer to tips on how to clean glass without streaks for best results.
Preventing Future Sticky Buildup
Preventing is better than deep cleaning. Regular maintenance saves you time and effort. It also keeps your hood working efficiently. I make sure to do small cleaning tasks often. This prevents big problems later. These simple habits keep your kitchen cleaner overall.
Regular Wiping After Cooking
Make it a habit to wipe down your range hood after each cooking session. Use a damp cloth with a little dish soap. This removes fresh grease before it hardens. It takes only a minute or two. This small step prevents sticky buildup from forming. It is especially important after frying or stir-frying. Fresh grease is easy to remove. Old grease is much harder.
Utilizing Exhaust Fan During Cooking
Always turn on your exhaust fan when you cook. Turn it on a few minutes before you start. Leave it on for a few minutes after you finish. This draws cooking fumes and grease particles away from your kitchen. It reduces how much grease settles on your hood and other surfaces. The fan is designed for this purpose. Using it properly is key to prevention.
Cleaning Filters Monthly
Clean your range hood filters at least once a month. If you cook often, clean them every two weeks. Clogged filters cannot trap grease effectively. This means more grease escapes into your kitchen air. Regular filter cleaning is easy. It makes a big difference in hood performance. Clean filters also extend the life of your hood. For more detailed filter care, refer to guides on how to clean range hood filter.
Using Splash Guards or Lids
Using lids on pots and pans helps contain grease splashes. This reduces the amount of grease that becomes airborne. Splash guards for frying also work well. They prevent grease from spattering onto your stovetop and hood. These simple tools minimize the mess. They make your hood stay cleaner longer. It is a small change that yields big results.
Addressing Kitchen Cabinet Stickiness
Grease can also spread to your kitchen cabinets. Especially cabinets near the stove. When cleaning your range hood, take a moment to wipe down nearby cabinet surfaces. Fresh grease on cabinets is easier to remove than old, sticky layers. Use similar degreasing solutions. This helps maintain a uniformly clean kitchen. A clean hood and clean cabinets go hand-in-hand. You can find more tips on how to clean sticky kitchen cabinets.
Common Mistakes to Avoid When Cleaning
Cleaning a range hood seems simple. However, some common mistakes can damage your hood or make cleaning harder. Avoiding these pitfalls ensures good results. I learned these lessons through experience. Now, I share them with you.
Ignoring Safety Precautions
The biggest mistake is forgetting safety. Always unplug the hood before cleaning. Water and electricity are a dangerous combination. Wearing gloves protects your skin. Good ventilation is important, especially with strong cleaners. Never mix different cleaning chemicals. This can create dangerous fumes. Ammonia and bleach are a prime example. Safety comes first, always.
Using Abrasive Cleaners or Tools
Avoid steel wool, abrasive scrubbers, or scouring powders. These can scratch or dull the finish of your hood. This is true for stainless steel, painted surfaces, and glass. Scratches trap more dirt and grease. Use soft cloths, sponges, or microfiber towels instead. Choose cleaning solutions designed for the material of your hood. Gentle cleaning agents prevent damage.
Not Soaking Filters Long Enough
Many people rush the filter cleaning process. They scrub before the grease has softened. This makes cleaning much harder. Give filters enough time to soak in hot, soapy water. At least 30 minutes is good. For heavy grease, soak for an hour or more. Soaking does most of the work for you. It allows the cleaning solution to break down the hardened grease.
Overlooking the Interior of the Hood
Focusing only on the visible exterior is a common mistake. The interior of the hood also collects grease. This buildup reduces airflow and efficiency. It can also be a fire hazard. Make sure to wipe down all accessible interior surfaces. Use a damp cloth to avoid spraying electronics directly. A thorough clean includes the inside.
Forgetting to Dry Surfaces Completely
Leaving surfaces wet after cleaning can lead to water spots. It can also attract new dust and make surfaces sticky again. Always dry the hood completely with a clean, dry cloth. For stainless steel, this helps prevent streaks. Complete drying is an important final step. It ensures a truly clean and polished finish.
Using the Wrong Cleaner for the Material
Not all cleaners are suitable for all materials. Vinegar can tarnish copper and brass. Harsh degreasers can strip paint or special coatings. Always check the hood’s material first. Then, choose a cleaner that is safe for that specific surface. If unsure, test a small, hidden area. This prevents accidental damage to your appliance.
Maintaining Optimal Kitchen Air Quality
A clean range hood does more than look good. It improves your kitchen’s air quality. This is important for your health and comfort. Cooking fumes contain particles and odors. The hood removes these from the air. Regular cleaning helps your hood do its job best.
The Role of the Range Hood in Air Quality
Your range hood pulls cooking fumes, steam, and grease particles into its ventilation system. It then filters or vents them outside. This prevents them from circulating in your home. Without a working hood, these pollutants linger. They can cause respiratory issues and leave odors in your home. A clean hood operates at peak efficiency. It keeps your air fresh.
Impact of Dirty Hoods on Indoor Air
A dirty, sticky range hood cannot effectively remove pollutants. Clogged filters restrict airflow. Grease buildup on surfaces reduces the fan’s power. This means more cooking byproducts stay in your kitchen. They settle on walls, furniture, and curtains. This leads to persistent cooking odors. It can also contribute to indoor air pollution. Regular cleaning directly improves your indoor air quality.
Health Benefits of a Clean Ventilation System
Better air quality means better health. Reducing exposure to cooking fumes protects your lungs. It can also reduce allergy symptoms. A clean kitchen environment feels more pleasant. It is also more hygienic. Your range hood is a vital part of this system. Keeping it clean supports a healthier home.
Beyond the Hood: Holistic Kitchen Cleaning
Maintaining a clean range hood is part of a larger kitchen cleaning routine. Grease and grime from cooking can affect other areas. This includes stovetops, backsplashes, and even floors. Regularly cleaning these areas complements your hood maintenance. It creates a healthier, cleaner kitchen. A comprehensive approach ensures all aspects of your kitchen contribute to good air quality. Consider regular deep cleaning for your entire kitchen. This includes your oven after self-clean cycles.
Frequently Asked Questions
Q1: How often should I clean my sticky range hood?
A1: You should wipe down the exterior of your range hood weekly, especially after heavy cooking. Clean the filters monthly for average use. If you cook frequently or fry often, consider cleaning the filters every two to three weeks. A deep clean of the entire hood, including interior parts, is good every three to six months.
Q2: Can I put my range hood filters in the dishwasher?
A2: Many metal mesh range hood filters are dishwasher safe. Check your hood’s user manual to confirm. If they are, place them in the dishwasher on a hot cycle with a strong detergent. Make sure to remove any large food particles first. Air dry them completely before reinstallation.
Q3: What is the best homemade degreaser for a sticky range hood?
A3: A strong homemade degreaser is a mixture of baking soda and a small amount of hot water to form a paste. Apply it to sticky areas and let it sit for a while. Another effective option is a solution of equal parts white vinegar and hot water in a spray bottle.
Q4: How do I clean a range hood that has very old, baked-on grease?
A4: For very old, baked-on grease, try a commercial heavy-duty degreaser, following product instructions carefully. Alternatively, make a thick baking soda paste and let it sit on the grease overnight. A steam cleaner can also effectively melt stubborn grease. Always use proper ventilation and protection.
Q5: Is it safe to use oven cleaner on a range hood?
A5: Most manufacturers do not recommend using oven cleaner on range hoods. Oven cleaners are very harsh and can damage the finish, paint, or electronic components of your hood. Stick to gentler degreasers specifically designed for kitchen surfaces or the methods outlined in this article.
Q6: Why does my range hood still smell after cleaning?
A6: If your range hood still smells after cleaning, the issue might be remaining grease deep within the fan motor or ductwork. Odors can also come from a dirty exhaust vent or a build-up in other kitchen areas. Ensure all filters are thoroughly clean and dry. Consider professional cleaning if the smell persists.
Conclusion
Cleaning a sticky range hood seems like a big task. But it becomes manageable with the right steps. You can bring back its shine and efficiency. We covered why hoods get sticky and what tools help. We then walked through cleaning filters, exteriors, and interiors. Remember to tackle stubborn grease and care for different materials. More importantly, we discussed prevention. Regular cleaning and proper fan use make a big difference.
A clean range hood helps keep your kitchen looking good. It also improves air quality for a healthier home. Do not let sticky grease build up. Take action today. You now have the knowledge to clean sticky range hood surfaces effectively. Start with one small section. You will soon enjoy a sparkling, efficient range hood. Your kitchen will thank you for it.
- range hood cleaning
- kitchen grease
- sticky residue
- home cleaning tips
- degreaser
- appliance care
- kitchen hygiene

