· Kitchen Maintenance · 16 min read
How To Clean Kitchen Faucet Head
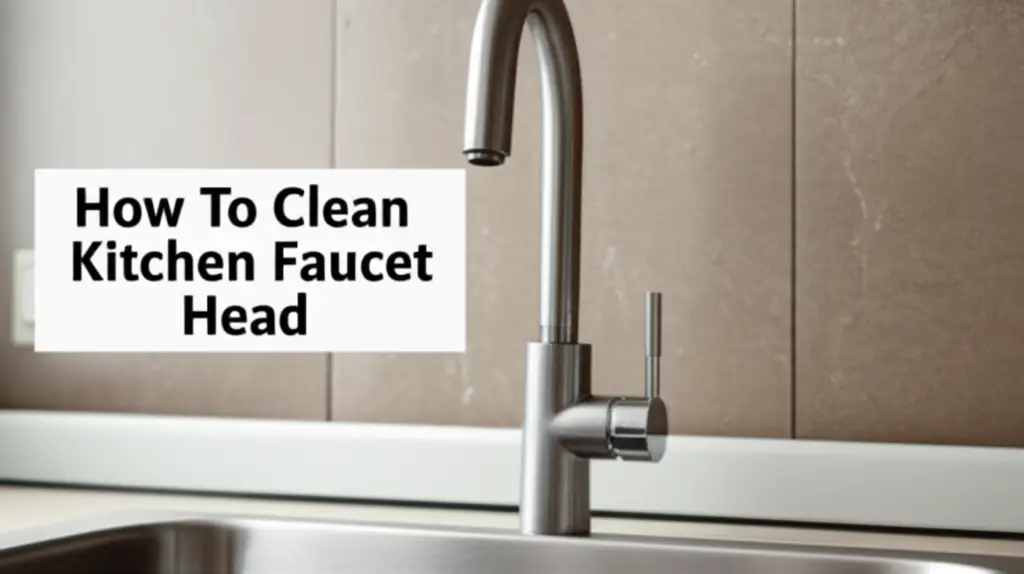
How To Clean Your Kitchen Faucet Head: A Complete Guide
Your kitchen faucet head works hard every day. It dispenses water for cooking, cleaning, and drinking. Over time, mineral deposits, food particles, and grime build up. This buildup can reduce water flow, spread germs, and make your kitchen look less inviting.
Learning how to clean kitchen faucet head parts is simple. You can restore water pressure and improve your kitchen’s hygiene. This guide provides step-by-step instructions. We cover various cleaning methods and tools. We will help you tackle even stubborn stains. Get ready to make your faucet shine and function like new.
Takeaway
- Gather Tools: Collect vinegar, baking soda, brushes, and rags.
- Disassemble Carefully: Remove the aerator for deep cleaning.
- Soak Parts: Use vinegar or a specialized cleaner to dissolve mineral buildup.
- Scrub Thoroughly: Clean all components, inside and out.
- Reassemble and Test: Put parts back together and check water flow.
- Maintain Regularly: Clean your faucet head often to prevent heavy buildup.
To clean a kitchen faucet head, remove the aerator if possible. Soak it in white vinegar for several hours to dissolve mineral deposits. Scrub away any remaining gunk with a small brush. Rinse all parts thoroughly. Reassemble the faucet head. This process restores water flow and removes buildup effectively.
Understanding Faucet Head Buildup
Faucet heads encounter various substances daily. Water contains minerals like calcium and magnesium. These minerals leave deposits when water evaporates. This forms hard water stains and limescale. Soap scum, food particles, and grease also stick to the faucet head.
Germs and bacteria grow in damp environments. Your faucet head is a prime spot for this. Regular cleaning stops these issues. It keeps your water supply clean. It also prevents clogs and maintains good water pressure. Ignoring buildup leads to poor performance and an unsightly appearance.
Why Faucet Heads Get Dirty
Water often contains dissolved minerals. These minerals accumulate as water dries. This creates a hard, chalky layer. We call this limescale or hard water buildup. This buildup happens on the aerator and around the nozzle. It can restrict water flow significantly.
Cooking activities also contribute to dirt. Grease and food splatters stick to the faucet. These residues trap dust and dirt. Soap scum from handwashing adds another layer of grime. Over time, this mixture becomes tough to remove. It needs more than a quick wipe.
Common Problems Caused by Buildup
Buildup on your faucet head causes several problems. The most common issue is reduced water pressure. Limescale clogs the small holes in the aerator. This stops water from flowing freely. Uneven water spray is another symptom. Some holes may be clear, while others are blocked.
A dirty faucet head also looks bad. Stains and grime detract from a clean kitchen. Harmful bacteria can also grow on the surface. These germs transfer to hands, dishes, and food. Cleaning your faucet head is crucial for both function and hygiene. Addressing how to clean build up on faucet regularly prevents these issues.
Essential Tools and Materials
Before you start cleaning, gather your supplies. Having everything ready makes the process smoother. You probably have most of these items in your home. These tools help you clean effectively and safely. You avoid last-minute trips to the store.
A well-stocked cleaning caddy saves time. It ensures you have the right item for each step. Proper tools protect your faucet from damage. They also make sure the job gets done right. Prepare these items for an easy and efficient cleaning session.
What You’ll Need
Here is a list of common items for cleaning a kitchen faucet head:
- White Vinegar: This is an acidic cleaner. It dissolves mineral deposits.
- Baking Soda: A gentle abrasive. It helps scrub away grime.
- Small Brush: An old toothbrush or a specialized faucet brush works well.
- Microfiber Cloths or Rags: For wiping and polishing.
- Pliers or Wrench (Optional): For removing a stubborn aerator. Protect the faucet with a cloth if using these.
- Small Bowl or Plastic Bag: For soaking parts.
- Dish Soap: For general cleaning.
- Soft Scrub Brush: For larger surfaces.
- Paper Towels: For drying.
Using the correct materials prevents scratching. It also ensures thorough cleaning. Avoid abrasive pads on polished surfaces. They can damage the finish. Always test cleaners in an inconspicuous area first.
Safety Precautions
Your safety matters when cleaning. Wear rubber gloves to protect your hands. Cleaning solutions can irritate skin. Good ventilation is also important. Open windows if you use strong cleaners. Never mix cleaning products, especially bleach and ammonia. This creates dangerous fumes.
Turn off the water supply to the faucet if you remove the aerator. This prevents accidental leaks. Place a towel in the sink basin. It catches any dropped parts. These steps keep you safe. They also protect your kitchen from damage during the cleaning process.
Step-by-Step Guide: Cleaning Your Faucet Head
Cleaning your kitchen faucet head is a straightforward process. Following these steps ensures a thorough clean. You will remove both visible grime and unseen mineral buildup. This restores your faucet’s performance and appearance.
This guide helps you tackle common issues. It provides clear instructions for each stage. We begin with general cleaning. Then we move to deeper methods. You will feel confident in your ability to make your faucet sparkle.
Initial Surface Cleaning
Start with the outside of your faucet head. This removes loose dirt and grease. Mix a few drops of dish soap with warm water. Dip a soft microfiber cloth into the solution. Wipe down the entire exterior of the faucet. Pay attention to the handle and spout.
For tougher spots, use a soft scrub brush. Gently scrub away any visible grime. Rinse the cloth often to avoid spreading dirt. Dry the faucet surface with a clean, dry cloth. This step makes subsequent deeper cleaning easier. It also instantly improves the faucet’s look.
Removing and Cleaning the Aerator
The aerator is the small screen at the tip of your faucet. It mixes air with water for a smooth flow. This part often collects the most mineral buildup. Removing it allows for a deep clean. Look for grooves or flat edges on the aerator.
You can often unscrew it by hand. If it is too tight, use pliers. Wrap a cloth around the aerator first. This protects the finish from scratches. Once removed, check for a rubber washer. Set it aside carefully. You will need it for reassembly. Some faucets also have a spray head. Cleaning how to clean kitchen faucet spray head can be done similarly.
Deep Cleaning with Vinegar
Vinegar is a powerful tool against mineral buildup. It is also natural and safe. Place the removed aerator and washer into a small bowl. Pour enough white vinegar to cover them completely. Let them soak for at least 30 minutes. For heavy buildup, soak overnight.
Vinegar dissolves the calcium and magnesium deposits. You might see bubbles forming. This indicates the acid reacting with the minerals. If you cannot remove the aerator, use a plastic bag. Fill the bag with vinegar. Secure it around the faucet head with a rubber band. Let it hang and soak. You can find more methods on how to clean faucet aerator without removing.
Scrubbing and Rinsing
After soaking, remove the aerator from the vinegar. Use a small brush, like an old toothbrush. Scrub away any remaining mineral deposits or grime. Pay close attention to the tiny holes. Ensure they are clear of debris. Rinse the aerator thoroughly under running water.
Clean the faucet spout’s interior where the aerator attaches. Use your small brush here too. Make sure no residue remains. Rinse all parts until they are completely clean. This ensures no vinegar taste or smell lingers. It also prepares the parts for reassembly.
Reassembly and Final Polish
Once all parts are clean and rinsed, reassemble your faucet head. Place the rubber washer back onto the aerator. Screw the aerator back into the faucet spout. Tighten it by hand. Do not overtighten with tools, as this can cause damage.
Turn the water supply back on if you turned it off. Test the water flow. It should be strong and even. Wipe down the entire faucet with a clean, dry microfiber cloth. Polish it until it gleams. This final touch makes your kitchen look fresh and inviting.
Tackling Stubborn Stains and Buildup
Sometimes, basic cleaning is not enough. Stubborn stains and heavy buildup require extra effort. These persistent issues often include deep mineral deposits or black gunk. Do not worry. Specific methods exist for these tough challenges.
Understanding these advanced techniques helps you achieve a truly clean faucet. We will cover options beyond vinegar. These methods address common complaints. They ensure your faucet head looks and performs its best.
Dealing with Heavy Limescale
For very heavy limescale, increase the soaking time. You can soak the aerator in vinegar for several hours, or even overnight. If vinegar alone is not enough, try a paste. Mix baking soda with a little vinegar to form a thick paste. Apply this paste directly to the affected areas. Let it sit for 15-30 minutes.
The fizzing action helps loosen the deposits. Scrub with a stiff brush after. Repeat if necessary. For extremely tough cases, consider a commercial limescale remover. Always follow product instructions carefully. Ensure it is safe for your faucet’s finish. A good article about how to clean hard water from shower head may offer additional insights.
Cleaning Black Gunk and Mold
Black gunk often indicates mold or mildew buildup. It can also be mineral deposits mixed with organic matter. For this, a solution of bleach and water works well. Mix one part bleach with ten parts water. Dip a brush in the solution. Scrub the affected areas thoroughly. Let it sit for a few minutes.
Rinse very well afterwards. Ensure no bleach residue remains. For a non-bleach option, use hydrogen peroxide. Apply it directly and let it sit. Scrub and rinse. Good ventilation is important when using bleach. Be careful not to splash it on surrounding surfaces. For more specific advice, see how to clean black gunk from faucet.
Alternative Cleaning Solutions
If you prefer not to use vinegar, other options exist. Lemon juice is another natural acid. It works similarly to vinegar but has a fresher scent. Apply lemon juice directly or soak parts in it. Rinse thoroughly afterwards.
Baking soda paste is also effective on its own. Mix baking soda with water until it forms a paste. Apply it, scrub, and rinse. Commercial hard water removers are available. They contain stronger acids. Use these products sparingly. Always check compatibility with your faucet’s finish. Remember, you can learn how to clean faucet head without vinegar using these alternatives.
Maintaining Your Kitchen Faucet Head
Regular maintenance prevents heavy buildup. It keeps your faucet working well and looking clean. A little effort often saves a lot of work later. Implementing simple habits extends the life of your faucet. It also ensures consistent water quality.
Think of it as preventive care for your kitchen. These practices are quick and easy. They fit into any busy schedule. They help you avoid stubborn stains and reduced water pressure.
Regular Cleaning Schedule
Clean your faucet head surface at least once a week. Use a damp cloth with mild dish soap. Wipe down the spout, handle, and base. This removes daily grime and soap scum. It stops light mineral deposits from hardening.
Every month, perform a mini-deep clean. Wipe around the aerator with a vinegar-soaked cloth. This keeps the small holes clear. For heavy use, a deeper clean might be needed every few weeks. Consistency is key for easy maintenance.
Preventing Hard Water Buildup
Hard water causes most faucet problems. You cannot change your water supply. You can, however, reduce its effects. Wipe your faucet dry after each use. This removes standing water. It prevents mineral spots from forming.
Consider installing a water softener for your home. This is a larger investment. It greatly reduces mineral content in your water. If a softener is not an option, use filtered water for drinking and cooking. This avoids introducing more minerals to the faucet.
When to Call a Professional
Most faucet cleaning is a DIY task. Sometimes, you may need professional help. If your faucet has a severe leak after cleaning, call a plumber. If the water flow remains very low despite cleaning, a pipe issue might exist.
If you cannot remove the aerator or other parts, a plumber can assist. They have specialized tools. They can also advise on replacement parts. Do not force anything. This prevents damage to your faucet or plumbing system.
Troubleshooting Common Faucet Problems
Even with regular cleaning, problems can arise. Understanding common faucet issues helps you address them quickly. Many problems stem from mineral buildup or worn parts. Knowing what to look for saves time and frustration.
This section covers typical complaints. We provide simple solutions. You can often fix these issues yourself. This empowers you to keep your kitchen running smoothly.
Low Water Pressure
Low water pressure is a classic sign of aerator clog. First, remove and clean the aerator as described earlier. Soak it in vinegar. Scrub all the tiny holes. If the pressure is still low, check the water supply lines. The shut-off valves under the sink might be partly closed. Ensure they are fully open.
Sometimes, debris from plumbing work can get into the lines. You might need to flush the lines. If the problem affects all faucets in your house, the issue is larger. It may involve your main water supply or a whole-house filter.
Uneven Water Flow
An uneven water flow means some aerator holes are blocked. The water stream looks scattered or sprays in odd directions. This is almost always due to mineral buildup. The solution is a thorough aerator cleaning.
Disassemble the aerator. Soak it in vinegar for an extended period. Use a small pin or needle to clear each individual hole. Be gentle to avoid damaging the aerator screen. Reassemble and test the flow. This usually solves the problem.
Dripping Faucet Head
A dripping faucet head is annoying and wastes water. This is usually not directly related to a dirty faucet head. It indicates a problem with the internal components. The most common cause is a worn-out washer or O-ring inside the faucet cartridge.
To fix this, you need to replace the faulty part. This involves turning off the water supply. Disassemble the faucet handle and body. Identify the cartridge or stem. Replace the worn rubber seals. This is a more involved repair. If unsure, consult a professional.
Advanced Faucet Care and Upgrades
Beyond basic cleaning, you can take steps to protect your faucet. Advanced care helps extend its life. It also keeps your kitchen looking modern. Consider these options for better performance and aesthetics.
Investing in your faucet pays off. It saves money on repairs. It ensures a reliable water source. These tips offer ways to enhance your kitchen experience.
Choosing Faucet Cleaners
While vinegar is excellent, specialized cleaners exist. Look for products designed for hard water. They often contain stronger acids. Always check the label for “faucet safe” or “chrome safe.” Avoid abrasive cleaners or scouring pads. They scratch finishes.
For matte black or brushed finishes, use non-abrasive cleaners. Some manufacturers recommend specific products for their faucets. Using the right cleaner protects your faucet’s warranty. It also preserves its appearance.
Protecting Faucet Finishes
Different faucet finishes require different care. Chrome is durable but shows water spots easily. Wipe it dry after each use. Brushed nickel and stainless steel are prone to fingerprints. Use a microfiber cloth for cleaning.
Matte black finishes need gentle care. Avoid harsh chemicals or abrasive materials. They can strip the finish. Stick to mild soap and water. Always test any new cleaner in an inconspicuous area. This prevents accidental damage.
Faucet Upgrades and Replacements
Sometimes, cleaning is not enough. An old or severely damaged faucet might need replacement. Consider upgrading to a new model. Modern faucets often have features that make cleaning easier. They may have anti-limescale nozzles.
Touchless faucets reduce germ spread. They also prevent dirty hands from touching the faucet. High-arc faucets give more space in the sink. When choosing, consider finish durability and ease of maintenance. A new faucet can transform your kitchen’s look and function.
Frequently Asked Questions
How often should I clean my kitchen faucet head?
You should wipe down your kitchen faucet head with mild soap and water at least once a week. Perform a deeper clean, including soaking the aerator in vinegar, every one to three months. This schedule depends on your water hardness and faucet usage. Regular cleaning prevents heavy mineral buildup and grime accumulation.
Can I clean my faucet head without removing it?
Yes, you can clean your faucet head without removing the aerator. Fill a plastic bag with white vinegar. Secure the bag around the faucet head with a rubber band so the aerator is submerged. Let it soak for a few hours or overnight. Remove the bag and scrub away any loosened buildup with a small brush.
What should I do if my faucet head still has low water pressure after cleaning?
If your faucet head still has low water pressure, check the shut-off valves under your sink. Ensure they are fully open. Debris might also be in the water supply lines. Consider flushing the lines or checking for other clogs in your plumbing system. If issues persist, a plumber can diagnose the problem.
Is it safe to use bleach to clean my kitchen faucet head?
You can use a diluted bleach solution (1 part bleach to 10 parts water) to clean black gunk or mold. Apply it with a brush, let it sit briefly, and rinse thoroughly. Always ensure good ventilation. Avoid using bleach on certain finishes, like matte black, as it can cause damage. Never mix bleach with other cleaners.
How do I prevent mineral buildup on my faucet head?
To prevent mineral buildup, wipe your faucet head dry after each use. This stops water from evaporating and leaving deposits. For hard water areas, consider installing a water softener. You can also apply a thin layer of car wax to the clean faucet. This creates a barrier against mineral adhesion.
Can I put my faucet aerator in the dishwasher?
It is not recommended to put your faucet aerator in the dishwasher. The high heat and harsh detergents in dishwashers can damage the rubber gaskets, plastic components, or the finish of the aerator. Soaking it in vinegar or cleaning it by hand is a safer and more effective method.
Conclusion
Cleaning your kitchen faucet head is a small task with big rewards. You restore water flow, eliminate germs, and enhance your kitchen’s appearance. Regular maintenance, combined with occasional deep cleaning, ensures your faucet performs its best. We covered the necessary tools, methods, and troubleshooting tips.
You now have the knowledge to tackle mineral buildup, black gunk, and low water pressure. Remember to clean your kitchen faucet head regularly. This simple habit keeps your kitchen hygienic and functional. A sparkling faucet contributes to a truly clean home.
- faucet cleaning
- hard water removal
- kitchen hygiene