· Automotive Maintenance · 19 min read
How To Clean Golf Cart Batteries
Clean Golf Cart Batteries: Enhance Performance and Lifespan
Do you rely on your golf cart for leisure, work, or daily transport around your property? If so, you understand how important it is for your cart to run smoothly. Often, the unsung heroes behind that smooth ride are your golf cart batteries. Neglecting them can lead to power loss, reduced range, and even complete battery failure. I’ve seen many golf cart owners overlook this simple but crucial maintenance step.
Learning how to clean golf cart batteries properly is key to maintaining your cart’s performance. It helps you avoid expensive replacements and keeps you on the green longer. This article will guide you through the process step-by-step. We will cover necessary safety precautions, the tools you need, and the best cleaning methods. Get ready to give your golf cart the power boost it deserves!
Takeaway
- Safety First: Always wear protective gear (gloves, eye protection) and ensure proper ventilation.
- Neutralize Corrosion: Use a baking soda and water solution to safely remove battery terminal corrosion.
- Maintain Electrolyte Levels: Regularly check and refill battery cells with distilled water.
- Regular Cleaning: Implement a consistent cleaning schedule to prevent future buildup and extend battery life.
Cleaning golf cart batteries involves safely disconnecting them, neutralizing acid corrosion with a baking soda and water solution, scrubbing terminals clean, rinsing, and then properly reassembling connections. This process improves electrical conductivity and extends battery lifespan.
The Importance of Cleaning Your Golf Cart Batteries
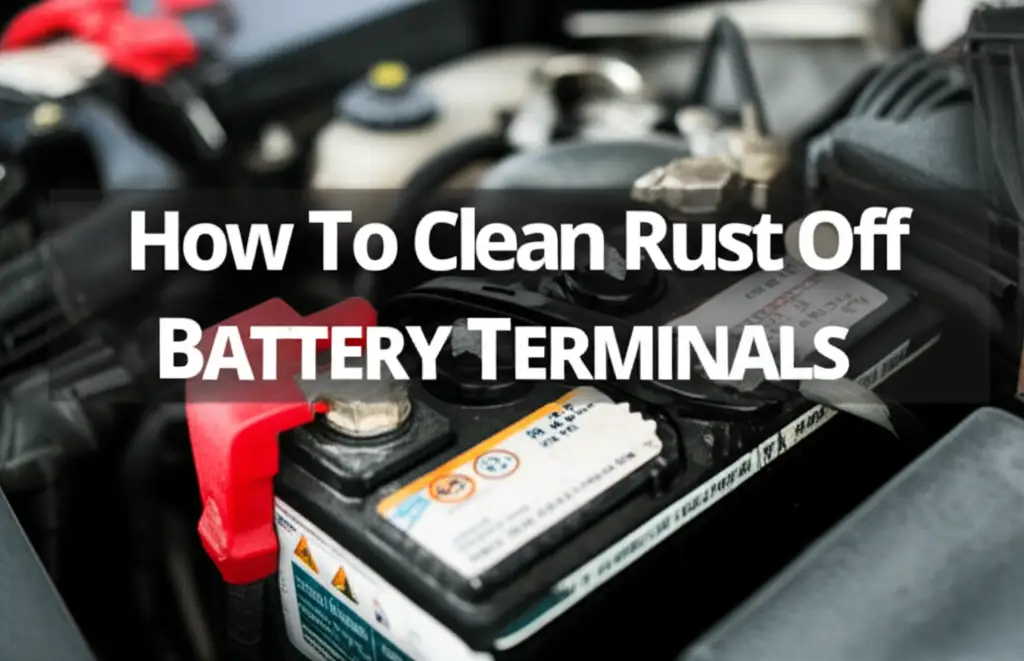
Your golf cart’s batteries are its heart. They power everything from the motor to the lights. Over time, corrosion builds up on battery terminals. This corrosion looks like a fuzzy, white, or greenish substance. It acts as an insulator, blocking the flow of electricity. This reduces your cart’s power and range.
Corrosion also shortens battery life. It can eat away at metal components if left unchecked. A clean battery system ensures peak performance and extends the life of your entire battery pack. I always tell my friends that a little cleaning goes a long way. This simple task saves you money in the long run by delaying costly battery replacements. Keep your golf cart running strong with regular battery care.
Essential Safety Precautions When Cleaning Batteries
Working with golf cart batteries means working with strong acids and electricity. Safety must be your top priority. I always make sure I have the right protective gear on hand. This protects you from potential hazards during the cleaning process. Never skip these steps.
Personal Protective Equipment (PPE)
You need to protect your eyes, hands, and skin. Battery acid is corrosive. Direct contact can cause severe burns.
- Safety Goggles or Face Shield: Protect your eyes from splashes of acid or cleaning solutions. Regular glasses are not enough.
- Acid-Resistant Gloves: Heavy-duty rubber or neoprene gloves protect your hands. Standard work gloves do not offer enough protection.
- Old Clothes or Apron: Wear clothing you do not mind getting dirty or damaged. Acid can ruin fabric.
- Respiratory Mask (Optional): If working in an enclosed space, a mask can protect against fumes, though usually not strictly necessary with good ventilation.
Work Area Safety
Choose your cleaning location carefully. A well-ventilated area is crucial. You want to avoid inhaling fumes.
- Ventilation: Work outdoors or in a garage with open doors and windows. This helps disperse any battery gas.
- No Sparks or Flames: Batteries produce hydrogen gas, which is highly flammable. Keep all ignition sources away. This includes cigarettes, lighters, and open flames.
- Non-Conductive Tools: Use wrenches with insulated handles. This reduces the risk of accidental short circuits.
- Baking Soda Nearby: Have a box of baking soda handy. It neutralizes battery acid spills quickly. This is your immediate go-to for acid contact on skin or surfaces.
Disconnecting and Reconnecting Batteries Safely
The order you disconnect and reconnect matters. An incorrect order can cause sparks or damage.
- Disconnect Negative First: Always disconnect the main negative terminal (usually black) first. This breaks the circuit.
- Disconnect Positive Second: Then disconnect the main positive terminal (usually red).
- Disconnect Series Connections: After the main terminals, disconnect the individual battery series and parallel connections.
- Reconnect Positive First: When reconnecting, attach all positive terminals first.
- Reconnect Negative Last: Finally, connect the main negative terminal last. This ensures a safe, complete circuit. Always double-check your connections before driving.
Gathering Your Cleaning Tools and Materials
Before you begin to clean golf cart batteries, collect all necessary tools and materials. Having everything ready makes the job quicker and safer. I like to lay everything out beforehand. This way, I do not have to search for items in the middle of the process.
Here is a comprehensive list:
- Personal Protective Equipment (PPE):
- Safety goggles or face shield
- Acid-resistant gloves
- Old clothes or an apron
- Cleaning Solutions:
- Baking Soda: A large box or container. This is your primary cleaner and acid neutralizer.
- Distilled Water: For rinsing and, if needed, topping off electrolyte levels. Tap water contains minerals that can harm batteries.
- Battery Terminal Protector Spray: An anti-corrosion spray or grease. This helps prevent future corrosion buildup.
- Cleaning Tools:
- Wire Brush or Battery Terminal Brush: Specifically designed for cleaning battery posts and clamps. A stiff-bristled brush works well too.
- Scrub Brush or Old Toothbrush: For general scrubbing of the battery tops and trays.
- Small Bucket or Spray Bottle: For mixing and applying the baking soda solution.
- Clean Rags or Towels: For wiping down surfaces and drying.
- Other Essential Tools:
- Battery Terminal Puller (Optional but Recommended): Makes removing stubborn terminals easier without damaging them.
- Socket Wrench Set: For loosening and tightening battery terminal nuts. Ensure the handles are insulated.
- Battery Hydrometer (Optional but Recommended): For checking the specific gravity of the electrolyte. This indicates battery charge and health.
- Funnel (Optional): For safely adding distilled water to battery cells.
Having these items organized helps you complete the task efficiently. Remember, proper tools make the job safer and more effective. Using the right materials ensures you clean golf cart batteries without causing damage.
Step-by-Step Guide to Cleaning Golf Cart Battery Terminals
Cleaning battery terminals is a methodical process. Following these steps carefully ensures a thorough and safe cleaning. I always take my time with each step. Rushing can lead to mistakes or injury.
1. Disconnecting Batteries Safely
First, ensure your golf cart is turned off. Remove the key from the ignition. Engage the parking brake. I cannot stress enough the importance of proper disconnection order.
- Locate the Main Negative Terminal: This is usually the last battery in the series, connected to the golf cart’s frame or controller with a black cable. Loosen and remove this cable first. Place it away from any metal.
- Locate the Main Positive Terminal: This is usually the first battery in the series, connected to the golf cart’s controller with a red cable. Loosen and remove this cable next.
- Disconnect Inter-Battery Cables: Now, disconnect the cables connecting individual batteries to each other. Do this one by one. Keep track of which cable goes where. Many people take a photo with their phone before starting. This helps during reconnection.
Remember, always use insulated tools when working near battery terminals. This prevents accidental short circuits.
2. Preparing the Cleaning Solution
A simple, effective cleaning solution is baking soda and water. This mixture neutralizes battery acid. It also helps loosen corrosion.
- Mix the Solution: In your small bucket or spray bottle, mix about one cup of baking soda with one gallon of warm water. You want a paste-like consistency if applying directly, or a fully dissolved solution for spraying. I prefer a slightly thicker solution for better scrubbing power.
- Test the Solution: Apply a small amount to a corroded area. It should fizz if there is acid present. This shows it is working. The chemical reaction neutralizes the acid, making it safe to clean. You can learn more about the power of these common household items for cleaning in general. For example, how to clean with vinegar and baking soda can offer broader insights into their cleaning properties. They are truly versatile!
3. Scrubbing Away Corrosion
Now, it is time to remove the buildup. This part takes a little elbow grease.
- Apply the Solution: Pour or spray the baking soda solution generously over the corroded terminals and battery tops. Let it sit for a few minutes. You should see it fizzing as it neutralizes the acid.
- Scrub Thoroughly: Use your wire brush or battery terminal brush to scrub the terminals. Get into all the nooks and crannies. A smaller old toothbrush works well for tighter spots. Remove all white, blue, or green powdery residue. For persistent corrosion, reapply the solution and scrub again. The goal is clean, shiny metal.
- Clean Battery Tops and Trays: Use a general scrub brush with the baking soda solution to clean the tops of the batteries and the battery tray. Wipe away any dirt or grime. This prevents future acid buildup from spills.
4. Rinsing and Drying
After scrubbing, proper rinsing and drying are essential. Do not skip this step.
- Rinse Carefully: Use a spray bottle filled with distilled water to rinse off all the baking soda solution and loosened corrosion. Do not use a hose or too much water. You want to avoid getting water into the battery cells.
- Wipe Dry: Use a clean, dry rag or towel to thoroughly dry all terminals, battery tops, and the battery tray. Ensure no moisture remains. Moisture can lead to new corrosion or even short circuits. I always double-check for any damp spots.
This meticulous cleaning ensures your battery connections are optimized. It prepares them for the next steps in battery maintenance.
Addressing Battery Corrosion and Acid Spills
Corrosion is a common issue with lead-acid batteries. It is important to understand why it happens and how to handle it. Acid spills are also a concern, requiring immediate attention. I have dealt with plenty of both in my time working with golf carts.
What Causes Battery Corrosion?
Corrosion on golf cart battery terminals typically appears as a white, blue, or green powdery substance. This is often lead sulfate or copper sulfate. It forms due to a chemical reaction between battery acid and the metal terminals or cables. Common causes include:
- Battery Gassing: During charging, batteries release hydrogen gas and small amounts of sulfuric acid mist. This mist settles on the terminals, reacting with the metal.
- Loose Connections: A loose cable connection can create resistance, leading to heat. This heat accelerates the chemical reaction.
- Overcharging: Charging a battery too much can cause excessive gassing, increasing corrosion.
- Cracked Battery Casing: Small cracks or leaks in the battery casing allow acid to escape, leading to corrosion on the battery top or tray.
Understanding the cause helps in preventing future issues.
Neutralizing Acid Spills
Battery acid is highly corrosive. Immediate neutralization is crucial if you spill any.
- Baking Soda is Key: Remember your baking soda? It is your best friend here. Sprinkle a generous amount of dry baking soda directly onto the acid spill.
- Observe and React: The baking soda will react with the acid, creating fizzing or bubbling. This shows the acid is being neutralized.
- Add Water (Slightly): Once the fizzing subsides, you can add a small amount of water to create a paste. Scrub the area.
- Rinse and Dry: Rinse the area with distilled water and thoroughly dry it. Dispose of any acid-soaked materials safely. I always keep a box of baking soda near my batteries, just in case.
Preventing Future Corrosion
Prevention is always better than cure. Once your terminals are clean, take steps to prevent corrosion from returning quickly.
- Apply Terminal Protector: After cleaning and drying, apply a battery terminal protector spray or grease. This creates a barrier against moisture and acid mist. I use a liberal amount on all connections.
- Check Connections Regularly: Ensure all battery cables are tightly secured. Loose connections contribute significantly to corrosion.
- Proper Charging Habits: Avoid overcharging your batteries. Follow the manufacturer’s recommendations for charging cycles.
- Regular Cleaning Schedule: Make battery cleaning part of your routine maintenance. Even a quick wipe-down every few months helps.
- Ventilation: Ensure your golf cart’s battery compartment has good airflow. This helps dissipate harmful gasses.
By following these steps, you can significantly reduce corrosion. This ensures a healthier and longer life for your golf cart batteries. Consistent care is the secret to battery longevity.
Checking Electrolyte Levels and Topping Off
Beyond cleaning the outside, maintaining the inside of your lead-acid golf cart batteries is vital. This means checking and topping off electrolyte levels. The electrolyte is a mixture of sulfuric acid and water. It is essential for the battery’s chemical reactions. I always make this a routine part of my battery maintenance.
Why Electrolyte Levels Matter
As lead-acid batteries charge and discharge, the water in the electrolyte evaporates or is consumed during the gassing process. This leaves the sulfuric acid more concentrated. If the water level drops too low, the battery plates become exposed to air. Exposed plates can sulfate and harden, causing permanent damage. This reduces the battery’s capacity and lifespan. It can also lead to battery failure. Maintaining proper electrolyte levels ensures the plates remain fully submerged.
When to Check Electrolyte Levels
The frequency depends on how often you use your golf cart and its charging habits.
- Monthly Check: For regularly used golf carts, I recommend checking levels at least once a month.
- After Every Few Charges: If you use your cart heavily, check levels every 5-10 charge cycles.
- Before Long Storage: Always check and top off before storing your golf cart for an extended period.
Always check levels when the batteries are fully charged and have cooled down. A fully charged battery gives a more accurate reading.
How to Check Electrolyte Levels
This process is straightforward but requires care.
- Safety First: Wear your safety goggles and acid-resistant gloves.
- Remove Vent Caps: Unscrew or pry off the battery vent caps. Some batteries have a single cap for all cells, others have individual caps.
- Inspect Levels: Look inside each cell. You should see the electrolyte covering the lead plates. The level should be about 1/4 to 1/2 inch above the plates. There is often a fill line marked inside the battery cell.
- Use a Hydrometer (Optional): A battery hydrometer measures the specific gravity of the electrolyte. This tells you the state of charge and overall health of each cell. A consistent reading across all cells indicates good health.
Topping Off with Distilled Water
If levels are low, you must add water. Only use distilled water.
- Why Distilled Water? Tap water contains minerals like calcium and magnesium. These minerals can build up on the battery plates. This reduces battery efficiency and lifespan. Distilled water is pure H2O.
- How to Add Water:
- Use a clean, plastic funnel for precision.
- Slowly pour distilled water into each cell until the level reaches the bottom of the fill line or about 1/4 to 1/2 inch above the plates.
- Avoid overfilling. Overfilling can cause acid to overflow during charging.
- Replace vent caps securely.
After topping off, it is a good idea to put the batteries on a full charge cycle. This helps mix the new water with the existing electrolyte. Proper electrolyte maintenance is a cornerstone of long-lasting golf cart batteries.
Reconnecting Batteries and Final Checks
Once your golf cart batteries are clean and, if needed, topped off, it is time to reconnect them. Proper reconnection is just as critical as safe disconnection. An incorrect order or loose connection can lead to sparks, damage, or poor performance. I always double-check everything at this stage.
The Correct Reconnection Sequence
Remember the order you disconnected? Now, reverse it. This ensures safety and a proper circuit.
- Reconnect Inter-Battery Cables: Start by reattaching the cables that connect individual batteries in series or parallel. Refer to your photo if you took one during disconnection. Ensure each connection is tight and secure. Loose connections are a common cause of power loss and future corrosion.
- Reconnect the Main Positive Terminal: Locate the main positive cable (usually red). Connect it to the positive terminal of the first battery in your series. Tighten the nut securely.
- Reconnect the Main Negative Terminal: Finally, locate the main negative cable (usually black). Connect it to the negative terminal of the last battery in your series. Tighten this connection firmly. This completes the circuit. You might see a small spark when connecting this last cable; this is normal.
Applying Battery Terminal Protector
After all connections are secure, apply a layer of protection. This step is crucial for preventing future corrosion.
- Use a Battery Terminal Protector: Spray a generous coating of battery terminal protector or apply a layer of dielectric grease over all terminals and cable connections. This creates a protective barrier against moisture, dirt, and acid fumes. It helps seal the connection and keeps oxygen away.
- Ensure Full Coverage: Make sure the spray or grease covers the entire connection point. This includes the terminal post and the cable clamp. I often use a small brush to spread the grease evenly.
Final Inspection and Testing
Before you take your golf cart for a spin, perform a final inspection. This ensures everything is in order.
- Check All Connections: Go around and visually inspect every single battery connection. Pull lightly on each cable to ensure it is tight. There should be no wobble or looseness.
- Verify Polarity: Double-check that all positive cables connect to positive terminals and negative cables to negative terminals. Incorrect polarity can severely damage your cart’s electrical system.
- Cleanliness Check: Ensure there is no residual cleaning solution or water on the battery tops or in the tray. Everything should be completely dry.
- Test the Cart: Once satisfied, turn on your golf cart. Listen for any unusual sounds. Check if the lights and other electrical components work. Take it for a short test drive to confirm full power and smooth operation.
Following these reconnection and inspection steps ensures your batteries are not only clean but also safely and securely integrated back into your golf cart’s system. This care translates directly into reliable performance.
Maintaining Your Golf Cart Batteries for Longevity
Cleaning your golf cart batteries is a vital step. However, it is just one part of a comprehensive maintenance routine. To truly maximize the lifespan and performance of your battery pack, ongoing care is essential. I always emphasize that consistent maintenance is the real secret to battery longevity.
Implement a Regular Cleaning Schedule
Consistency is key to preventing major corrosion buildup. Do not wait until you see thick layers of crud.
- Quarterly Cleaning: I recommend performing a thorough cleaning of your battery terminals and tops at least once every three months. This helps catch minor corrosion before it becomes a problem.
- Monthly Wipe-Down: A quick wipe-down of battery tops with a damp cloth (and baking soda solution if needed) can be done monthly. This removes dust and minor spills.
- Post-Heavy Use Check: If you use your golf cart heavily, especially in dusty or humid conditions, consider more frequent checks and cleanings.
By sticking to a schedule, you ensure your connections remain optimal year-round.
Proper Charging Habits
How you charge your batteries significantly impacts their health. Incorrect charging is a major cause of premature battery failure.
- Use the Right Charger: Always use a charger specifically designed for your golf cart’s battery type and voltage. An incompatible charger can damage batteries.
- Avoid Undercharging: Do not consistently stop the charging cycle early. Lead-acid batteries need a full charge to prevent sulfation.
- Avoid Overcharging: Overcharging causes excessive gassing, which can boil away electrolyte and lead to plate corrosion. Most modern chargers have automatic shut-off features. Ensure yours is working correctly.
- Charge After Every Use: For maximum battery life, charge your batteries after every significant use, even if you only used the cart for a short period. Do not wait until they are fully discharged.
- Charge in a Ventilated Area: This helps dissipate the hydrogen gas produced during charging.
Avoid Deep Discharges
Draining your batteries completely (deep discharge) is very harmful to lead-acid batteries.
- Monitor Battery Level: Pay attention to your golf cart’s battery indicator. Recharging when the battery is around 50% capacity is ideal.
- Do Not Run Batteries Dead: Running batteries completely dead stresses them severely. This reduces their overall capacity and lifespan.
- Charge During Storage: If storing your golf cart for an extended period, ensure the batteries are fully charged before storage. Then, use a smart charger or maintainer to provide a trickle charge. This prevents self-discharge and sulfation.
Keep Batteries Hydrated (Distilled Water)
As discussed earlier, electrolyte levels are crucial. Make sure you are using only distilled water.
- Regular Checks: Check electrolyte levels monthly or more often depending on usage.
- Top Off ONLY with Distilled Water: Never use tap water.
- Fill After Charging: Add water only after the batteries are fully charged and have cooled down.
By integrating these practices into your golf cart maintenance routine, you will significantly extend the life of your batteries. This translates to more reliable performance and fewer expenses. A well-maintained battery system keeps your golf cart running efficiently for years.
Frequently Asked Questions About Cleaning Golf Cart Batteries
How often should I clean golf cart batteries?
You should aim to clean golf cart battery terminals at least every three months. If you use your golf cart frequently or in dusty, humid environments, more frequent checks and cleanings (e.g., monthly) are beneficial. Regular cleaning prevents corrosion from building up and causing performance issues.
What causes corrosion on golf cart batteries?
Corrosion primarily results from battery gassing, where acid mist escapes and reacts with metal terminals. Loose connections, overcharging, and small cracks in the battery casing also contribute to corrosion. This chemical reaction forms the white or blue-green deposits seen on terminals.
Can I use plain water to clean battery terminals?
No, plain water alone is not enough. Plain water does not neutralize battery acid or effectively remove corrosion. You need a solution of baking soda and distilled water. The baking soda neutralizes the corrosive acid, making it safe to clean and effectively dissolving the built-up corrosion.
Is it safe to clean golf cart batteries myself?
Yes, it is safe to clean golf cart batteries yourself, provided you follow proper safety precautions. Always wear acid-resistant gloves and safety goggles. Work in a well-ventilated area and ensure no sparks or open flames are nearby. Disconnect and reconnect batteries in the correct sequence.
What is the best way to prevent future battery corrosion?
To prevent future corrosion, apply a battery terminal protector spray or dielectric grease after cleaning. Ensure all battery cable connections are tight. Practice proper charging habits, avoiding both overcharging and undercharging. Regularly check and maintain electrolyte levels with distilled water.
How long do golf cart batteries typically last with proper cleaning and maintenance?
With diligent cleaning, proper charging, and regular electrolyte checks, golf cart batteries can last significantly longer. You can expect them to last 5-7 years, sometimes even more. Without proper maintenance, their lifespan might reduce to 2-3 years.
Conclusion
Cleaning golf cart batteries is a straightforward yet crucial maintenance task. It directly impacts your golf cart’s power, range, and overall lifespan. I have seen firsthand how a little bit of regular effort in battery care can save you a lot of money and frustration in the long run. By following the steps outlined in this guide, you equip yourself with the knowledge to maintain your golf cart’s power source effectively.
Remember the key takeaways: always prioritize safety with proper PPE and ventilation. Use the simple yet powerful baking soda solution to tackle corrosion. Consistently check electrolyte levels and top off with distilled water. Finally, reconnect everything carefully and apply a protective layer. Making “how to clean golf cart batteries” a regular part of your maintenance routine ensures your cart remains a reliable workhorse or a fun ride for years to come. Take charge of your battery health today!
- golf cart maintenance
- battery cleaning
- golf cart battery care
- lead-acid batteries
- battery corrosion
- battery lifespan

