· Tool Maintenance · 17 min read
How To Clean Greasy Tools

Clean Greasy Tools: A Comprehensive Guide
Do you have tools covered in oil and grime? Greasy tools are common for anyone who works on cars, engines, or anything with moving parts. This oil buildup does more than just make your hands dirty. It can also make tools hard to grip, cause them to rust faster, and reduce their lifespan.
Cleaning your tools keeps them in good shape. It also makes your work safer and more pleasant. A clean tool performs better and lasts longer. This article shares how to clean greasy tools, from light grime to heavy oil. We will cover necessary supplies, step-by-step cleaning methods, and important tips for tool care. By the end, you will know how to keep your tools looking new and working well.
Takeaway:
- Regular cleaning prevents rust and extends tool life.
- Match your cleaning method to the type and amount of grease.
- Always dry tools completely to prevent rust.
- Proper storage is key to keeping tools clean.
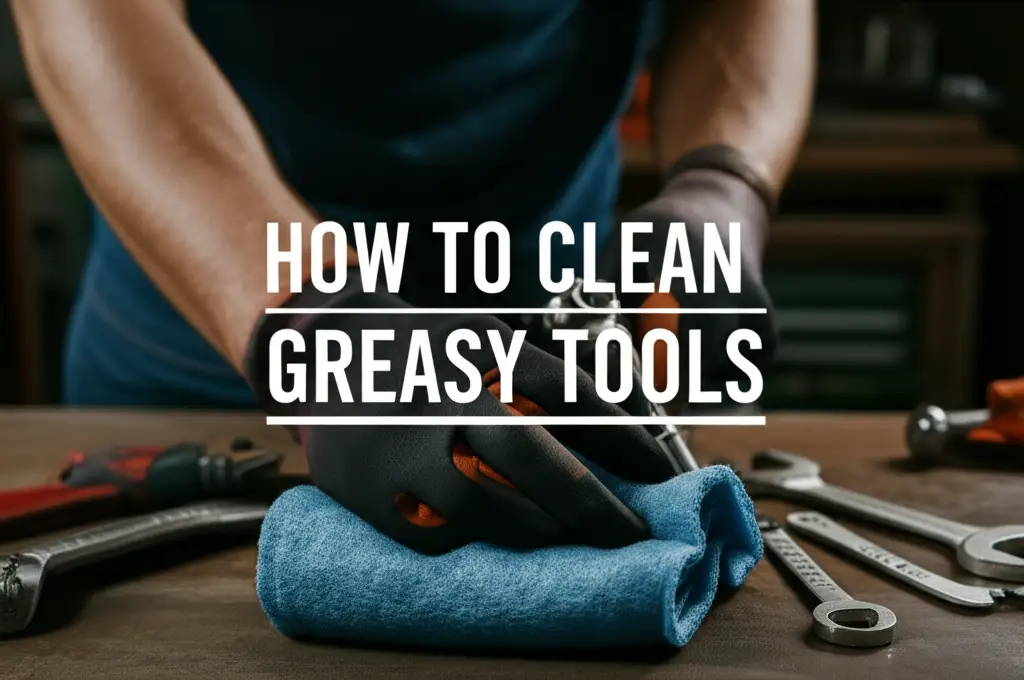
To clean greasy tools, gather suitable degreasers like dish soap, solvent, or specialized cleaners. Use brushes or rags to scrub away oil and grime. Rinse the tools thoroughly and ensure they are completely dry to prevent rust.
Why Tools Get Greasy and Why Cleaning Matters
Tools often become greasy when used with lubricants, oils, or fuels. Mechanics, carpenters, and DIY enthusiasts frequently encounter this. Oil can stick to tool surfaces during engine repairs or machinery work. Over time, this grease mixes with dirt, dust, and metal shavings. This creates a thick, sticky grime layer. This buildup makes tools less effective.
Grease on tools also causes safety problems. A greasy wrench can slip from your hand easily, leading to accidents. Greasy handles are hard to hold, making precise work difficult. Beyond safety, grime damages tools. It can hide rust starting on the metal. It also attracts more dirt, which grinds into moving parts. This wears them out faster. Cleaning your tools regularly solves these problems. It protects your investment and keeps your workspace safer. Clean tools are ready for any job.
Regular cleaning prevents tool damage. It stops rust from forming under the grease. It also prevents dirt from scratching or jamming tool mechanisms. A clean tool performs as it should. It feels good in your hand. This simple habit saves you money in the long run. You avoid replacing tools often.
Cleaning tools improves their function. Dirt and grease can stop moving parts from working smoothly. Hinges on pliers or ratchets may stick. Grease can also hide cracks or damage on your tools. This means you might miss important signs of wear. A clean tool allows for full inspection. It ensures you know your tools are safe to use. You can spot problems early. This protects both the tool and you.
Essential Supplies for Greasy Tool Cleanup
Before you start cleaning, gather all necessary items. Having everything ready makes the job easier and faster. Your safety comes first. Always wear gloves to protect your hands from grease and cleaning agents. Safety glasses also guard your eyes from splashes. You might need different cleaning supplies based on how greasy your tools are.
For light grease, simple items work well. A bucket of warm water is useful. Dish soap is a great degreaser. Old rags or shop towels are good for wiping. Stiff-bristled brushes help scrub away grime. An old toothbrush can reach small areas. These items are safe and effective for many jobs.
For heavier grease, you will need stronger cleaners. Mineral spirits are a powerful option for tough oil. Degreasing sprays are also effective. Brake cleaner works well for metal tools. Make sure to use these in a well-ventilated area. Read product labels for specific safety instructions. You might also need a scraper for dried-on gunk. A dedicated parts washer can be a good investment for very large collections of greasy tools.
Here is a list of supplies you might need:
- Safety Gear:
- Gloves (nitrile or heavy-duty rubber)
- Safety glasses
- Respirator mask (for strong solvents)
- Cleaning Agents:
- Dish soap (for light grease)
- Automotive degreaser or engine degreaser (spray or liquid)
- Mineral spirits or kerosene (for heavy grease)
- Brake cleaner (for metal tools, evaporates quickly)
- Rubbing alcohol (for final wipe down on some surfaces)
- Cleaning Tools:
- Stiff-bristled brushes (nylon or wire, depending on tool material)
- Old toothbrushes or small detail brushes
- Shop towels or old rags
- Scraper (for dried-on gunk)
- Small bucket or basin
- Air compressor (for drying, optional)
- Post-Cleaning Care:
- Rust preventative oil (e.g., WD-40, silicone spray)
- Clean, dry cloth
Using the right supplies protects your tools and yourself. Choose non-abrasive tools for delicate surfaces. Always test new cleaners on a small, hidden spot first. This helps prevent damage to your tools. Proper preparation sets you up for successful cleaning.
Step-by-Step Guide to Cleaning Lightly Greasy Tools
Cleaning lightly greasy tools is quick and simple. You can often do this with common household items. This method works well for hand tools that see regular but not heavy use. Think of screwdrivers, wrenches, or pliers with a thin layer of oil. This approach is gentle on your tools. It prevents rust and keeps them looking good.
Steps for Lightly Greasy Tools:
- Remove Loose Debris: First, wipe away any loose dirt or dust. Use an old rag or brush. This prevents mud from spreading when you introduce water. It makes the cleaning process more effective.
- Prepare Soapy Water: Fill a bucket with warm water. Add a generous amount of dish soap. Dish soap is excellent at breaking down grease. Stir the water to create suds.
- Submerge and Soak (if appropriate): For tools without electrical parts or wooden handles, you can submerge them. Let them soak for 5-10 minutes. This helps loosen the grease.
- Scrub the Tools: Take one tool at a time. Use a stiff-bristled brush or an old toothbrush. Scrub all surfaces of the tool. Pay attention to crevices, hinges, and textured handles. Work the soapy water into the grease.
- Rinse Thoroughly: Rinse each tool under clean, running water. Make sure all soap residue is gone. Soap left on tools can attract dust later. It can also cause corrosion over time.
- Dry Completely: This step is very important. Use a clean, dry shop towel to wipe down each tool. Make sure no water remains. Air dry them completely for several hours if possible. A fan can speed this up. Any moisture left behind will lead to rust.
- Apply Rust Protection: Once tools are dry, apply a light coat of rust preventative. A thin spray of WD-40 or a wipe with an oily rag works well. This creates a barrier against moisture. It keeps your tools ready for next use. This is especially important for tools made of carbon steel. For more information on rust and cleaning, you might find useful tips on how to clean old tools.
This simple method helps keep your general hand tools in good condition. It prevents the buildup from becoming severe. Regular light cleaning saves time later. It ensures your tools are always ready for work.
Tackling Heavily Greasy and Grimy Tools
When tools have thick, sticky grease and grime, you need stronger methods. This level of dirt often comes from engine work, machinery repair, or long-term neglect. Simple soap and water may not be enough here. We will use more potent degreasers. Always work in a well-ventilated area for these steps. This protects you from fumes.
Steps for Heavily Greasy Tools:
Scrape Off Excess Grime: Start by removing as much caked-on grease and dirt as possible. Use a plastic scraper or an old flathead screwdriver. Be careful not to scratch the tool’s surface. This step reduces the amount of degreaser needed.
Apply a Strong Degreaser:
- Commercial Degreasers: Spray a liberal amount of automotive degreaser directly onto the greasy areas. Let it sit for the time recommended on the product label. This allows the cleaner to break down the grease.
- Mineral Spirits/Kerosene: For extremely stubborn grease, soak the tools in a shallow pan of mineral spirits or kerosene. Only submerge the greasy parts if possible. Let them soak for 15-30 minutes. These solvents are very effective.
- Brake Cleaner: For metal-only tools, brake cleaner can be sprayed on. It cuts grease quickly and evaporates fast. Be careful as it can damage some plastics or painted surfaces.
Scrub Vigorously: Use a stiff wire brush (for tough metal parts) or a nylon brush. Scrub all surfaces where grease remains. Pay close attention to textured handles, hinges, and joints. An old toothbrush helps reach tight spots. For tough deposits like dried epoxy, techniques for how to clean epoxy resin off tools might be helpful. If you deal with other sticky residues, also look into how to clean resin off tools.
Rinse Thoroughly: After scrubbing, rinse the tools under running water. If using mineral spirits or kerosene, you may need a second wash with dish soap and water to remove the solvent residue. This ensures all the degreaser and grime are gone. Some people prefer to wipe off solvents instead of rinsing with water, then proceed to drying immediately.
Dry Completely: This step is even more critical for heavily cleaned tools. Use compressed air if available to blow out water from crevices. Otherwise, wipe down with dry rags. Allow tools to air dry fully, preferably in a warm, dry place. Moisture causes rust.
Lubricate Moving Parts and Apply Rust Protection: Once bone dry, apply a light oil or lubricant to all moving parts. This includes hinges, springs, and pivot points. Then, apply a thin coat of rust preventative to all metal surfaces. This creates a protective barrier. It prepares your tools for their next use. This comprehensive approach helps bring even the dirtiest tools back to life.
Special Considerations for Different Tool Types
Not all tools are the same, and their cleaning needs vary. Different materials and designs require specific care. Applying the wrong cleaning method can damage your tools. Understanding these differences helps keep your tools safe and functional. This section covers special care for various tool types.
Power Tools
Cleaning power tools needs extra caution. Water and electricity do not mix. Never submerge power tools in water or use excessive liquids.
- Disconnect Power: Always unplug the tool before cleaning. Remove any batteries. This prevents accidental startups or electrical shock.
- Wipe Down Exterior: Use a damp cloth with a mild cleaner to wipe the outer casing. Avoid getting water into the motor housing or vents.
- Compressed Air: Use compressed air to blow dust and debris from vents and internal components. This keeps the motor cool and running well.
- Avoid Solvents: Strong solvents can damage plastic housings or electrical components. Stick to mild degreasers or denatured alcohol on a cloth.
- Clean Accessories: Remove and clean any accessories like blades or bits separately. Use appropriate methods for their materials.
Hand Tools with Wooden Handles
Wooden handles can absorb water and swell or crack. They also absorb oils.
- Avoid Soaking: Do not submerge wooden handles in water. This prevents swelling and damage.
- Spot Clean: Use a damp cloth with mild soap to clean the metal parts. Wipe the wooden handle with a barely damp cloth.
- Oil the Wood: After cleaning and drying, apply a small amount of linseed oil or mineral oil to the wooden handles. This conditions the wood. It prevents drying and cracking.
Delicate Tools and Precision Instruments
Some tools, like calipers, micrometers, or electronic diagnostic tools, require gentle handling.
- Mild Cleaners Only: Use rubbing alcohol or electronic cleaner on a cloth. Avoid harsh chemicals that could damage sensitive components or readouts.
- Lint-Free Cloths: Use microfibers or lint-free cloths to prevent leaving fibers behind.
- Avoid Force: Do not apply excessive force when cleaning. Delicate parts can bend or break.
- Lubricate Sparingly: If lubrication is needed, use very light, specialized oils. Refer to the tool’s manual for guidance.
Garden Tools
Garden tools often have sap, soil, and rust, not just grease. Cleaning them properly extends their life. You might find more specific advice on how to clean garden tools.
- Remove Soil: Scrape off all soil and plant debris first. A hose can help wash away loose dirt.
- Warm Soapy Water: Use warm, soapy water for general cleaning. A stiff brush helps remove caked-on dirt.
- Disinfect: For cutting tools, disinfect blades with rubbing alcohol or a bleach solution (1 part bleach to 9 parts water). This prevents spreading plant diseases.
- Sharpen: After cleaning, sharpen blades if needed.
- Oil for Rust Prevention: Apply a thin layer of oil (e.g., mineral oil or spray lubricant) to metal parts. This protects against rust.
By tailoring your cleaning approach, you ensure each tool gets the care it needs. This protects its function and extends its useful life.
Drying and Rust Prevention After Cleaning
Cleaning tools effectively involves more than just scrubbing away grease. The drying phase is just as important, if not more so, for tool longevity. Any water left on metal surfaces will lead to rust. Rust is the enemy of tools. It weakens metal, jams moving parts, and makes tools unusable. Preventing rust saves you money and effort in the long run.
Steps for Effective Drying:
- Initial Wipe Down: As soon as you finish rinsing a tool, wipe it thoroughly. Use a clean, dry shop towel or microfiber cloth. Remove as much visible water as possible.
- Air Dry (Crucial): After wiping, allow your tools to air dry completely. Place them in a warm, dry area. Avoid humid environments. You can lay them on a clean, dry surface or hang them up. This lets any remaining moisture evaporate.
- Use Compressed Air (Optional but Recommended): If you have an air compressor, use it. Blow air into crevices, hinges, and tight spots. This pushes out hidden water droplets. It ensures no moisture remains in hard-to-reach areas. This is especially good for tools with complex mechanisms.
- Consider a Desiccant: For very humid environments, you might place a desiccant packet (like silica gel) near your drying tools. These absorb moisture from the air.
Rust Prevention Strategies:
Once your tools are bone dry, apply a rust preventative. This creates a barrier against moisture and oxygen. It keeps your tools protected.
Light Oil Application:
- Spray Lubricants: Products like WD-40 or similar rust-inhibiting sprays work well. Spray a light, even coat over all metal surfaces. Wipe off any excess.
- Mineral Oil: You can apply a thin layer of mineral oil using a clean cloth. This is a good option for tools that touch skin or food items.
- Machine Oil: General machine oil or 3-in-1 oil can also provide protection.
- How to Apply: Pour a small amount onto a clean rag. Wipe the rag over all metal parts of the tool. Ensure a thin, even layer. Do not over-apply. Excess oil attracts dust.
Silicone Spray: For tools with plastic or rubber parts that you want to protect, silicone spray is a good choice. It lubricates and protects without attracting dust as much as oil.
Wax Coatings: For long-term storage or very exposed tools, consider a paste wax or car wax. Apply a thin coat and buff it off. This creates a durable protective layer.
Desiccant Packs in Storage: Place desiccant packs in your toolbox or storage area. These absorb humidity. They help maintain a dry environment for your tools.
By focusing on thorough drying and applying a protective layer, you significantly extend the life of your tools. Clean, dry, and protected tools are always ready for their next job. They resist rust and operate smoothly for years.
Maintaining Clean Tools and Preventing Future Buildup
Keeping tools clean is an ongoing process. It is easier to prevent heavy grease buildup than to clean it later. Regular maintenance saves you time and effort. It also ensures your tools are always in top working condition. A few simple habits can make a big difference.
Tips for Ongoing Tool Maintenance:
- Clean After Every Use: This is the most effective prevention. After finishing a task, take a moment to wipe down your tools. Use a shop rag to remove oil, grease, and dirt. This simple step prevents grime from drying and hardening.
- Store Tools Properly:
- Dry Environment: Store tools in a dry area. Basements and garages can be humid. Consider a dehumidifier or desiccant packs in your toolbox.
- Toolbox/Drawer Liner: Use non-slip drawer liners or toolbox mats. These absorb small amounts of oil and provide a cushioned surface.
- Organize: Keep tools organized. This makes it easier to spot a dirty tool and grab the right one.
- Individual Slots/Holders: If possible, store tools in individual slots or holders. This prevents them from rubbing against each other.
- Light Lubrication: For tools with moving parts, apply a tiny amount of lubricant regularly. This keeps them moving smoothly. It also helps repel moisture. For example, a drop of oil on pliers’ pivots.
- Inspect Regularly: Take a few minutes each month to inspect your tools. Look for signs of grease buildup, rust, or damage. Address issues early before they become major problems.
- Use Tools Correctly: Using a tool for its intended purpose reduces stress and wear. This also reduces the chance of damaging it or making it overly dirty.
- Avoid Putting Dirty Tools Away: Never put a greasy tool back into a clean toolbox. This contaminates other tools and the storage space. It makes future cleaning harder.
Creating a Cleaning Routine:
Consider setting up a cleaning routine. For instance, do a quick wipe-down after each use. Once a month, do a more thorough check and clean. This systematic approach ensures no tool is overlooked. It helps maintain the quality of your entire tool collection. A well-maintained tool set performs better. It lasts longer. It makes your work more efficient and enjoyable. Taking good care of your tools is an investment in your craft.
FAQ Section
What is the best degreaser for tools?
The best degreaser depends on the grease level. For light grease, dish soap works well. For heavy grime, automotive degreasers, mineral spirits, or brake cleaner are effective. Always choose a product safe for your tool’s material. Ensure good ventilation when using strong chemicals.
Can I use WD-40 to clean greasy tools?
WD-40 can help loosen some grease and displace moisture. It is more of a penetrating oil and water dispersant than a primary degreaser. Use it to help break down light grease or free stuck parts. Follow up with a dedicated cleaner for heavy grease.
How do I prevent tools from getting greasy?
Wipe tools down immediately after each use. Store them in a clean, dry toolbox or drawer. Apply a light coat of rust-preventative oil to metal surfaces for protection. Avoid storing tools in humid environments.
Is it safe to clean power tools with water?
No, it is generally not safe to clean power tools with water. Water can damage internal electrical components. Always unplug power tools first. Use a damp cloth to wipe the exterior. Use compressed air to remove dust from vents.
How often should I clean my tools?
Clean tools after every use to remove light grime. Perform a deeper clean whenever you notice significant grease buildup. For tools used frequently, a monthly inspection and thorough cleaning are good practice.
What about rusty tools?
Cleaning rusty tools requires specific methods. First, remove the grease as described. Then, use rust removers like rust-dissolving solutions or abrasive methods like wire brushing. After removing rust, always dry thoroughly and apply rust preventative oil. For comprehensive rust removal strategies, consider looking at articles specifically on how to clean old tools.
Conclusion
Cleaning greasy tools is a simple but important part of tool maintenance. It keeps your equipment working well and lasts longer. We have covered why tools get greasy and the many benefits of keeping them clean. You now know the essential supplies needed for any level of grime. We also walked through step-by-step guides for both light and heavy grease.
Remember to consider specific tool types like power tools or delicate instruments. Proper drying and rust prevention are crucial. They protect your investment. Finally, we looked at how to maintain clean tools and prevent future grease buildup. Regular wiping, good storage, and a little bit of oil go a long way. Make tool cleaning a regular habit. Your tools will thank you with years of reliable service. Keep your tools clean, and they will always be ready for the job ahead.
- greasy tools
- tool cleaning
- degreasing tools
- rust prevention
- tool care


