· Tool Maintenance · 13 min read
How To Clean Hedge Trimmer Blades

Keep Your Hedge Trimmer Blades Sharp: A Guide to Cleaning
Have you ever noticed your hedge trimmer struggling to cut through branches? Dull or dirty blades often cause this problem. Cleaning your hedge trimmer blades is not just about making them look nice. It is about keeping them sharp, preventing rust, and extending the life of your tool. I find that regular cleaning makes my trimming tasks much easier and more efficient.
This guide will show you exactly how to clean hedge trimmer blades. We will cover why cleaning is important and what tools you need. I will also share step-by-step methods for removing sap, dirt, and rust. You will learn how to protect your blades for future use. Let’s make sure your hedge trimmer performs at its best, season after season.
Takeaway
- Regularly clean hedge trimmer blades to ensure efficient cutting.
- Always prioritize safety by disconnecting power before cleaning.
- Remove sap and debris with appropriate cleaners.
- Address rust promptly to prevent blade damage.
- Lubricate blades after cleaning for smooth operation and rust prevention.
Clear Answer
Cleaning hedge trimmer blades involves disconnecting power, removing large debris, scrubbing off sap and dirt with a brush and cleaning solution, addressing any rust with a wire brush or steel wool, then thoroughly drying and lubricating the blades to protect them from future corrosion.
The Importance of Cleaning Hedge Trimmer Blades
Cleaning hedge trimmer blades regularly is very important. Dirty blades make your work harder. They can also damage your plants. When blades are covered in sap and debris, they pull and tear at branches instead of making clean cuts. This stresses your plants and makes them more prone to disease.
Clean blades cut efficiently. This means less effort for you and healthier hedges. Think about how much better a sharp, clean knife cuts compared to a dull one. The same idea applies to your hedge trimmer. Also, dirt and sap can hold moisture against the metal. This leads to rust formation. Rust degrades the blade’s edge and its overall strength.
Regular cleaning prevents these problems. It saves you money on repairs or replacements. It also keeps your tool ready for use whenever you need it. A clean tool is a reliable tool. I always make sure to clean mine after each significant use.
Essential Tools and Materials for Blade Cleaning
Before you start cleaning, gather all your supplies. Having everything ready saves time and makes the process smooth. You likely have many of these items already in your home or garage. Safety equipment is the most important item on your list.
Here is what you will need:
- Safety Gloves: Protect your hands from sharp blades and cleaning solutions.
- Safety Glasses: Keep your eyes safe from debris and chemical splashes.
- Stiff Brush or Wire Brush: Ideal for scrubbing away stubborn dirt and rust.
- Cloth Rags or Paper Towels: For wiping down blades and applying solutions.
- Cleaning Solution: This could be dish soap and water, a specialized blade cleaner, or a mixture of vinegar and water. For tough organic residues, I often consider the strong cleaning power of vinegar, similar to how it tackles tough mold with vinegar.
- Rubbing Alcohol or Mineral Spirits: Effective for dissolving sticky sap.
- Wire Wool or Fine-Grit Sandpaper: For removing light rust.
- Lubricating Oil or Silicone Spray: Essential for protecting blades after cleaning.
- Screwdriver/Wrench (if disassembling): Sometimes necessary for deeper cleaning.
Having these tools nearby ensures you can complete the cleaning job properly and safely. Do not skip any safety gear. Your hands and eyes are valuable.
Step-by-Step Guide to Cleaning Hedge Trimmer Blades
Cleaning your hedge trimmer blades is a straightforward process. Following these steps will ensure a thorough clean. Always remember to prioritize safety first. Never rush through the process.
Step 1: Prioritize Safety Measures
Safety is crucial when handling sharp blades. Before you do anything else, disconnect the power source. For electric trimmers, unplug the cord. For battery-powered trimmers, remove the battery pack. Gasoline trimmers require the spark plug wire to be disconnected. This prevents accidental starts.
Wear heavy-duty work gloves. These gloves protect your hands from cuts. Safety glasses are also important. They shield your eyes from any debris that might fly off during cleaning. Make sure your work area is well-lit and stable. I always double-check these steps before I even pick up a rag.
Step 2: Remove Large Debris and Loose Dirt
Start by getting rid of the obvious stuff. Use a stiff brush to brush off large pieces of leaves, twigs, and loose dirt. A plastic scraper can help with caked-on mud. Be gentle to avoid damaging the blades. You want to clear the surface for a deeper clean.
Hold the trimmer blades downward so debris falls away from the motor. This quick first pass saves you effort later. It also gives you a clearer view of stubborn spots like sap and rust. I use a dry brush for this initial step.
Step 3: Tackle Stubborn Sap and Grime
Sap and resin are notorious for sticking to blades. They make blades gummy and inefficient. For fresh sap, a simple solution of warm water and dish soap can work wonders. Use a rag soaked in this mixture to wipe down the blades. If the sap is older and hardened, you will need something stronger.
Rubbing alcohol or mineral spirits are very effective at dissolving tough sap. Apply a small amount to a cloth and wipe the blades. You might need to let it sit for a few minutes on very stubborn spots. I find that the stickiness goes away quite quickly. This step is crucial for restoring the blade’s smooth action. You want the blades to move freely, not stick together. Sometimes, very tough, stuck-on residues are like those on a dirty pan, requiring persistent effort; consider how one might clean the bottom of a pan for similar tenacious grime.
Step 4: Address Rust Spots
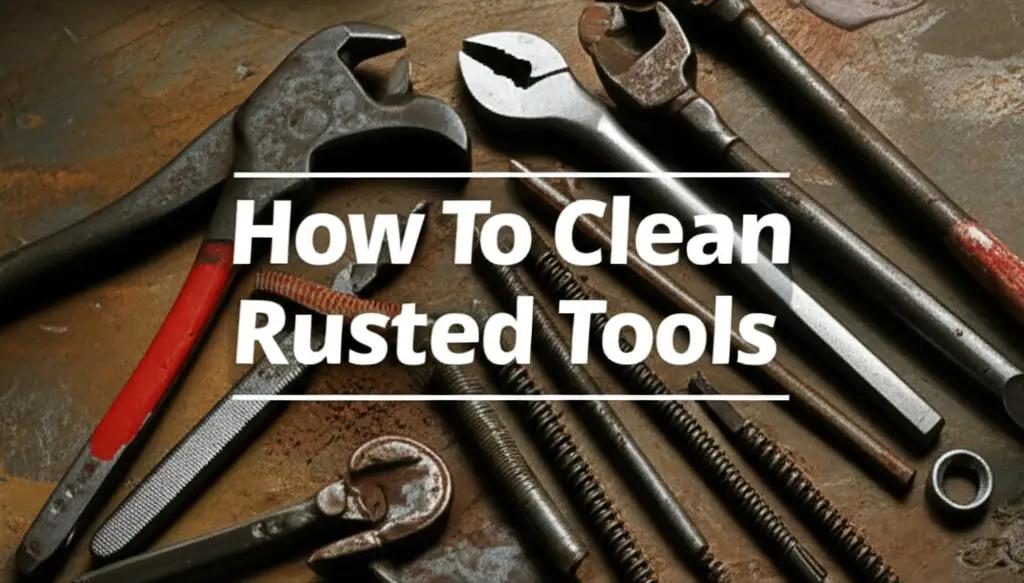
Rust is the enemy of any metal tool. It dulls the edge and weakens the blade over time. If you see light rust, you can often remove it with a wire brush or steel wool. Gently scrub the rusted areas. For more stubborn rust, fine-grit sandpaper (around 120-grit) can be used. Rub gently in the direction of the blade, not across it.
Another option for light rust is a mixture of vinegar and water. Soak a rag in equal parts vinegar and water and apply it to the rusted areas. Let it sit for 15-30 minutes, then scrub. Vinegar’s acidity helps break down rust. For organic residues like sap, vinegar also works well, much like how it helps to clean mold with vinegar in other contexts. After removing the rust, wipe the area clean. It is important to completely dry the blades after this step to prevent new rust from forming.
Step 5: Dry the Blades Completely
After cleaning with any liquid solution, thorough drying is critical. Moisture is the main cause of rust. Use clean, dry rags or paper towels to wipe down every part of the blades. Pay special attention to crevices and overlapping areas. You can also let the trimmer air dry in a warm, dry place for a few hours.
Make sure no water droplets remain. I sometimes use compressed air to blow out moisture from tight spots. This step prevents new rust from forming immediately after cleaning. A completely dry blade is ready for the next important step.
Step 6: Lubricate for Protection and Performance
Lubrication is the final and very important step in blade maintenance. Applying a good quality lubricating oil protects the blades from rust. It also ensures smooth operation. Rust-inhibiting oil or silicone spray works best. Apply a thin, even coat over the entire surface of both blades. Make sure to get into the grooves and along the cutting edges.
Cycle the blades a few times to spread the oil evenly. This helps the oil penetrate all moving parts. Lubrication reduces friction, which keeps the blades sharper longer. It also makes your trimming tasks easier. This step extends the life of your hedge trimmer significantly. Just like keeping other engine parts clean, proper lubrication keeps the entire tool running smoothly, much like understanding how to clean a carburetor on a Stihl hedge trimmer ensures fuel delivery for optimal performance.
Maintaining Your Hedge Trimmer Blades for Longevity
Regular maintenance goes beyond just cleaning. It involves a routine that keeps your blades in top condition. This approach maximizes their lifespan. It also ensures your hedge trimmer is always ready for peak performance. I have found that a consistent routine saves me a lot of trouble and expense in the long run.
Regular Cleaning After Each Use
The best way to maintain your blades is to clean them after every use. Even a quick wipe-down can prevent sap and debris from hardening. This proactive approach saves you from dealing with tough, caked-on grime later. A few minutes of cleaning now prevents hours of work later. It is a simple habit that makes a big difference.
Proper Storage Techniques
How you store your hedge trimmer affects blade condition. Always store your trimmer in a dry, covered area. A shed or garage is ideal. Avoid storing it in places with high humidity. Humidity encourages rust formation. I keep mine elevated on a hook to prevent ground moisture from affecting it. This also protects the blades from accidental damage.
Sharpening Blades When Needed
Even with the best cleaning and lubrication, blades will eventually dull. Dull blades tear at branches and make trimming difficult. Sharpen your blades annually or more often if you use your trimmer frequently. You can use a flat file, a sharpening stone, or a specialized blade sharpener. If you are unsure, professional sharpening services are available. Sharp blades make clean cuts. They also reduce strain on the motor.
Inspecting for Damage
Before each use, take a moment to inspect your blades. Look for any signs of damage like nicks, bends, or cracks. Damaged blades can be dangerous and inefficient. Replace them if they are severely damaged. Early detection of issues can prevent bigger problems down the line. A quick check only takes a moment.
Common Cleaning Challenges and Solutions
Sometimes, cleaning hedge trimmer blades presents unique challenges. Dealing with very sticky sap or deep rust can be frustrating. However, specific solutions exist for these common problems. Do not give up if your blades do not come perfectly clean right away.
Very Sticky Sap
Very sticky sap requires a strong solvent. Mineral spirits, paint thinner, or even WD-40 can break down stubborn resin. Apply the solvent to a cloth. Then, wipe down the blades. Let it sit for a few minutes on really tough spots. A stiff brush can help scrub away the softened sap. Always wipe away excess solvent afterwards.
Heavy Rust Accumulation
For heavy rust, more aggressive action might be needed. After trying wire wool, consider a rust-removing gel or liquid. These products dissolve rust chemically. Follow the product instructions carefully. They often require the product to sit for a period. Always wear appropriate safety gear. After treatment, thoroughly clean and dry the blades. Then, lubricate them generously to prevent future rust.
Gunk in Tight Spaces
Debris can get packed into tight spaces between the blades. A small, stiff brush or an old toothbrush can reach these areas. You can also use a wooden stick or a plastic pick to dislodge stubborn gunk. Never use metal objects that could scratch or damage the blade surface. Compressed air can also help blow out small particles. Taking the time to clean these areas ensures full blade movement.
When to Seek Professional Help
While cleaning your hedge trimmer blades yourself is usually straightforward, sometimes professional help is the best option. Knowing when to call in an expert can save you time and prevent further damage. I usually handle the cleaning myself, but some issues truly need a professional touch.
Consider professional service if:
- Blades are severely bent or warped: This type of damage affects blade alignment. It can make cutting impossible or dangerous. Professionals have specialized tools to fix or replace warped blades.
- Deep rust has pitted the metal: Pitting weakens the blade structure. It can also create an uneven cutting surface. A professional can assess if the blade is salvageable or needs replacement.
- You suspect internal damage: If the blades are not moving smoothly even after cleaning and lubrication, there might be internal mechanism issues. These issues are beyond simple blade cleaning.
- You need expert sharpening: If you are uncomfortable sharpening the blades yourself, or if they require a specific angle, a professional sharpening service is ideal. They ensure the correct edge is restored without damage.
Professional help ensures your hedge trimmer remains safe and effective. It extends the life of your valuable tool. Do not hesitate to seek expert advice when facing complex problems.
Frequently Asked Questions
What should I use to clean sticky sap off hedge trimmer blades?
For sticky sap, rubbing alcohol or mineral spirits work best. Apply a small amount to a clean cloth. Then, wipe down the blades. For very stubborn sap, let the solution soak for a few minutes before scrubbing gently with a stiff brush. Dish soap and warm water can also work on fresh sap.
How often should I clean my hedge trimmer blades?
You should clean your hedge trimmer blades after every use. A quick wipe-down removes fresh sap and debris. This prevents buildup and hardening. For a more thorough cleaning, including rust treatment and lubrication, performing this annually or after every 25 hours of use is a good practice.
Can I use WD-40 to clean hedge trimmer blades?
Yes, WD-40 can help clean hedge trimmer blades. It acts as a solvent to loosen sap and grime. It also provides light lubrication and rust prevention. Spray it on, let it sit, then wipe clean. Follow up with a dedicated lubricating oil for better long-term protection.
What is the best way to prevent rust on hedge trimmer blades?
To prevent rust, always clean and thoroughly dry your blades after each use. Then, apply a rust-inhibiting lubricating oil or silicone spray. Store the trimmer in a dry, protected environment. Avoid leaving it exposed to moisture or humidity. These steps create a protective barrier.
Do I need to sharpen my blades after cleaning them?
Not necessarily after every cleaning, but you should sharpen blades when they become dull. Cleaning removes grime, which improves performance. However, dullness is from wear, not dirt. If your trimmer pulls or tears at branches despite being clean, it is time for sharpening.
Is it safe to use water to clean electric hedge trimmer blades?
Using water directly on electric hedge trimmer blades is safe if the trimmer is unplugged and fully dried afterwards. Avoid spraying water directly into the motor housing. For electric models, a damp cloth with cleaning solution is often safer than full submersion. Ensure complete drying before reconnecting power.
Conclusion
Cleaning your hedge trimmer blades is a simple task with big rewards. It keeps your tool performing its best. Clean blades cut more efficiently, which means healthier plants and less work for you. Regularly removing sap, dirt, and rust also extends the life of your hedge trimmer. This saves you money in the long run.
Remember to prioritize safety by always disconnecting power. Then, systematically clean, dry, and lubricate your blades. A little effort after each use makes a huge difference. By following this guide on how to clean hedge trimmer blades, you ensure your garden tasks remain easy and your hedges look great for years to come. Start cleaning your blades today for better performance tomorrow!
- hedge trimmer maintenance
- clean blades
- garden tools
- rust prevention
- tool care
- blade cleaning
- sap removal