· Automotive Care · 14 min read
How To Clean Headlamps With Baking Soda
Illuminate Your Drive: How To Clean Headlamps With Baking Soda
Do you ever notice your car’s headlights look cloudy? Hazy headlamps reduce visibility. They make night driving less safe. A natural solution exists for this common problem. You can clean headlamps with baking soda. This common household item offers an effective way to restore clarity. It brings back original brightness to your car’s lights.
This article shows you how to clean headlamps with baking soda. We cover why headlights get cloudy. We explain baking soda’s cleaning power. You will find a clear, step-by-step guide. We also provide tips for maintaining headlight clarity. Learn simple methods to improve your car’s appearance and safety.
Takeaway:
- Identify Oxidation: Hazy headlights occur due to UV exposure and oxidation.
- Gather Supplies: Collect baking soda, water, microfiber cloths, and painter’s tape.
- Create Paste: Mix baking soda with water to form a thick paste.
- Apply and Scrub: Spread the paste on headlamps and gently scrub with a cloth.
- Rinse Thoroughly: Wash off all residue with clean water.
- Protect Lenses: Apply a UV protectant or sealant after cleaning.
You can clean headlamps with baking soda effectively. Mix baking soda with water to create a paste. Apply this paste to your cloudy headlamps. Gently scrub the surface. This abrasive action removes oxidation and grime. Rinse the headlamps clean for improved clarity and brightness.
Understanding Hazy Headlights: The Science Behind the Cloudiness
Headlights on older cars often look cloudy. This problem affects many vehicles. It happens because of how modern headlights are made. Most car headlights use polycarbonate plastic lenses. This plastic is strong and light. It is also cheap to produce. Car manufacturers apply a clear coat to these lenses. This coat protects the plastic from damage.
This protective clear coat breaks down over time. Sunlight causes the main damage. Ultraviolet (UV) radiation from the sun hits the lenses. This UV light breaks down the clear coat at a chemical level. The plastic underneath also suffers damage. The clear coat starts to oxidize. This oxidation makes the surface cloudy. It turns yellowish or hazy.
Road debris also contributes to haze. Small rocks and dirt particles hit the lenses. These impacts create tiny scratches. Car washes use harsh chemicals sometimes. These chemicals can also degrade the clear coat. Even regular weather exposure harms the lenses. Over time, these factors combine. They turn clear headlights into dull, hazy ones. This haze blocks light output. It reduces visibility for drivers. A good solution involves restoring the lens surface.
Baking Soda: The Natural Solution for Headlamp Clarity
Baking soda is a powerful cleaning agent. It is a common household product. People use it for many cleaning tasks. Its scientific name is sodium bicarbonate. Baking soda works well for cleaning headlamps. It has two key properties that make it effective. First, it is mildly abrasive. Second, it is alkaline. These properties help remove oxidation and grime from plastic lenses.
The mild abrasive quality of baking soda helps scrub away contaminants. When you mix baking soda with water, it forms a gritty paste. This paste acts like a fine sandpaper. It gently buffs the surface of the headlight lens. This action removes the oxidized layer. It scrapes off the hazy film without scratching the underlying plastic. The particles are small enough to be safe. They are not too harsh for the delicate surface of your headlamps. You can learn more about how baking soda cleans in general by exploring articles such as how to clean with vinegar and baking soda.
Baking soda also has an alkaline pH. This alkaline nature helps break down acidic grime. It reacts with dirt and oxidation. This reaction loosens the bonds holding the grime to the lens. The alkalinity helps neutralize acidic pollutants. This makes it easier to wipe away tough stains. This natural compound offers a safe alternative to harsh chemicals. It avoids strong solvents that could damage your car’s paint or trim. The process is gentle. It is also environmentally friendly. For other abrasive cleaning applications, consider how people clean stainless steel pans with baking soda.
Gathering Your Toolkit: Essential Supplies for Headlamp Cleaning
Before you start cleaning your headlamps, gather all necessary items. Having everything ready makes the process smooth. You will need a few common household supplies. These tools ensure a safe and effective cleaning job. This preparation step is crucial. It helps you avoid interruptions during the cleaning process.
First, you need baking soda. This is your main cleaning agent. Get a fresh box or bag. Second, you need water. Plain tap water works fine. A spray bottle helps apply water evenly. You will also need a few microfiber cloths. These cloths are soft. They do not scratch surfaces. Use one for applying the paste. Use another for rinsing and drying. Make sure they are clean.
Painter’s tape is another essential item. It protects your car’s paint. Headlights sit close to painted body panels. The tape creates a barrier. It prevents the baking soda paste from touching your car’s finish. Although baking soda is mild, it is always best to protect painted surfaces. Car wash soap or a gentle dish soap can also be useful. You will use it for an initial cleaning. A bucket of water is helpful for rinsing. Finally, consider a UV protectant or headlight sealant. This product is for after cleaning. It helps keep your headlamps clear for longer. Gather all these items before you start working on your headlamps.
Step-by-Step: Restoring Headlamp Clarity with Baking Soda
Cleaning your headlamps with baking soda is a simple process. Follow these steps carefully. You will see clear results. This method restores brightness to your car’s front lights. It improves both appearance and safety.
Prepare the Area: Park your car in a shaded spot. The sun can dry the paste too quickly. Use painter’s tape to mask off the areas around your headlamps. Apply the tape to the paint and trim. This protects these surfaces from the cleaning paste. It prevents any accidental damage. Make sure the tape adheres well to create a clean line. This initial step is important for protecting your vehicle’s finish.
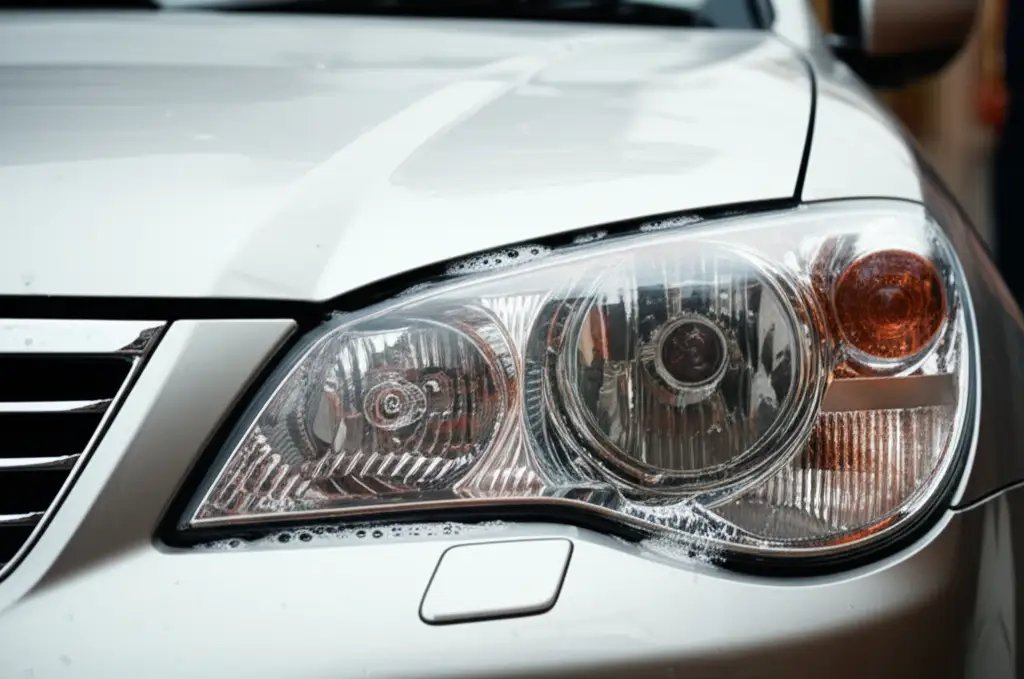
Initial Cleaning: Wash your headlamps first. Use car wash soap and water. This removes loose dirt and grime. Rinse them thoroughly. A clean surface helps the baking soda work better. Dry the headlamps with a clean microfiber cloth. Ensure no large debris remains on the surface. This initial wash provides a clean slate for the deep cleaning.
Create the Baking Soda Paste: In a small bowl, combine baking soda and water. Start with about half a cup of baking soda. Add water slowly. Mix until you get a thick paste. The consistency should be like toothpaste. It must be thick enough to stick to the headlight lens. It should not be too runny. Adjust the water amount as needed.
Apply the Paste: Scoop some paste onto a clean microfiber cloth. Apply a generous layer of the paste onto the entire surface of one headlamp. Make sure to cover all hazy areas. Spread it evenly. Do not let the paste dry out. Work quickly to ensure full coverage.
Scrub Gently: Begin scrubbing the headlamp with the paste-covered cloth. Use gentle, circular motions. Apply light to medium pressure. Focus on the cloudiest areas. You may see a yellowish residue coming off. This is the oxidation. Continue scrubbing for several minutes. Do not press too hard. You want to remove the haze, not scratch the lens. Repeat the application and scrubbing if the haze is severe.
Rinse Thoroughly: Use a fresh, clean microfiber cloth and clean water to rinse the headlamp. Wipe away all the baking soda paste. Ensure no residue remains. The paste must be completely removed. Any leftover baking soda can dry on the lens. This can leave streaks or new haze. Rinse several times if necessary. You can also use a spray bottle with water for rinsing.
Dry and Inspect: Dry the headlamp completely with another clean, dry microfiber cloth. Inspect the clarity of the lens. You should see a noticeable improvement. If some haze remains, you can repeat the process. Apply more paste and scrub again. Sometimes, stubborn oxidation needs a second round.
Optional: Apply a UV Protectant: After cleaning, consider applying a UV protectant or headlight sealant. This step is crucial for long-term clarity. The cleaning process removes the old, degraded clear coat. A new protective layer helps prevent future oxidation. Follow the product instructions for application. This final step helps maintain your clear headlamps for many months.
Post-Cleaning Care: Protecting Your Newly Clear Headlamps
Cleaning your headlamps brings back clarity. However, this clarity is not permanent. The cleaning process removes the oxidized layer. It also strips away the original protective coating. Without protection, your headlamps will haze again. Sunlight, road grime, and harsh weather will attack the plastic. Protecting your newly cleaned headlamps is essential. It maintains their brightness. It extends the life of your restoration efforts.
The most important step is to apply a UV protectant or headlight sealant. These products create a new barrier on the lens surface. Many sealants come as a wipe or spray. They contain chemicals that block ultraviolet rays. UV rays are the main cause of headlight hazing. Applying a sealant is simple. Follow the product’s instructions carefully. You usually wipe it on and let it cure. This layer acts like a new clear coat. It shields the plastic from environmental damage. Look for products specifically designed for polycarbonate headlight lenses.
Regular maintenance also plays a role. Wash your car regularly. Pay attention to the headlights. Use a gentle car wash soap. This removes dirt and grime before it builds up. Avoid abrasive sponges or harsh brushes on the headlamps. They can scratch the new protective layer. Reapply the UV protectant every few months. The frequency depends on your climate and driving conditions. Cars parked outdoors need more frequent reapplication. This proactive approach prevents the haze from returning quickly. It keeps your headlamps looking new. This ensures better visibility and safer driving for longer periods.
Troubleshooting & Advanced Tips for Stubborn Oxidation
Sometimes, a single cleaning with baking soda might not fully restore your headlamps. Stubborn oxidation can be challenging. Do not worry if your headlights are still slightly hazy. There are ways to improve the results. You can adjust your approach. These advanced tips help tackle tough cases. They help you achieve maximum clarity.
First, repeat the cleaning process. Multiple applications can be effective. If the first round did not clear all the haze, try again. Apply a fresh baking soda paste. Scrub the lenses again with gentle, circular motions. Sometimes, persistent oxidation requires more than one attempt. Be patient. Give the baking soda more time to work on the deeper layers of haze. Ensure you rinse completely between applications. This prevents any residue buildup.
For extremely stubborn oxidation, you might need a slightly more aggressive approach within the baking soda method. You can try a slightly thicker paste. A thicker paste might offer more abrasive power. Ensure the paste is still smooth and not gritty with large chunks. You can also increase scrubbing time. Instead of just a few minutes, try scrubbing for 5-10 minutes per headlamp. Always use a soft microfiber cloth. Avoid using anything too coarse. The goal is to remove oxidation without damaging the plastic.
Consider pairing baking soda with another mild household item. Some people use white vinegar in combination with baking soda for tougher cleaning tasks. While this article focuses on baking soda, a small amount of white vinegar can activate baking soda more strongly. Apply the baking soda paste, then lightly spray with vinegar, letting it fizz. Scrub and rinse quickly. This method is stronger. Test it on a small, less visible area first. Always prioritize gentle methods to protect your headlamps. Remember to apply a UV sealant after any successful cleaning. This prevents future haze.
The Environmental Edge: Why Natural Cleaning Matters
Choosing natural cleaning methods offers significant benefits. Using baking soda for headlamps is an example of this. It helps you avoid harsh chemicals. This choice is good for your health. It is also good for the environment. Many commercial headlight restoration kits use strong solvents. These solvents can be hazardous. They often release fumes. They require special disposal methods.
Baking soda is a safe, non-toxic substance. It is edible. It does not produce harmful fumes. When you rinse it away, it does not pollute water systems. This makes it a much greener alternative. Traditional cleaning products can contain volatile organic compounds (VOCs). VOCs contribute to air pollution. They can also irritate skin and respiratory systems. Using baking soda avoids these issues. You protect yourself and the air around you.
The production of baking soda also has a smaller environmental footprint. It is a naturally occurring mineral. It requires less energy to produce than complex chemical compounds. This reduces your overall impact. By choosing baking soda, you support sustainable practices. You also save money. Natural cleaning solutions are often cheaper than specialized chemical products. You likely already have baking soda in your pantry. This means no extra purchases or trips to the store. This choice benefits your wallet and the planet. It proves that effective cleaning does not require harsh chemicals. You can achieve clear headlamps responsibly. For other natural cleaning solutions around your home, you can also explore how to clean a washing machine with baking soda and vinegar.
FAQ Section
How often should I clean my headlamps with baking soda?
You should clean your headlamps as needed. This usually means every 6-12 months. The frequency depends on factors like sun exposure and driving conditions. Cars parked outside will need cleaning more often. Regular cleaning helps maintain clarity. It prevents severe haze buildup.
Can baking soda damage my headlights?
No, baking soda is very gentle. It is a mild abrasive. It will not scratch or damage your headlight lenses when used properly. Always mix it into a paste with water. Use a soft microfiber cloth for scrubbing. Avoid using excessive force. Proper technique prevents any issues.
Do I need to seal my headlights after cleaning?
Yes, applying a UV protectant or headlight sealant after cleaning is highly recommended. The cleaning process removes the old, degraded protective layer. A new sealant prevents new oxidation. It keeps your headlamps clear for a longer period. This step is crucial for lasting results.
What if baking soda doesn’t work completely?
If some haze remains, repeat the cleaning process. Stubborn oxidation may need multiple applications. Ensure you are scrubbing thoroughly. You can also try a slightly thicker paste. For very severe cases, you might need a stronger commercial restoration kit.
Can I use baking soda on all types of headlamps?
Baking soda is safe for most modern polycarbonate plastic headlamps. These are common on cars from the 1980s onwards. It is not intended for glass headlamps, which rarely haze. Always confirm your headlamps are plastic before using this method.
Is baking soda better than commercial kits?
Baking soda is a cost-effective and natural alternative. It works well for light to moderate haze. Commercial kits can be more aggressive. They often contain harsher chemicals. For severe oxidation, commercial kits might be faster. For regular maintenance, baking soda offers a gentle, effective, and eco-friendly solution.
Conclusion
Cloudy headlamps reduce your car’s light output. This makes driving at night less safe. You can easily fix this common problem. Learning how to clean headlamps with baking soda offers a simple, effective solution. This natural ingredient brightens your car’s appearance. It improves your visibility on the road. This process uses a household item you likely already own. It saves you money on expensive commercial products.
We explored the reasons behind hazy headlights. We saw how UV damage and oxidation affect plastic lenses. We learned about baking soda’s gentle abrasive power. We also understood its alkaline properties. These qualities make it perfect for removing stubborn haze. The step-by-step guide helps you restore your headlights. We discussed protecting your newly clear lenses. Applying a UV sealant is crucial for long-lasting results.
I encourage you to try this method. See the difference for yourself. A small effort can greatly improve your car’s safety and look. It is a simple DIY project anyone can do. Embrace natural cleaning solutions. You will save money. You will also help the environment. Do not let hazy headlamps dim your drive. Use baking soda to make them shine again.
- headlight restoration
- baking soda cleaning
- car maintenance
- DIY car care
- hazy headlights
- natural cleaning