· Automotive Care · 14 min read
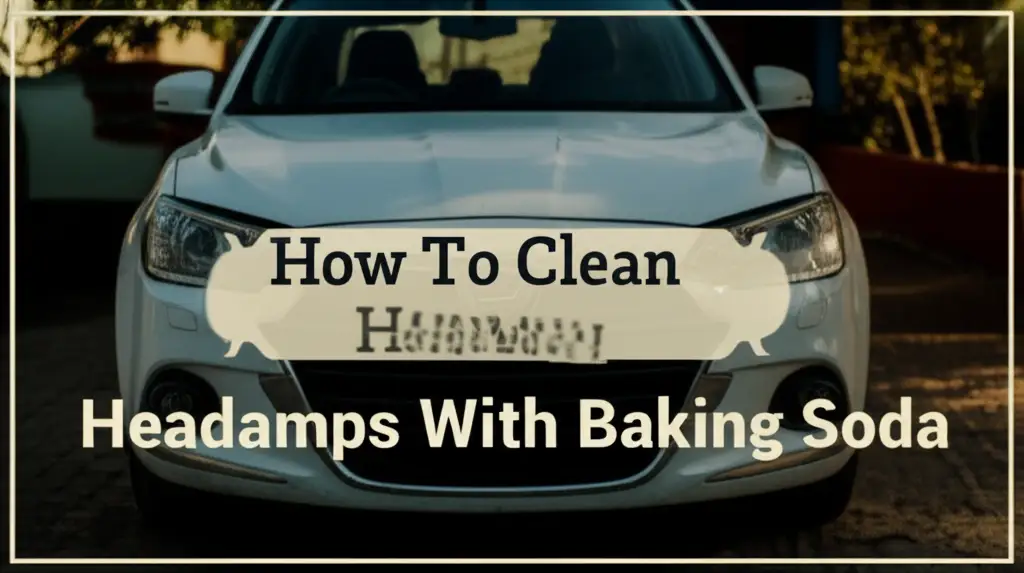
How To Clean Headlamps With Toothpaste
Restore Headlight Clarity: The Toothpaste Method
Has your car started looking a bit tired? Often, hazy or yellowed headlamps are the culprits, dimming your vehicle’s appeal and, more importantly, its safety. Imagine driving at night with limited visibility because your headlights cannot cut through the darkness effectively. This common issue affects many older vehicles, but there’s a surprisingly simple and cost-effective solution right in your bathroom: toothpaste. This article will show you exactly how to clean headlamps with toothpaste, restoring their shine and improving your nighttime driving experience. Get ready to learn a powerful DIY trick that can save you money and keep you safer on the road.
Takeaway:
- Toothpaste offers a surprisingly effective, budget-friendly solution for restoring cloudy headlamps.
- The mild abrasive properties of toothpaste help remove oxidation and discoloration from plastic lenses.
- Proper preparation and a careful application technique are key to achieving clear, lasting results.
- This DIY method can significantly improve nighttime visibility and your car’s appearance.
You can clean headlamps with toothpaste by using its mild abrasive qualities to buff away the oxidized, yellowed layer on plastic lenses. Simply apply a non-gel, non-whitening toothpaste to the headlamp surface, rub it vigorously with a soft cloth, and then rinse it clean. This process helps restore clarity, making your headlights brighter and safer.
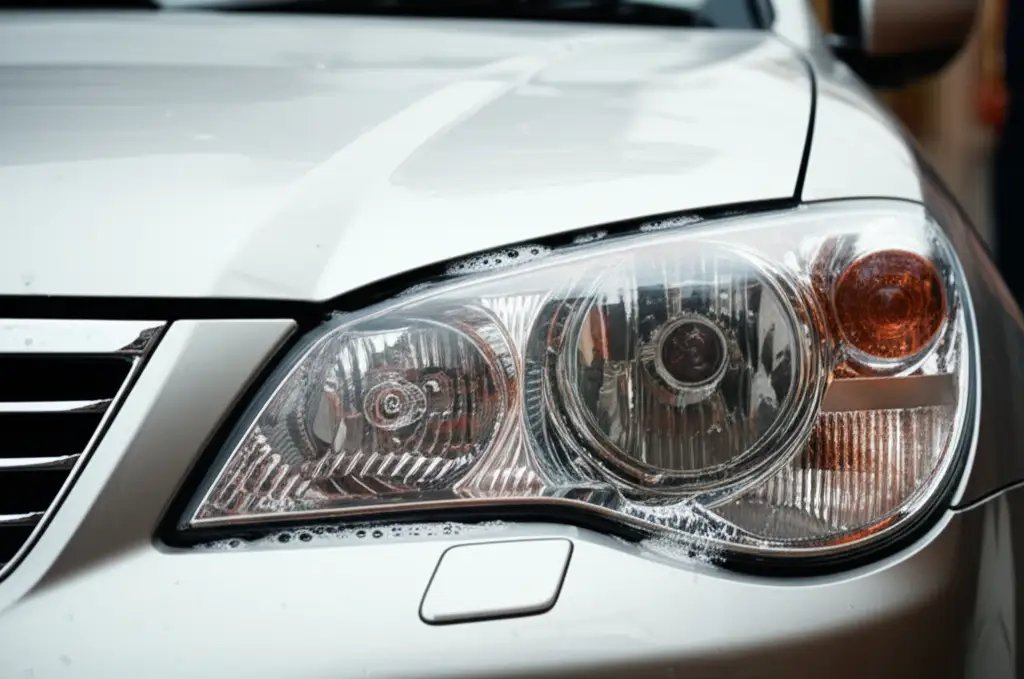
Why Headlamps Get Cloudy and Why Clarity is Key
Have you ever wondered why your car’s headlamps start looking foggy? They are made of polycarbonate plastic, which is quite durable. However, this material breaks down over time. Exposure to harsh sunlight, UV rays, and environmental pollutants causes the plastic to oxidize.
This oxidation forms a cloudy, yellowed layer on the lens surface. This layer reduces the amount of light passing through the headlamp. As a result, your visibility at night decreases significantly. Dim headlights are a serious safety concern for drivers and others on the road.
Beyond safety, clear headlamps also make your car look better. Hazy headlights can make a well-maintained car appear old and uncared for. Restoring their clarity improves your vehicle’s overall aesthetic appeal. It adds to the car’s resale value too.
Maintaining clear headlamps is a simple yet crucial part of car care. It ensures your safety and keeps your car looking its best. Learning how to clean headlamps with toothpaste offers an easy way to address this common problem. This simple method can save you money on professional services.
Understanding Toothpaste’s Cleaning Power for Car Headlights
Toothpaste is not just for brushing teeth; it holds a secret power for car cleaning. Many people wonder how something so simple can tackle stubborn headlight haze. The answer lies in its composition. Toothpaste contains very fine abrasive particles.
These tiny particles are designed to gently scrub away plaque and stains from your tooth enamel. On headlamps, they work similarly. They effectively buff away the thin, oxidized layer that forms on the plastic surface. This action is like a very fine sandpaper, but much gentler.
It is important to use the right type of toothpaste. Opt for a standard white paste, not a gel. Gel toothpastes typically lack the necessary abrasive compounds. Avoid formulas with special whitening agents or harsh chemicals, as these might scratch or damage the plastic.
The key to success is the mechanical action of rubbing the toothpaste onto the headlamp. This friction combined with the mild abrasives removes the cloudy film. The process reveals the clearer plastic underneath. This simple science makes toothpaste a surprisingly effective and accessible solution for restoring your car’s headlights.
Essential Supplies for Your Headlamp Cleaning Project
Before you begin to clean headlamps with toothpaste, gather all your materials. Having everything ready makes the process smooth and efficient. You probably have most of these items already at home. Preparation is key to a successful cleaning job.
First, you will need a tube of toothpaste. Remember to choose a non-gel, standard white toothpaste. Avoid any formulas that claim “whitening” or have extra chemicals, as these might be too harsh for your headlamps. A basic, inexpensive toothpaste works best for this task.
Next, get several clean, soft cloths. Microfiber cloths are ideal because they are gentle and highly absorbent. You will need one for applying the toothpaste, another for buffing, and a fresh one for the final wipe-down. Old t-shirts or cotton rags can also work if they are clean and soft.
You will also need a spray bottle filled with water. This is for rinsing the headlamps during and after the cleaning process. A bucket of soapy water, made with mild car soap, is also helpful for an initial wash. This removes loose dirt before you apply any toothpaste.
Finally, gather some painter’s tape or masking tape. This tape protects the surrounding paintwork from accidental contact with the toothpaste or abrasive rubbing. It creates a clean border around the headlamp, preventing any damage to your car’s finish. With these supplies in hand, you are ready to begin the transformation of your car’s headlights.
Preparing Your Vehicle for Headlamp Cleaning
Proper preparation is crucial before you clean headlamps with toothpaste. This step ensures safety for your car’s paint and maximizes cleaning effectiveness. A little effort here prevents potential headaches later. Do not skip these initial steps.
Begin by thoroughly washing your headlamps and the surrounding area. Use mild car soap and water to remove any dirt, grime, or bugs. This initial wash is important because you do not want to rub abrasive dirt into the headlamp surface during the cleaning process. Rinse the area well and let it dry completely.
Once the headlamps are clean and dry, grab your painter’s tape or masking tape. Carefully apply the tape around the entire perimeter of each headlamp. Make sure the tape adheres firmly to the paint and forms a clear border. This protects your car’s paint from accidental scrubbing or toothpaste residue.
The tape acts as a shield, preventing scratches or dull spots on your vehicle’s finish. It also helps you focus your cleaning efforts solely on the headlamp lens. Taking the time to tape off the area properly ensures a professional-looking result. This simple step protects your car and makes the cleaning process easier.
Think of it like prepping a wall before painting; you want to protect the parts you don’t intend to clean. This small effort makes a big difference in the final outcome. Your car’s paint will thank you for this careful preparation.
The Detailed Process: How to Clean Headlamps with Toothpaste
Now, let’s get into the main event: learning how to clean headlamps with toothpaste. This is where you transform dull, yellowed lenses into clear, bright ones. Follow these steps carefully for the best results.
Applying the Toothpaste
Start by squeezing a generous amount of toothpaste directly onto the headlamp surface. You want enough to cover the entire lens evenly. Use your fingers or a clean, soft cloth to spread the toothpaste. Make sure to create a thin, even layer across the whole headlamp.
Rubbing the Surface
Once the toothpaste is spread, begin rubbing it into the headlamp. Use a clean, soft cloth, preferably a microfiber one. Apply firm, circular motions. Work on one section of the headlamp at a time, if needed, to ensure thorough coverage.
Continue rubbing for several minutes, focusing on areas that appear most cloudy or yellowed. You might see the toothpaste turn slightly yellowish or brown as it lifts the oxidation. This is a good sign; it means the toothpaste is working. For tough stains, you might need to apply more pressure or rub for a longer duration. Remember the gentle abrasive quality is doing the work here. This is similar to how a mild abrasive helps to clean an iron plate with toothpaste.
Rinsing and Repeating
After rubbing for about 5-10 minutes, use your spray bottle filled with water to rinse off the toothpaste. Spray thoroughly to remove all residue. You will start to see the headlamp’s clarity improve. If the headlamp is still cloudy, repeat the process.
Apply more toothpaste and rub again. You might need to repeat this step two or three times for severely oxidized headlamps. Patience is key to achieving optimal results. Some people have found similar success using other common household items, such as when they learn how to clean headlamps with baking soda.
Final Wipe Down
Once you are satisfied with the clarity, give the headlamp a final rinse with clean water. Then, use a fresh, dry microfiber cloth to wipe the surface completely dry. Remove all traces of water and toothpaste. Take off the painter’s tape carefully.
Stand back and admire your work. You will notice a significant improvement in your headlamp’s appearance and transparency. This simple method truly makes a difference. Just as toothpaste can make your nails shine when you learn how to clean nails with toothpaste, it can bring clarity back to your car’s headlamps.
Finishing Touches and Protecting Your Restored Headlights
You have successfully learned how to clean headlamps with toothpaste. Now, it is important to protect your newly restored headlights. This step helps maintain their clarity for a longer time. Skipping this can lead to quicker re-oxidation.
After thoroughly cleaning and drying the headlamps, consider applying a UV sealant or a car wax designed for plastic surfaces. These products create a protective barrier over the headlamp lens. This barrier shields the plastic from harmful UV rays, which are the main cause of yellowing and oxidation.
Applying the sealant is usually straightforward. Follow the product instructions carefully. Typically, you will apply a thin, even coat using a clean applicator pad. Let it haze, then buff it off with a separate clean microfiber cloth. This extra layer of protection is vital for extending the life of your cleaning effort.
Regular car washes also help maintain headlamp clarity. Dirt and grime can accumulate, contributing to dullness. Washing your car regularly prevents heavy buildup. Use a gentle car wash soap, and be sure to rinse the headlamps well.
Parking your car in a garage or shaded area also makes a difference. Reducing direct exposure to sunlight minimizes UV damage. If a garage is not an option, consider using a car cover. These small habits protect your headlights and keep them looking fresh.
Troubleshooting Common Issues and What to Expect
Even with the best instructions, issues can arise when you clean headlamps with toothpaste. Knowing what to expect and how to troubleshoot helps manage your efforts. This DIY method is effective, but it has limits.
One common issue is that the headlamps might not become perfectly clear on the first try. If your headlamps were very yellowed or cloudy, one application might not be enough. Do not get discouraged. Simply repeat the cleaning process. Applying more toothpaste and rubbing longer can often yield better results.
Another challenge can be streaks or residue. This usually happens if you do not rinse the headlamp thoroughly enough. After rubbing, ensure you use plenty of water to wash away all toothpaste. Then, dry the surface completely with a clean, dry cloth. Any leftover residue will appear as streaks, especially when the headlamp dries.
Sometimes, despite multiple attempts, the headlamps remain somewhat hazy. This could be due to severe, deep oxidation. Toothpaste works well on surface-level discoloration. However, if the damage is deep within the plastic, toothpaste may not be enough. This often indicates the need for a more aggressive restoration kit or professional help.
It is also important to manage expectations. While toothpaste can dramatically improve clarity, it may not restore headlamps to factory-new condition. The goal is significant improvement in brightness and appearance, not absolute perfection. This method is a great temporary or budget-friendly fix.
When to Seek Professional Help or Other Methods
While learning how to clean headlamps with toothpaste is a great DIY skill, there are times when this method might not be enough. Understanding its limitations helps you decide when to seek professional help or try other cleaning approaches.
If your headlamps show deep cracks or extensive internal condensation, toothpaste cannot fix these problems. Cracks usually mean the plastic is compromised, and condensation indicates a faulty seal. In such cases, the headlamp unit itself may need replacement. Toothpaste is only for surface haze.
For severe, long-term oxidation that multiple toothpaste applications cannot remove, a more aggressive solution might be necessary. Professional headlight restoration services use specialized tools and compounds. These tools can sand down the surface and polish it deeply. This achieves a much higher level of clarity than DIY methods.
Alternatively, you could try a dedicated headlight restoration kit available at automotive stores. These kits often include various grades of sandpaper and polishing compounds. They offer a more robust solution for stubborn cases than toothpaste alone. Many people also find that baking soda can be a good alternative, and you can learn how to clean headlamps with baking soda for similar results.
Consider the value of your time and the desired outcome. If you want a near-perfect finish or your headlamps are severely damaged, professional help is often the best choice. For most mild to moderate haziness, however, the toothpaste method offers an excellent, cost-effective first step. It is similar to how toothpaste can be used for general polishing, such as when you want to clean a diamond ring with toothpaste.
FAQ Section
Can any type of toothpaste be used to clean headlamps?
No, not all toothpastes are suitable. You should use a standard white paste, not a gel toothpaste. Avoid formulas with harsh whitening chemicals or abrasive beads designed for extra whitening. These might scratch or damage the plastic. A simple, basic toothpaste works best due to its mild abrasive properties.
How often should I clean my headlamps with toothpaste?
The frequency depends on how quickly your headlamps re-oxidize. For many cars, cleaning every 6-12 months might be sufficient. If your car is frequently exposed to harsh sunlight or extreme weather, you might need to clean them more often. Regular cleaning helps maintain optimal clarity and visibility.
Is toothpaste bad for car paint?
Toothpaste contains mild abrasives. Direct, vigorous rubbing of toothpaste on car paint can potentially cause very fine scratches or dull the finish. This is why using painter’s tape to mask off the surrounding paint is crucial. Always protect your paintwork when cleaning headlamps with toothpaste.
How long does the toothpaste cleaning effect last?
The effect of cleaning headlamps with toothpaste is not permanent. Without a protective UV sealant, the headlamps will begin to re-oxidize due to sun exposure. The clarity might last for several weeks to a few months. Applying a UV sealant after cleaning can extend the clarity significantly.
What are the main benefits of cleaning headlamps with toothpaste?
Cleaning headlamps with toothpaste offers several benefits. It is highly cost-effective, using a common household item. It is a simple DIY method that anyone can perform. Most importantly, it improves nighttime visibility, enhancing driving safety, and also boosts your car’s aesthetic appeal by restoring clarity.
Can toothpaste damage my headlamps?
If used correctly, toothpaste is unlikely to damage headlamps. The key is to use a non-gel, non-whitening paste and to rub gently but firmly. Overly aggressive scrubbing or using a toothpaste with large abrasive particles could potentially cause fine scratches. Always test a small, inconspicuous area first if you are unsure.
Conclusion
You have now learned a powerful, simple, and budget-friendly method to clean headlamps with toothpaste. This technique can dramatically improve your car’s appearance and, more critically, your visibility at night. From understanding why headlamps get hazy to the step-by-step process of restoration, you have all the knowledge to tackle this common automotive issue. Remember, the mild abrasives in toothpaste are the secret, gently buffing away years of oxidation.
Taking the time to restore your headlights is a small investment that yields big returns in safety and aesthetics. You do not need expensive tools or professional services for many cases of cloudiness. With a tube of toothpaste and a bit of effort, you can bring clarity back to your headlamps. So, gather your supplies, follow these simple steps, and give your car the bright eyes it deserves. Drive safer, and let your vehicle shine!
- headlight restoration
- DIY car care
- toothpaste cleaning
- automotive maintenance
- car cleaning tips