· Home Maintenance · 15 min read
How To Clean Heat Exchanger
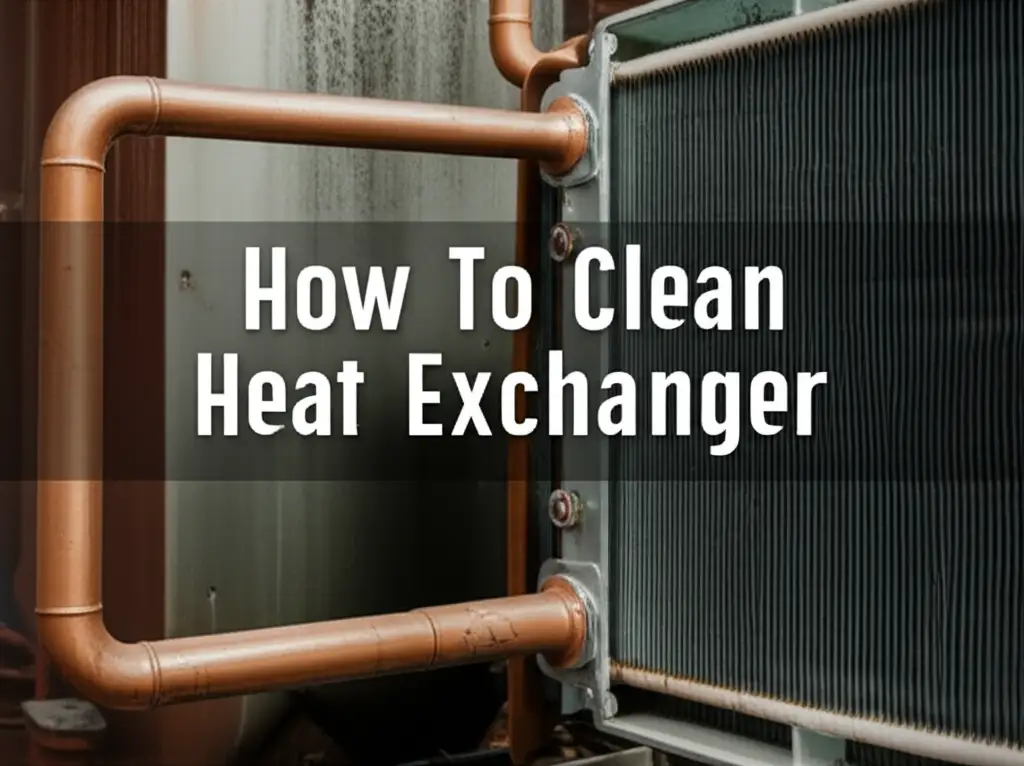
Unlock Efficiency: How To Clean Your Heat Exchanger
Imagine your home’s heating or cooling system struggling. Or perhaps an industrial process losing its edge. Often, a dirty heat exchanger is the hidden culprit. This crucial component transfers heat, making systems work. When it gets dirty, efficiency drops.
Understanding how to clean heat exchanger components is essential. This guide will walk you through the entire process. We will cover why cleaning matters, what signs to look for, and the best methods to use. You will learn safety steps and tools needed. My goal is to help you restore your heat exchanger to optimal performance. Let’s get started on bringing back that lost efficiency.
Takeaway
- Regular heat exchanger cleaning restores efficiency.
- Identifying fouling signs early saves energy.
- Safety procedures are critical before any cleaning.
- Mechanical and chemical cleaning methods both have roles.
- Preventative maintenance keeps the system running smoothly.
How do you clean a heat exchanger effectively?
You clean a heat exchanger by removing built-up deposits like scale, rust, or biological growth. This involves either mechanical methods, such as brushing or high-pressure water, or chemical cleaning using specialized descaling solutions. The best method depends on the type of fouling and the heat exchanger design.
Understanding Heat Exchangers: Why Cleaning Is Important
Heat exchangers are vital components in many systems. They transfer heat from one fluid to another without mixing the fluids. Think of them in your furnace, air conditioner, or even a car radiator. Their job is to move heat efficiently.
Over time, these units collect dirt. This dirt can be mineral scale, rust, sludge, or even biological growth like algae. This buildup is called fouling. Fouling acts like an insulator. It prevents heat from moving freely. This means your system works harder to achieve the same results.
When a heat exchanger is dirty, it consumes more energy. This increases your utility bills. It also shortens the lifespan of the equipment. Regular cleaning keeps your system running at peak performance. It also extends the life of costly equipment. Neglecting cleaning leads to breakdowns and expensive repairs.
Signs Your Heat Exchanger Needs Cleaning
Recognizing when your heat exchanger needs attention saves you trouble. Several common signs point to fouling. Knowing these indicators helps you schedule cleaning before major problems occur. Pay close attention to system performance.
One major sign is reduced efficiency. Your heating system might take longer to warm your home. Your air conditioner might struggle to cool it. This means the unit works harder to achieve desired temperatures. You might notice your energy bills increasing suddenly. This higher energy consumption is a direct result of the heat exchanger losing its ability to transfer heat effectively.
Another indicator is a drop in system flow rate. Fouling can restrict fluid pathways inside the exchanger. This causes less water or air to move through. You might hear strange noises, such as gurgling or whistling, due to restricted flow. Temperature differences also tell a story. If the temperature difference between the inlet and outlet fluids is smaller than usual, it often means heat transfer is poor. This suggests a dirty heat exchanger. Ignoring these signs can lead to complete system failure.
Safety First: Essential Precautions Before You Start
Safety must be your top priority when cleaning any equipment. Heat exchangers often involve high temperatures, dangerous chemicals, or moving parts. Proper preparation protects you from harm. Never skip these critical steps.
First, always disconnect power to the unit. This prevents accidental startup. Ensure no stored energy remains in the system. Lockout/tagout procedures are best practice for industrial systems. For home units, simply unplugging is usually enough. Next, relieve any system pressure. High-pressure fluids can cause serious injury. Open vents or drain valves slowly. Wear appropriate personal protective equipment (PPE). This includes safety glasses or goggles, chemical-resistant gloves, and protective clothing. If using strong chemicals, a respirator might be necessary. Good ventilation is also key. Make sure the area is well-aired to prevent fume buildup.
Always read the manufacturer’s manual for your specific heat exchanger. Different models have different requirements. The manual will guide you on proper shutdown, cleaning agents, and reassembly. It might also specify parts that need special handling. Understanding these details protects you and your equipment. If you feel unsure about any step, consider calling a professional. Your safety is worth it.
Tools and Materials for Heat Exchanger Cleaning
Gathering the right tools and materials before you begin saves time. It also ensures a thorough and safe cleaning process. The specific items you need depend on the type of heat exchanger. They also depend on the cleaning method you choose.
Mechanical Cleaning Tools
For mechanical cleaning, you will need a few basic items. A stiff-bristled brush is essential for scrubbing surfaces. Consider brushes made of nylon or brass, depending on the material of your heat exchanger. Avoid steel brushes as they can scratch delicate surfaces. A high-pressure washer is very effective for dislodging loose debris. Make sure the pressure setting is appropriate for your unit. You might also need a scraper for stubborn deposits. Remember to use plastic or non-marring scrapers. Buckets or containers are useful for collecting wastewater or cleaning solutions. A good shop vacuum can help clean up dry debris.
Chemical Cleaning Materials
If you plan to use chemical cleaning, specific agents are necessary. Descaling solutions are common for removing mineral buildup. These often contain mild acids like citric acid, phosphoric acid, or specialized industrial cleaners. Always check the heat exchanger material before selecting a chemical. Some metals react poorly with certain acids. For biological growth, biocides or sanitizers work well. You will also need a pump for circulating the chemical solution. Hoses are needed to connect the pump to the heat exchanger. pH testing strips or a pH meter help monitor the acidity of your cleaning solution. This ensures safe and effective cleaning. Always read chemical product labels carefully. Follow all instructions for mixing and use. Proper disposal of chemical waste is also critical. Always ensure you have a clean water source for rinsing.
Step-by-Step Guide: Cleaning Plate Heat Exchangers
Plate heat exchangers are common in many residential and light industrial settings. They use a series of metal plates to transfer heat. Cleaning them often involves disassembling the unit. This allows access to individual plates.
Disassembly and Inspection
First, isolate the heat exchanger from the system. Drain any remaining fluids. Carefully loosen the tie bolts that hold the plates together. You will then be able to slide the plates apart. As you remove each plate, inspect it for damage. Look for cracks, pitting, or worn gaskets. These might need replacement. Lay the plates flat on a clean surface. Note the order of the plates. This helps during reassembly.
Mechanical Cleaning of Plates
Once the plates are separated, you can begin mechanical cleaning. Use a soft brush and a water hose to remove loose debris. For stubborn scale or deposits, a high-pressure washer works well. Set the pressure carefully to avoid damaging the plates or gaskets. You can also use a plastic scraper to gently remove any remaining buildup. Avoid metal tools that could scratch the plate surface. Pay close attention to the gasket grooves. Fouling can get trapped there. Rinse each plate thoroughly with clean water. Make sure no cleaning solution residue remains. This step is critical for preventing future corrosion.
Chemical Cleaning of Plates (Optional)
For heavy scale, chemical cleaning might be necessary. Prepare a descaling solution as per the manufacturer’s instructions. You can immerse the plates in a large container filled with the solution. Allow them to soak for the recommended time. Alternatively, you can circulate the solution through the assembled heat exchanger if suitable. This requires a pump and careful handling. After soaking, scrub any remaining deposits. Rinse the plates extremely well with clean water. Neutralize any acid residue if recommended by the chemical manufacturer. Ensure all plates are spotless before reassembly. A clean plate means efficient heat transfer.
Reassembly
Reassemble the plates in their correct order. Ensure all gaskets are properly seated. Tighten the tie bolts evenly, following the manufacturer’s torque specifications. Uneven tightening can warp plates or cause leaks. Refill the system and check for leaks. Finally, test the system for proper operation.
Step-by-Step Guide: Cleaning Shell and Tube Heat Exchangers
Shell and tube heat exchangers are robust units used in heavy industrial applications. They consist of a bundle of tubes inside a shell. One fluid flows through the tubes, and the other flows around the tubes within the shell. Cleaning these units requires different methods than plate exchangers.
Preparation and Isolation
Begin by isolating the shell and tube heat exchanger. Close all inlet and outlet valves. Drain both the tube side and the shell side completely. Ensure no pressure remains in the system. Disconnect any electrical power. For large industrial units, implement a full lockout/tagout procedure. Have all your tools ready, including specialized tube cleaning brushes or lances. Prepare your work area. Make sure it is clear and well-ventilated.
Mechanical Cleaning of Tubes
The most common method for tube cleaning is mechanical. You will need to remove the channel covers or bonnets to access the tube ends. Use specialized tube brushes or high-pressure water lances. These tools fit inside the tubes. Push the brush or lance through each tube to dislodge deposits. For very tough scale, consider using a rotating mechanical cleaner. This tool spins a brush or cutting head inside the tube. You can also use high-pressure water blasting. This method is very effective for removing scale and sludge. Direct the water into each tube. The debris will exit the other end. Collect any removed debris for proper disposal.
Mechanical Cleaning of Shell Side (if accessible)
Cleaning the shell side is often more challenging. If the tube bundle is removable, you can pull it out. This allows for easier access. Use high-pressure water or a scraper to clean the outside of the tubes and the inside of the shell. Pay attention to baffle plates where deposits can accumulate. If the bundle is fixed, chemical cleaning might be the only option for the shell side. Flush the shell side thoroughly with water after cleaning. This removes any loose debris.
Chemical Cleaning (Circulation Method)
For difficult-to-reach areas or stubborn deposits, chemical cleaning is effective. You will circulate a cleaning solution through either the tube side or the shell side. First, ensure the heat exchanger material is compatible with the chemical. Connect a pump and reservoir to the unit. Fill the reservoir with the chosen chemical descaler or cleaner. Pump the solution through the unit for the recommended duration. Monitor the pH of the solution. This indicates its activity. After cleaning, drain the chemical solution. Rinse the heat exchanger thoroughly with clean water. Continue rinsing until the discharge water is clear and its pH is neutral. Cleaning your water filter helps ensure your rinse water is pure, preventing new deposits. Proper disposal of chemical waste is crucial.
Reassembly and Testing
After cleaning, carefully reassemble the heat exchanger. Replace any old gaskets or O-rings with new ones. Tighten all bolts evenly to prevent leaks. Refill the system with the operating fluids. Check for any leaks. Finally, test the heat exchanger’s performance. Monitor fluid temperatures and pressures. A clean unit will show improved efficiency.
Chemical Cleaning Methods for Heat Exchangers
Chemical cleaning offers a powerful way to remove stubborn deposits from heat exchangers. This method uses specific chemical solutions to dissolve or loosen fouling. It is especially useful for complex geometries. It also helps when mechanical cleaning is not practical.
Types of Chemical Cleaners
Various chemical cleaners target different types of fouling. Acids are common for mineral scale, rust, and calcium deposits. Hydrochloric acid or phosphoric acid are often used. However, they require careful handling due to their corrosive nature. Citric acid is a milder, more environmentally friendly alternative. It works well for light scale. Alkaline cleaners remove organic deposits, grease, and oil. These often contain strong bases like sodium hydroxide. Biocides are used to kill and remove biological growth. This includes algae, bacteria, and slime. Always choose a cleaner compatible with your heat exchanger’s materials. Mismatched chemicals can damage the equipment. I know from experience that some solutions, like vinegar for cleaning mold, can be effective for certain biological growths, but always verify compatibility.
Circulation Cleaning
Circulation cleaning is the most common chemical method. You connect a pump and a temporary tank to the heat exchanger. The chemical solution circulates through the unit. This allows the chemical to penetrate and dissolve deposits. The circulation time depends on the severity of the fouling. It also depends on the chemical’s strength. Monitoring the solution’s color or pH can indicate when cleaning is complete. Once done, drain the dirty solution. Rinse the heat exchanger thoroughly with clean water. Neutralize any residual acid or base if necessary. This prevents corrosion.
Soaking Method
For heat exchangers that can be easily disassembled, the soaking method works well. Individual components, like plates from a plate heat exchanger, are immersed in a chemical bath. This allows for deep penetration of the cleaning solution. Soaking is effective for heavy, localized deposits. After soaking, scrub any remaining debris. Then, rinse the components completely with clean water. This method provides excellent cleaning for removable parts.
Safety Precautions for Chemical Cleaning
Chemical cleaning carries risks. Always wear appropriate personal protective equipment (PPE). This includes chemical-resistant gloves, safety goggles, and a face shield. A respirator is crucial if fumes are present. Ensure the work area is well-ventilated. Have an emergency eyewash station or shower nearby. Always follow the chemical manufacturer’s instructions for mixing and handling. Never mix different chemicals without specific guidance. Some combinations can produce dangerous reactions. Proper disposal of chemical waste is essential. Follow local regulations for hazardous waste. Always dilute strong chemicals before disposal if allowed. When I handle strong chemicals, I always double-check the safety data sheets.
Preventative Maintenance for Optimal Heat Exchanger Performance
Cleaning your heat exchanger is important, but preventing fouling is even better. Regular preventative maintenance reduces the need for intense cleaning. It also extends the life of your equipment. A proactive approach saves money and downtime.
Regular Monitoring and Inspections
Consistent monitoring helps catch problems early. Regularly check fluid temperatures and pressures across the heat exchanger. Any significant deviation from normal operating parameters suggests fouling. For example, if the temperature difference between inlet and outlet decreases, it indicates reduced heat transfer. Periodically inspect the external surfaces of the heat exchanger. Look for leaks, corrosion, or external buildup. Visual inspections can reveal problems before they become severe. Keep detailed logs of performance data. This allows you to track trends and predict when cleaning might be needed. This is similar to how you might keep track of when to clean the bottom of your pan to prevent burnt-on stains.
Water Treatment Programs
Many heat exchangers use water as a fluid. Untreated water is a common source of fouling. It contains minerals that form scale. It also contains microorganisms that cause biological growth. Implementing a proper water treatment program is crucial. This might include using water softeners to remove hard minerals. Chemical inhibitors can prevent scale formation and corrosion. Biocides control algae and bacterial growth. Filtration systems remove suspended solids from the water. Regular testing of water quality ensures the treatment program is effective. Clean water entering the heat exchanger significantly reduces fouling rates.
Scheduled Flushing and Cleaning
Even with good preventative measures, some fouling is inevitable. Schedule periodic flushing of your heat exchanger. This involves running clean water through the unit at high velocity. Flushing helps remove loose deposits before they solidify. For systems prone to specific types of fouling, consider light chemical cleaning on a routine basis. This could be an annual or bi-annual treatment. For example, if you know your system builds up mild scale, a dilute acid flush might be beneficial. This proactive cleaning prevents heavy buildup. It keeps your heat exchanger running at peak efficiency all year round. Regular, light cleaning is always better than intensive, emergency cleaning.
When to Call a Professional for Heat Exchanger Cleaning
While I encourage DIY cleaning, some situations truly demand professional help. Knowing when to call an expert saves you time, money, and potential damage. Never hesitate to seek professional assistance if you feel unsure.
Complex Systems and Heavy Industrial Units
Large industrial heat exchangers are often part of complex systems. They can be very difficult to disassemble. They might also handle hazardous fluids or operate under extreme conditions. Professionals have specialized equipment for these units. They also possess the necessary training and certifications. Trying to clean such a system yourself can be dangerous. It could also cause expensive damage. Industrial cleaning services often use advanced techniques like chemical circulation skids or automated tube cleaning systems. These methods are not available to the average homeowner.
Hazardous Materials and Chemicals
Some heat exchangers process dangerous chemicals. Cleaning these units requires strict safety protocols. Professionals have the right PPE and containment procedures. They know how to handle and dispose of hazardous waste safely. If your heat exchanger uses ammonia, strong acids, or other toxic substances, do not attempt DIY cleaning. Similarly, if your fouling involves hazardous biological agents, call a specialist. They can ensure safe and complete decontamination.
Persistent Fouling or Unknown Issues
If you have cleaned your heat exchanger multiple times but issues persist, it is time for a professional. Persistent fouling suggests an underlying problem. This could be incorrect water treatment, design flaws, or severe material degradation. A professional can diagnose the root cause. They can also recommend long-term solutions. Sometimes, performance issues might not even be due to fouling. They could be mechanical failures. An expert can accurately pinpoint the problem. They can then advise on the best course of action. This ensures your system runs correctly.
- Heat Exchanger Cleaning
- HVAC Maintenance
- Appliance Care
- Energy Efficiency
- Scale Removal