· Automotive Maintenance · 16 min read
How To Clean Ignition Coil
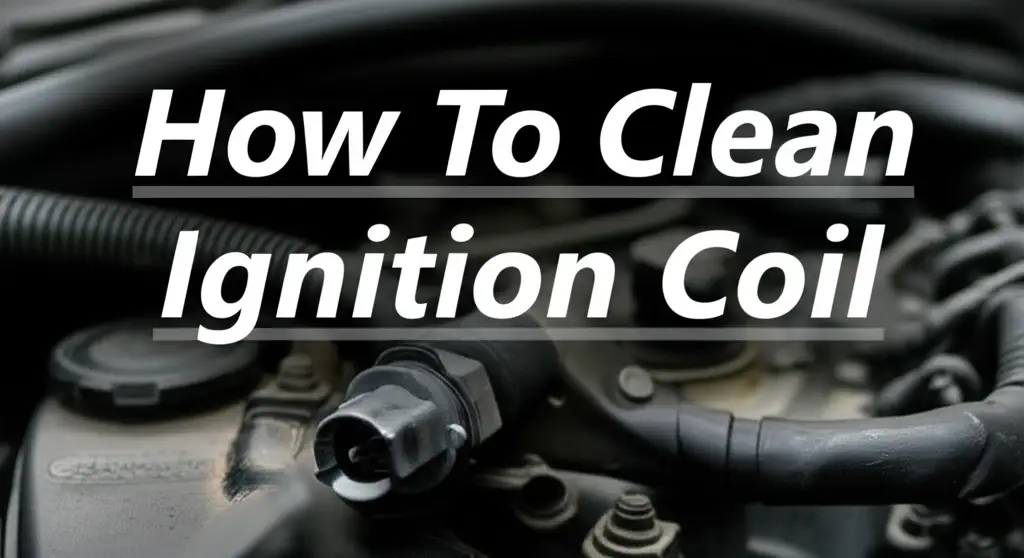
How To Clean Ignition Coil for Better Engine Performance
Does your car feel sluggish? Are you noticing strange engine sounds or a decrease in gas mileage? Your ignition coils might be asking for attention. These small but mighty components are vital for your engine to run smoothly. Dirt and corrosion can build up on them, leading to many performance problems.
I understand that working on a car engine might seem daunting. However, cleaning your ignition coils is a task many car owners can do themselves. This simple maintenance step saves you money and improves your car’s health. We will explore why ignition coils matter and how to identify problems. We will also cover the tools you need and give you a detailed, step-by-step guide to cleaning them. Get ready to bring back your engine’s spark!
Takeaway:
- Improve Engine Performance: Cleaning ignition coils helps your engine run smoother and more efficiently.
- Prevent Costly Repairs: Regular cleaning avoids issues like misfires and reduces the need for expensive replacements.
- DIY Friendly: With proper tools and steps, you can clean your ignition coils at home.
- Boost Fuel Economy: A clean coil ensures proper spark, which helps your car use fuel more effectively.
- Extend Component Life: Keeping coils free of dirt and corrosion prolongs their lifespan.
Clear Answer:
You clean an ignition coil by first disconnecting the battery for safety. Then, you carefully remove the coil from the engine. Use an electrical contact cleaner and a soft brush to remove dirt and corrosion from the coil’s exterior and electrical contacts. Allow it to dry completely before reinstallation.
Understanding Your Ignition Coil
Let’s talk about what an ignition coil does inside your car’s engine. An ignition coil is an induction coil. It converts the low voltage from your car’s battery into a high-voltage spark. This high voltage then travels to the spark plugs. The spark plugs ignite the air-fuel mixture in the engine’s cylinders. This process creates the power that moves your car. Without a properly working ignition coil, your engine cannot fire correctly.
Ignition coils work in a tough environment. They are exposed to heat, vibrations, and sometimes moisture. Over time, dirt, oil, and road grime can build up on their surfaces. Electrical connections can also suffer from corrosion. This buildup acts like a barrier. It prevents the coil from sending a strong, consistent spark. A weak spark leads to incomplete combustion. This means your engine wastes fuel and loses power. Regular checks and cleaning help prevent these issues. Keeping these parts clean makes sure your engine performs at its best.
Each cylinder in your engine usually has its own ignition coil, or coils are grouped in a “coil pack.” These coils are often located directly above the spark plugs or near them. The coil’s job is simple but critical: deliver electricity. When dirt or corrosion covers the coil’s outer casing or its electrical terminals, it cannot dissipate heat effectively. It also struggles to make proper electrical contact. This can lead to overheating or misfires. A small amount of preventive cleaning goes a long way. It stops minor issues from turning into major engine problems.
Many car owners overlook ignition coil maintenance. They only address issues when a “check engine” light comes on. However, proactive cleaning can save you from that headache. It maintains steady engine operation. A clean coil ensures a strong spark every time your engine fires. This contributes to better overall engine health and longevity. It is a simple step you can take to keep your vehicle running smoothly.
Signs You Need to Clean Your Ignition Coil
Your car often tells you when something is wrong. Ignition coils are no exception. Knowing the signs helps you decide when to clean them. One common sign is a “misfire.” This feels like a momentary hesitation or jerk from the engine. It happens when a cylinder does not fire correctly. You might feel this as rough idling. The engine shakes more than usual when you are stopped.
Another key sign is reduced fuel economy. When an ignition coil sends a weak spark, fuel does not burn completely. This means your car uses more gas to travel the same distance. You will notice yourself filling up more often. A dirty coil can also cause your car to accelerate poorly. It might feel like the engine has less power than usual. This is especially true when you try to speed up quickly. Your car simply cannot respond as it should.
Sometimes, the “Check Engine” light will illuminate on your dashboard. This light often points to engine performance problems. A diagnostic scanner can read the error codes stored in your car’s computer. Common codes related to ignition coils include P0301, P0302, and so on. These indicate a misfire in a specific cylinder. While these codes can point to bad spark plugs or other issues, a dirty ignition coil is often the cause. Do not ignore this warning light. It directs you to potential problems.
Strange engine noises can also signal an issue. A faulty or dirty coil might lead to knocking or pinging sounds. These noises come from inefficient combustion in the engine cylinders. Your car might also struggle to start, especially in damp conditions. A weak spark from a dirty coil makes it harder for the engine to catch. If you notice any of these symptoms, inspecting and cleaning your ignition coils is a good first step. Catching problems early saves you time and money later.
Essential Tools and Materials for Cleaning Ignition Coils
Before you start cleaning, gather all your supplies. Having everything ready makes the job easier and safer. First, you will need proper safety gear. This includes work gloves to protect your hands from grime and chemicals. Safety glasses are also important to shield your eyes from any debris. I always make sure to put these on first.
Next, you need the right cleaning agents. Electrical contact cleaner is essential. This product is designed to clean electrical components without damaging them. It leaves no residue and evaporates quickly. Do not use household cleaners or water. These can cause further damage or corrosion. I usually get a can specifically marked for automotive electrical use. You will also need a few clean, lint-free microfiber cloths. These are great for wiping away dirt and applying cleaner.
For stubborn grime, a small, non-abrasive brush might be useful. A soft-bristled brush or even a toothbrush can work. Avoid wire brushes. They can scratch or damage the coil’s delicate parts. You might also need a coil puller tool. Some cars have coils that are difficult to remove by hand. This tool helps lift the coil out without damaging it. You can often find these at auto parts stores.
Finally, consider dielectric grease. This is a non-conductive, silicone-based grease. You apply it to the electrical connections after cleaning. It helps prevent future corrosion and moisture intrusion. It also makes the next removal easier. It protects the connections from environmental factors. This list ensures you have everything needed for a thorough and safe cleaning process. Preparing properly is half the battle won.
Step-by-Step Guide: How to Clean Your Ignition Coil Safely
Cleaning your ignition coils is a straightforward task. It just requires patience and attention to detail. Follow these steps carefully to ensure a safe and effective cleaning.
Preparation
Safety comes first. Always disconnect your car’s negative battery terminal before starting any electrical work. This prevents accidental shocks or short circuits. Locate the battery, usually under the hood or in the trunk. Use a wrench to loosen the negative terminal clamp and remove it. Store it away from the battery post. This step cuts all power to the engine’s electrical system.
Next, locate your ignition coils. They are usually found on top of the engine, often directly above the spark plugs. Each coil will have an electrical connector and a boot leading to the spark plug. Take pictures of the coil layout before you begin. This helps you remember where each coil and wire goes during reinstallation. This simple step can prevent much frustration later.
Removal
To remove each ignition coil, first gently unplug its electrical connector. Some connectors have a small tab you must press or pull. Do not pull on the wires directly. Pull only on the connector housing. Next, carefully twist and pull the ignition coil straight up. This removes the coil from the spark plug well. If it feels stuck, use your coil puller tool. Be gentle. The coil and spark plug boot can be fragile. Place removed coils on a clean surface in the order you removed them. This ensures you put them back in the correct cylinders.
Cleaning Process
Once the coils are out, inspect them for dirt, oil, and corrosion. Focus on the body of the coil and the electrical terminals. Spray electrical contact cleaner liberally onto the coil’s body and its electrical connections. This cleaner evaporates quickly and leaves no residue. For any stubborn dirt or corrosion, use a soft-bristled brush. Gently scrub the affected areas. You can also use a clean microfiber cloth to wipe away loosened grime. Remember, the goal is to remove all contaminants. Just as you might remove stubborn buildup from surfaces, much like when you clean the bottom of a pan, focus on thoroughness here.
Allow the coils to air dry completely. This is crucial. Any moisture left on the coil can cause electrical problems when you restart the engine. Using specialized cleaners to clear away deposits is similar to how you would clean a water filter to restore its function, ensuring all impurities are removed.
Reinstallation
Before putting the coils back, apply a small amount of dielectric grease inside the spark plug boot. This grease helps seal out moisture and prevents corrosion on the spark plug terminal. It also makes future coil removal easier. Now, carefully insert each coil back into its spark plug well. Make sure it seats fully and feels snug. Push down until you hear a click or feel it lock into place. This process ensures all contaminants are gone, just as you would clean mold with vinegar to fully eliminate it.
Reconnect the electrical connectors to each coil. Make sure they click into place. Double-check all connections to ensure they are secure. Finally, reconnect the negative battery terminal. Tighten the clamp firmly. Your car is now ready for a test drive. Start the engine and listen for any changes. You should notice a smoother idle and better acceleration. Reaching into tight spaces to clean effectively mirrors the effort needed when you clean under a refrigerator.
Common Mistakes to Avoid When Cleaning Coils
Cleaning ignition coils can improve your car’s performance. However, making mistakes can lead to more problems. Knowing what to avoid is as important as knowing what to do. One common error is using the wrong cleaning products. Never use water, soap, or abrasive cleaners. These can damage the delicate internal wiring of the coil. They can also leave residue that causes electrical shorts. Always stick to electrical contact cleaner. It is specifically designed for this purpose and evaporates completely.
Another mistake is being too rough during removal or reinstallation. Ignition coils are often made of plastic and can be brittle, especially when old. Pulling too hard on the electrical connector can break the locking tabs or pull wires out. Forcing the coil out of the spark plug well without a proper coil puller can damage the coil boot or the coil itself. Be gentle and use the right tools. If a coil feels stuck, take a moment to understand why before applying more force.
Over-cleaning is also a trap. You do not need to soak the coils or scrub them aggressively. A light spray of contact cleaner and a gentle wipe or brush is usually enough. Excessive scrubbing can scratch the coil’s surface or dislodge internal components. Remember, you are cleaning the exterior and electrical contacts, not rebuilding the coil. Keep your efforts focused and precise.
Finally, improper reinstallation can negate all your cleaning efforts. Not seating the coil fully into the spark plug well can cause a poor connection. This leads to misfires even after cleaning. Forgetting to reconnect the electrical connector or leaving it loose will also prevent the coil from working. Always double-check every connection. Make sure the negative battery terminal is reconnected securely too. These small details ensure your cleaning efforts deliver the desired results. Taking care during each step prevents new issues.
When to Replace Your Ignition Coil Instead of Cleaning
While cleaning your ignition coils can solve many problems, it is not always the answer. Sometimes, a coil is too damaged to be fixed by cleaning. Knowing when to replace it saves you time and prevents further engine issues. One clear sign for replacement is visible damage. Look for cracks in the coil body, especially if they are deep. Cracks can allow moisture to enter, leading to internal shorts. You might also see signs of overheating, like melted plastic or a burnt smell around the coil. These indicate a coil that is failing internally.
Another reason for replacement is severe corrosion. If the electrical terminals or the spark plug boot connection are heavily corroded, cleaning might not be enough. Corrosion eats away at metal. It creates a poor electrical connection that even cleaning cannot fully restore. In such cases, the coil cannot deliver the consistent high voltage needed for a strong spark. Trying to clean severely corroded parts often yields short-term fixes.
Your car’s diagnostic codes can also tell you when cleaning is not enough. If you have recurring misfire codes (e.g., P0301, P0302) for the same cylinder after cleaning and retesting, the coil is likely faulty. You can also test an ignition coil with a multimeter. While not every car owner has one, a mechanic can perform this test easily. A multimeter measures the coil’s resistance. If the resistance values are outside the manufacturer’s specifications, the coil is bad and needs replacing.
Finally, consider the age and mileage of your vehicle. Ignition coils have a lifespan. On older cars or cars with high mileage, coils might simply wear out. If one coil fails, others might follow soon. In such cases, replacing all coils at once can be a wise preventative measure. It saves you from dealing with individual coil failures later. Cleaning is for maintenance, but replacement is for failure. Do not hesitate to replace a coil if it shows clear signs of damage or failure.
Maintaining Your Ignition Coils for Long-Term Health
Cleaning your ignition coils is a great step. But regular maintenance extends their life and keeps your engine happy. Think of it as preventative care for your car’s electrical heart. A key part of this is keeping your engine bay clean. Dirt, dust, and oil can accumulate over time. This grime can eventually settle on your ignition coils. Regularly wiping down the engine bay helps reduce this buildup. You do not need harsh chemicals. A damp cloth often works well for general dust and light oil.
Spark plug condition also affects your ignition coils. Worn-out spark plugs demand more voltage from the coils to fire. This extra strain can shorten the coils’ lifespan. Check and replace your spark plugs according to your car’s service schedule. This is typically every 30,000 to 100,000 miles, depending on the type of plug. New, properly gapped spark plugs ensure the coils work efficiently. They do not have to work as hard to create a spark.
Protecting the coils from moisture and heat also helps. Ensure all engine covers and seals are in good condition. These parts are there to shield sensitive components from the elements. If you notice any cracked hoses or loose connections around the coils, address them promptly. Proper ventilation in the engine bay also prevents excessive heat buildup. Heat is a common enemy of electrical components.
Finally, regular car servicing plays a big role. During routine maintenance checks, mechanics can spot early signs of coil degradation. They can advise you on cleaning or replacement before a full failure occurs. If your check engine light comes on, get it diagnosed quickly. Do not let engine problems linger. Addressing issues early protects your ignition coils and other vital engine parts. Consistent care means a reliable and efficient vehicle for years to come.
FAQ Section
Can I clean ignition coils with WD-40?
No, do not use WD-40 to clean ignition coils. WD-40 leaves an oily residue that can attract more dirt. It can also interfere with electrical conductivity. Always use a specialized electrical contact cleaner. These cleaners evaporate fully and do not harm electrical components.
How often should I clean ignition coils?
You do not need to clean ignition coils on a strict schedule. Instead, clean them when you replace spark plugs or if you notice symptoms of a failing coil. It is wise to inspect them every 30,000 to 50,000 miles. Clean them if they show dirt or corrosion buildup.
What causes ignition coils to go bad?
Ignition coils go bad due to several reasons. High engine heat and constant vibration are common culprits. Worn spark plugs increase the strain on coils. Electrical overloads or short circuits can also damage them. Lastly, age and accumulated mileage simply wear them out.
Is cleaning an ignition coil effective?
Yes, cleaning an ignition coil is effective for certain problems. It can resolve issues caused by dirt, oil, or light corrosion on the coil’s exterior and electrical contacts. This often restores proper spark delivery. However, cleaning does not fix internally damaged or cracked coils.
What are the benefits of a clean ignition coil?
A clean ignition coil provides several benefits. It ensures a strong and consistent spark, leading to better engine combustion. This improves fuel efficiency and overall engine performance. It also helps prevent misfires, rough idling, and extends the lifespan of your coils.
Is it hard to clean an ignition coil?
Cleaning an ignition coil is not hard for most DIYers. The process involves disconnecting the battery, unplugging the coil, cleaning it with contact cleaner, and reinstalling it. Proper tools and following safety steps make the job straightforward.
Conclusion
Taking care of your car’s ignition coils is a simple yet impactful task. Cleaning your ignition coil can significantly improve your car’s performance. It helps your engine run smoother and more efficiently. We covered why these coils are important and how to spot signs of trouble. You now know the right tools to use and have a clear, step-by-step guide for cleaning them safely. Remember to avoid common mistakes and understand when it is better to replace a coil instead of cleaning it.
Regular maintenance, including keeping your engine bay tidy and replacing spark plugs on time, plays a vital role. These steps ensure your ignition coils last longer and perform their best. I encourage you to tackle this maintenance task. You will save money on potential repairs and enjoy a more reliable drive. If you ever feel uncertain, do not hesitate to consult a professional mechanic. Your car will thank you for the care.
- ignition coil cleaning
- car engine cleaning
- spark plug maintenance
- vehicle performance
- DIY car repair
- engine misfire fix

