· Kitchen Maintenance · 16 min read
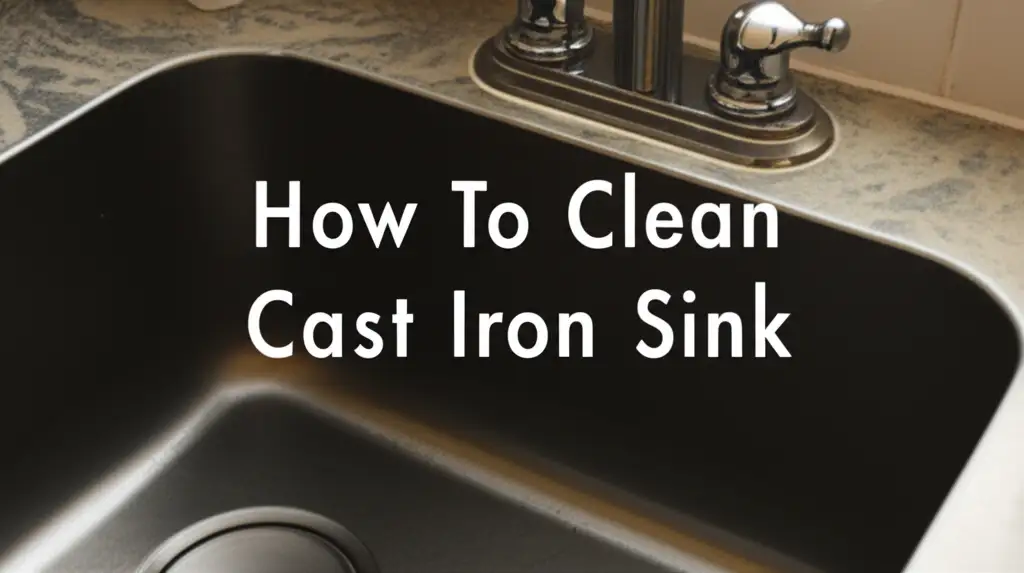
How To Clean Kitchen Drain
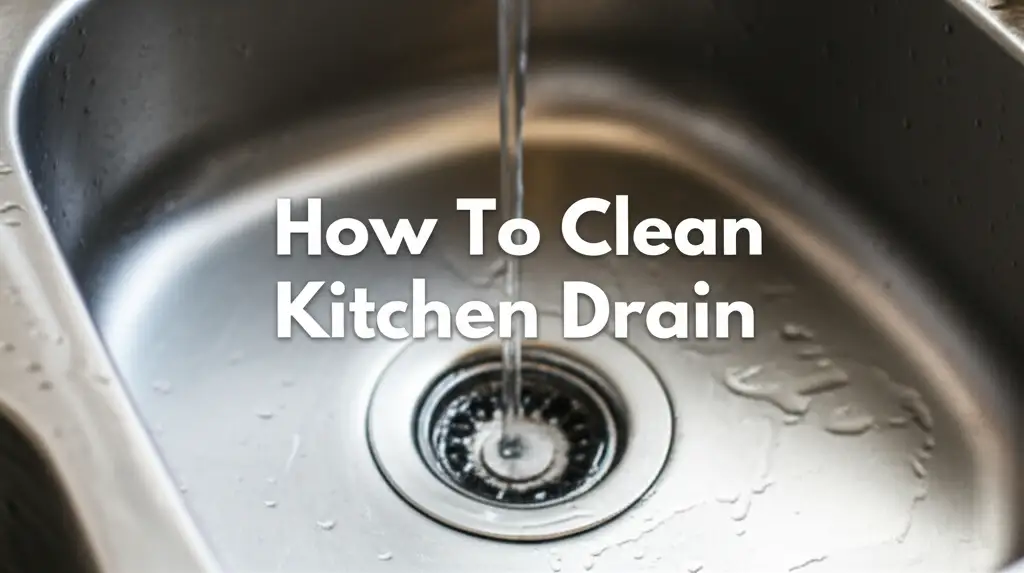
How To Clean Kitchen Drain: A Complete Guide
A slow or smelly kitchen drain can disrupt daily life. We rely on our kitchen sinks for cooking, cleaning, and preparing food. A blocked or foul-smelling drain makes these tasks difficult. Learning how to clean kitchen drain effectively keeps your sink working well. It also maintains a hygienic kitchen environment. This guide explores different cleaning methods. We will cover natural solutions, mechanical tools, and strong chemical options. You will also learn how to prevent future clogs. By the end, you will have a clear plan for a clean, free-flowing kitchen drain.
Takeaway
- Use Natural Methods First: Baking soda and vinegar or boiling water often clear minor clogs and odors.
- Employ Mechanical Tools: A plunger or drain snake provides effective clog removal for tougher blockages.
- Understand Chemical Cleaners: Use chemical solutions with caution and only when necessary.
- Practice Regular Maintenance: Prevent future clogs with daily habits and routine cleaning.
- Know When to Call a Professional: Some clogs require expert help for safe removal.
To clean a kitchen drain, remove the drain cover. Pour boiling water down the drain. Follow this with a mixture of baking soda and white vinegar. Let it foam for 30 minutes, then flush with more hot water. For stubborn clogs, use a plunger or a drain snake to physically dislodge blockages.
Why Your Kitchen Drain Gets Dirty and Clogged
Kitchen drains face daily challenges. Food particles, grease, and soap scum enter the drain every time you use the sink. Over time, these items build up inside the pipes. This accumulation leads to slow draining or complete blockages. Understanding these common culprits helps you clean your drain better. It also guides your prevention efforts.
Grease is a major problem for kitchen drains. When hot, grease is liquid. It flows easily down the drain. As it cools, grease hardens and sticks to pipe walls. This sticky layer catches other debris. Food scraps like coffee grounds, rice, or pasta also contribute to clogs. Even small pieces can combine with grease to form a solid mass. Soap scum from dish soap adds to the buildup. It sticks to the pipe walls, creating a rough surface. This surface traps more debris, making clogs worse. Regular use of your sink introduces these elements. Therefore, cleaning your kitchen drain becomes a necessary task to avoid major issues.
Essential Tools and Materials for Drain Cleaning
Before you start cleaning your kitchen drain, gather the right supplies. Having everything ready makes the process smoother. You need a few basic household items and some simple tools. These tools help tackle different types of clogs effectively. Prepare your workspace before you begin. Place a bucket under the sink’s P-trap if you plan to disassemble it. This catches any water or debris that might fall out.
Here is a list of common items you might need:
- Boiling Water: Hot water helps dissolve grease and loosen minor clogs. Always start with this simple method.
- Baking Soda: This common pantry item is an excellent natural cleaner. It reacts with vinegar to create a fizzy cleaning action.
- White Vinegar: Another natural cleaning agent, vinegar reacts with baking soda. This reaction helps break down grime and odors. You can learn more about how to clean a sink drain with vinegar.
- Plunger: A standard cup-style plunger creates suction. It pushes and pulls clogs loose. Use one specifically for sinks, not toilets.
- Drain Snake (or Augur): This flexible tool reaches deep into pipes. It pulls out hair, grease, and other debris. Manual snakes are good for home use.
- Gloves: Protect your hands from grime and cleaning agents. Rubber gloves are suitable for this task.
- Bucket or Bowl: Use this to catch water and debris if you disassemble the P-trap.
- Old Towels: Lay these down to protect your floor and catch spills.
- Screwdriver/Wrench: You might need these to remove the P-trap or drain cover.
- Flashlight: A flashlight helps you see inside the drain opening. This is helpful for locating visible debris.
- Commercial Drain Cleaner (Optional): Use these as a last resort. Read instructions carefully and follow all safety warnings.
Having these items on hand ensures you are prepared for any kitchen drain cleaning task. Proper tools make the job easier and more effective.
Natural Methods for a Clean Kitchen Drain
Many people prefer to avoid harsh chemicals. Natural cleaning methods are safe, cost-effective, and environmentally friendly. They work well for minor clogs and regular maintenance. These methods use common household ingredients. They break down grease and food particles without damaging pipes.
1. The Boiling Water Flush
This is the simplest method. It works best for grease buildup. Grease often solidifies in cool pipes. Hot water helps melt it and push it through.
- Instructions:
- Boil a large pot of water.
- Carefully pour the boiling water directly down the kitchen drain. Pour slowly in stages.
- Wait a few minutes between pours. This gives the water time to work.
- Repeat this process a few times.
- Tips: Do not use boiling water if you have PVC pipes and chemical drain cleaner is present. The combination can damage pipes.
2. Baking Soda and Vinegar Reaction
This classic combination creates a powerful fizzy reaction. It helps loosen grime, grease, and minor clogs. This method also helps eliminate odors. For tougher issues like black sludge, this method can be very effective in helping clear the drain. You can learn more about how to clean black stuff in sink drain using similar principles.
- Instructions:
- Remove any standing water from the sink.
- Pour one cup of baking soda down the drain. Try to get as much as possible directly into the drain opening.
- Follow with one cup of white vinegar. You will see fizzing immediately.
- Cover the drain opening with a stopper or a plate. This keeps the reaction concentrated inside the pipe.
- Let it sit for at least 30 minutes, or even overnight for stubborn clogs.
- Flush the drain with a pot of boiling water. Repeat if necessary.
- Tips: For best results, use hot vinegar. You can heat it slightly in the microwave. This enhances the reaction. This method is also excellent for regular monthly maintenance.
These natural methods are great starting points. They are gentle on pipes and safe for your home. If these methods do not clear the clog, you may need stronger approaches.
Mechanical Methods for Clearing Kitchen Drain Clogs
Sometimes, natural methods are not enough. Physical obstructions require mechanical tools. These tools help break apart or pull out stubborn clogs. Using mechanical methods can save you from calling a plumber. They provide direct action on the blockage.
1. Using a Plunger Effectively
A plunger creates pressure and suction. This action helps dislodge clogs. Make sure you use a cup-style plunger, not a toilet plunger. This style creates a better seal over the sink drain.
- Instructions:
- Remove the sink stopper or drain cover.
- Fill the sink with enough water to cover the plunger cup. About 2-3 inches of water is usually enough. This water helps create a tight seal.
- Place the plunger cup firmly over the drain opening. Make sure it forms a tight seal.
- Plunge vigorously 15-20 times. Maintain the seal.
- Quickly pull the plunger up on the last plunge. This creates strong suction.
- Listen for the sound of rushing water. This means the clog has cleared.
- Flush the drain with hot water for several minutes.
- Tips: If you have a double kitchen sink, plug the second drain. This ensures all the pressure goes to the clogged side. For very stubborn clogs, try plunging again after using the baking soda and vinegar method. You can also apply these plunging techniques to other drains, such as when you need to clean a clogged bathroom drain.
2. Maneuvering a Drain Snake
A drain snake, also called an augur, is a long, flexible tool. It reaches deep into the drain to break up or retrieve clogs. This tool is very effective for hair, food, and grease buildups. You can use it through the drain opening or by removing the P-trap.
- Instructions (Through Drain Opening):
- Remove the sink stopper or drain cover.
- Push the snake’s end into the drain opening.
- Feed the snake slowly down the pipe. Rotate the handle as you push. This helps the snake navigate bends.
- You will feel resistance when you hit the clog.
- Once you reach the clog, twist the snake to break it apart. Alternatively, try to hook the debris. Pull it out slowly.
- Retract the snake. Clean any debris from its end.
- Flush the drain with hot water.
- Instructions (Through P-Trap Removal):
- Place a bucket under the P-trap. This is the curved pipe under your sink.
- Use a wrench or pliers to loosen the nuts on both ends of the P-trap.
- Carefully remove the P-trap. Water and debris will fall into the bucket. Clean the P-trap thoroughly. This is often where clogs collect.
- Insert the drain snake into the pipe leading to the wall. Push and rotate the snake as described above.
- Once the clog is cleared, reassemble the P-trap. Tighten all connections securely.
- Run water through the faucet to check for leaks and proper drainage.
- Tips: Always wear gloves when using a drain snake. The retrieved material can be very messy. Be gentle to avoid damaging pipes. A professional may be needed for severe clogs.
These mechanical methods are powerful for clearing blockages. They provide a direct solution to persistent kitchen drain clogs. Always clean your tools after use. This keeps them ready for next time.
Understanding Chemical Drain Cleaners
Chemical drain cleaners offer a quick solution for many clogs. They work by dissolving or breaking down organic matter. However, they come with risks. Use them with extreme caution. They can be harmful to pipes, the environment, and your health. Always read and follow the product’s instructions precisely.
Types of Chemical Drain Cleaners
Chemical drain cleaners contain strong ingredients. These ingredients work in different ways:
- Caustic Cleaners: These contain lye (sodium hydroxide) or potash (potassium hydroxide). They create heat, which turns grease into a soap-like substance. They can also dissolve hair.
- Oxidizing Cleaners: These contain bleach, peroxides, or nitrates. They cause organic material to oxidize. This breaks down the clog.
- Acidic Cleaners: These are typically for professional use. They contain high concentrations of sulfuric acid or hydrochloric acid. They are very corrosive and dissolve almost anything. Never use these in home drains without expert advice.
When and How to Use Them Safely
Use chemical drain cleaners only when natural and mechanical methods fail. They are harsh. Consider these points:
- Read Instructions: Always read the product label carefully. Follow all warnings and usage directions.
- Ventilation: Ensure good airflow in your kitchen. Open windows and turn on exhaust fans. Fumes can be dangerous to inhale.
- Protective Gear: Wear rubber gloves and eye protection. Avoid skin contact.
- Never Mix: Do not mix different chemical drain cleaners. This can create dangerous chemical reactions and toxic fumes. Also, do not use chemical cleaners after trying natural methods involving vinegar or baking soda.
- Pipe Compatibility: Check if the cleaner is safe for your type of plumbing. Some chemicals can damage older pipes or certain pipe materials.
- Follow Dosing: Use only the recommended amount. More is not better. Overdosing can cause damage or leave corrosive chemicals sitting in your pipes.
- Flush Thoroughly: After the recommended waiting time, flush the drain with plenty of water. This removes the cleaner and dissolved clog material.
- Consider Grease: Chemical cleaners are less effective on solidified grease. They might just push the problem further down the pipe. For effective grease removal from your pipes, specific methods might be needed. You can learn more about how to clean grease from drain pipes.
Risks and Downsides
Using chemical drain cleaners carries several risks:
- Pipe Damage: The heat and corrosive action can warp or corrode PVC pipes. They can also degrade old metal pipes.
- Environmental Harm: Chemicals can harm water systems when flushed away.
- Health Hazards: Skin burns, eye damage, and respiratory problems are possible from fumes or contact.
- Recurring Clogs: They might clear a clog temporarily. However, they do not address the root cause of buildup. This often leads to recurring clogs.
- Professional Difficulty: If a plumber is eventually needed, the presence of chemicals makes their job more dangerous. Inform the plumber if you used a chemical cleaner.
I generally recommend avoiding chemical drain cleaners. Prioritize natural solutions and mechanical tools. If you must use them, do so with extreme caution and as a last resort.
Deep Cleaning Your P-Trap
The P-trap is the curved section of pipe directly under your kitchen sink. It holds a small amount of water. This water creates a seal. The seal prevents sewer gases from entering your home. It also acts as a primary collection point for debris. Many kitchen drain clogs happen right inside the P-trap. Cleaning it directly is often the most effective way to remove a stubborn blockage.
This task might seem daunting, but it is straightforward. You only need a few tools and some protective measures.
Steps to Clean Your P-Trap:
Prepare Your Workspace:
- Clear everything from under your kitchen sink.
- Place a large bucket or bowl directly under the P-trap. This will catch any water, grime, or debris that spills out. Old towels placed around the bucket can also help with spills.
- Wear old clothes and rubber gloves. This is a dirty job.
Loosen the Slip Nuts:
- The P-trap is usually connected by two large slip nuts. One nut connects the P-trap to the tailpiece coming down from the sink drain. The other nut connects it to the drain pipe leading into the wall.
- Use channel-lock pliers or a basin wrench to loosen these nuts. If they are plastic, you might be able to loosen them by hand.
- Turn the nuts counter-clockwise to loosen them. Do not remove them completely yet.
Remove the P-Trap:
- Once the nuts are loose, gently pull the P-trap downwards and away from the pipes.
- Be ready for water and sludge to come out. Let it drain into your bucket.
- Inspect the P-trap. You will likely find a collection of food scraps, grease, and other debris inside. This is usually the source of the clog.
Clean the P-Trap:
- Take the disconnected P-trap to another sink or an outdoor area.
- Use a stiff brush, a bottle brush, or even an old toothbrush to thoroughly scrub the inside of the P-trap.
- Run hot water through it to rinse away all remaining gunk. You can also use dish soap to cut through grease.
- Check for any blockages further down the drain pipe or up the tailpiece. Use a flashlight to look inside. If you see debris, use a small wire or the end of a drain snake to clear it.
Reassemble the P-Trap:
- Align the P-trap carefully with the tailpiece and the wall drain pipe.
- Hand-tighten the slip nuts back into place. Ensure they are straight and not cross-threaded.
- Once hand-tight, use your pliers or wrench to give them a final quarter-turn. Do not overtighten. Overtightening can crack plastic nuts or damage plastic pipes.
Test for Leaks and Drainage:
- Turn on the faucet and let water run into the sink for several minutes.
- Watch closely under the sink for any drips or leaks around the P-trap connections. If you see a leak, tighten the slip nut slightly.
- Observe the drain speed. The water should flow freely and quickly.
Cleaning the P-trap is a hands-on method. It ensures you remove the actual clog. This provides a lasting solution for your kitchen drain. This deep cleaning is more involved than plunging. However, it is very effective for stubborn clogs.
Preventing Future Kitchen Drain Clogs
A clean kitchen drain starts with prevention. Regular habits can greatly reduce the chances of clogs. Prevention is easier and cheaper than cleaning a stubborn blockage. By taking simple steps daily, you can keep your drain flowing freely.
1. Be Mindful of What Goes Down the Drain
This is the most important rule. The kitchen drain is not a garbage disposal. Many items should never go down it.
- Grease and Oils: Never pour cooking oil, bacon grease, or other fats down the drain. Even hot water will not prevent grease from solidifying in your pipes. It sticks to pipe walls. Instead, pour cooled grease into a container and dispose of it in the trash.
- Food Scraps: Use a sink strainer to catch food particles. Scrape plates into the trash or compost bin before rinsing. Even small crumbs, coffee grounds, and rice can swell or stick together, causing blockages. For larger food items or if you have a disposal, ensure they are fully broken down before sending them down.
- Starchy Foods: Pasta, rice, and bread can absorb water and expand. They become sticky and easily clog pipes.
- Fibrous Foods: Celery, potato peels, and fruit peels can tangle and form nets inside pipes.
- Non-Food Items: Never put cotton balls, paper towels, or other non-biodegradable items down the drain.
2. Use a Drain Strainer Regularly
A simple drain strainer is your first line of defense. Place one over your drain opening. It catches food particles before they enter the pipes. Empty the strainer into the trash after each use. Rinse it clean to remove any sticky residue. This inexpensive tool saves you from many headaches.
3. Flush Your Drain with Hot Water
Make it a habit to flush your drain with hot water. After doing dishes, let the hot water run for a minute or two. This helps push any lingering grease or debris through the pipes. You can also boil a kettle of water and pour it down the drain once a week. This simple flush helps prevent buildup.
4. Regular Baking Soda and Vinegar Treatment
Performing the baking soda and vinegar cleaning method once a month can prevent clogs from forming. It helps break down minor buildups and keeps the drain smelling fresh. I find this simple routine very effective. It requires minimal effort but offers great benefits. This method is also excellent for addressing how to clean a clogged kitchen sink before the problem becomes severe.
5. Consider Enzyme-Based Cleaners
Enzyme-based drain cleaners are different from harsh chemicals. They contain natural bacteria that “eat” away organic matter. They are safe for pipes and the environment. Use them periodically as a preventative measure. Follow the product instructions for best results. These work slowly, often overnight. They are not for clearing active clogs. They are for maintaining clear drains.
By adopting these preventative measures, you significantly reduce the need for intensive drain cleaning. A clean kitchen drain improves kitchen hygiene and prevents costly plumbing issues.
When to Call a Professional Plumber
While many kitchen drain clogs are DIY-friendly, some situations require professional help. Knowing when to call a plumber can save you time, effort, and potential damage to your home. Do not hesitate if you face a severe or recurring problem.
Here are signs it is time to call a professional:
- Persistent Clogs: You have tried natural methods, plunging, and snaking. The clog simply will not clear. This indicates a deep or very stubborn blockage beyond your reach.
- Multiple Drains Clogged: If not just your kitchen sink, but also your bathroom sink, toilet, or shower drains are slow or clogged, it suggests a main line blockage. This is a serious issue that needs professional diagnosis and repair. A main line clog can cause sewage to back up into your home.
- Foul Odors Persist: You have cleaned your drain, but a strong, foul odor remains. This might indicate bacterial growth or decaying matter deep within the pipes. It could also point to issues with your sewer line.
- Water Backs Up Elsewhere: When you use your kitchen sink, water appears or backs up in another drain (e.g., your dishwasher or laundry tub). This is a clear sign of a shared drain line blockage.
- Gurgling Sounds: Loud gurgling sounds from your drain or toilet often indicate trapped air due to a serious blockage. This is not just a simple clog.
- kitchen drain cleaning
- clogged drain
- drain maintenance
- natural drain solutions